SEARCH FINESCALE.COM

Enter keywords or a search phrase below:

Knights of the Sky WWI GB The End

111747 views
1882 replies
1 rating 2 rating 3 rating 4 rating 5 rating
  • Member since
    September 2003
  • From: South Central Wisconsin
Posted by Daywalker on Sunday, February 17, 2008 2:19 PM

Guys,

Found this over in Aircraft, check it out!

Sopwith Camel and Spitfire

Frank 


  • Member since
    September 2003
  • From: South Central Wisconsin
Posted by Daywalker on Sunday, February 17, 2008 9:34 AM
SD- It has been my pleasure!  You fellas are the ones making it what it is with the beautiful aircraft on display here.  If you would like to do another one here, by all means please do!  Just let me know and I will update the list. Big Smile [:D]

Frank 


  • Member since
    January 2006
  • From: K-Town, Germany
Posted by sirdrake on Sunday, February 17, 2008 5:14 AM

Thanks everybody. Glad you ike the SPAD!

And Thanks to Frank for organizing this GB. It is a great place for these fantastic aircrafts, and it was great fun for me to join. Somehow I have the feeling that this is not over yet Big Smile [:D]. I can't imagine that I won't build another one until October... There is this old SMER Fokker Dr.1 in 1:48 that I once got for very cheap, smiling at me...

SirDrake 

  • Member since
    January 2004
  • From: Westland. MI USA
Posted by mkhoot on Saturday, February 16, 2008 6:59 PM
Sirdrake well done. The finish and rigging all look very nice.
When in doubt just build it. Mark http://www.ipmslivonia.org/ipms/
  • Member since
    September 2003
  • From: South Central Wisconsin
Posted by Daywalker on Saturday, February 16, 2008 5:56 PM
Sign - Welcome [#welcome] Daryl!  I added your name to the roster on page one, and please feel free to post as many WIP photos as you like! Big Smile [:D]

Frank 


  • Member since
    November 2005
  • From: that state up North
Posted by More Power Scotty on Saturday, February 16, 2008 5:22 PM

Stephen,

Thanks for another quick response!  I will do some looking for the 1166 brown (in the little bottle) as I do not think that I have that one.  Again I thank you for the additional details that accompany your response, as it makes for some very interesting reading.

Sirdrake,

Let me just say WOW!  That rigging is phenomenal!Bow [bow]

All,

As I was cleaning some paint off of one of my photoetched parts I was shocked to find that the PE frets in my kit are plated brass.  I had thought that they were stainless steel as they have a shiny silver appearance, and I was wondering if I might damage my photoetch shears cutting off the many parts of this kit.  No worries about that now, but I do have to deal with the extra frailty of the brass compared to something a little more stout.  I have previously built three of the Eduard "strip down" kits, and although they look nice when finished, just breathing improperly when handling them can cause complete mayhem.  I will keep you posted on my progress.  In the mean time, feel free to check out the Aircraft Carrier group build if you want to see photos of my 1/700 scale biplanes for the USS Saratoga CV-3.

Scott
  • Member since
    February 2006
  • From: Smithers, BC, Canada
Posted by ruddratt on Saturday, February 16, 2008 5:08 PM

Sirdrake.....wow!!! That is simply stunning!!!! Bow [bow] I know how complicated the rigging is on that particular bird, and you did a first-rate job on it as well as every other aspect of your build. What else can I say?......it impressed the heck outta me! Thumbs Up [tup]

Daryl, welcome to the GB! Sign - Welcome [#welcome] The Eduard Pfalz is a great kit! Not sure if 50 officially qualifies me for geezer-dom. Wink [;)]

Mike

 "We have our own ammunition. It's filled with paint. When we fire it, it makes pretty pictures....scares the hell outta people."


  • Member since
    October 2004
  • From: Colorado
Posted by StephenLawson on Saturday, February 16, 2008 1:48 PM

Greetings sirdrake,  nicely done!

Daryl Huhtala for my part welcome!  I am a Geezer myself. 


Stachel...unconfirmed by Armee means unconfirmed!!!!

  • Member since
    June 2004
  • From: Hooterville
Posted by Daryl Huhtala on Saturday, February 16, 2008 1:20 PM

I have an Eduard Pfalz D.III on the bench that I'm about to start as my first WW1 build since about 1966 (yeah I'm a geezer)

I just took a long walk through all these pages and there's a lot of inspiration here so I think I'll join the group if I may.......

  • Member since
    December 2002
  • From: Northern California
Posted by jeaton01 on Saturday, February 16, 2008 12:29 PM
Great job, SirDrake.  The wires and struts are especially nice, but the whole thing is very well done.  Super!

John

To see build logs for my models:  http://goldeneramodel.com/mymodels/mymodels.html


  • Member since
    February 2007
  • From: Lubbock, TX
Posted by MrDrummy on Saturday, February 16, 2008 10:12 AM

Sirdrake-

That looks awesome man!!  That paint job is killer,  and I think that the rigging is great.  Looks the part to me!!

That's one big ol' bird. 

-Justin
On the Bench: 1:48 Dragon Dr. 1 1:48 Trumpeter MiG-15 Fagot B Photo Sharing and Video Hosting at Photobucket
  • Member since
    September 2003
  • From: South Central Wisconsin
Posted by Daywalker on Saturday, February 16, 2008 6:38 AM

sirdrake-

That looks absolutely beautiful!  Smooth finish, great paint and the wires make it look oh, so busy.  Very well done my friend, thanks for sharing! Bow [bow]

I updated page one for you! Thumbs Up [tup]

Frank 


  • Member since
    January 2006
  • From: K-Town, Germany
Posted by sirdrake on Saturday, February 16, 2008 6:12 AM

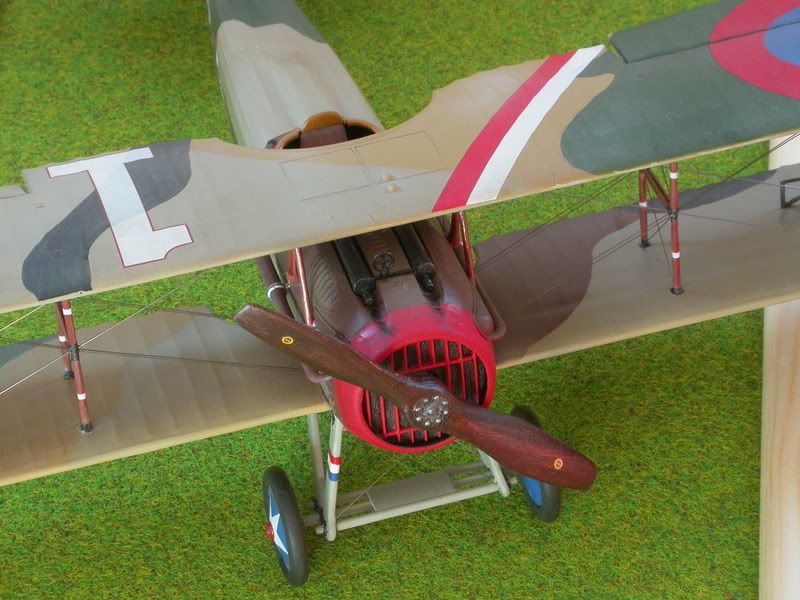
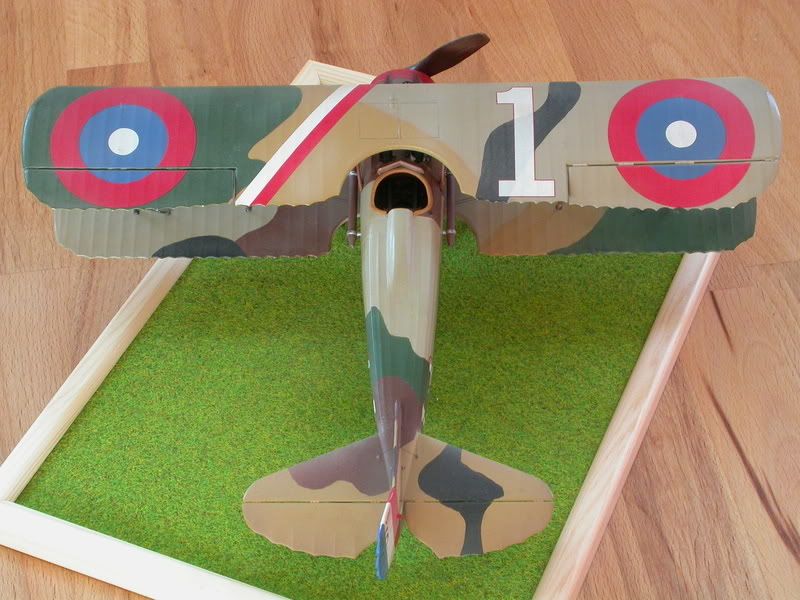
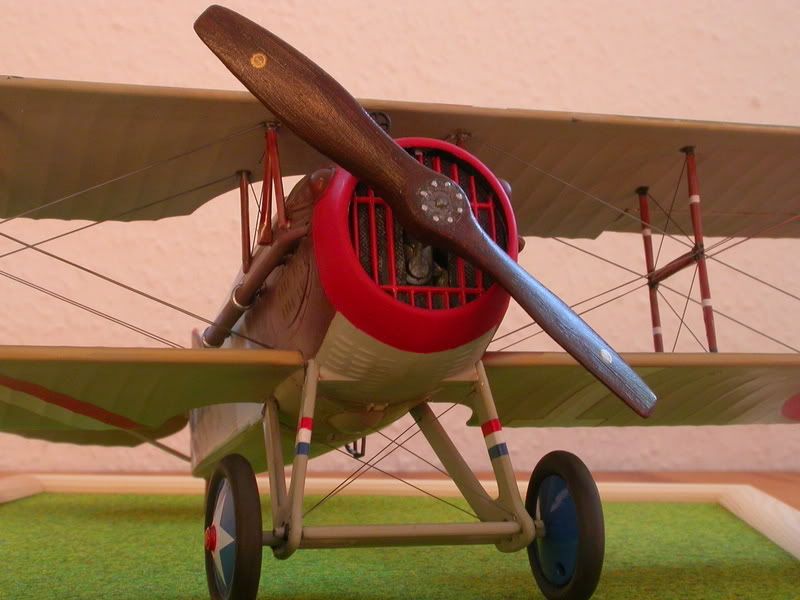
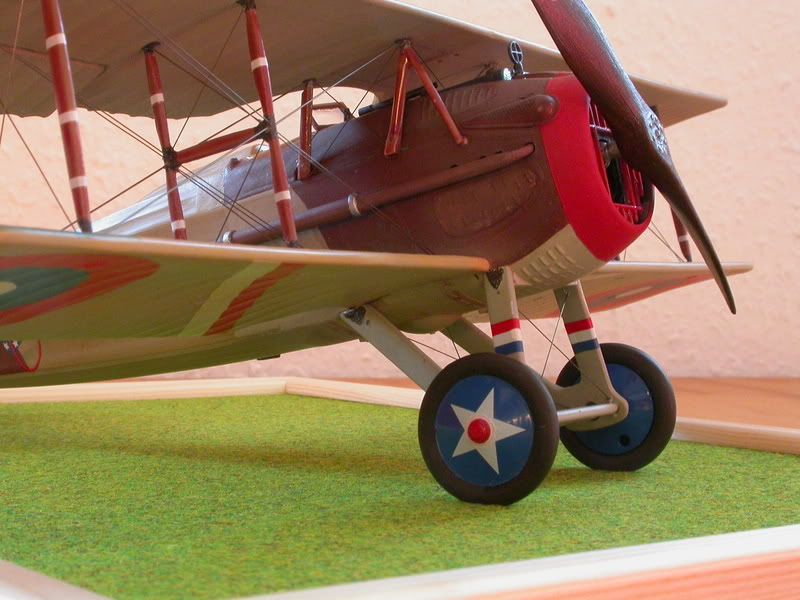
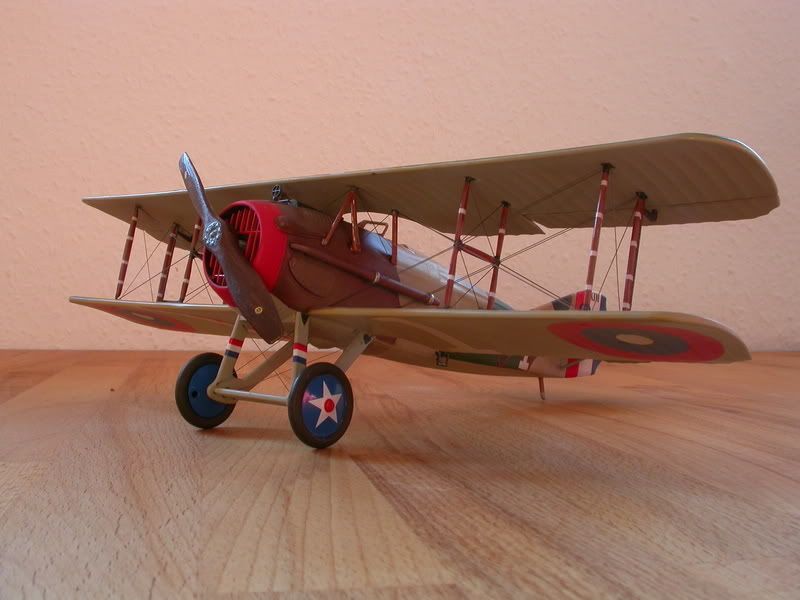
Done...! Here's some pictures of the big lady. Added landing gear, propeller, and rigging.
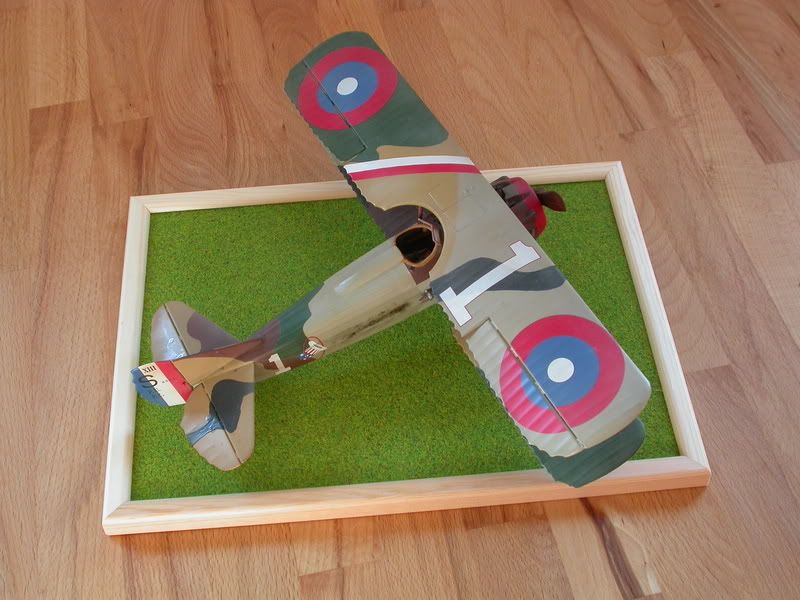
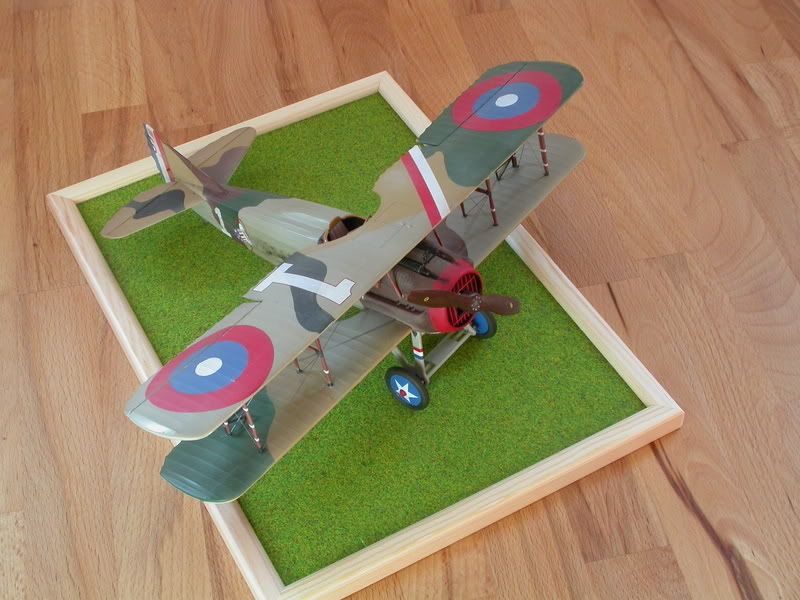
For the rigging, I used 0.009" and 0.008" staight wire for the wings, and 0.005" wire for the controls at the tail. This bird really has quite a large amount of rigging - although I enjoy doing it, I'm also always hapyy when it's over. The landing wires could be thicker in diameter compared to the flying wires, but I can live with the way it looks.
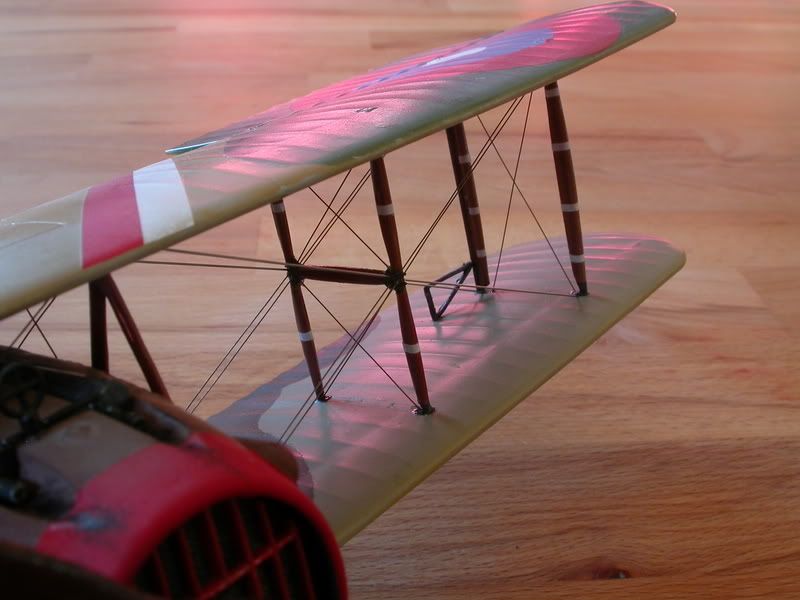
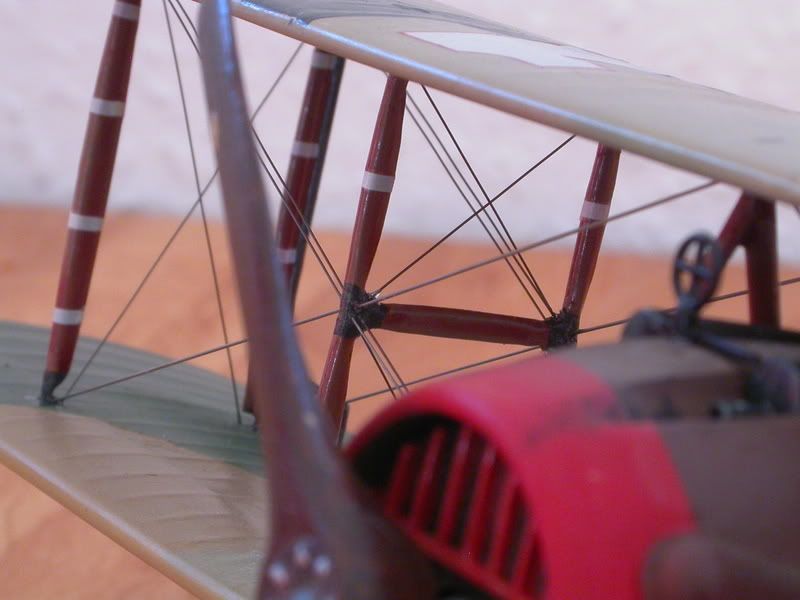
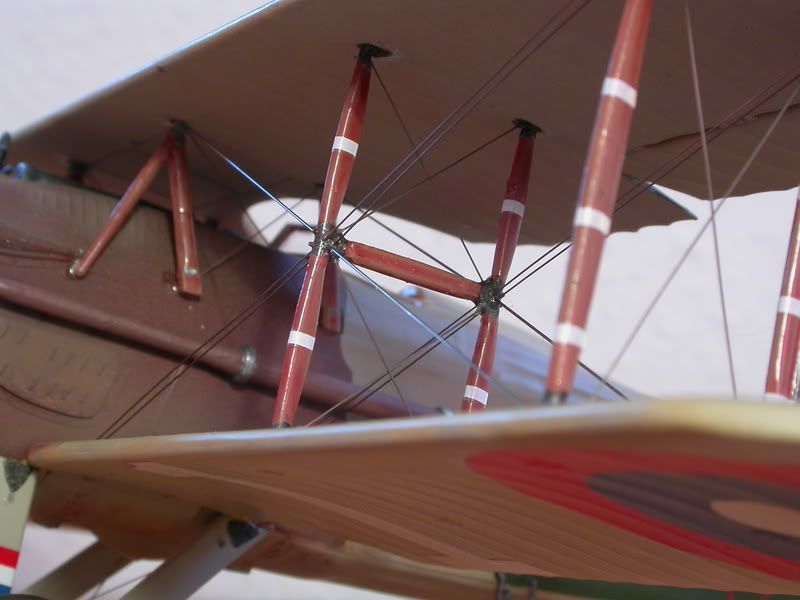
 

After everything was done, I also realized that these small triangular thingies at the rear outer struts should be at an angle, because they move the control surfaces on the upper wing, which are not in their neutral position. Well next time... I'm positive nobody I know will realized it, and you guys can keep a secret, can you?

All comments welcome!  

SirDrake

  • Member since
    October 2004
  • From: Colorado
Posted by StephenLawson on Thursday, February 14, 2008 5:14 PM

That you for the kind words Scott;

To help with the next question.  a modern Pantone interpretation of the red used on Richthofen's Dr.I 425/17  can be described from electro mircon levels.  Several fellows got with Ray Rimell back in 1977 when he did a special Windsock feature on MvR's aircraft for 1978.  The colour is termed "Indian Lake Red"  To do something comparable with hobby paints, I mixed Testors Insignia Red with an Orange brown (Testors 1166 in the small bottle).  The mix is 6 parts red to 2 parts 1166 brown. 

This colour only fits for 425/17, 152/17 and possibly 477/17.  These machines were all assigned to MvR and had some extensive over painting done in April 1918.


Stachel...unconfirmed by Armee means unconfirmed!!!!

  • Member since
    November 2005
  • From: that state up North
Posted by More Power Scotty on Thursday, February 14, 2008 11:21 AM

Stephen,

 I must admit that it is a pleasure being in a group build with someone possessing your level of knowledge on this topic.  All that I was expecting was a "go ahead and use the Humbrol #74" comment, but you certainly exceeded my expectations, especially with information on thread counts.  Just incredible.  Let me know if you ever need information on Nimitz-class aircraft carriers, as I served aboard two of them, and that is probably one of the few areas that I may have knowledge on a similar level to yours of WWI aircraft.Wink [;)]

 I guess a follow-up question would be on an appropriate red to simulate one of Richthoffen's planes.  I do know that he flew, and had victories in more than one Dr. 1, but I am thinking about painting the solid external areas to represent his "all red" Dr.1. I have a lithograph of his different aircraft, and there are different reds shown on the planes.  Of course this is just an artist's rendering, and I have come to learn that you can not always take their work as gospel. 

Anyway, thanks for the quick response on the linen paint question.

Scott
  • Member since
    October 2004
  • From: Colorado
Posted by StephenLawson on Wednesday, February 13, 2008 2:09 AM
 More Power Scotty wrote:
'All right guys, consider me "in".  I opened the box on my 1/72 Eduard Fokker Dr.I  yesterday and glued my first pieces together (kind of like starting a journey of a hundred kilometers with that first pedal stroke {for my fellow cycling enthusiasts}). 

I do have a quick question for the group, probably directed at Stephen though.  What is a good paint to use to simulate the interior linen color on my plane?  I have a tin of Humbrol #74 "Linen", and I am wondering if it is the best color to use.  I have a fair selection of Humbrol, Model Master, and some Gunze paints, so I have some flexibility.  There are only a few parts that will receive the paint, but I want them to look correct for this build.  Thanks in advance!

Fokker used unbleached linen for his production Triplanes  This is a warm buff colour, without the streaking it would look like clear doped linen.  Linen or radome tan with a mix of white is good.  Though radome tan tends to be a little pink next to other similar colours.  Whitening it brings it into a go sembelance of German fabrics

German fabrics had a lesser count per square inch than Allied types.  The Germans calendered their fabric to sqawsh the cross section of the threads, thus getting coverage in a similar area. I have seen convincing uses of Sail, linen, radome tan, and in Polly S acrylics, I have used  dirty white, doped linen(a little too green) French Beige (like radome tan a little pink), antique white  and etc. 


Stachel...unconfirmed by Armee means unconfirmed!!!!

  • Member since
    September 2003
  • From: South Central Wisconsin
Posted by Daywalker on Tuesday, February 12, 2008 10:13 PM
That's good noews Scott!  I really can't wait to see this little Fokker in all of it's exposed glory! Thumbs Up [tup]

Frank 


  • Member since
    November 2005
  • From: that state up North
Posted by More Power Scotty on Tuesday, February 12, 2008 7:23 PM

All right guys, consider me "in".  I opened the box on my 1/72 Eduard Fokker Dr. 1 yesterday and glued my first pieces together (kind of like starting a journey of a hundred kilometers with that first pedal stroke {for my fellow cycling enthusiasts}). 

I do have a quick question for the group, probably directed at Stephen though.  What is a good paint to use to simulate the interior linen color on my plane?  I have a tin of Humbrol #74 "Linen", and I am wondering if it is the best color to use.  I have a fair selection of Humbrol, Model Master, and some Gunze paints, so I have some flexibility.  There are only a few parts that will receive the paint, but I want them to look correct for this build.  Thanks in advance!

Scott
  • Member since
    February 2006
  • From: Smithers, BC, Canada
Posted by ruddratt on Monday, February 11, 2008 9:17 PM
 razordws wrote:
Probably cause I bought the last P-38 when I was there over new years visiting my brother!!! Heh Heh Evil [}:)]Whistling [:-^]Propeller [8-]

If he would have had he Me 262 in stock at the time I might have bought that too. 

So it was YOU! Why, I oughta.........!!!! Tongue [:P]

Mike

 "We have our own ammunition. It's filled with paint. When we fire it, it makes pretty pictures....scares the hell outta people."


  • Member since
    February 2006
  • From: Smithers, BC, Canada
Posted by ruddratt on Monday, February 11, 2008 9:15 PM
 StephenLawson wrote:

Greetings rudratt; Here is a bit of fun I have started on the Roden 1/48 SE 5a.  

Click Here

Stephen, thanks a bunch for the link! Looks like it's going to be a fun build! Thumbs Up [tup]

Mike

 "We have our own ammunition. It's filled with paint. When we fire it, it makes pretty pictures....scares the hell outta people."


  • Member since
    February 2006
Posted by CH53CrewChief on Monday, February 11, 2008 3:33 PM

Thank you for the propeller advice. I'll play with the different techiniques...Rich

  • Member since
    January 2006
  • From: K-Town, Germany
Posted by sirdrake on Monday, February 11, 2008 2:03 AM

Stephen, thanks for the hint. It actually sounds like something I will try out the next time I have a kit of that scale on my desk. I already glued the cabane struts back on, with a little spacer that basically eliminates the tension of the wing. So far they are holding. Famous last words...

SirDrake 

  • Member since
    September 2004
  • From: Vernon, BC, Canada
Posted by razordws on Sunday, February 10, 2008 7:51 PM
 ruddratt wrote:

 razordws wrote:
Mike, I'll be looking forward to the full build report on that Acadmy Me 262! Propeller [8-]

Dave, I called our favorite N. Van. hobby shop looking for that 1/72 P-38, and as he was currently out of them, he suggested the 262 kit. Checked out some online reviews and went for it. Looks like a sweet little kit! Thumbs Up [tup]

Probably cause I bought the last P-38 when I was there over new years visiting my brother!!! Heh Heh Evil [}:)]Whistling [:-^]Propeller [8-]

If he would have had he Me 262 in stock at the time I might have bought that too. 

Dave

  • Member since
    October 2004
  • From: Colorado
Posted by StephenLawson on Sunday, February 10, 2008 6:00 PM
 sirdrake wrote:
 sirdrake wrote:
". . .Let's see for how long. . .

". . . well, for about one hour, then the cabane struts broke off their connection. Repairs underway. . . "

Please forgive my impertanence. For wing tip concerns - If I may suggest Using a .078 gauge bit. Drill vertically straight through the top wing.  Next if the long interplane struts are still attached at their opposing ends, drill through them horizontally.   Pass a brass wire through the strut end then slip the ends through the top wing. Using accelerator and thin consistancy superglue and a modified large gauge sewing needle, the brass wire can be faired into the strut endcap / ends and secured into the top wing. Using this method has worked well with others building this kit.


Stachel...unconfirmed by Armee means unconfirmed!!!!

  • Member since
    February 2006
  • From: Smithers, BC, Canada
Posted by ruddratt on Sunday, February 10, 2008 2:48 PM

 razordws wrote:
Mike, I'll be looking forward to the full build report on that Acadmy Me 262! Propeller [8-]

Dave, I called our favorite N. Van. hobby shop looking for that 1/72 P-38, and as he was currently out of them, he suggested the 262 kit. Checked out some online reviews and went for it. Looks like a sweet little kit! Thumbs Up [tup]

Mike

 "We have our own ammunition. It's filled with paint. When we fire it, it makes pretty pictures....scares the hell outta people."


  • Member since
    February 2006
  • From: Smithers, BC, Canada
Posted by ruddratt on Sunday, February 10, 2008 2:45 PM
sirdrake, that's a shame about the wing, but I really admire your perseverence. Keep at it. You've got a real masterpiece in the works.

Mike

 "We have our own ammunition. It's filled with paint. When we fire it, it makes pretty pictures....scares the hell outta people."


  • Member since
    September 2003
  • From: South Central Wisconsin
Posted by Daywalker on Sunday, February 10, 2008 8:35 AM

SD,

Sounds like quite the dilema with that wing!  I hope you are able to repair it, as the aircraft is coming along beautifully!

Frank 


  • Member since
    January 2006
  • From: K-Town, Germany
Posted by sirdrake on Sunday, February 10, 2008 5:57 AM
 sirdrake wrote:

Let's see for how long...

... well, for about one hour, then the cabane struts broke off their connection. Repairs underway... 

  • Member since
    January 2006
  • From: K-Town, Germany
Posted by sirdrake on Sunday, February 10, 2008 4:57 AM

mkhood, great! That lozenge makes me dizzy just by looking at it!


And here's some pictures of the spad getting her upper wing attached. It was a little bit tricky. You may remeber my first posts about the warp of rhe upper wing. Although I managed to straighten it more or less, some slight upward bend of the outer wing tips remained. As a result, the outer interplane struts appeared a few mm too short, but actually it was of course just the space between upper and lower wing that was too wide. This being a 1:28 scale, the upper wing is a pretty thick and massive piece of plastic, and kind of hard to bend. You can literally feel the pain when trying... Impossible to attach all the struts at once, so I started with cabane struts and mid-bay struts. After letting them dry for a day, I added some 1mm of styrene she into the holes for the outer struts to shorten the distance just a bit, and then glued those into place, forcing my will upon them with superglue and lots of rubber bands. Because of the flaps in the upper wings I could't use rubber bands at the outer edge - the force would have bend the flaps - and so I used nylon thread that could be fiddled between the wing and the flap and got tensioned with some turns of a toothpick.


And this morning was the moment of truth. Would I just hear a loud 'snap'? Well, so far it all holds together:


Let's see for how long...

SirDrake 

  • Member since
    January 2004
  • From: Westland. MI USA
Posted by mkhoot on Saturday, February 9, 2008 10:36 PM
Thanks for the comments guys. I'm gonna switch gears now and build a fast mover. I started a F-101 for a century series group build over on Hyperscale.
When in doubt just build it. Mark http://www.ipmslivonia.org/ipms/
JOIN OUR COMMUNITY!

Our community is FREE to join. To participate you must either login or register for an account.

SEARCH FORUMS
FREE NEWSLETTER
By signing up you may also receive reader surveys and occasional special offers. We do not sell, rent or trade our email lists. View our Privacy Policy.