SEARCH FINESCALE.COM

Enter keywords or a search phrase below:

Knights of the Sky WWI GB The End

111747 views
1882 replies
1 rating 2 rating 3 rating 4 rating 5 rating
  • Member since
    February 2006
  • From: Smithers, BC, Canada
Posted by ruddratt on Friday, November 9, 2007 2:17 PM

John & Scott, thanks a bunch for the comments! They are much appreciated. Thumbs Up [tup]

OK guys, let's see s'more pics! Big Smile [:D]

Mike

 "We have our own ammunition. It's filled with paint. When we fire it, it makes pretty pictures....scares the hell outta people."


  • Member since
    February 2007
  • From: Lubbock, TX
Posted by MrDrummy on Friday, November 9, 2007 3:57 PM

*pant pant grumble grumble*Sign - Dots [#dots]

I just got done wrestling a decal down on my Albatros.  It was one of those oh so fun ones that wraps around the fuselage, and of course, I couldn't get it to go down at all.  After trimming it a bit, and slitting it a few times with my x-acto blade, I think that it's going to turn out ok...here's to hoping, anyway. Make a Toast [#toast]  Pics to follow....

-Justin
On the Bench: 1:48 Dragon Dr. 1 1:48 Trumpeter MiG-15 Fagot B Photo Sharing and Video Hosting at Photobucket
  • Member since
    February 2006
  • From: Smithers, BC, Canada
Posted by ruddratt on Friday, November 9, 2007 5:52 PM
I'm sure it turned out awesome, Justin! Definitely looking forward to the pics! Thumbs Up [tup]

Mike

 "We have our own ammunition. It's filled with paint. When we fire it, it makes pretty pictures....scares the hell outta people."


  • Member since
    September 2003
  • From: South Central Wisconsin
Posted by Daywalker on Friday, November 9, 2007 7:37 PM

Here is a (supposedly) original Nieuport 28 prop on Ebay.  Just thought I'd post the link as there is a wealth of detail in the photos.

Nieuport 28 prop

Frank 


  • Member since
    October 2004
  • From: Colorado
Posted by StephenLawson on Sunday, November 11, 2007 12:43 PM

Greetings all;

Frank, please note all my builds completed and I am starting the Roden 1/48 Junkers D.I.  Model On!


Stachel...unconfirmed by Armee means unconfirmed!!!!

  • Member since
    September 2003
  • From: South Central Wisconsin
Posted by Daywalker on Sunday, November 11, 2007 12:57 PM

Stephen,

I have updated page one, and added the D.I to your build list!  I had considered building one of these, I am excited to hear how yours goes.

Frank 


  • Member since
    October 2004
  • From: Colorado
Posted by StephenLawson on Sunday, November 11, 2007 1:55 PM

 Daywalker wrote:
Stephen, I have updated page one, and added the D.I to your build list!  I had considered building one of these, I am excited to hear how yours goes.

Here is a bit of fun Link to preview


Stachel...unconfirmed by Armee means unconfirmed!!!!

  • Member since
    February 2007
  • From: Lubbock, TX
Posted by MrDrummy on Sunday, November 11, 2007 3:27 PM

Hey all--

Looking for a few tips here.   I've got to paint a thin black line around the fuselage, bordering the white on the tail of my Albatros.  Now, normally this wouldn't be a big deal, but this is stumping me! 

As you can see-- the vertical and horizontal stabilizers get in the way of any masking efforts, unless I had masking tape that was about 1mm wide, or maybe even thinner.  I've thought about trying to cut a decal, but I'm not so sure how that'd turn out.

Anyway, any advice would be much appreciated!!

-Justin
On the Bench: 1:48 Dragon Dr. 1 1:48 Trumpeter MiG-15 Fagot B Photo Sharing and Video Hosting at Photobucket
  • Member since
    September 2003
  • From: South Central Wisconsin
Posted by Daywalker on Sunday, November 11, 2007 3:46 PM

Justin-

Hmmm... that's a difficult one!  I have tried cutting Tamiya tape into strips as thin as 1mm, but have had mixed results doing it.  It seems to loosen up and bleed under as often as not.  If you were painting a color similar to the one next to it (As in two similar camo colors), it might not be too noticeable.  But, painting a black stripe next to white could be a challenge.  If it were me, I'd go with the decal option.

  Just my My 2 cents [2c]

Let us know how it works out!

Frank 


  • Member since
    December 2003
  • From: Los Angeles
Posted by dostacos on Sunday, November 11, 2007 6:48 PM
 Daywalker wrote:

Justin-

Hmmm... that's a difficult one!  I have tried cutting Tamiya tape into strips as thin as 1mm, but have had mixed results doing it.  It seems to loosen up and bleed under as often as not.  If you were painting a color similar to the one next to it (As in two similar camo colors), it might not be too noticeable.  But, painting a black stripe next to white could be a challenge.  If it were me, I'd go with the decal option.

  Just my My 2 cents [2c]

Let us know how it works out!

a coat of clear over the edge of the tape seals it, then when painted it will pull clean without leaking under
Dan support your 2nd amendment rights to keep and arm bears!
  • Member since
    February 2006
  • From: Smithers, BC, Canada
Posted by ruddratt on Sunday, November 11, 2007 6:52 PM
I would go with the paint method, Justin. Might be a bit more labor-intensive, but it would look awesome! .... and I'll second the suggestion of using a clearcoat after masking and before you paint the black.

Mike

 "We have our own ammunition. It's filled with paint. When we fire it, it makes pretty pictures....scares the hell outta people."


  • Member since
    April 2005
  • From: Piscataway, NJ!
Posted by wing_nut on Sunday, November 11, 2007 7:36 PM
I would use a piece of bare metal foil. Apply ove rthe area and cut with a new #11 blade. It has become my aboslute favorite for any intricate masking job.

Marc  

  • Member since
    October 2004
  • From: Colorado
Posted by StephenLawson on Sunday, November 11, 2007 8:09 PM

 MrDrummy wrote:
". . .I've thought about trying to cut a decal, but I'm not so sure how that'd turn out. Anyway, any advice would be much appreciated!!


Mine is a decal.   No worries


Stachel...unconfirmed by Armee means unconfirmed!!!!

  • Member since
    February 2007
  • From: Lubbock, TX
Posted by MrDrummy on Monday, November 12, 2007 12:31 AM

Well, I went ahead and took a shot with a decal, knowing that I could pull it off if it didn't work out.  Luckily I had some old Microscale Normandy invasion stripes laying around, and plenty of long, black strips!  It took me just one try to get it to fit, and the thing was so thin and nice, that it went right down with no problems!!

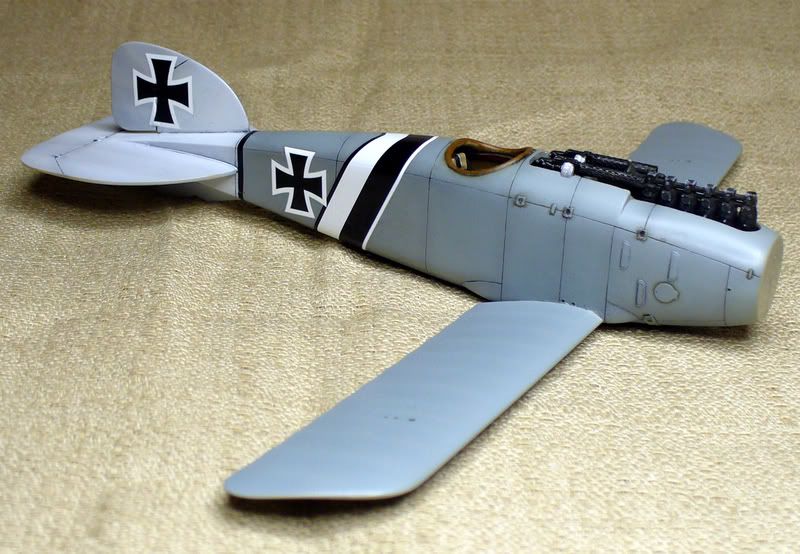
Here are a couple of shots of the fuselage with decals added- unfortunately I couldn't get the black and white sash to fit right, so it's a little too far back on the fuselage, and the cross a little too far forward.  Oh well.  Maybe next time? 
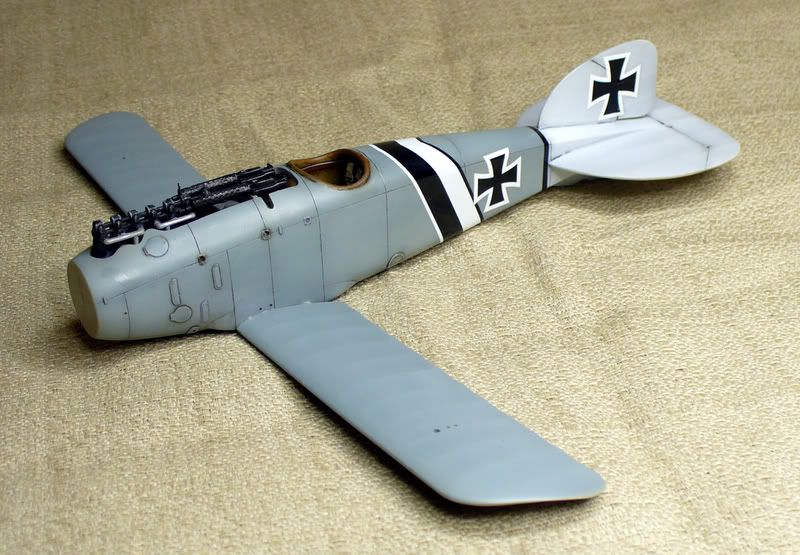
 

One other big stupid issue!  I just didn't think about this at all.  Notice the crosses on the tail are outlined in white--on a white tail.  I don't know if I'm ever going to be able to get the white on the crosses to look like the white on the tail.  Bummer.  May have to find some all black crosses for the tail or something, and pull these off.


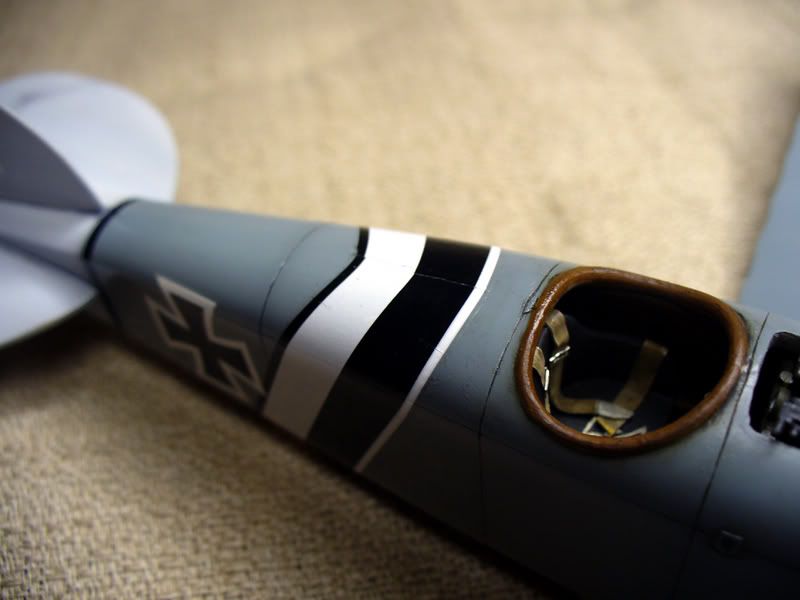
Also, here's a shot of an issue that popped up when I was fitting the sash around the fuselage- EEK!  The decals split a little, and some of the white from underneath is showing through.  I've used Sharpie in the past to touch up black decals-(it's funny-it looks purple at first, but when you flatcoat it, it comes out nice and black!) but do you guys have any other methods?  I'm going to have to do a little magic to make this look right.  I'm not good at working with decals like this, I guess. (Yes, I noticed the ugly little spot right behind the coaming on the cockpit, too.  More to fix! Clown [:o)])

Also- sorry to be so long-winded!! 

-Justin
On the Bench: 1:48 Dragon Dr. 1 1:48 Trumpeter MiG-15 Fagot B Photo Sharing and Video Hosting at Photobucket
  • Member since
    February 2006
  • From: Smithers, BC, Canada
Posted by ruddratt on Monday, November 12, 2007 12:14 PM

Justin, that looks simply incredible! The stripe decal in front of the tail assembly looks perfect. I never thought about the sharpie method for doing touch-ups....may have to try that at some point. I have these acrylic gouaches from Jo Sonja that brush-paint on nicely and cover well. Just thin them with water and do my touch-ups with those. The tail cross will be tricky to blend in as is. I would probably do the same as you're thinking of doing and remove the current one's in favor of all-black ones.

I am really impressed with how your Albatros is progressing so far. Keep up the great work. It's gonna be a real looker when it's finished! Thumbs Up [tup]

Mike

 "We have our own ammunition. It's filled with paint. When we fire it, it makes pretty pictures....scares the hell outta people."


  • Member since
    October 2004
  • From: Colorado
Posted by StephenLawson on Monday, November 12, 2007 2:19 PM

Greetings Justin: I agree The Albatros D.III is coming along nicely!  I would go with new all black rudder / fin crosses. IMHO.

A further bit of good news ! Roden has evidently overcome the virus!  They are back up and running.  Though there is one case where some images are in the wrong gallery.  I am sure they will get to it. Another day of Champagne and fish eggs!

RODEN-scale model kits


Stachel...unconfirmed by Armee means unconfirmed!!!!

  • Member since
    February 2007
  • From: Lubbock, TX
Posted by MrDrummy on Monday, November 12, 2007 3:46 PM

Thanks Mike and Stephen!  I'm kind of stalled til I get those crosses on the tail taken care of, though!  Bummer! 

 StephenLawson wrote:

I would go with new all black rudder / fin crosses. IMHO.


Anyone have any black crosses laying around in their stash? 


-Justin
On the Bench: 1:48 Dragon Dr. 1 1:48 Trumpeter MiG-15 Fagot B Photo Sharing and Video Hosting at Photobucket
  • Member since
    September 2003
  • From: South Central Wisconsin
Posted by Daywalker on Monday, November 12, 2007 5:26 PM

Justin-

Great work on the Albatros, you never cease to amaze with your work!  This is your first WWI kit, right?  Sure doesn't look like it's your first...

Glad the decal idea worked!  As for cross decals, I have none.  In fact, a couple of the guys here have helped me out with decals I needed.  Thank you guys!Big Smile [:D]

Frank 


  • Member since
    February 2006
  • From: Smithers, BC, Canada
Posted by ruddratt on Monday, November 12, 2007 7:04 PM

 MrDrummy wrote:
Anyone have any black crosses laying around in their stash? 

Justin, I may be able to help you out with that. Shoot me a pm and let me know what size crosses you're looking for (in mm) and how many.

Mike

 "We have our own ammunition. It's filled with paint. When we fire it, it makes pretty pictures....scares the hell outta people."


  • Member since
    September 2003
  • From: South Central Wisconsin
Posted by Daywalker on Monday, November 12, 2007 8:10 PM

Just a quick update to show I am actually getting somewhere with the DVIII!  I managed to spray the engine in it's base color, and put the lozenge decal (thanks again Mike!) on the inner surfaces of the fuselage.  But, I didn't put the decals low enough.  Looking at the floor piece, it looked as though it would go all of the way up to the fuse side so I only decaled down to the level of the floor.  Problem is, there is a small gap between the floor and the fuse so I need to cut a couple of strips of lozenge to fill in the space.  Here's a pic to show where she's at:

Frank 


  • Member since
    April 2005
  • From: Piscataway, NJ!
Posted by wing_nut on Tuesday, November 13, 2007 9:18 AM

Frank that is looking real nice.


I too have made some progress.  The stomach virus that has attacked me has improved enough to allow me to sit at the bench (yes I know... WAY too much infoLaugh [(-D])

After trying to spray the preshade on either side of the tiny little ribs and not completely filling the space in between... and failing miserably... I had an idea.  Paint the whole wing black and just sand it off.

The lower wing with a light black coat... 

The upper wing after being sanded.  I wet sanded with 3200 micro mesh cloth so it would get down into the recesses.  The rear deck is sanded too in the first pic. Green gets sprayed as soon as I hit the POST button so we'll see how it worked.


And here is a shot of he PE/resin guns.  I love that little red dog.


Marc  

  • Member since
    February 2006
  • From: Smithers, BC, Canada
Posted by ruddratt on Tuesday, November 13, 2007 9:26 AM

Frank, that is looking awesome, buddy! Nice detail on the engine, and the woodgrain looks perfect. Thumbs Up [tup] How are you enjoying your first WWI kit? You finding them any different than their WWII counterparts?

Glad you're feeling better, Marc, and that was a very cool idea for the rib highlighting! Incredible work so far! From looking at the guns (very nice pieces I might add), I have to ask....are you building one of Barker's mounts?

Mike

 "We have our own ammunition. It's filled with paint. When we fire it, it makes pretty pictures....scares the hell outta people."


  • Member since
    April 2005
  • From: Piscataway, NJ!
Posted by wing_nut on Tuesday, November 13, 2007 9:38 AM

Yup it will be one of Barker's birds.  It is the last one in the instruction book but the description of that particular scheme is entirely in Czech.

And guess what I just snapped off... again...Angry [:(!]

Marc  

  • Member since
    September 2003
  • From: South Central Wisconsin
Posted by Daywalker on Tuesday, November 13, 2007 9:49 AM

Marc- Thanks, yours looks exquisite as well!  Great idea on the sanding down for preshading, I am excited to see how it works.

Mike- Thanks buddy!  Adding the spark plug wires was not as difficult as I thought it would be, and really adds to it I think.  These WWI birds are a lot of fun, quite different than my usual stuff but I am really enjoying the change of pace!  After working on this one, I will be ready to tackle the wood floor on my next P-51 build!

Frank 


  • Member since
    April 2005
  • From: Piscataway, NJ!
Posted by wing_nut on Tuesday, November 13, 2007 10:25 AM

Thanks Frank.

And the results are in...


Marc  

  • Member since
    February 2006
  • From: Smithers, BC, Canada
Posted by ruddratt on Tuesday, November 13, 2007 10:37 AM

That wood floor on the P-51 should be a breeze for ya, buddy! I'm really psyched to see how this build of yours turns out.

Marc, oh no! Don't tell me it was one of the cabane struts! That'd be a major bummer. Sad [:(] The paint looks fantastic, my friend! Thumbs Up [tup] ...and believe it or not, it looks like we're doing the same bird! LOL! I needed a Canadian subject as this guy is going on display at the legion hall here in town once it's finished. I liked the cut-away on the upper wing....made it easier to see the 'pit.

Mike

 "We have our own ammunition. It's filled with paint. When we fire it, it makes pretty pictures....scares the hell outta people."


  • Member since
    February 2007
  • From: Lubbock, TX
Posted by MrDrummy on Tuesday, November 13, 2007 11:05 AM
 wing_nut wrote:

The stomach virus that has attacked me has improved enough to allow me to sit at the bench (yes I know... WAY too much infoLaugh [(-D])

Ouch!!  Sorry to hear you weren't feeling well--of course the little smilie made me chuckle a bit!  You always have good little smilies.

Anyway-the preshading idea worked great!!  I think that the wings in particular look really, really nice!! 

Frank- yours is looking awesome!  The wood floor and ribs on the sides look like the real thing! 

-Justin
On the Bench: 1:48 Dragon Dr. 1 1:48 Trumpeter MiG-15 Fagot B Photo Sharing and Video Hosting at Photobucket
  • Member since
    October 2004
  • From: Colorado
Posted by StephenLawson on Tuesday, November 13, 2007 12:31 PM
 ruddratt wrote:
 MrDrummy wrote:
Anyone have any black crosses laying around in their stash? 

Justin, I may be able to help you out with that. Shoot me a pm and let me know what size crosses you're looking for (in mm) and how many.

If he don't, I probably do.


Stachel...unconfirmed by Armee means unconfirmed!!!!

  • Member since
    October 2004
  • From: Colorado
Posted by StephenLawson on Tuesday, November 13, 2007 12:41 PM

 wing_nut wrote:
Yup it will be one of Barker's birds.  It is the last one in the instruction book but the description of that particular scheme is entirely in Czech.  And guess what I just snapped off... again...Angry [:(!]

I usually have to drill holes in the cabane ends and insert brass wire/rod to stabilize.

Also here is a bit ont the scheme's history. Profile H. Sopwith Camel F.1 B6313 was flown by Major W.G. Barker as CO of 139 Sqdn RAF in Italy during September 1918.  It was dismantled on 2 October 1918.  This bird had a lengthy war service and was repainted several times. the red dog is supposed to be a "devil or pan figure".  If I remember correctly it was a radiator cap originally and in recent years some one from the Cross & Cockade Intl. had found one and did a short history on it there was even a photograph.


Stachel...unconfirmed by Armee means unconfirmed!!!!

  • Member since
    October 2004
  • From: Colorado
Posted by StephenLawson on Tuesday, November 13, 2007 12:46 PM

 Daywalker wrote:

Nicely done Frank.


Stachel...unconfirmed by Armee means unconfirmed!!!!

JOIN OUR COMMUNITY!

Our community is FREE to join. To participate you must either login or register for an account.

SEARCH FORUMS
FREE NEWSLETTER
By signing up you may also receive reader surveys and occasional special offers. We do not sell, rent or trade our email lists. View our Privacy Policy.