SEARCH FINESCALE.COM

Enter keywords or a search phrase below:

The Official F4U Corsair Group Build 4/01/08 - rolling end date

179031 views
1732 replies
1 rating 2 rating 3 rating 4 rating 5 rating
  • Member since
    March 2008
  • From: Charleston, SC
Posted by kg4kpg on Wednesday, April 30, 2008 7:50 AM

 Summit wrote:
Chris, out of the reference books I have, the color photos show the green.


okay, thanks.

  • Member since
    September 2007
  • From: galt, ca.
Posted by dirtball on Thursday, May 1, 2008 1:53 AM
GEEZZ, Almost 24hrs without a post. I guess I   ll see ya later alligator...................Harv
"I once shot an elephant in my pajamas. How he got in my pajamas, I`ll never know!"
  • Member since
    March 2006
Posted by simpilot34 on Thursday, May 1, 2008 6:08 AM

I don't know if I will committ to building a Corsair or not but since it's a year long I just might. I received my order from Hannants today, and I have my 1/72 Blacksheep (Korea) decals for my Italeri F4U-4Party [party], Hi-tech PE set and quickboost engine for my Revell F4U-5. The inspiration is there.Thumbs Up [tup]

Cheers

Cheers, Lt. Cmdr. Richie "To be prepared for war, is one of the most effectual means of preserving the peace."-George Washington
gzt
  • Member since
    May 2007
  • From: Massachusetts
Posted by gzt on Thursday, May 1, 2008 9:46 AM
 Gigatron wrote:

Hey Sean,

As someone who has built several of the P&W R2800 double wasps, I can tell you what I've found through my research.  The gear covers are light grey, the piston cases can be either steel or aluminium in color, the pushrod cases are either black or aluminium in color and the rocker covers are either black or aluminium in color.  I've seen ignition wiring in aluminium, grey, black and copper color.  Pretty much any combination of those is correct.  I don't know if they came that way from the factory or those were restoration colors.  Unfortunately, most pictures of war-time engines are black and white.

-Fred


I was looking through searching for cockpit colors Sad [:(] (Tamiya specs it as: XF-3 + XF-5 (1:1) - but I do not use tamiya Sad [:(] so I picked Green Zinc Chromate from MM. is it correct ??

Also while I found your post, I remember that John mentioned once P&W DoubleWasp had cylinders painted black (EDIT: probobly during the manufacturing process they got black color, I doubt those were painted Smile [:)]). After the war those were aluminum color but during the war cylinders were black.


All the engines in museums have aluminum color (art least what I saw) including this one:


Flying is a thrill #2 known to mankind. Landing is #1.

http://www.rwd-6.org

  • Member since
    March 2006
Posted by simpilot34 on Thursday, May 1, 2008 10:06 AM

Thank you for posting the close-ups of the R-2800 gzt, they are awesome!Bow [bow]Thumbs Up [tup]

Cheers

Cheers, Lt. Cmdr. Richie "To be prepared for war, is one of the most effectual means of preserving the peace."-George Washington
  • Member since
    September 2007
  • From: galt, ca.
Posted by dirtball on Thursday, May 1, 2008 1:18 PM
    gzt,thanks for the pics. Nice photos and will be a big help ............Harv
"I once shot an elephant in my pajamas. How he got in my pajamas, I`ll never know!"
gzt
  • Member since
    May 2007
  • From: Massachusetts
Posted by gzt on Thursday, May 1, 2008 3:03 PM

you are welcome Smile [:)]

so, what about this tamiya references for cockpit colors ?? What exactly is it? Interior green ?? Euro Interior Green ???

I have my new IWATA HP airbrush and I have to test it Smile [:)] 


Flying is a thrill #2 known to mankind. Landing is #1.

http://www.rwd-6.org

  • Member since
    October 2007
  • From: Inland Northwest
Posted by Summit on Thursday, May 1, 2008 3:44 PM
Greg, I agree with the others on the photos.... Thumbs Up [tup] Man, after seeing them I think I need to toss that Trump engine and go with an aftermarket resin now that I know what they are suppose to look like.  Well Gents. tomorrow (May 2nd) is the Day I catch my Flight to the Snowy Winterland of Colo. Will be back postin later  if my Dad does not work me to death...
Sean "I've reached nearly fifty years of age with my system." Weekend GB 2008
gzt
  • Member since
    May 2007
  • From: Massachusetts
Posted by gzt on Thursday, May 1, 2008 4:09 PM

LOL

In fact both Tamiya and Hasegawa have pretty nice detail level already there. Few touches (Frank did an exceptional detailing on that engine Bow [bow]) like few wires will do the trick.

Flying is a thrill #2 known to mankind. Landing is #1.

http://www.rwd-6.org

  • Member since
    August 2004
Posted by spong on Thursday, May 1, 2008 6:35 PM

Hi Guys

This might be a dumb question BUT

when assembling the pit I realised that when painted,paint to paint surfaces dont stick too well,

so do you guys pre assemble as much as possible prior to painting,paint then glue after removing paint from the bonding surfaces,or what

the areas I was considering as problematic are the pit and landing gear

Opinions please


Chris aka spong 


"We copy you down Twank,Tranquillity,You got a bunch of guys about to turn blue,we're breathing again, thanks alot" Charlie Duke Capcom Apollo 11 July 20th 1969
  • Member since
    April 2003
Posted by oscardeuce on Thursday, May 1, 2008 7:56 PM

Those Aluminum cylinders are way too clean. 

I have the Trumpy 1/32 F4U-4 built with first paint. Some decals on the wings. I'm keeping the wings off for now.


  • Member since
    September 2003
  • From: South Central Wisconsin
Posted by Daywalker on Thursday, May 1, 2008 8:25 PM

Greg- Thanks for the excellent photos, and the engine compliment! Big Smile [:D]  As for your question on the interior color, I believe that Interior Green would be correct for the cockpit, though early Corsairs also had the interior parts painted black.  I'll do some more digging in my reference pile to see what I can come up with. Thumbs Up [tup]

Chris- I usually build up cockpits and LG into subassemblies, then paint.  WHere parts need to be glued, I remove the glue from the mating surfaces before assembling them.  HTH! Thumbs Up [tup]

Oscar- OUTSTANDING WORK THERE!  Nice looking paint job, and decals! Bow [bow]

Frank 


  • Member since
    March 2006
Posted by simpilot34 on Thursday, May 1, 2008 10:30 PM

Oscar, she's looking good mate!Thumbs Up [tup]

Cheers

Cheers, Lt. Cmdr. Richie "To be prepared for war, is one of the most effectual means of preserving the peace."-George Washington
gzt
  • Member since
    May 2007
  • From: Massachusetts
Posted by gzt on Friday, May 2, 2008 10:48 AM

I see nice progress here !

Finally I got a MDC Conversion kit and I painted "green" all the parts that required this color (Tamiya XF-3+XF-5). I used my new Iwata AB (finally) and it is just great !!!!

Tomorrow may start with cockpit but have to wait for some eduard stuff. In the meantime while waiting  I may finish my Spitfire Smile [:)] 

Flying is a thrill #2 known to mankind. Landing is #1.

http://www.rwd-6.org

  • Member since
    September 2003
  • From: South Central Wisconsin
Posted by Daywalker on Friday, May 2, 2008 12:14 PM

Greg-

Glad you got your MDC set and Iwata!  I am anxious to hear how you like that resin set, as I may get one for my next project- an FAA Corsair.  I applied my decals last night, ended up using the kit ones (Tamiya) as the ones from my intended Superscale had an odd shade of blue on the circles.  I also discovered to my dismay that although the sheet is supposedly designed with the Tammy kit in mind, the numbers are WAY too large (look more like 1/32) and the checkerboards are not long enough to reach around the cowl.  GRRR!  So, plan B.  After drooling over photos of the FG-1D recently sold by Provenance Fighter Sales, I opted to add ONLY the stars and bars, a few stencils, and the bu. numbers /model designators.  The FG-1D has a very plain look, which I found quite appealing.  So, mine will have no squadron codes or numbers.  Chalk it up to artistic liscense, or perhaps the aircraft in question was flying with the squadron within a day or so of it's arrival and they had not yet applied any squadron markings.  Either way, I like it so here she is!

Frank 


  • Member since
    September 2007
  • From: galt, ca.
Posted by dirtball on Friday, May 2, 2008 12:39 PM

   Frank, most excelent! The kit decals look good. Seams they went on very well. Nice to see progress. What a bummer about the Superscale ones. I`ve had good luck with the ones I`ve used.

  Oscar, Yours is looking great also! If I had a -4 thats the decals I would of used. My dad was stationed in Olathe  in the mid 60`s. Lived there for about 4 yrs.So I always wanted to do the one your building. To bad you cant get those any more. If you happen to find another set, let me know 

"I once shot an elephant in my pajamas. How he got in my pajamas, I`ll never know!"
  • Member since
    September 2003
  • From: South Central Wisconsin
Posted by Daywalker on Friday, May 2, 2008 1:39 PM
Thanks Harv.  Yeas, it is a bummer about those decals.  I used theirs on my P-40 last year, and they worked VERY well.  Nice and thin, and snuggle down well.  The sheet I was going to use had the familiar "530" from VMF-312, and I was quite excited to use them.  They also left out the bu. no. on the sheet, and the model designator found on the rudder.  Oh, well...c'est la vie.  The kit decals are very thick, and required a lot of cutting and massaging to get them down into the panel lines.  But, they worked well in the long run.  Thanks again for the kind words! Approve [^]

Frank 


  • Member since
    July 2003
  • From: Cincinnati, Ohio
Posted by ridleusmc on Saturday, May 3, 2008 12:48 PM

Yes those kit decals are looking good.  Corsairs don't need decoration to look good.  It's too bad your Superscale decals didn't work out, but that little problem didn't seem to phase you any.  She looks good. 

And thanks again for the painting info.

Semper Fi,

Chris

  • Member since
    September 2003
  • From: South Central Wisconsin
Posted by Daywalker on Saturday, May 3, 2008 12:56 PM
 ridleusmc wrote:

...Corsairs don't need decoration to look good.

I couldn't agree more! Approve [^]

Thanks Chris, I appreciate that!  And, glad to help. Thumbs Up [tup]

Frank 


  • Member since
    November 2006
  • From: Coastal Maine
Posted by dupes on Sunday, May 4, 2008 8:57 AM

Frank - looking great! Big Smile [:D] Question for you...did you use the Tamiya "recommended" paint mixing for your scheme (or even Tamiya sprays), or did you go with another brand of paint using the FS numbers?

Another forum member nearing his FIVE THOUSANDTH POST - planning on some sort of a/c buying spree to celebrate the occasion? Laugh [(-D]Party [party]Make a Toast [#toast]

  • Member since
    March 2007
  • From: NJ
Posted by JMart on Sunday, May 4, 2008 9:15 AM

oscardeuce - really nice crisp build so far

Daywalker - Hey, looks good to me and your explanation is entirely plausible ;) and your paint job is excellent


  • Member since
    September 2003
  • From: South Central Wisconsin
Posted by Daywalker on Sunday, May 4, 2008 10:42 AM

dupes and Jmart- Thank you very much! Big Smile [:D]

 dupes wrote:

Frank - looking great! Big Smile [:D] Question for you...did you use the Tamiya "recommended" paint mixing for your scheme (or even Tamiya sprays), or did you go with another brand of paint using the FS numbers?

Another forum member nearing his FIVE THOUSANDTH POST - planning on some sort of a/c buying spree to celebrate the occasion? Laugh [(-D]Party [party]Make a Toast [#toast]

For the paint, I used Gunze #H-54 (Navy Blue).  I have seen profiles and photos of these with what appears to be two different dark blue colors.  I am not sure if it is the weathering effect causing some aircraft to appear lighter, or what.  I tend to weather my birds quite a bit so the base color will be altered in the end.  I've never done an all-blue one before, curious as to how she turns out! Big Smile [:D]

I can't believe it, 5000 posts!  Man, I talk too much. Taped Shut [XX]  A buying spree is DEFINATELY in order me thinks! Smile,Wink, & Grin [swg]

Frank 


  • Member since
    May 2003
  • From: Abbotsford, B.C. Canada
Posted by DrewH on Sunday, May 4, 2008 11:26 AM

Looking great Frank!! Thumbs Up [tup] I like the color, is just right.

 congrats on 5K! Make a Toast [#toast]  Me thinks you need to order a couple more Tamiya Corsairs Laugh [(-D]

Take this plastic and model it!
  • Member since
    September 2003
  • From: South Central Wisconsin
Posted by Daywalker on Sunday, May 4, 2008 1:17 PM
 DrewH wrote:

Looking great Frank!! Thumbs Up [tup] I like the color, is just right.

 congrats on 5K! Make a Toast [#toast]  Me thinks you need to order a couple more Tamiya Corsairs Laugh [(-D]

Thanks Drew!  And, me thinks you may be right! Big Smile [:D]

Frank 


  • Member since
    September 2007
  • From: galt, ca.
Posted by dirtball on Monday, May 5, 2008 10:53 AM

   Well guys, got my last delivery Sat. Jerry Rutman AM resin prop & wheels. I like them alot! I also got all my P51C stuff also. So if your interested in the stang stuff, I`ll post on aircraft forum. So here ya go............Harv

 100_0116.jpg picture by dirtball_photo

"I once shot an elephant in my pajamas. How he got in my pajamas, I`ll never know!"
  • Member since
    July 2003
  • From: Cincinnati, Ohio
Posted by ridleusmc on Tuesday, May 6, 2008 1:05 AM

I've been working slowly but surely. 

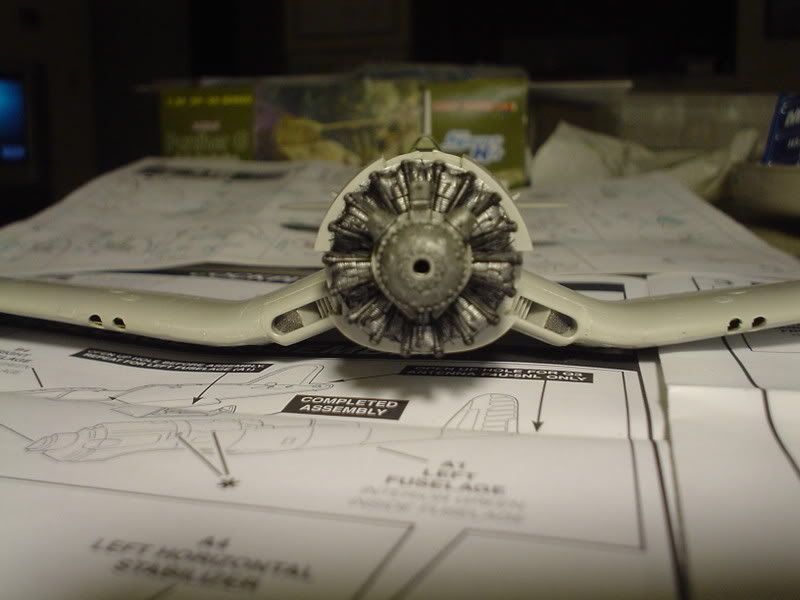
The Pratt & Whitney Double Wasp is done.  At first I didn't like this engine and I considered going the aftermarket route.  The aft bank of cylinders stretches all the way back to the firewall, and it looks toyish.  However, I realized that the faces of the cylinders look pretty good.  The faces are really the only visible part unless you do some surgery to open the cowling.  The plug wires are from my Eduard PE set. 
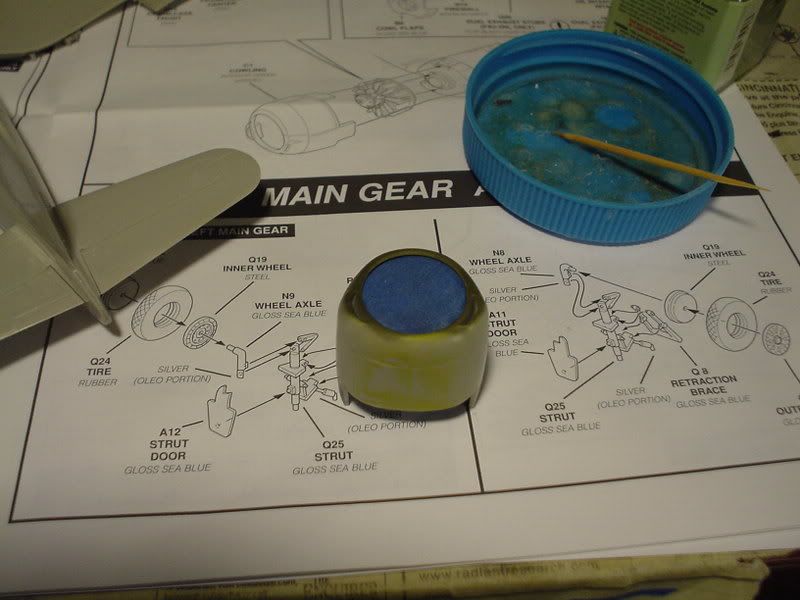
I'm going to attach the cowl before I paint.  I made and applied a simple little mask.  It's not important, I just like the way it looks.
Here's an overview of the model. 
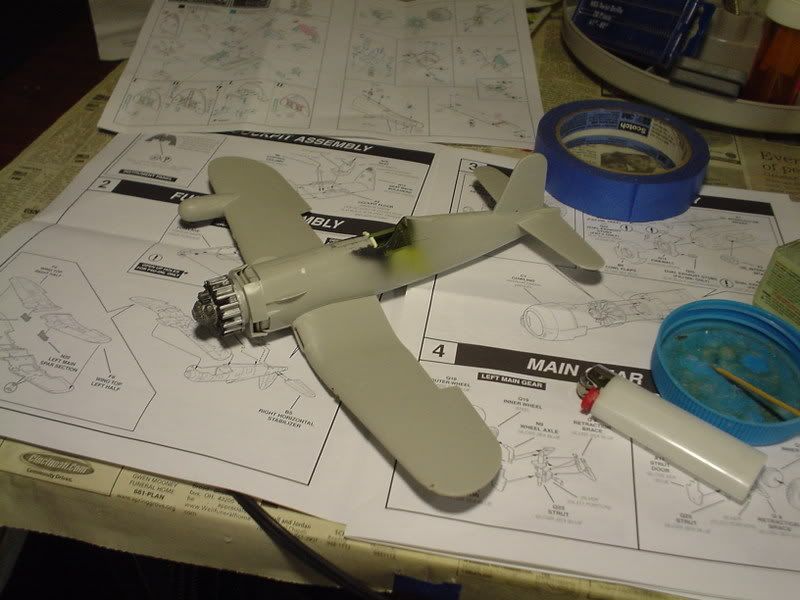
 

Maybe I can start applying paint on the weekend.  Like Mick Jaggar said "I want to Paint it Black"

Semper Fi,

Chris

  • Member since
    February 2003
  • From: Melbourne, Australia
Posted by darson on Tuesday, May 6, 2008 1:29 AM
Looks great Chris and I'm looking forward to seeing your bird with a coat of paint on.
  • Member since
    September 2007
  • From: galt, ca.
Posted by dirtball on Tuesday, May 6, 2008 1:38 AM
Chris, your doing a bang up job, especialy on such a small scale. Engine looks great. One thing I have to ask. The "nose" of the engine is suppose to be grey, I believe. Anyone correct me if I`m wrong. Other than that its excellent!!..............Harv
"I once shot an elephant in my pajamas. How he got in my pajamas, I`ll never know!"
  • Member since
    July 2003
  • From: Cincinnati, Ohio
Posted by ridleusmc on Tuesday, May 6, 2008 2:20 AM

Thanks Darren, Thanks Harv,

You're right Harv, the Nose (Crankcase housing) should be grey.  Actually, I did paint it grey before I gave it a dirty-black-nasty wash.  The wash was pretty heavy and it got rid of the bright sparkle of the Aluminum cylinder heads.  The grey crankcase housing got a heavy dose as well.  I stippled the engine with alcohol when the wash was half-dry.  It gives a splotchy effect.  To my eye it looks right for a greasy, old, oil stained engine.  I could be wrong.  But you're right, the crankcase housing should be grey.  I just wanted to cover mine with oil. 

Semper Fi,

Chris        

  • Member since
    December 2003
  • From: 37deg 40.13' N 95deg 29.10'W
Posted by scottrc on Tuesday, May 6, 2008 6:36 AM
looking good everyone

JOIN OUR COMMUNITY!

Our community is FREE to join. To participate you must either login or register for an account.

SEARCH FORUMS
FREE NEWSLETTER
By signing up you may also receive reader surveys and occasional special offers. We do not sell, rent or trade our email lists. View our Privacy Policy.