SEARCH FINESCALE.COM

Enter keywords or a search phrase below:

Project Commando - 1:35 Cadillac Gage V-100/M706

2522 views
19 replies
1 rating 2 rating 3 rating 4 rating 5 rating
  • Member since
    May 2009
  • From: Poland
Project Commando - 1:35 Cadillac Gage V-100/M706
Posted by Pawel on Saturday, April 13, 2024 5:36 PM

Hello everybody!

I’m starting a project thread in which I would like to tackle model(s) of the Cadillac Gage V-100 Commando armored car, also known as M706 in the US Armed Forces, also called a “duck” from what I heard.
In 2008 Hobby Boss issued a styrene model of this AFV in 1:35 and this made the Verlinden resin model somewhat obsolete. In 2020 it was joined by the model of the M706E2 variant - this variant had an open roof and was used by the USAF for air base security.
I have bought the Hobby Boss kit as soon as it appeared, but right on it was clear, that it has some problematic areas, mainly on the interior. When the M706E2 appeare I have bought it too, hoping it would improve some of the problems of the original kit - which it did, but I have also had more references and I was able to spot more problems. For a long time I thought how to fix them and for a time it seemed an interior kit from a Czech company called MMK, that I finally bought could be a solution here. But after getting the MMK kit it turned out that there are still to many problems here for my liking. Then I tried to correct them old school like - with a saw and lot of filler.
1:35 M706 Commando by Pawel

1:35 M706 Commando by Pawel

1:35 M706 Commando by Pawel

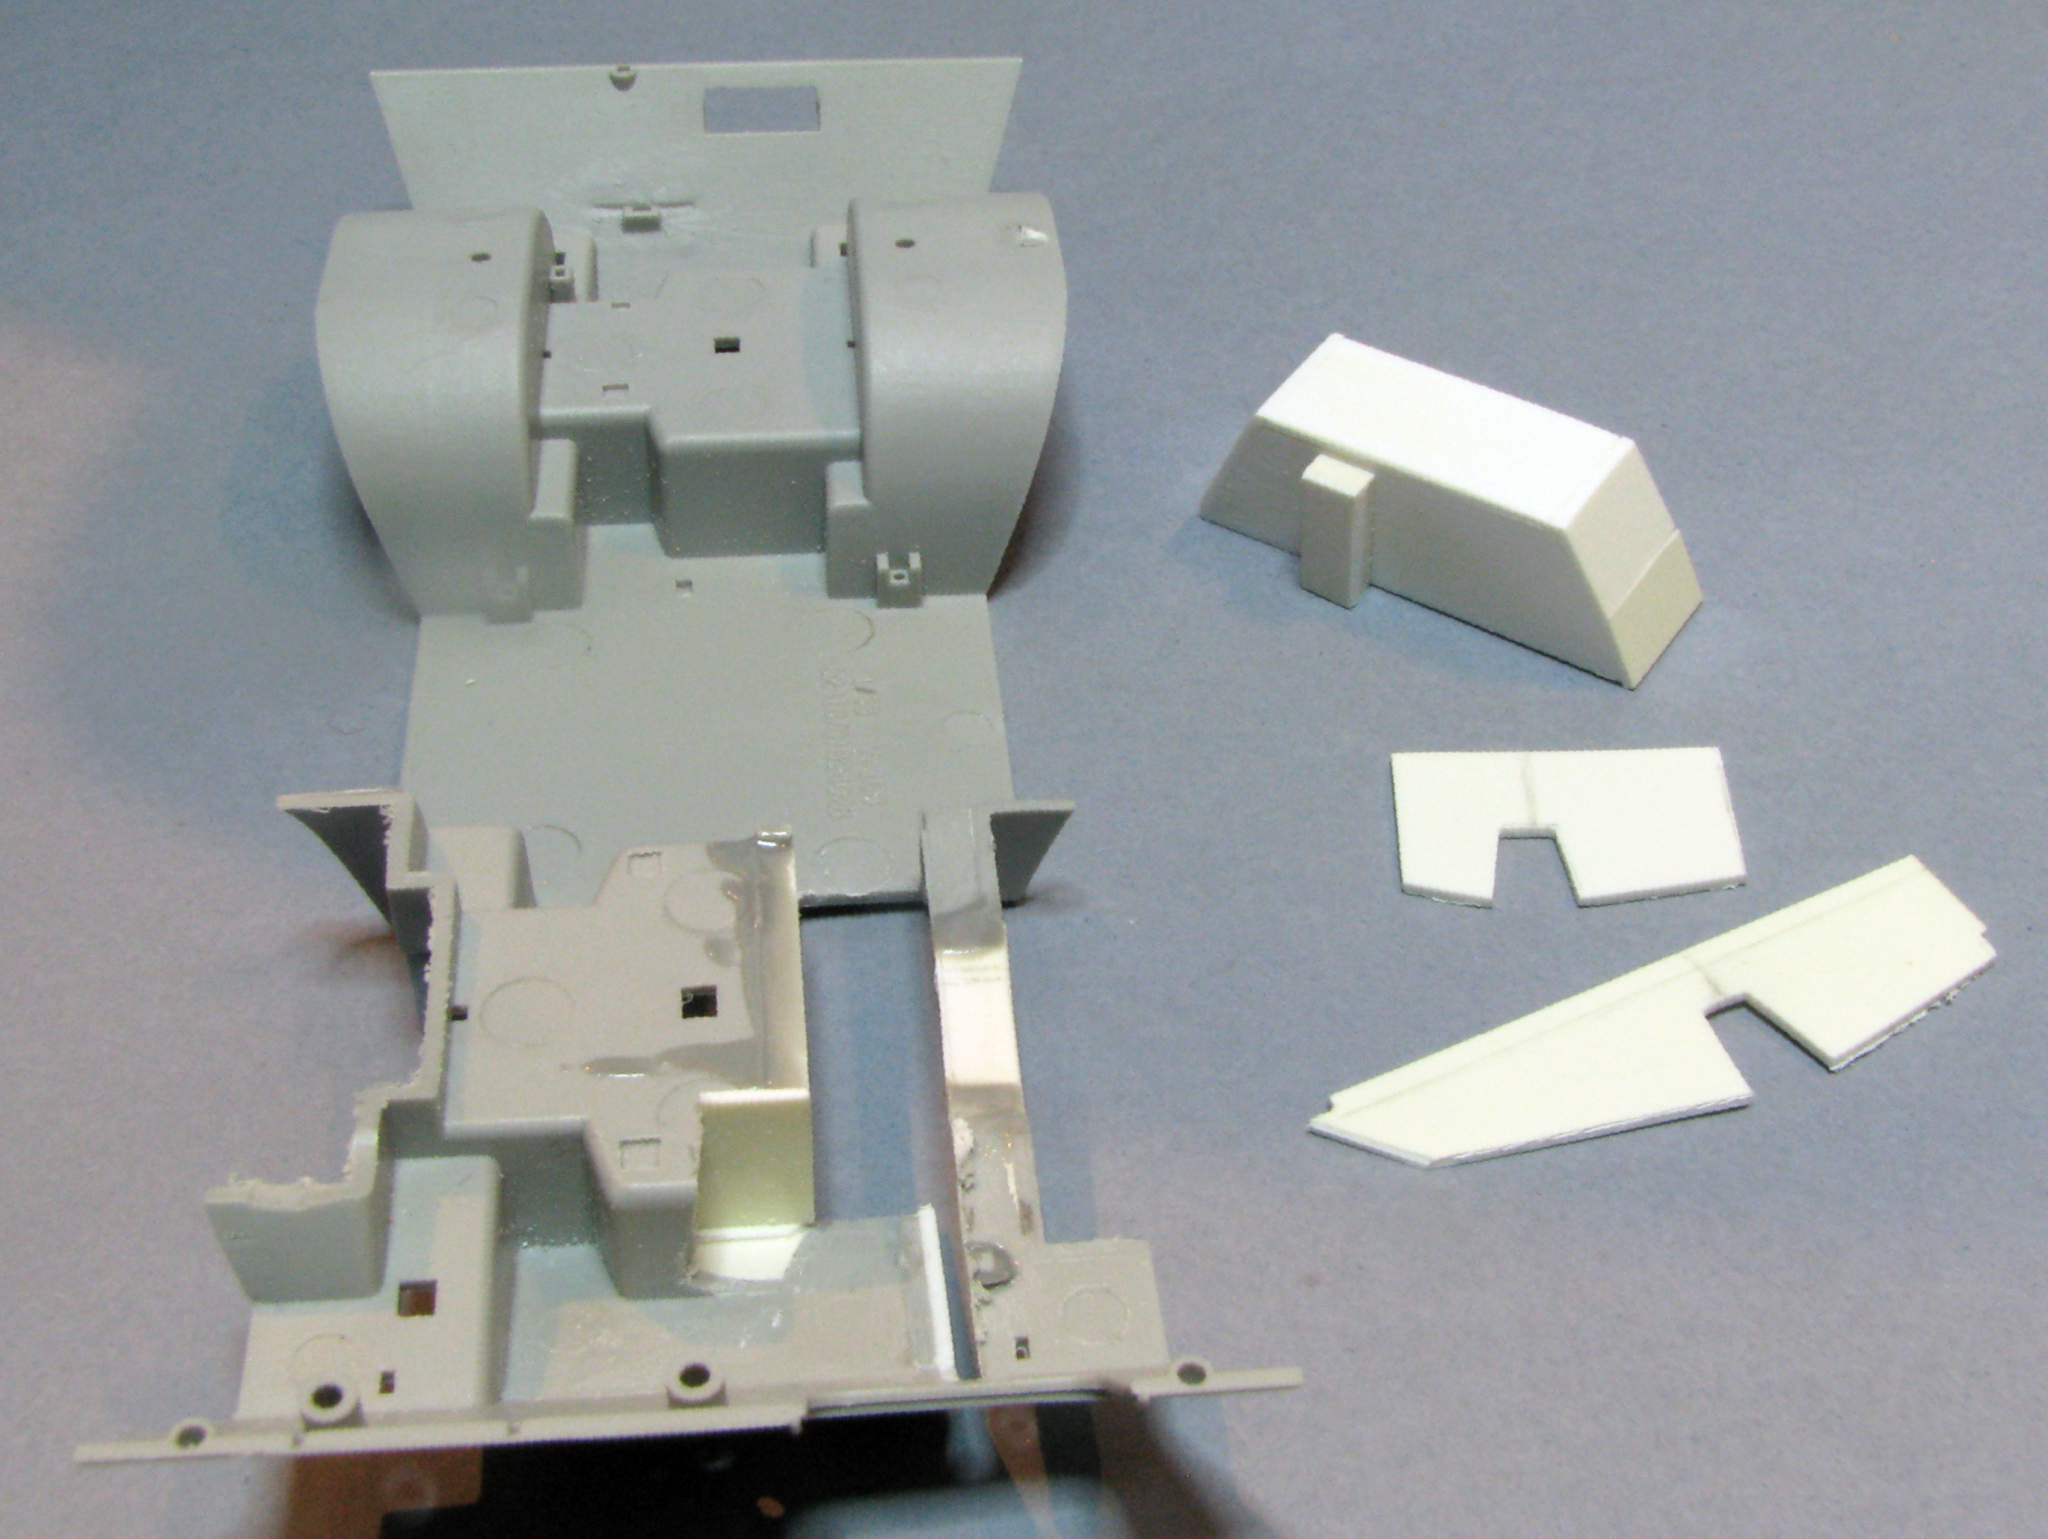
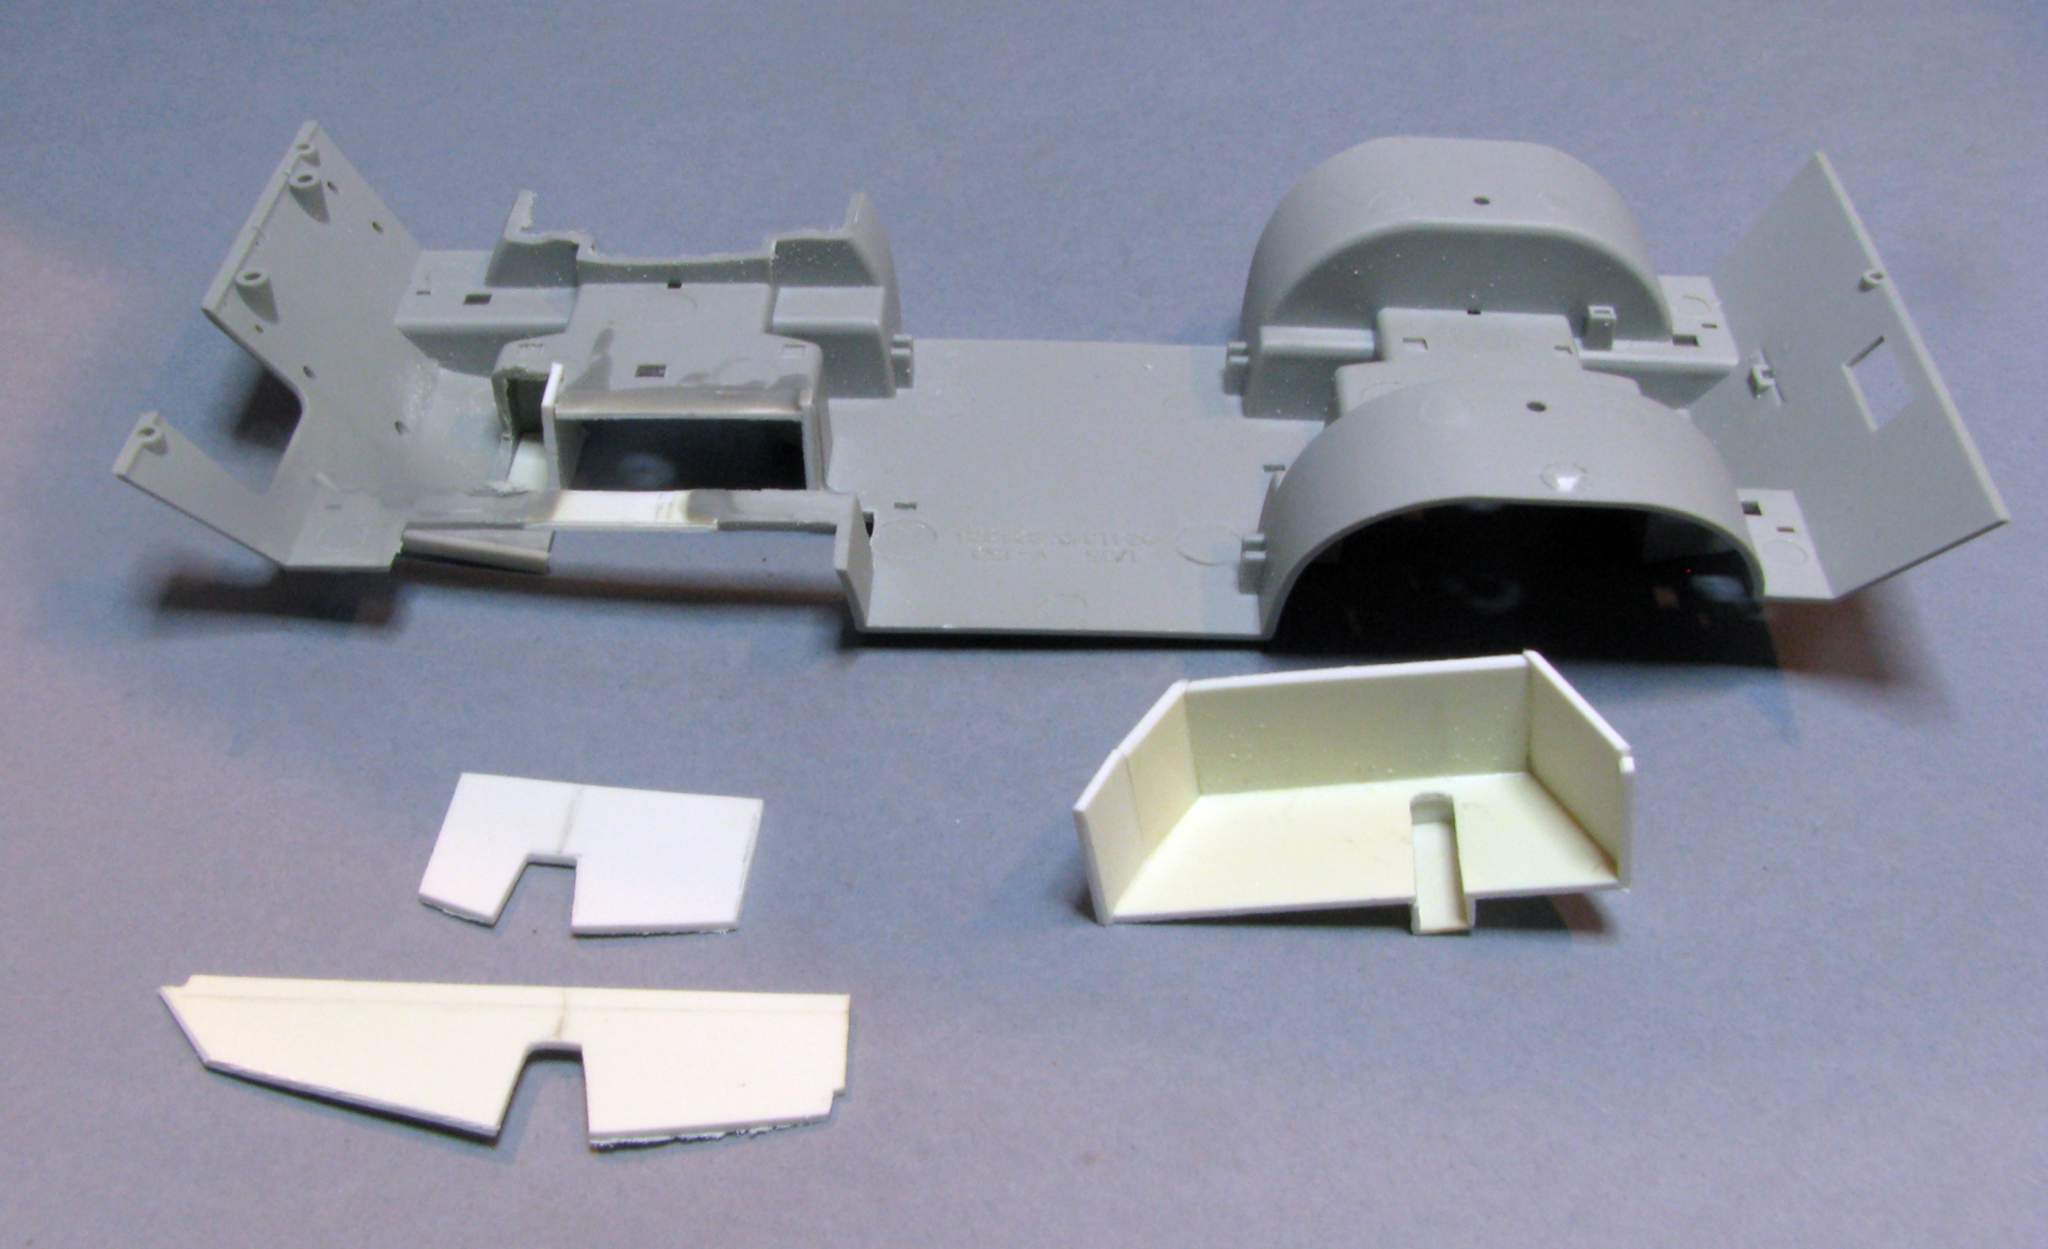
Now in the rear of the vehicle it might even work, but the fron was to complicated to tackle this way. That’s when I decided to redraw the whole chassis in 3D to be able to finally 3D print it, especially since I got a lot of help in form of photos of the rear thing from the people in the USA who owned vehicles like that. So recently I got my 3D prints and that’s why I’m starting this thread today. Here is what my parts look like:
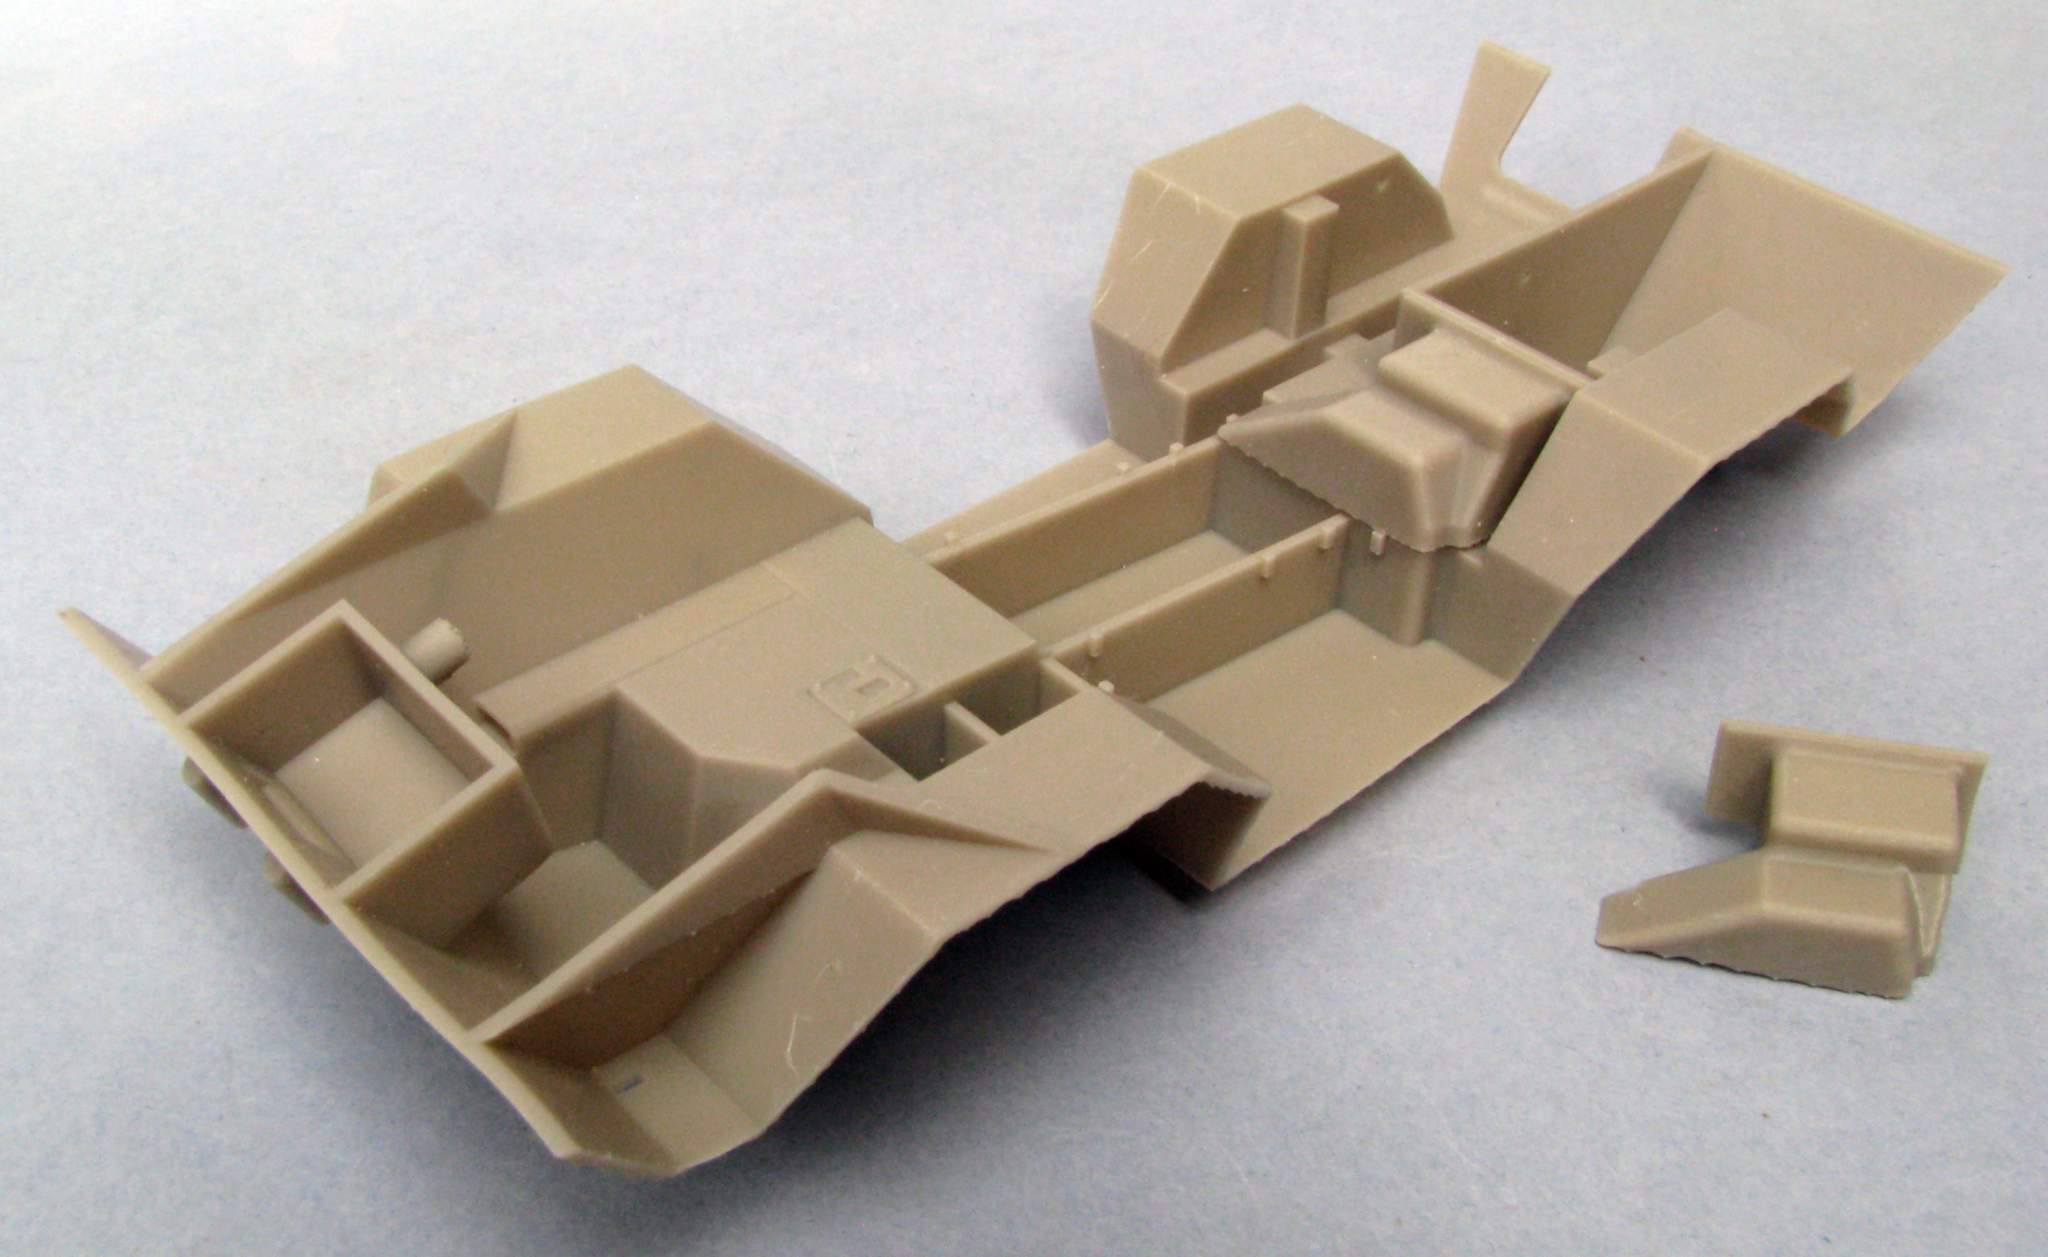
1:35 M706 Commando by Pawel

On the right there is a spare transmission cover. I plan to build the tunnel and tool box covers from styrene plate
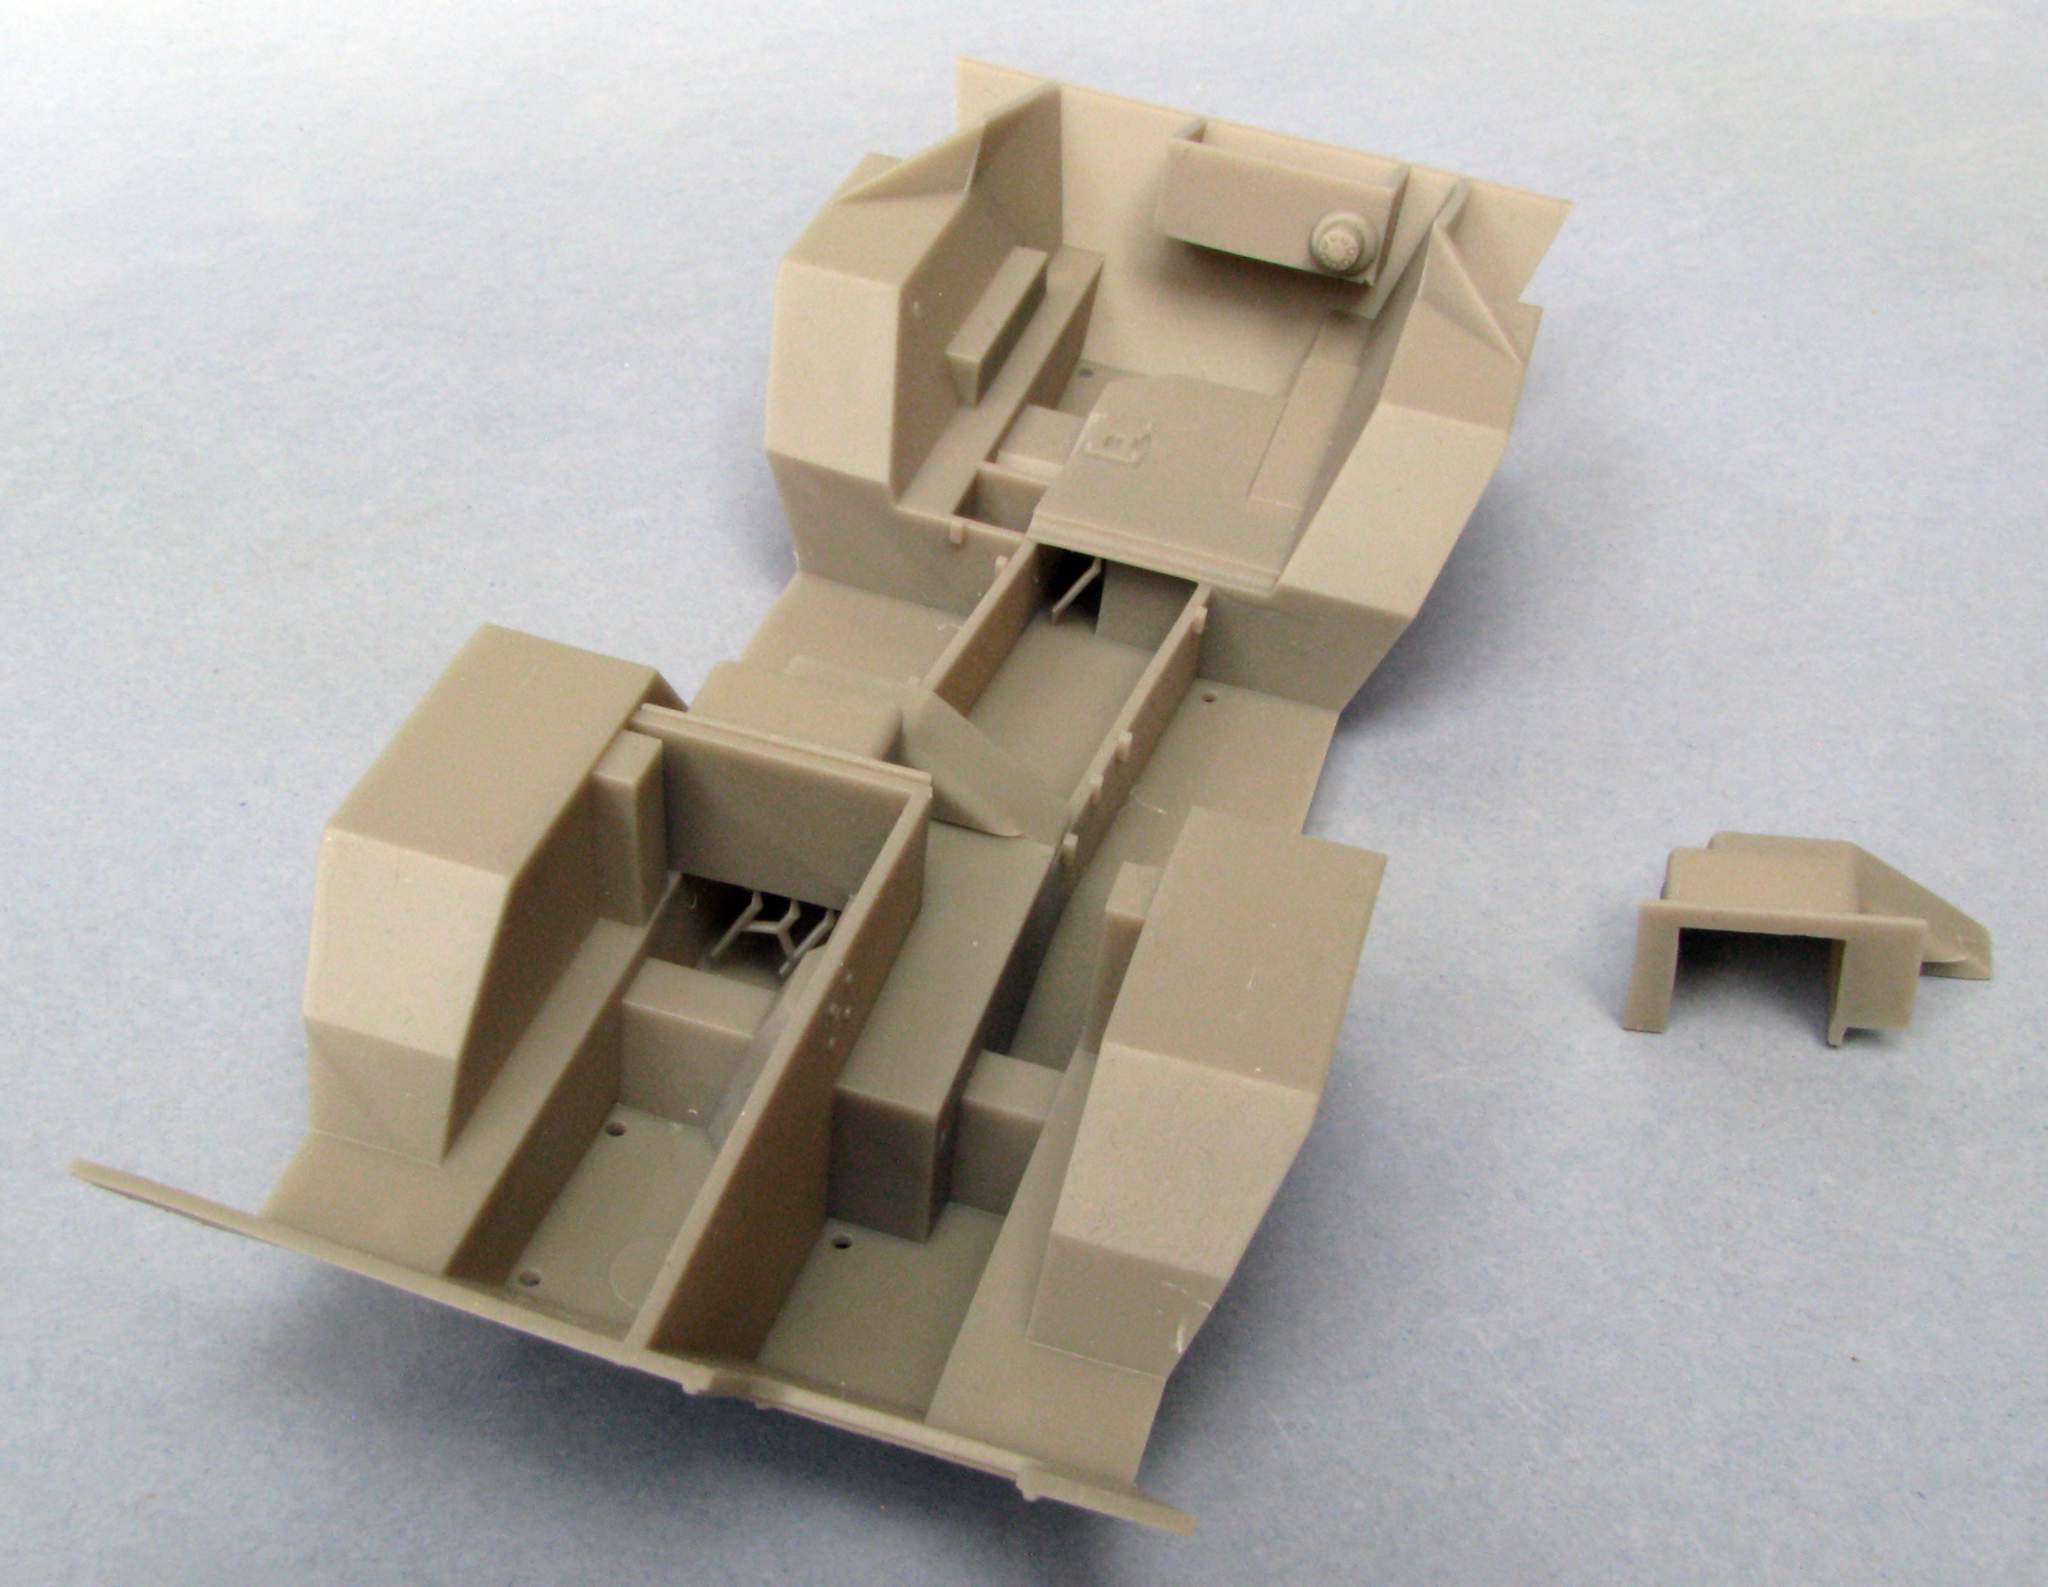
1:35 M706 Commando by Pawel

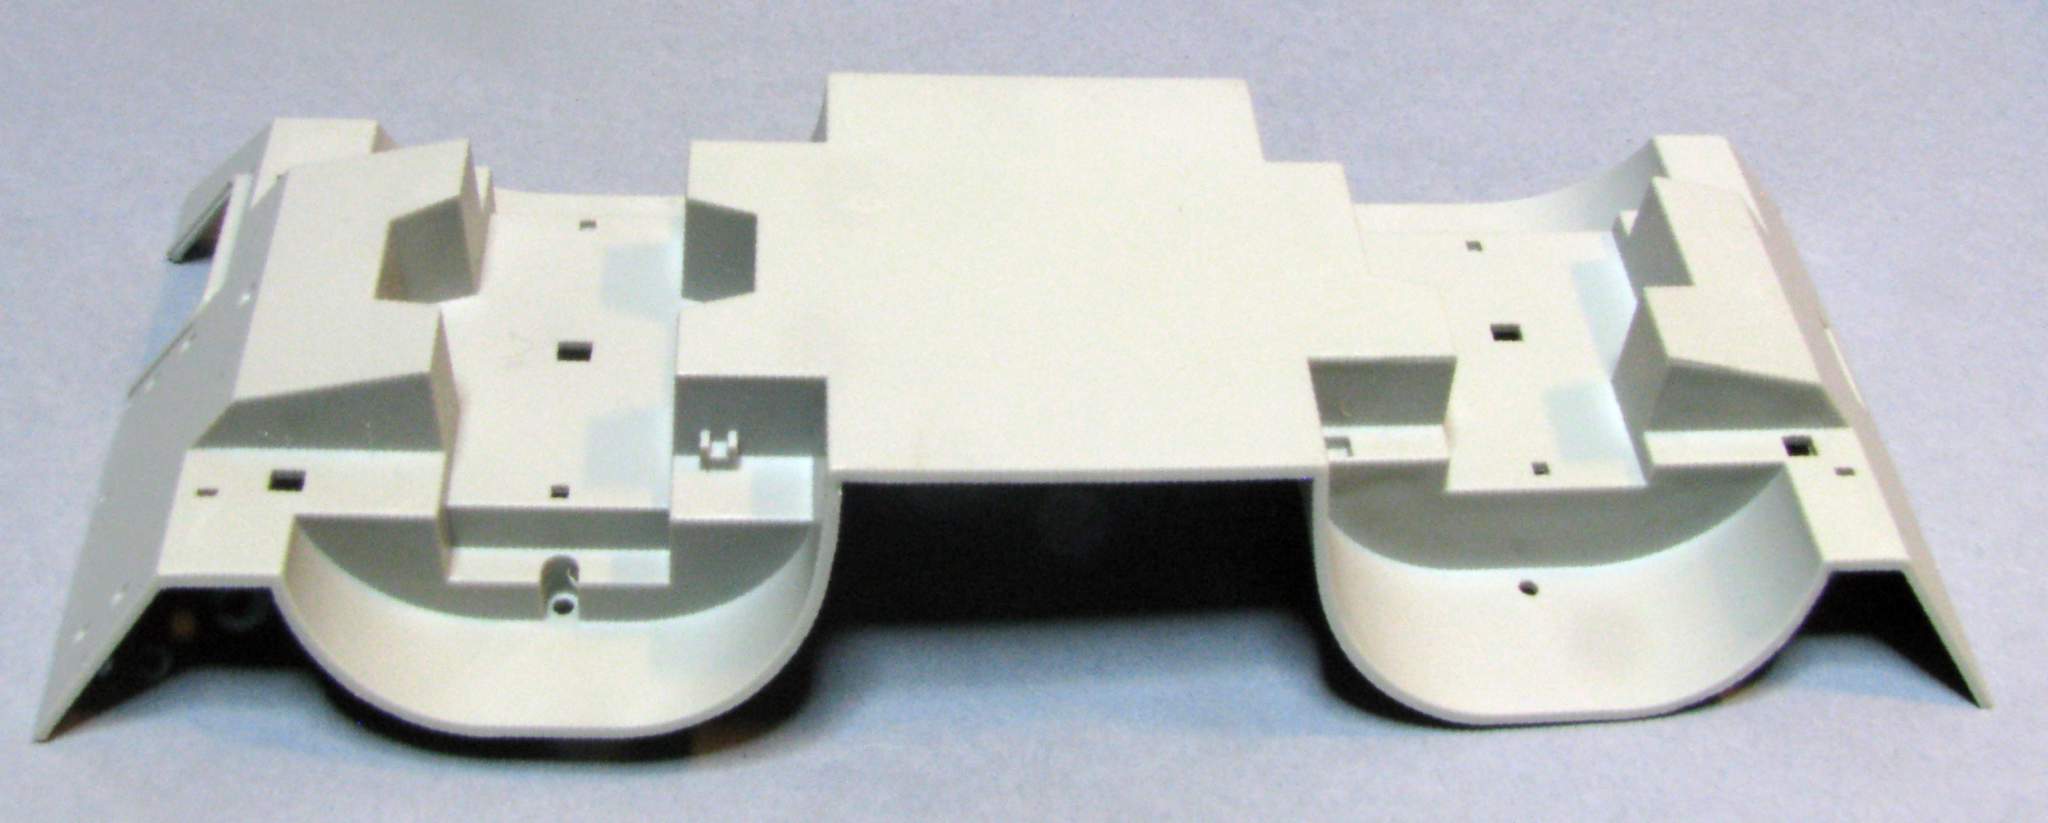
The most important question here would be: Does it fit? Did I get the dimensions and angles right? Luckily it doesn’t look too bad:
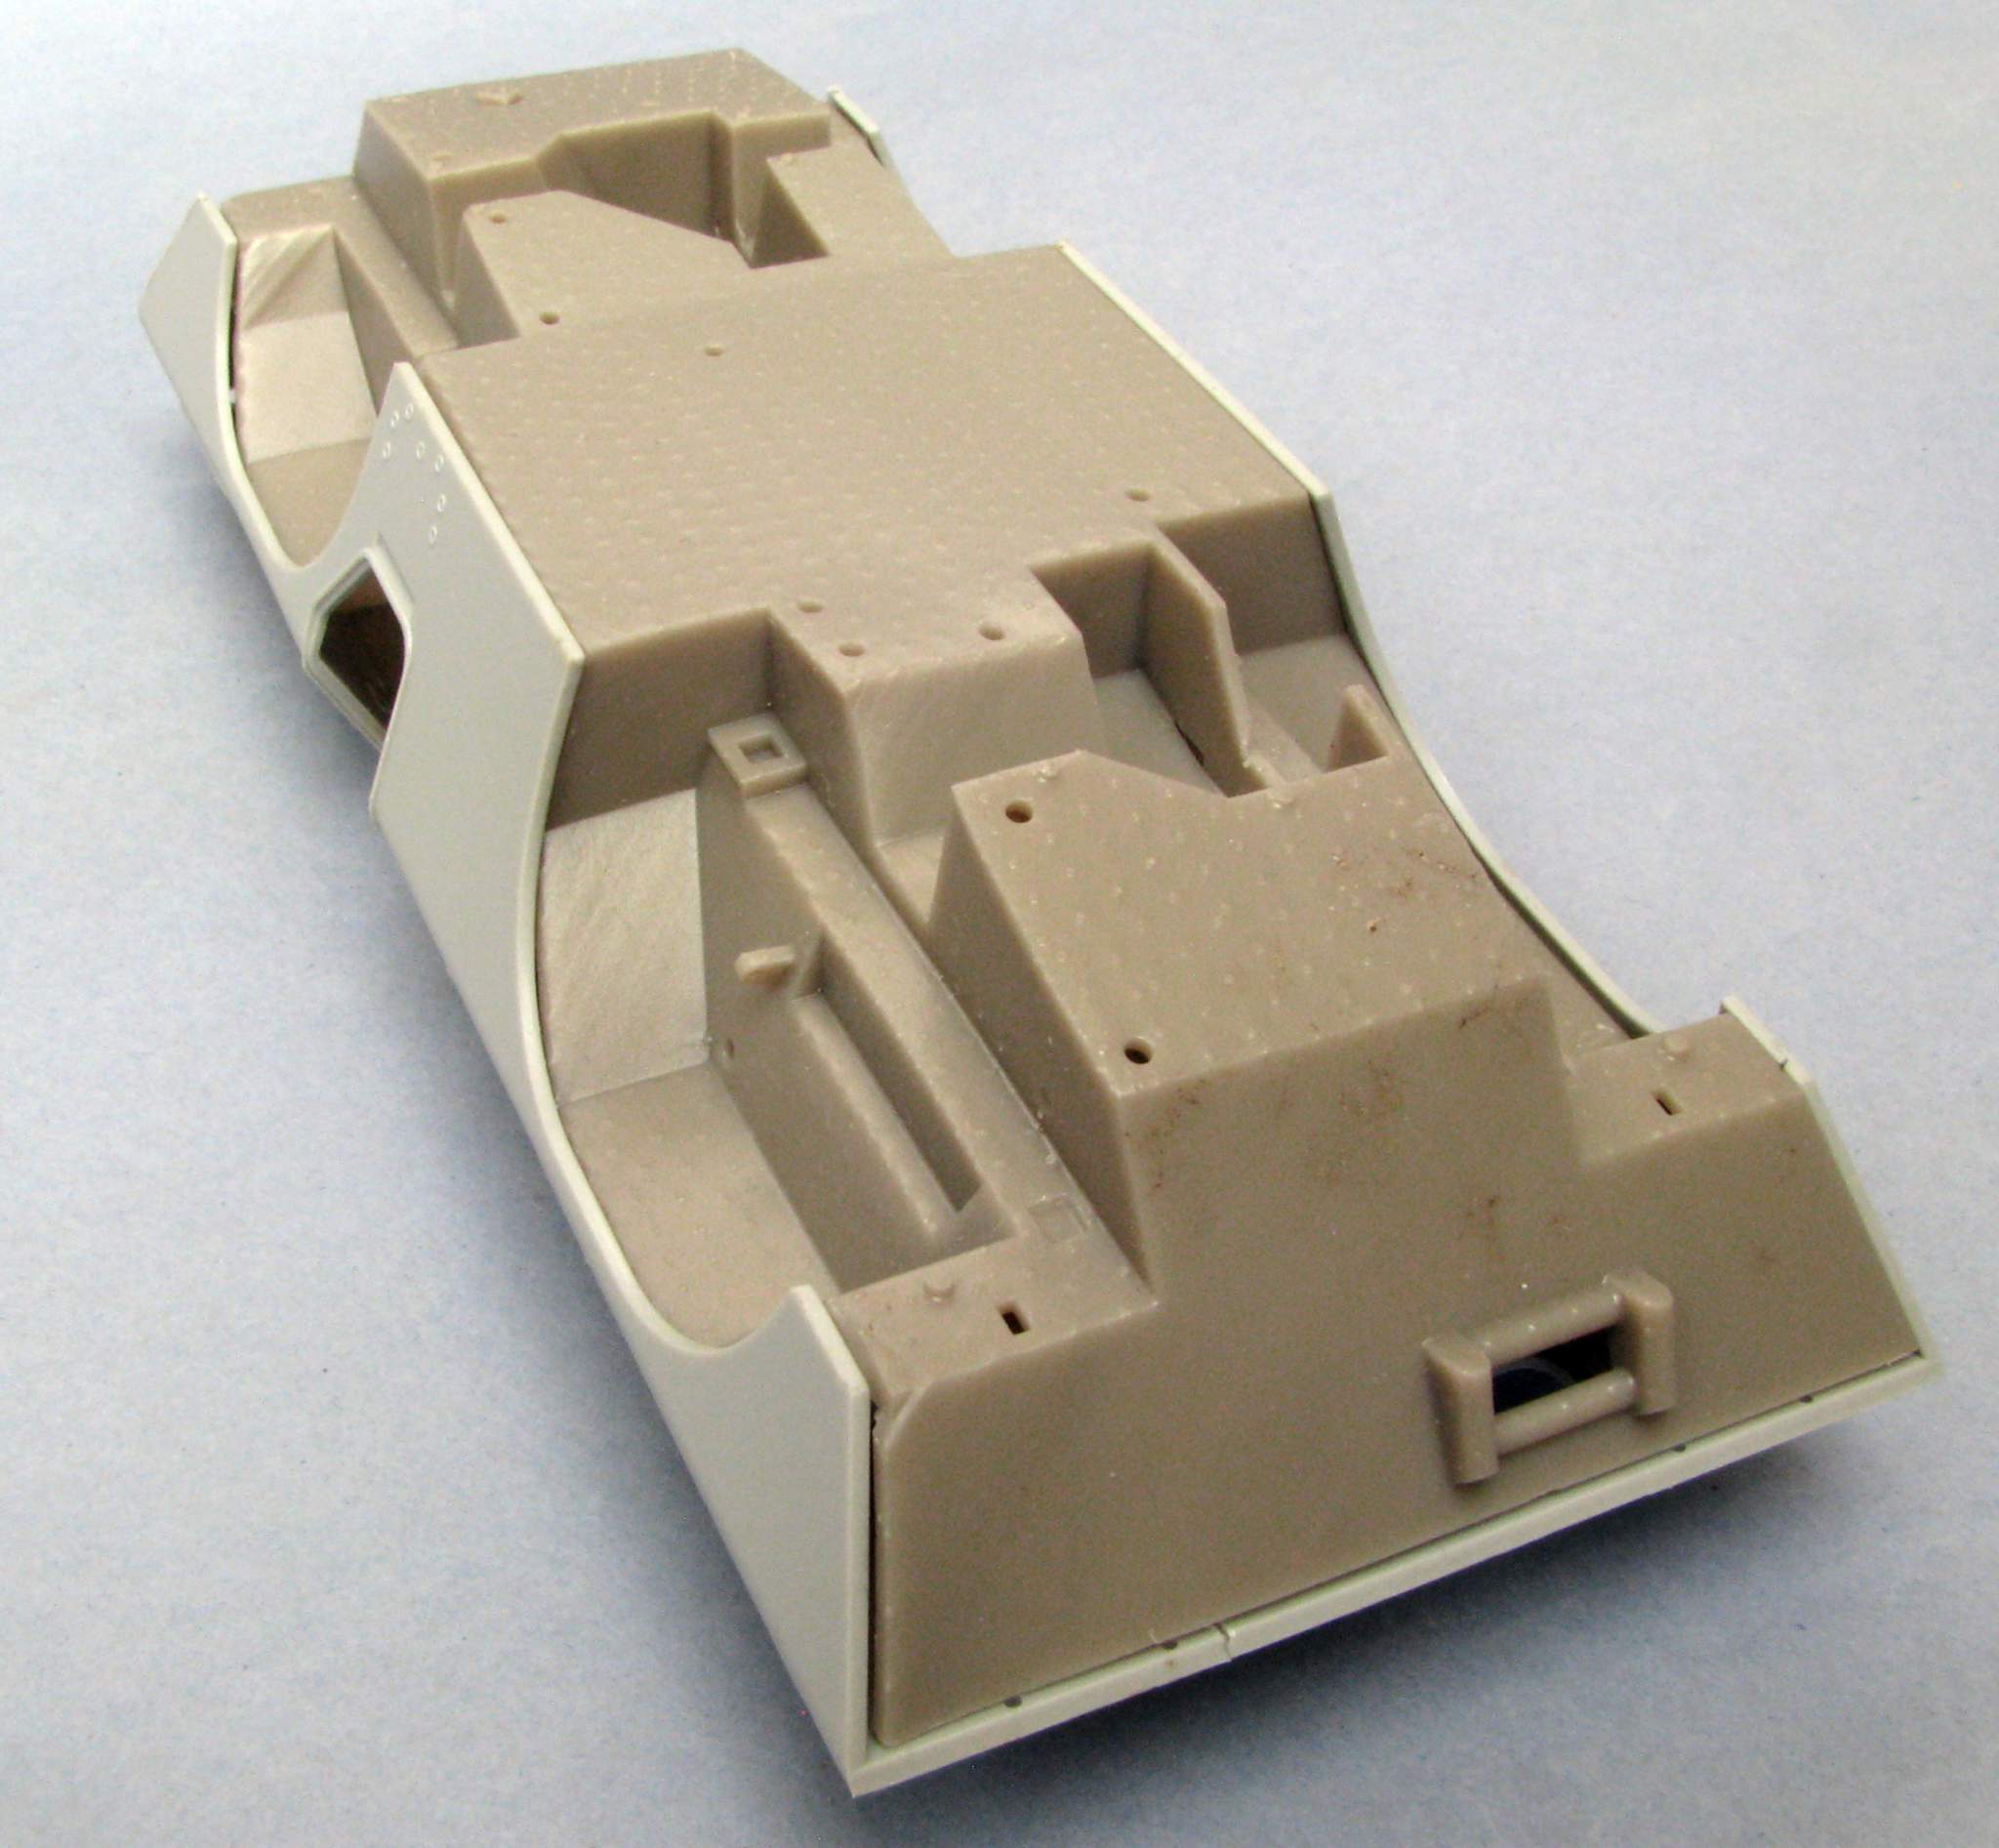
1:35 M706 Commando by Pawel

As you can see there are lots of marks on the underside, where the support structures were attached. There are also some holes my printer said were necessary, that now have to be plugged, I plant to do that with a styrene rod:
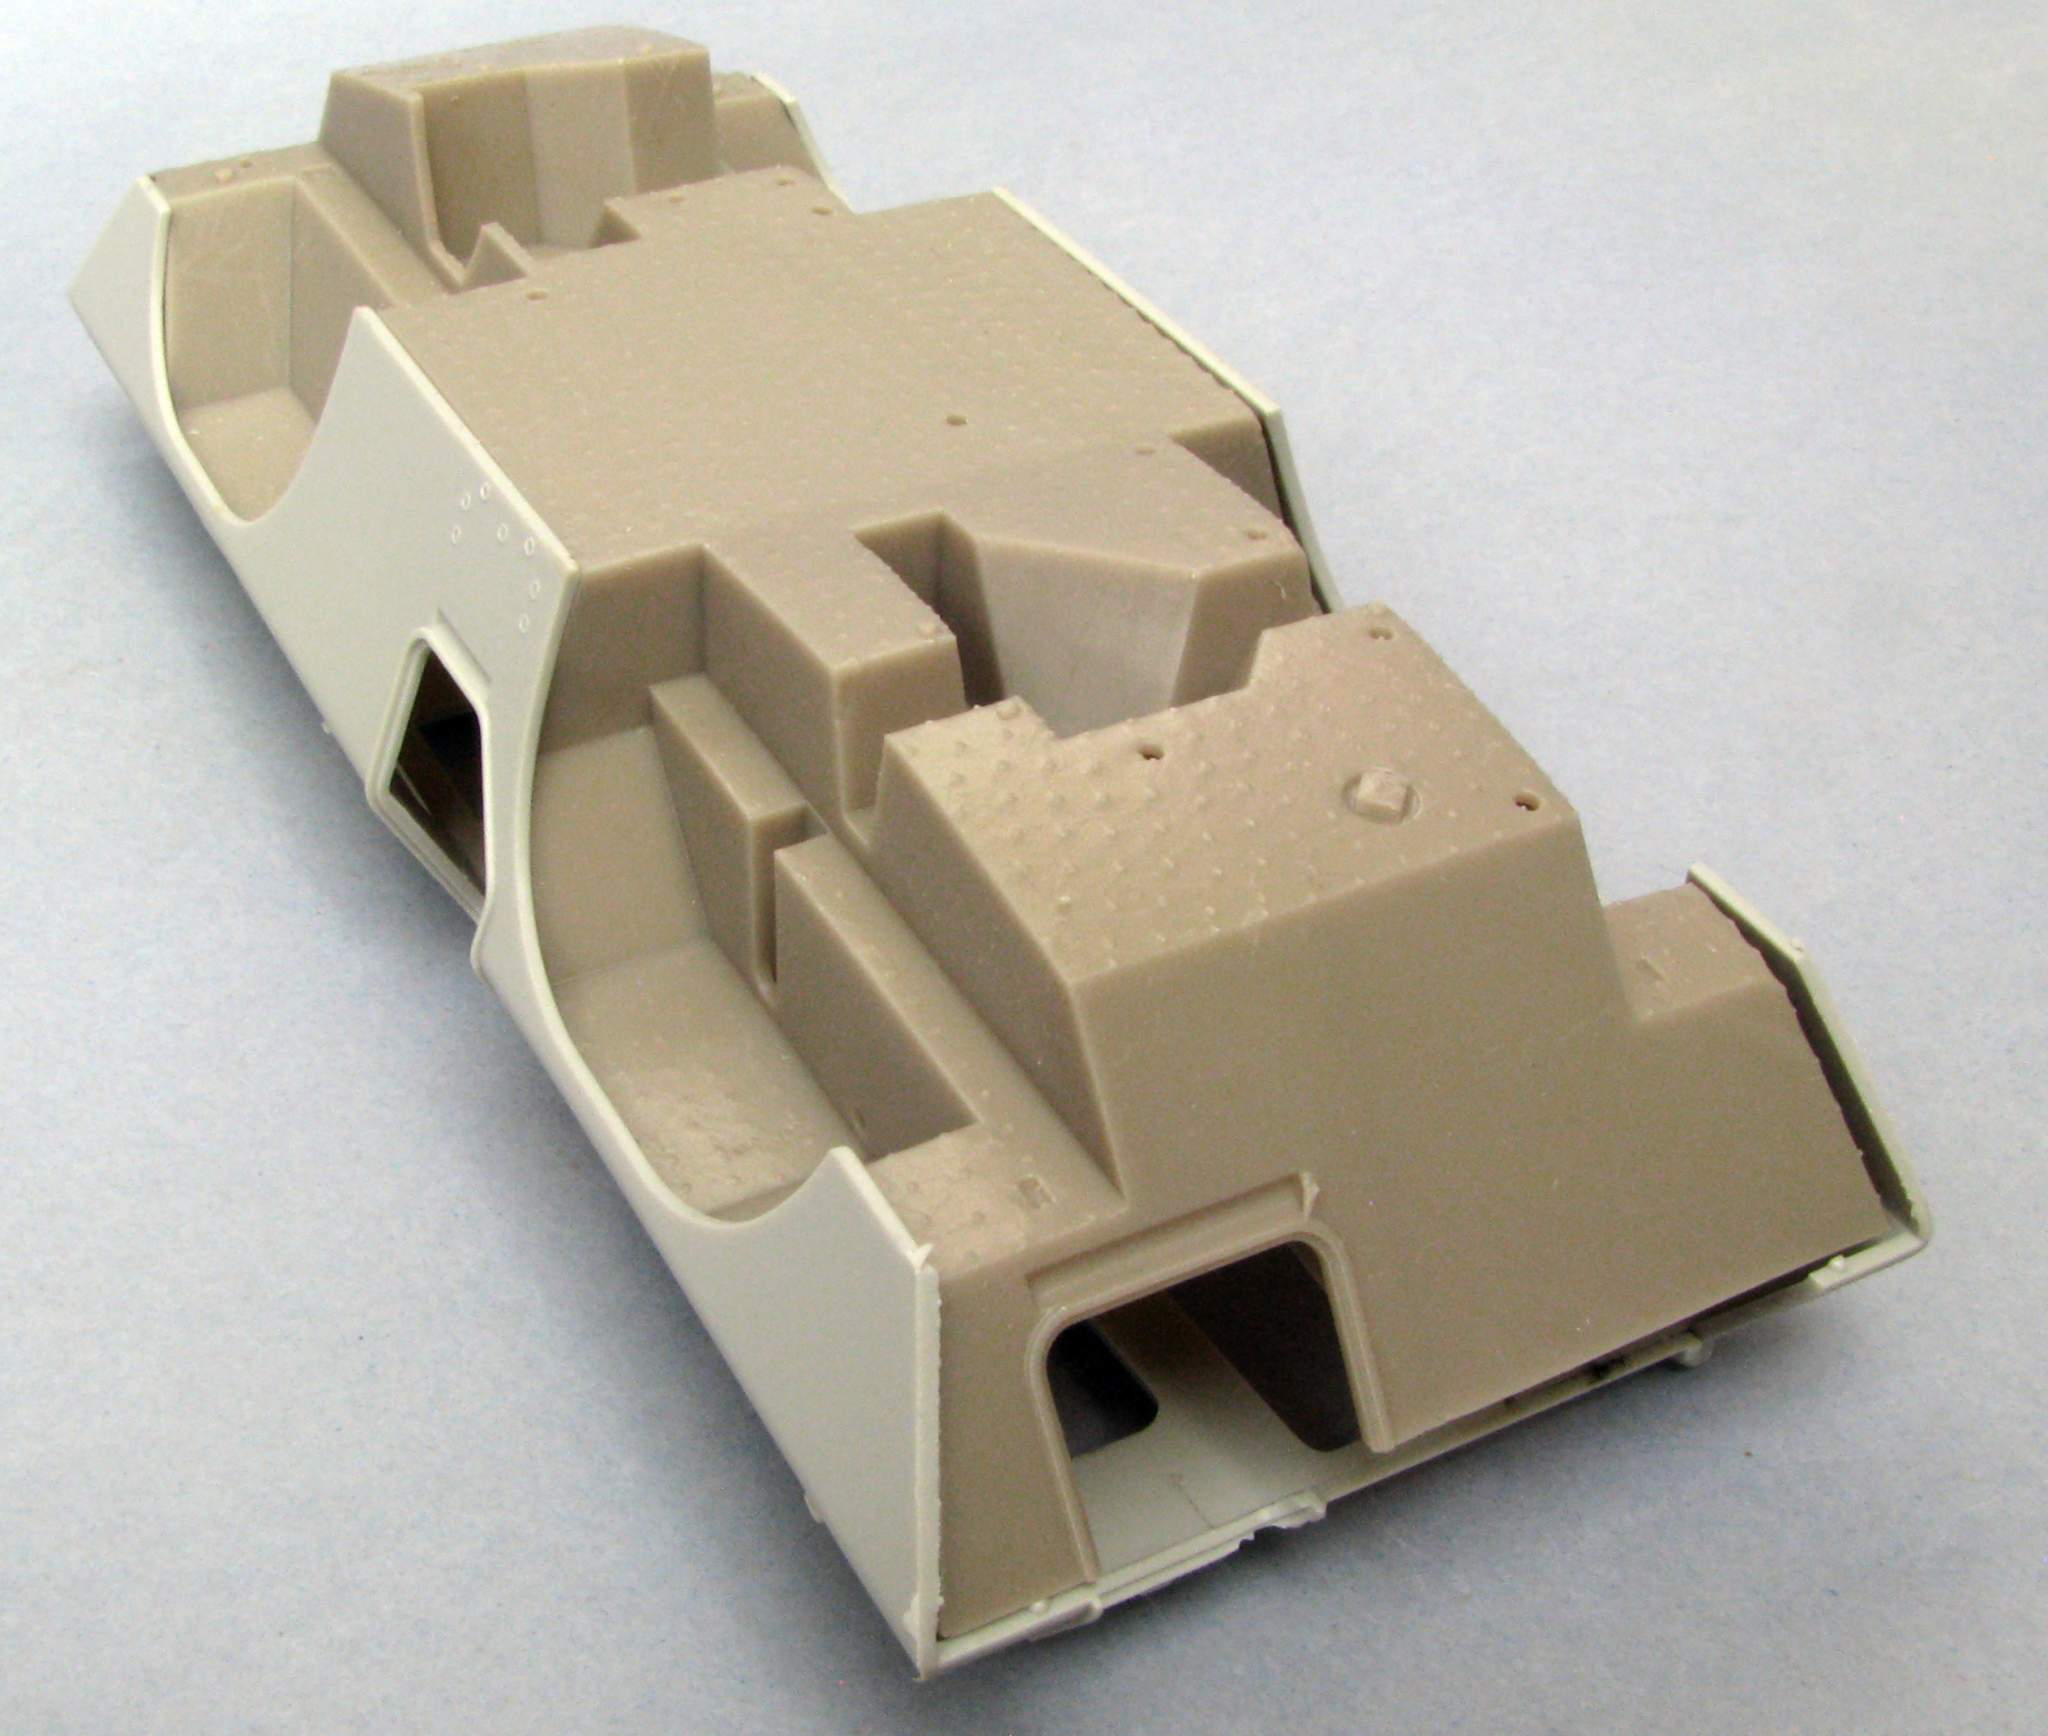
1:35 M706 Commando by Pawel

Worst fit is in the rear - looks like I missed about 1,5mm of height here, I plan to correct it in the next version.

Here is a comparison between my part (in the left portion of the photo below) and the Hobby Boss kit part:
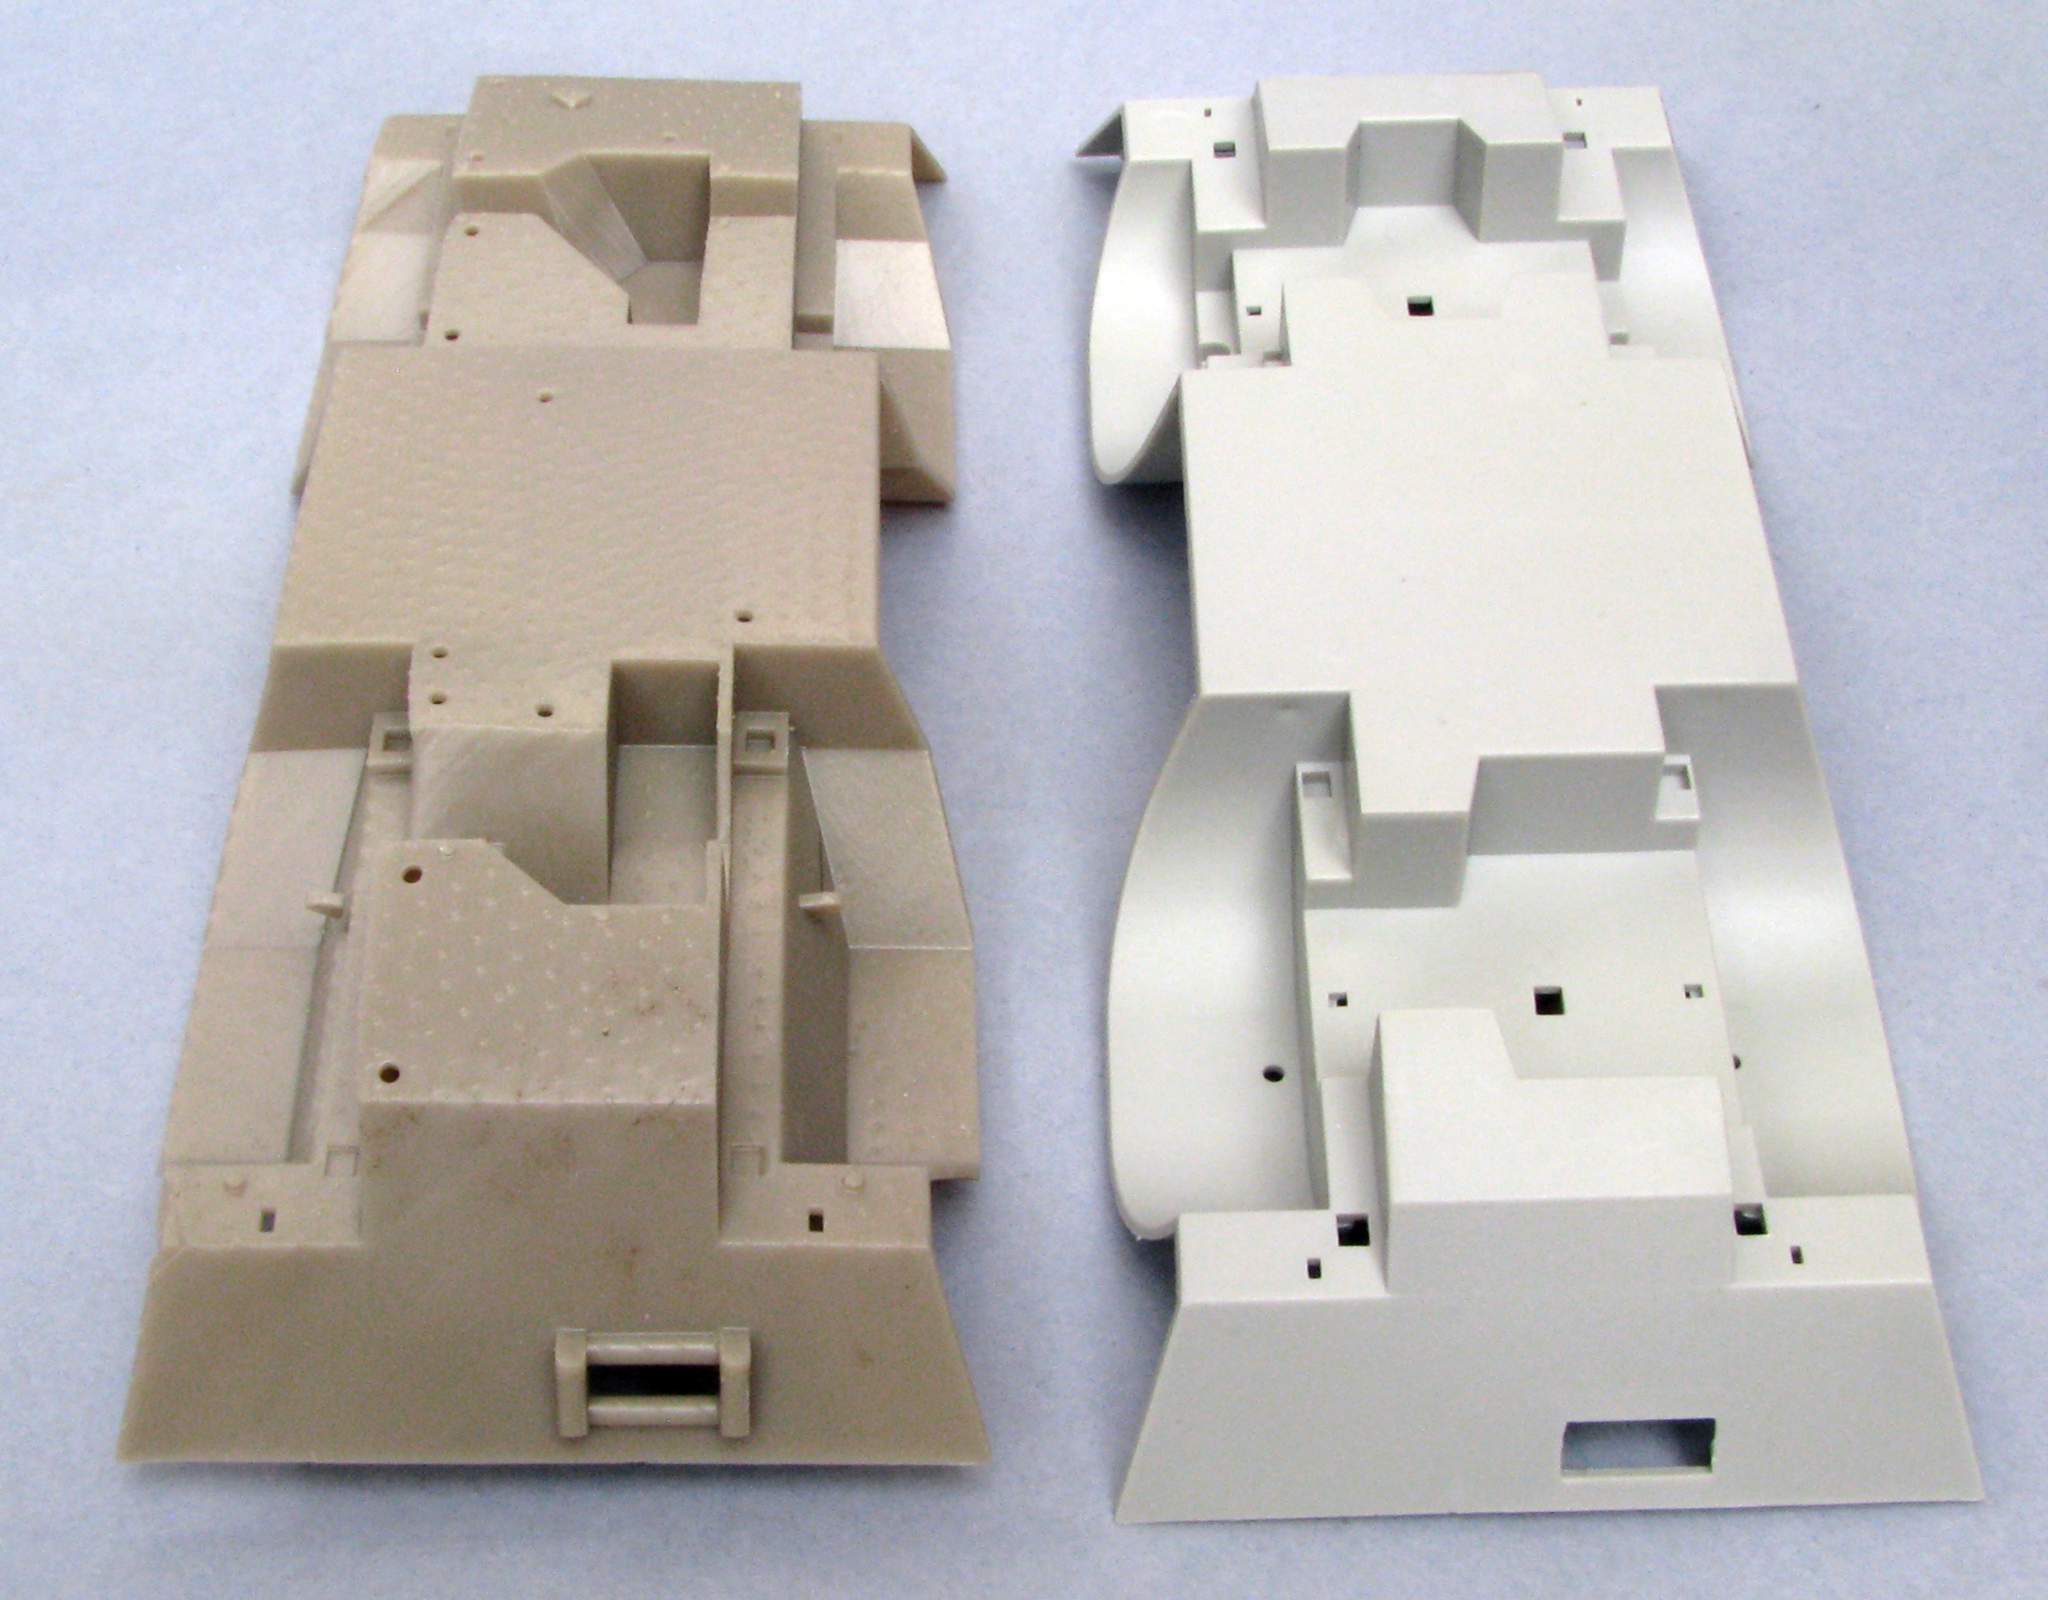
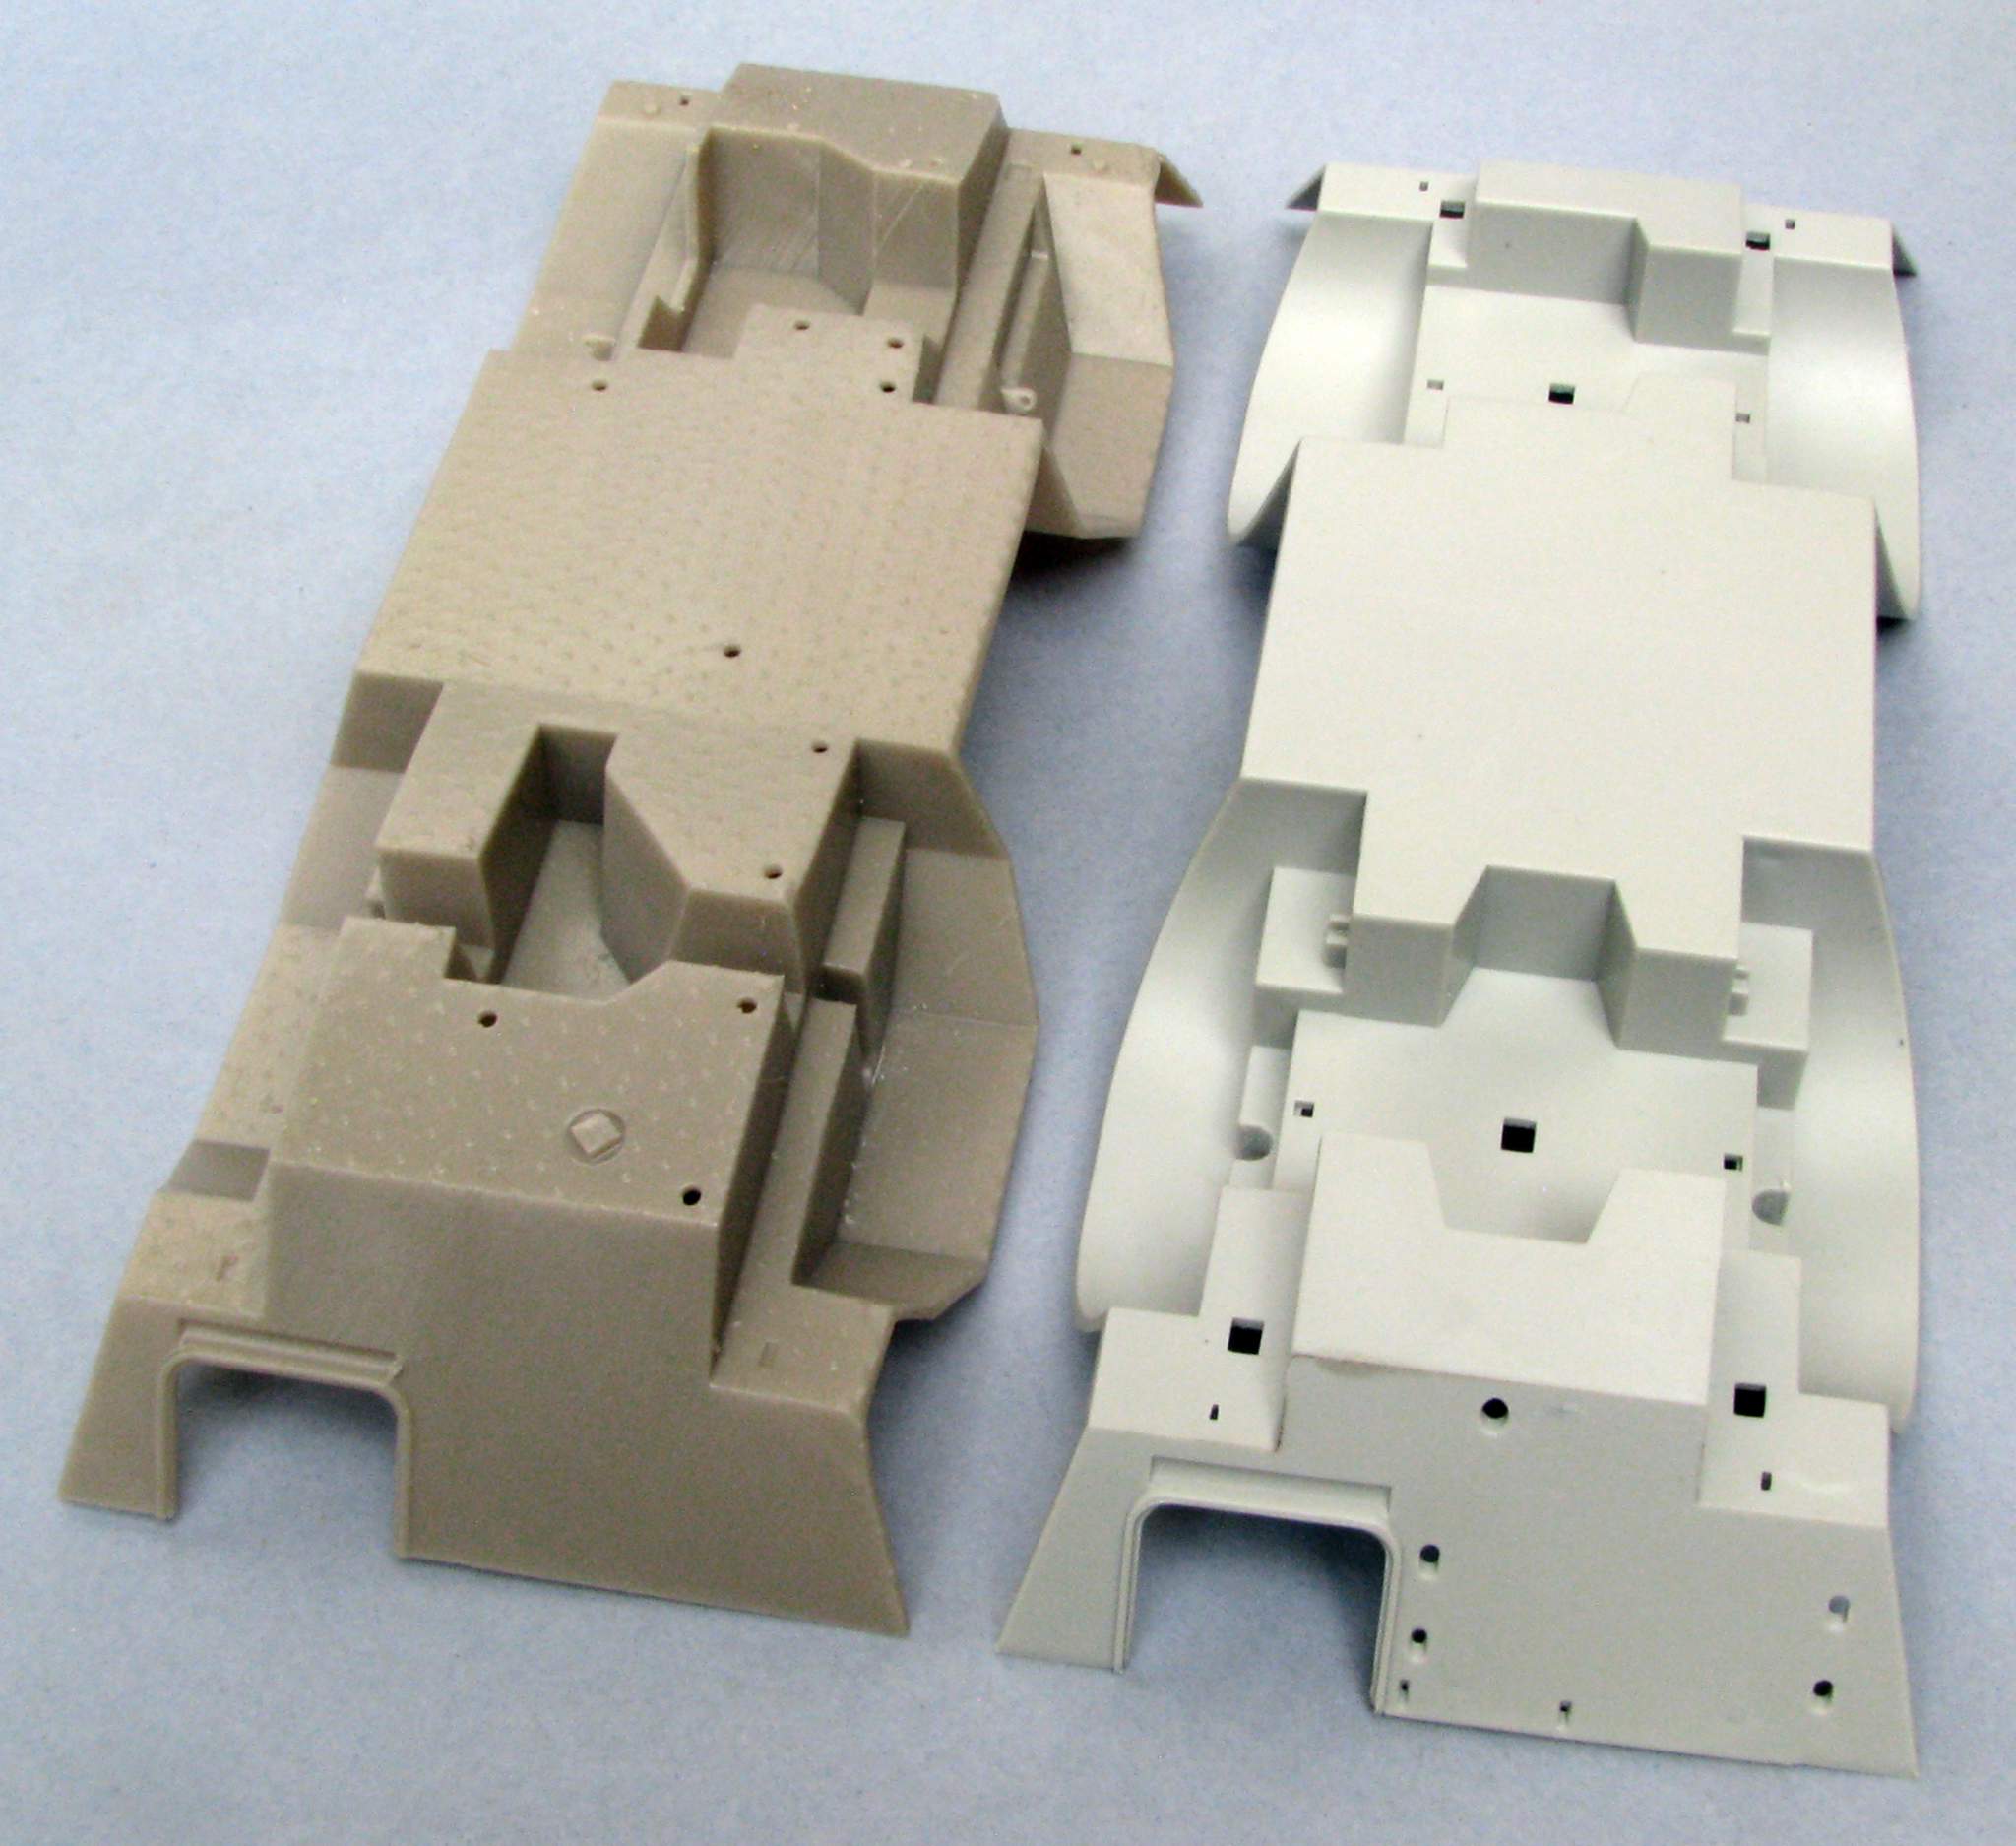
1:35 M706 Commando by Pawel

1:35 M706 Commando by Pawel

And one more comparison, from the left my part, the MMK chassis and the Hobby Boss kit part:
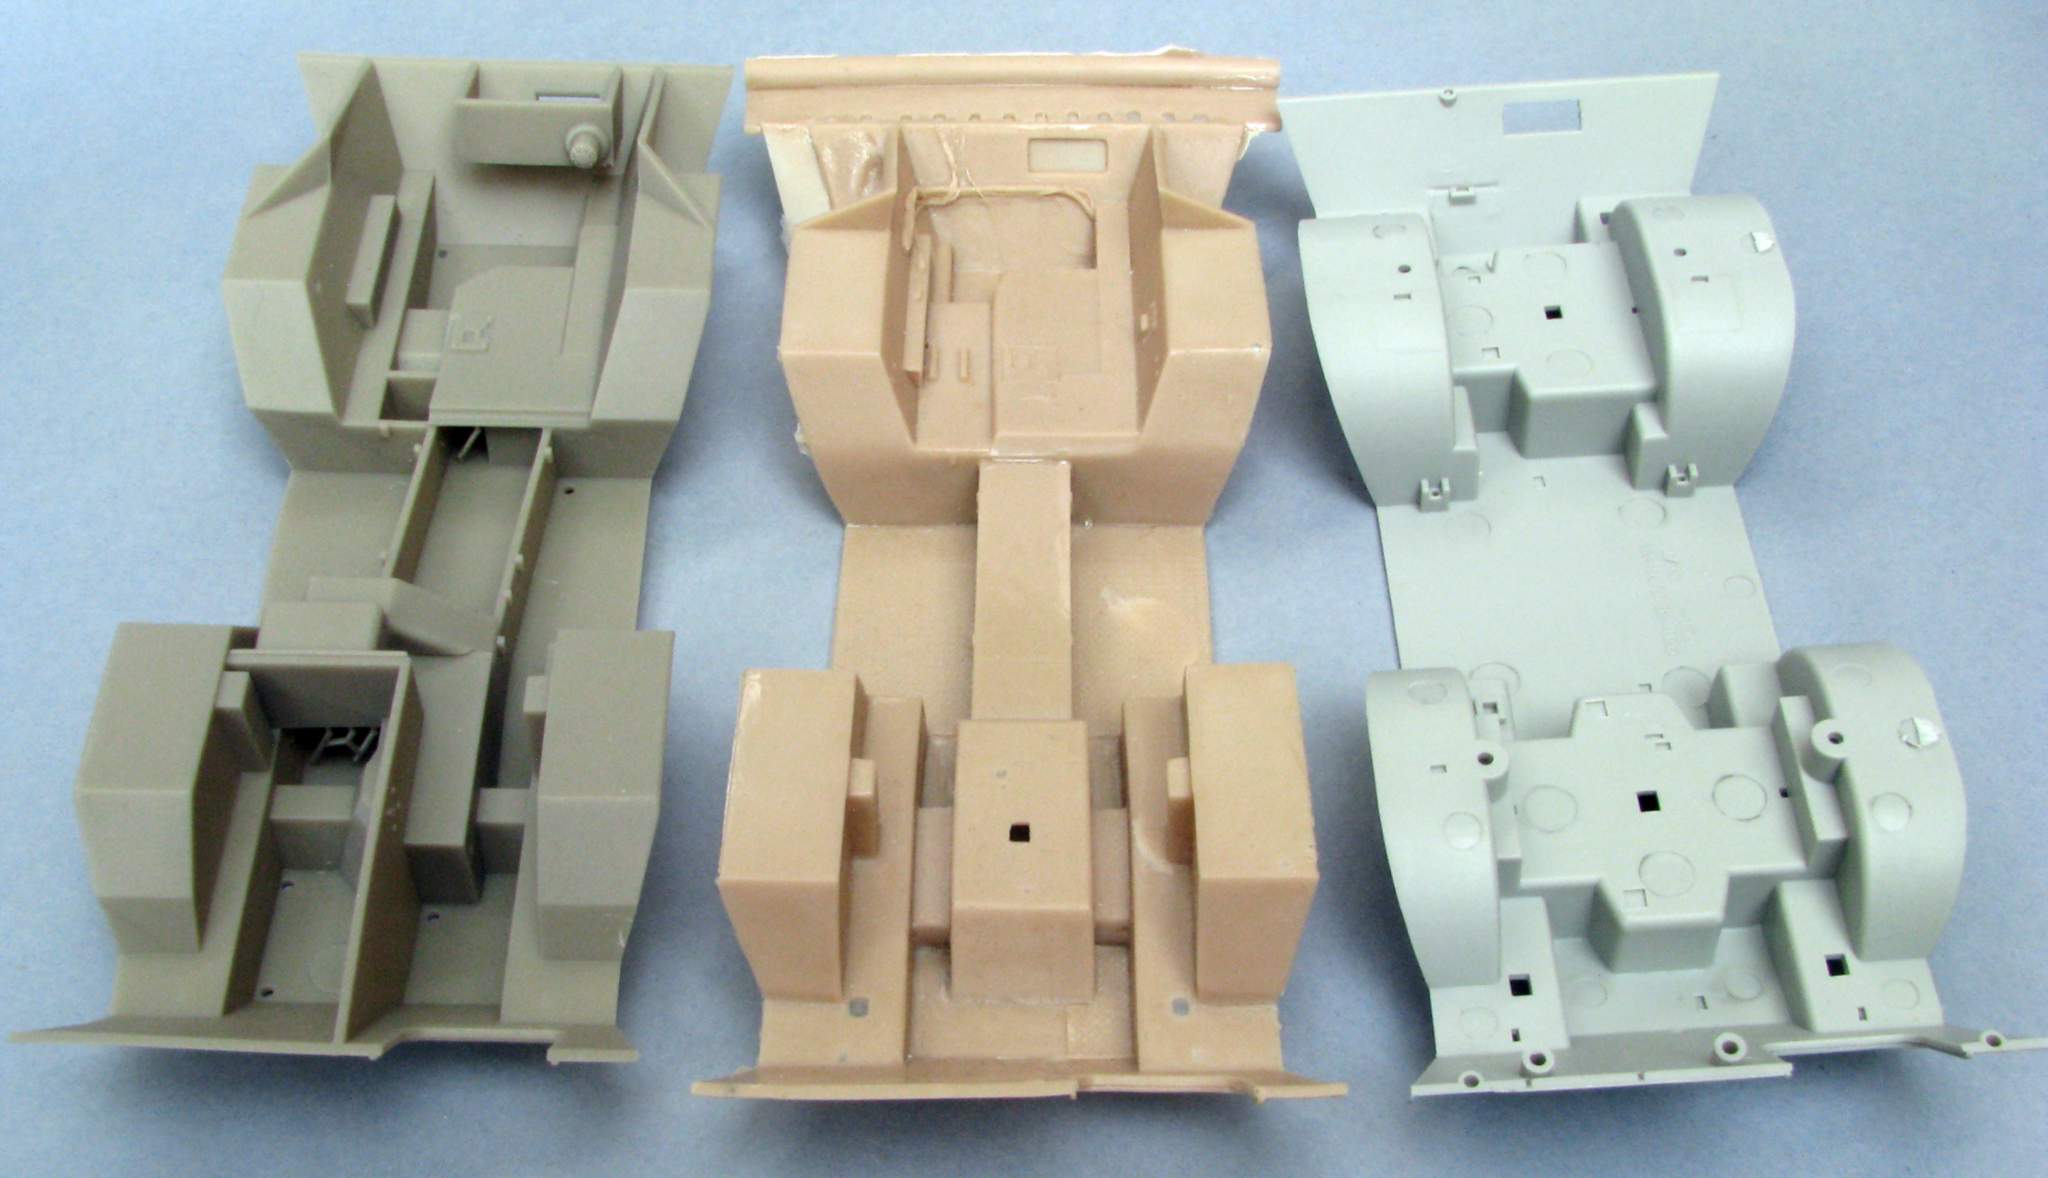
1:35 M706 Commando by Pawel

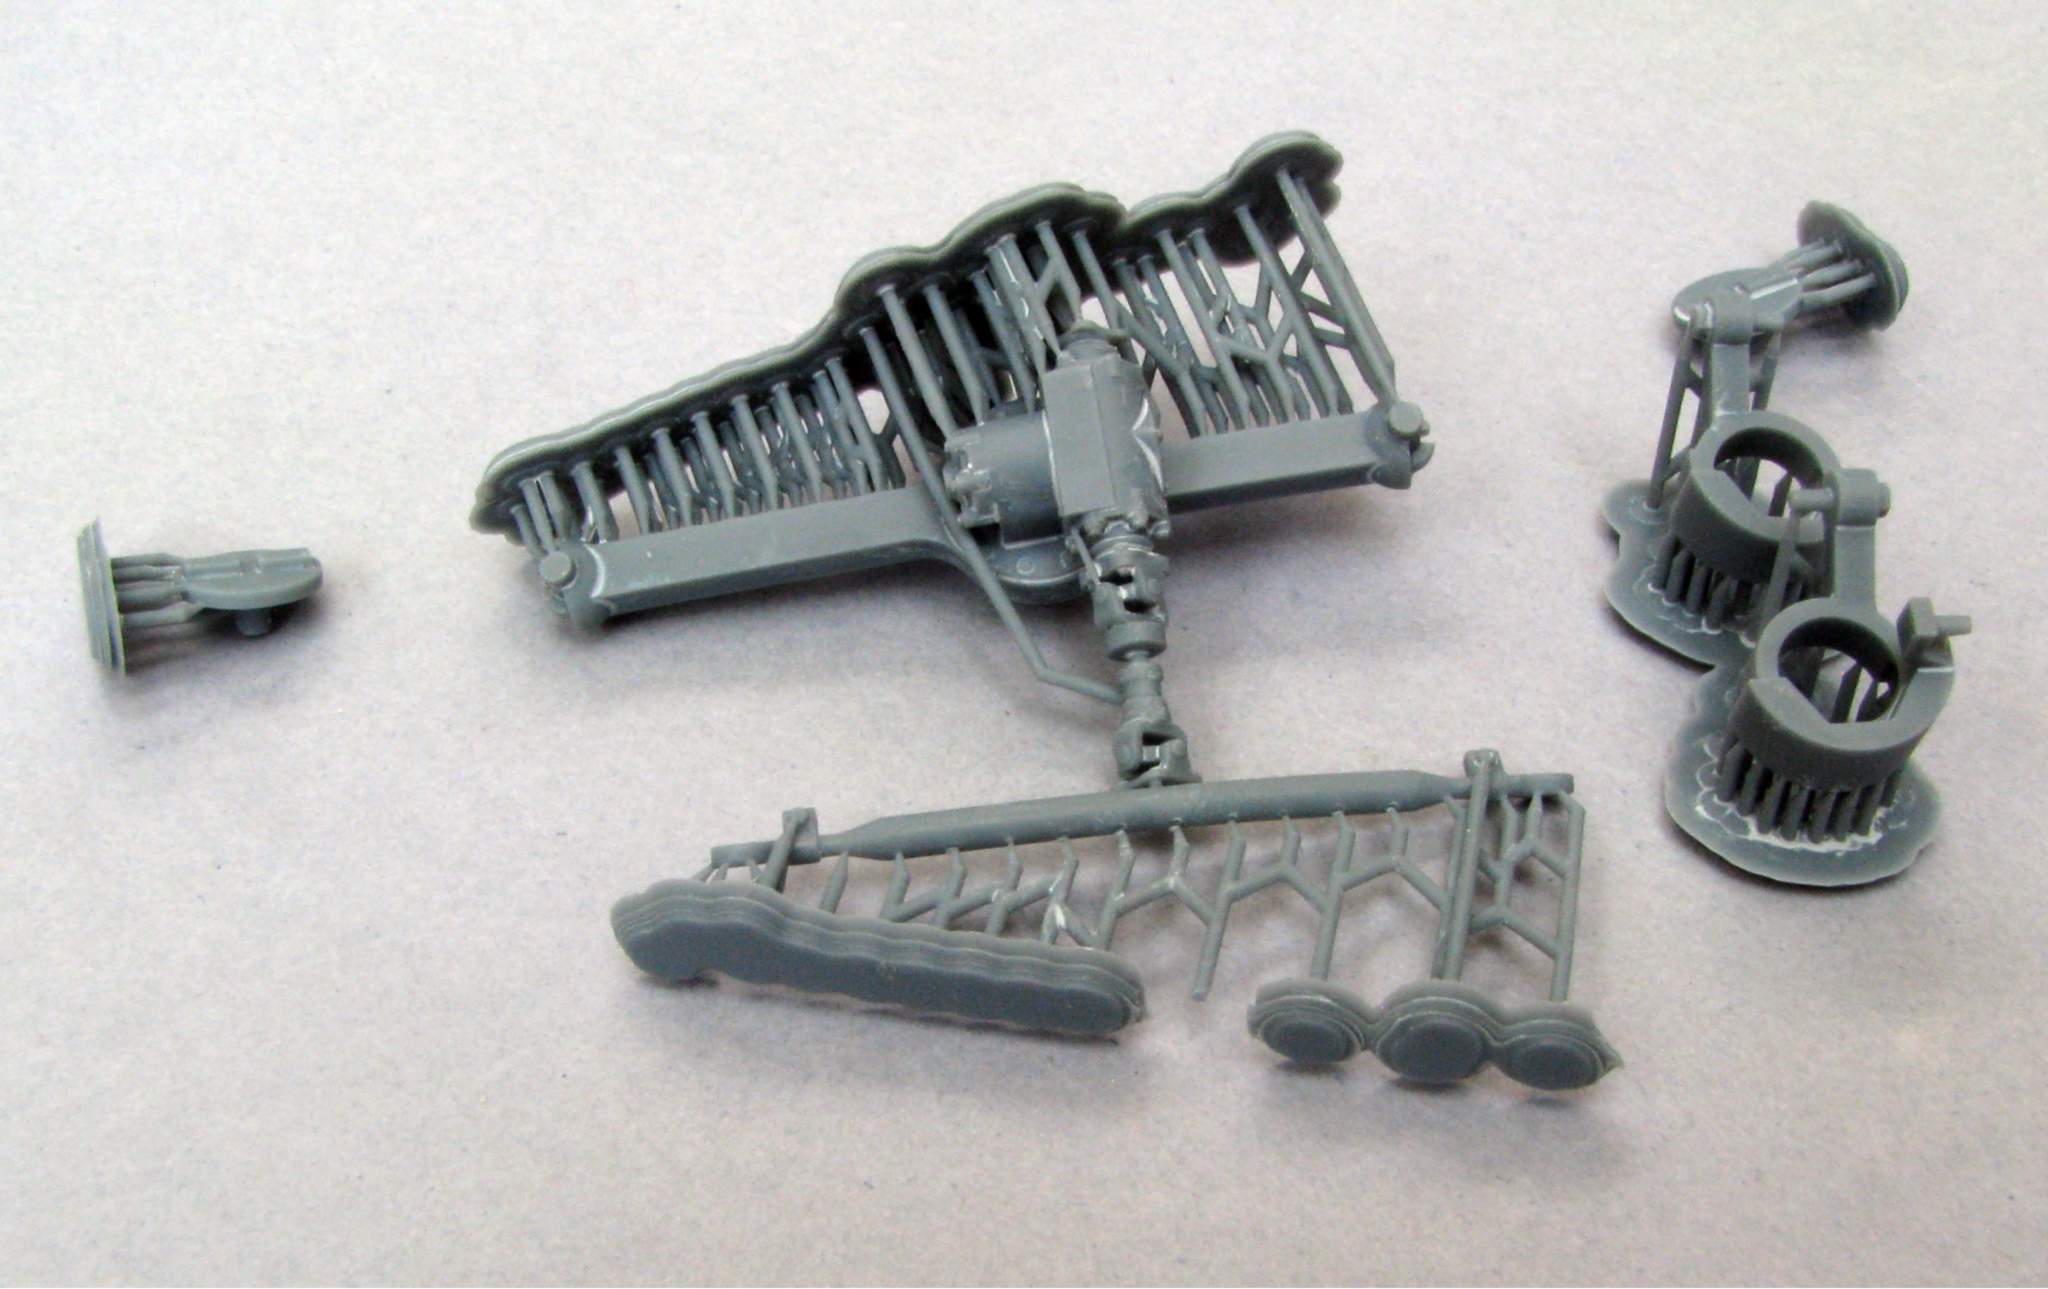
Right after starting my work I noticed I will also need new axles, because the kit parts are dramatically wrong. Below also photos of the axles I drew up and got as a 3D print:

Rear axle:
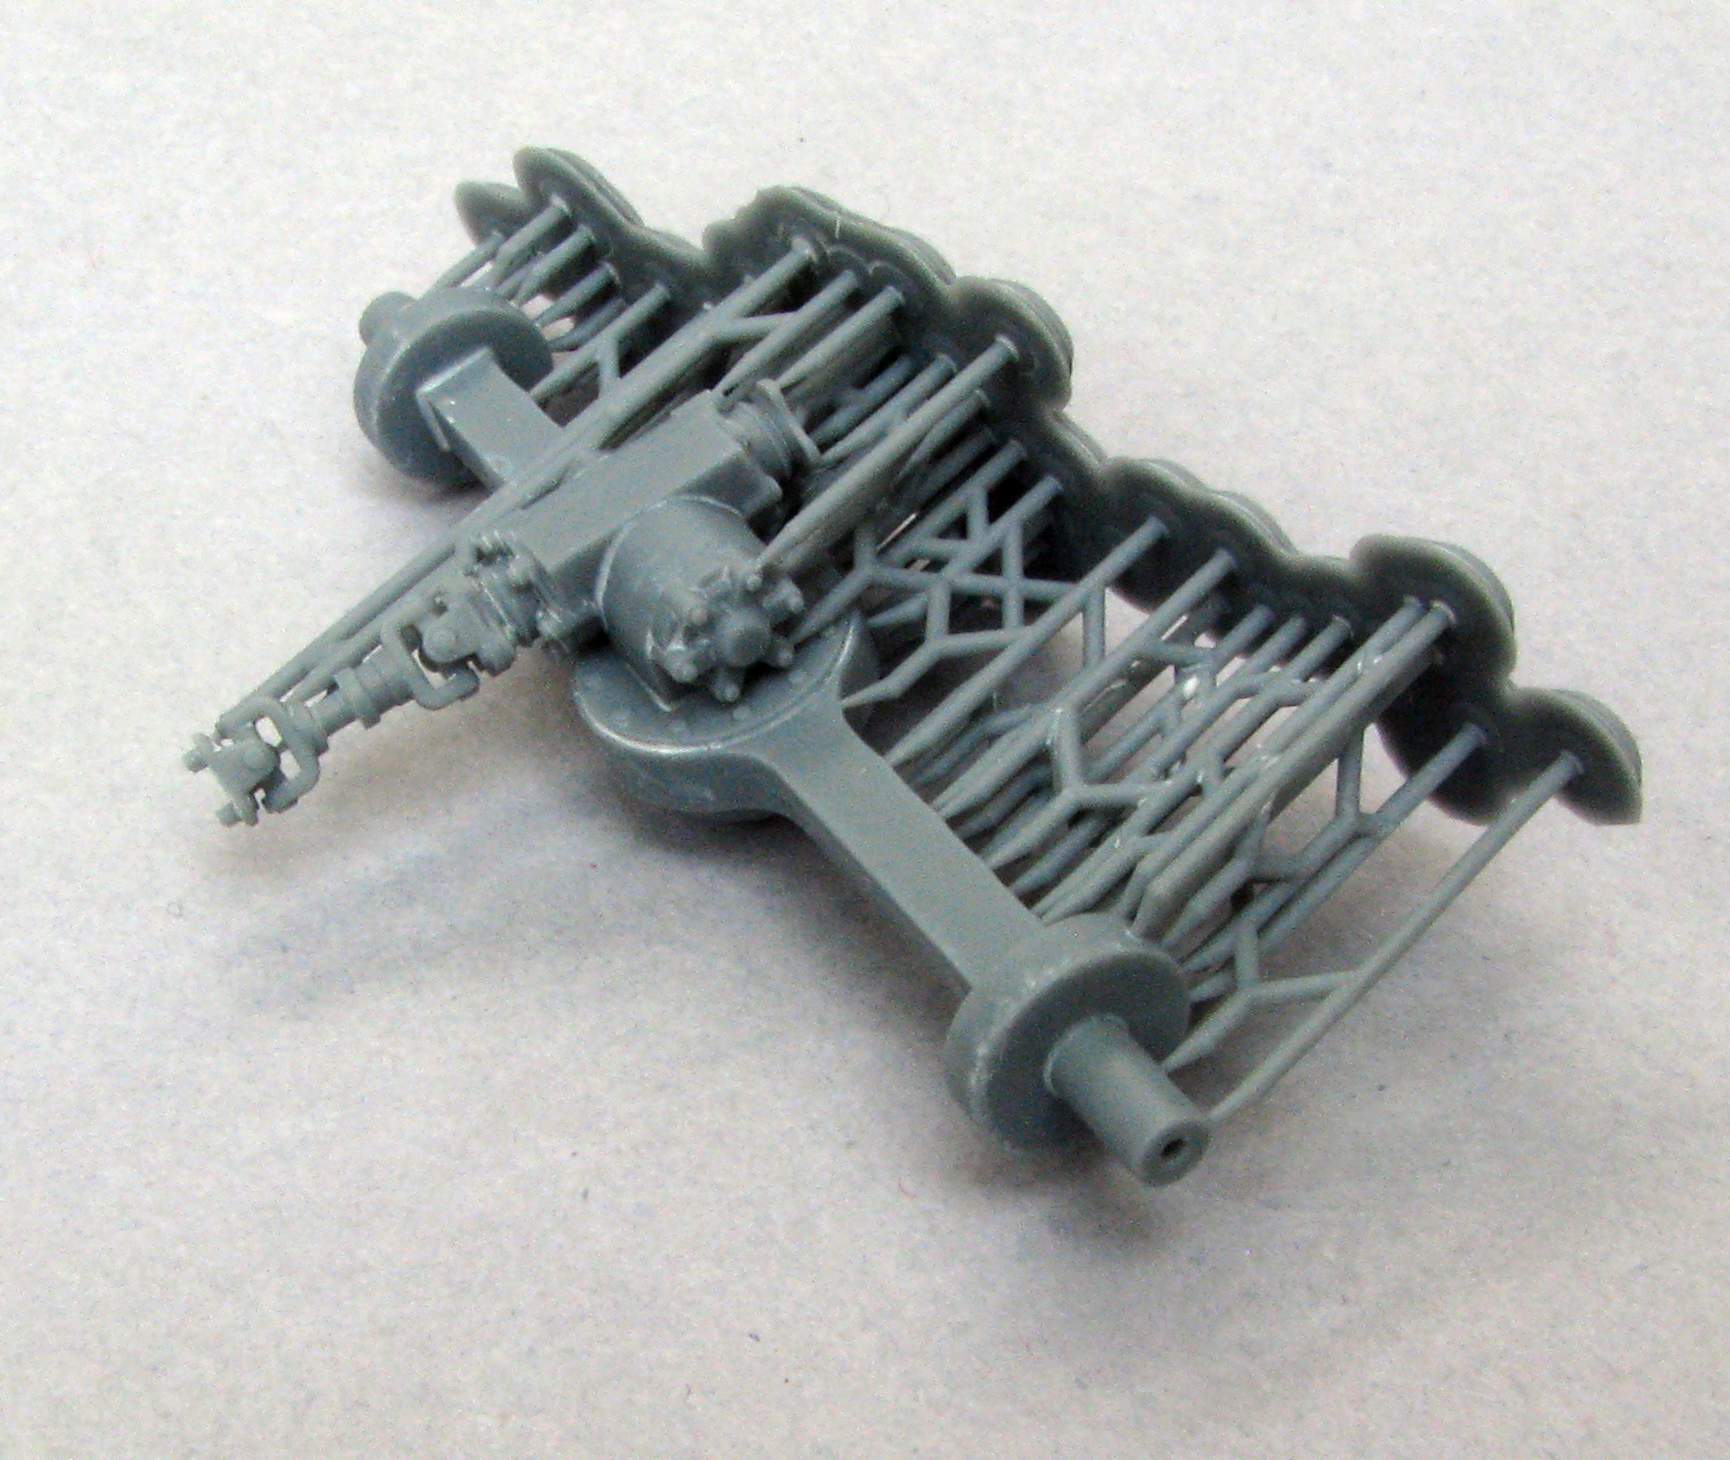
1:35 M706 Commando by Pawel

Front axle:

1:35 M706 Commando by Pawel

Both axles have a hole running straight through to allow me to stiffen them with some steel wire, to avoid the axles bending under stress and temperature. Additionally the front axle will be poseable to show the wheels “steered” to left or right (the Hobby Boss doesn’t allow that).

So that would be it for the first time - thanks for looking and have a nice day

Paweł


All comments and critique welcomed. Thanks for your honest opinions!

www.vietnam.net.pl

  • Member since
    November 2009
  • From: SW Virginia
Posted by Gamera on Saturday, April 13, 2024 7:50 PM

Oh wow that's a pile of work! Looks good so far, looking forward to more updates! 

"I dream in fire but work in clay." -Arthur Machen


  • Member since
    February 2024
Posted by S Hollowell on Sunday, April 14, 2024 7:04 AM

This looks like it'll be a complacated project! Good work!

  • Member since
    November 2005
  • From: Formerly Bryan, now Arlington, Texas
Posted by CapnMac82 on Sunday, April 14, 2024 12:48 PM

Pawel
Cadillac Gage V-100 Commando armored car, also known as M706

A sadly under-represented vehicle.  Which may well match its Armed Forces use, to whare a few dozen were ordered here and there, then modifications wanted, so they all varied a bit in real life.

Visually they are very striking--which may be their best feature overall.

I'm looking forward to your build on this.

  • Member since
    May 2009
  • From: Poland
Posted by Pawel on Monday, April 15, 2024 3:58 PM

Hello everybody!

Thanks a lot for your comments!

Gamera, S Holowell - I sure hope I can keep the amount of work under control and finish this one some sunny day!

Cap'n - my Polish friends compared the M706 to the russian BRDM-2, and it's interesting to note how the BRDM was/is much more common.

I removed the support structures from the axles, reinforced them with wire (it’s brass after all, not steel) and I have dry fitted the front axle. Let’s see if I can keep the wheels movable or if I will have to glue them in some position:

axle03.jpg

Thanks for looking and have a nice day

Paweł

All comments and critique welcomed. Thanks for your honest opinions!

www.vietnam.net.pl

  • Member since
    May 2009
  • From: Poland
Posted by Pawel on Sunday, May 5, 2024 5:58 PM

Hello everybody!

At last I started working on the interior. I'm using parts from the MMK interior kit.

Here's how the front looks like:

1:35 M706 Commando by Pawel

And the rear:

1:35 M706 Commando by Pawel

The steering box with the pedal assembly was especially "funny" to build. Some PE parts from the MMK kit are IMO barely buildable!.

Thanks for looking and have a nice day

Paweł

All comments and critique welcomed. Thanks for your honest opinions!

www.vietnam.net.pl

  • Member since
    November 2009
  • From: SW Virginia
Posted by Gamera on Monday, May 6, 2024 10:19 PM

She's coming along well Pawel! 

And I know what you mean, some replacement parts are almost unusable. I always just tossed them in the tool box. 

"I dream in fire but work in clay." -Arthur Machen


  • Member since
    May 2009
  • From: Poland
Posted by Pawel on Sunday, May 12, 2024 6:56 AM

Hello Gamera!

Thanks a lot for your comment! It's good to know you're with me on this one!

Have a nice day!

Paweł

All comments and critique welcomed. Thanks for your honest opinions!

www.vietnam.net.pl

  • Member since
    October 2004
  • From: Orlando, Florida
Posted by ikar01 on Monday, May 13, 2024 11:33 AM

I finally started looking at your progress.  Off to a good start and believe it or not, you still some way to go.  If you want, I'll post a few pictures.  Are you going to use the kit tires or get the ones sold seperately?

One thing, the winch in the front used a cable, not a chain like the kit provides.  The only chaines on the vehicle were attached to the gas caps so they don't get lost or stolen.

Another name we called them was "pig".

  • Member since
    May 2009
  • From: Poland
Posted by Pawel on Monday, May 13, 2024 2:24 PM

Hello Bob!

I'm glad to finally have you here on my thread!

Of course I'd love to have your pictures here!

You're right about that long way to go. Right now I'm concentrating on outfitting the bottom part, then I plan to do the insides of the body shell and finally I want to mate both parts together and then do the outsides.

I have two sets of resin tires for the M706 and I think I'll use them. I'll post a picture of them next time I'll break out my camera.

Hope to hear from you soon and have a nice day!

Paweł

All comments and critique welcomed. Thanks for your honest opinions!

www.vietnam.net.pl

  • Member since
    May 2009
  • From: Poland
Posted by Pawel on Wednesday, May 15, 2024 3:20 PM

Hello Bob!

Thanks a lot for the photos! I definitely want to use that info about those white ammo boxes here.

I've been working on the interior. First I painted everything Tamiya grey primer:

1:35 M706 Commando by Pawel

Then I painted everything Seafoam Green - the paint is actually called APC Interior Light Green by AK Interactive. I have also made some of the crash pads out of masking tape painted black:

1:35 M706 Commando by Pawel

I also started working on the instrument panel, I had to scratchbuild it. I started with thin styrene sheet, I put some holes in it and bezels out of thin copper wire:

1:35 M706 Commando by Pawel

Then I made an underlay with instruments and painted it:

1:35 M706 Commando by Pawel

And that would be it for now - thanks for looking and have a nice day

Paweł

All comments and critique welcomed. Thanks for your honest opinions!

www.vietnam.net.pl

  • Member since
    October 2004
  • From: Orlando, Florida
Posted by ikar01 on Wednesday, May 15, 2024 3:43 PM

Looks good so far.

Here's a coiuple things I don't think are mentioned in a book.  There was no fuel gadge for the two tanks, only a clear tube one on each side, that you had to watch, usually with a light and under the driver's seat was a round piece, about the size of your hand and only a few inches tall.  This was the master cut off switch that killed all power to the vehicle.  It was practically invisible because of its location and usually only the driver/team commanders knew it was there.  Supposidly.   I'm sure that most of the RTGs in the reaction team knew about it but didn't care, it was the driver's problem.

fox
  • Member since
    January 2007
  • From: Narvon, Pa.
Posted by fox on Wednesday, May 15, 2024 7:14 PM

Very nice work going on there Pawel! Very interesting too! I'll be following along to watch how you turn this sows ear into a silk purse.Wink

Stay safe.

Jim Captain

 Main WIP: 

   On the Bench: Artesania Latina  (aka) Artists in the Latrine 1/75 Bluenose II

I keep hitting "escape", but I'm still here.

  • Member since
    November 2009
  • From: SW Virginia
Posted by Gamera on Wednesday, May 15, 2024 7:59 PM

That's looking really good! Great work there on the instrument panel Pawel! 

"I dream in fire but work in clay." -Arthur Machen


  • Member since
    February 2024
Posted by S Hollowell on Wednesday, May 15, 2024 8:21 PM

Good job, Pawel!


S.H.

  • Member since
    October 2004
  • From: Orlando, Florida
Posted by ikar01 on Thursday, July 4, 2024 9:13 AM

How are you doing on the rubber duck?

  • Member since
    May 2009
  • From: Poland
Posted by Pawel on Thursday, July 4, 2024 12:48 PM

Hello everybody!

Please excuse me replying so late - the work on this baby has been slow, but I'm glad to report that it didn't stop, just went on slow.

Bob - Thanks for asking about my progress, that's very kind of you. I got info from an owner of an ex-Army M706 that on his machine the master switch was located in the rear, next to the slave receptacle on the engine "cell" wall, vis-a-vis the radio.

Gamera, Jim, S.H. - thanks a lot for your kind words, they mean a lot to me!

And as for progress I'd say I have the front almost done, just the steering wheel is missing here. On the rear I'm still working on the radio. I also started working on the interior of the outer shell. I made the gun ports and vision blocks, but I don't have a photo yet. Here's the photo I've got:

1:35 M706 Commando by Pawel

Thanks for looking and have a nie day!

Paweł

All comments and critique welcomed. Thanks for your honest opinions!

www.vietnam.net.pl

  • Member since
    May 2009
  • From: Poland
Posted by Pawel on Tuesday, July 16, 2024 4:24 PM

Hello!

Another update on the interior. I have finished the radio:

1:35 M706 Commando by Pawel

Here's how it looks like from the rear:

1:35 M706 Commando by Pawel

And after adding some seatbelts, the lower part of the interior is kinda done :-)


1:35 M706 Commando by Pawel

So I started working on the upper interior - I started fitting out the kit's shell with some gun ports and vision blocks made out of thin styrene sheet:

1:35 M706 Commando by Pawel

There are also some more small details like the flashlight holder or the copper wire grab handles. I'll add some more after I paint the insides seafoam green.

Thanks for looking and have a nice day!

Paweł

All comments and critique welcomed. Thanks for your honest opinions!

www.vietnam.net.pl

  • Member since
    November 2009
  • From: SW Virginia
Posted by Gamera on Tuesday, July 16, 2024 5:21 PM

That looks great Pawel!!! All it needs is some muddy boot prints! Stick out tongue

"I dream in fire but work in clay." -Arthur Machen


JOIN OUR COMMUNITY!

Our community is FREE to join. To participate you must either login or register for an account.

SEARCH FORUMS
FREE NEWSLETTER
By signing up you may also receive reader surveys and occasional special offers. We do not sell, rent or trade our email lists. View our Privacy Policy.