SEARCH FINESCALE.COM

Enter keywords or a search phrase below:

Sd.Kfz.7/1 2cm Flakvierling 38 WIP: Update 5/31/09 Body assembly part I

29267 views
39 replies
1 rating 2 rating 3 rating 4 rating 5 rating
  • Member since
    January 2009
  • From: Everett, WA
Posted by Schnobs on Thursday, May 28, 2009 10:44 AM

Don you do excellent work!! Thumbs Up [tup]

"There is a principle which is a bar against all information, which is proof against all arguments and which cannot fail to keep a man in everlasting ignorance. That principle is contempt prior to investigation." Herbert Spencer
  • Member since
    October 2007
  • From: N.H.
Posted by panzerguy on Thursday, May 28, 2009 3:21 PM

  Pordoi you really have out done yourself on that undercarriage!

  I vaguely remember when I built the Tamiya kit (built it twice first one was destroyed in a fire) back when I was a teen and like doog said what a difference in detail.

"Happiness is a belt fed weapon"

  • Member since
    January 2008
  • From: Bournemouth UK
Posted by Bodge on Thursday, May 28, 2009 5:23 PM

      great build so far Don, if i may use your first name? its comming on nicelyThumbs Up [tup]

   I hear you DissastermasterHeadphones [{(-_-)}]

  • Member since
    October 2007
  • From: Louisville, KY
Posted by pordoi on Sunday, May 31, 2009 9:39 AM

    Wow, my apologies to everyone for the late response.  I've been traveling on business and haven't had the time or internet connection to follow up with responses or to progress much with the build.  So first, let me thank everyone who commented after my last post.  It's nice to have you following the build.  I hope to have an update soon, since I have gotten a little bench time this weekend. 

Bodge:  First name basis is fine... hows the Famo coming?

'Zaster:  that eye is spooky

 Don


  • Member since
    October 2007
  • From: Louisville, KY
Posted by pordoi on Sunday, May 31, 2009 6:26 PM

The front fender sub-assembly is constructed and added to the chassis in step 9.  Fit is perfect as the exhaust pipes, air cleaner and radiator pipe all line up perfectly with their mates on the fender assembly.  The radiator fan also fits nicely and few pieces of PE are added in this step.  I'll have to hand paint the air filter after final assembly of the engine compartment.


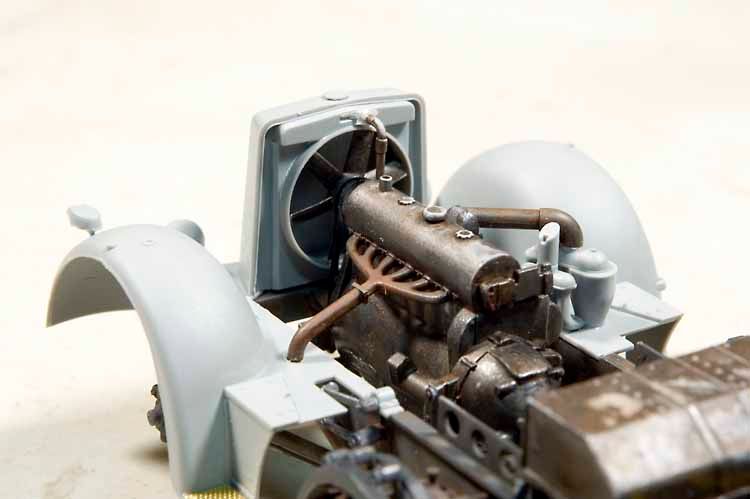
The only problem is that once installed as I have done here, it will be a bear to paint without alot of masking of the chassis.  Because of that, all the remaining body assemblies will be built and given a primer of Mr. Surfacer 1200 and a basecoat of Tamiya German gray prior to gluing to the chassis.

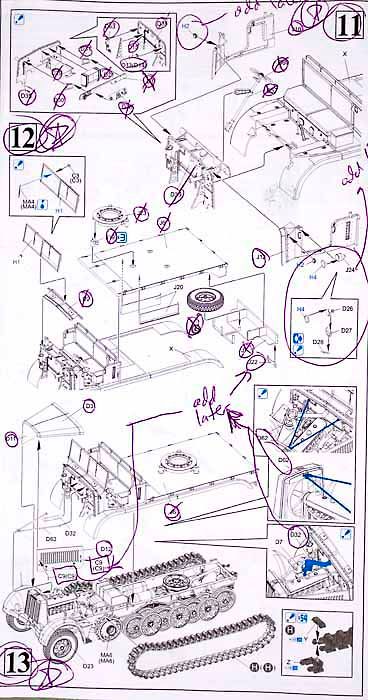
The assembly of the body and fenders is carried out in steps 10,11,12 and 13.  I'm sorry for the scribblings on the instructions as there are lots of small pieces that can be added in these steps, but I usually leave them for later so I don't knock them off during handling and assembly.


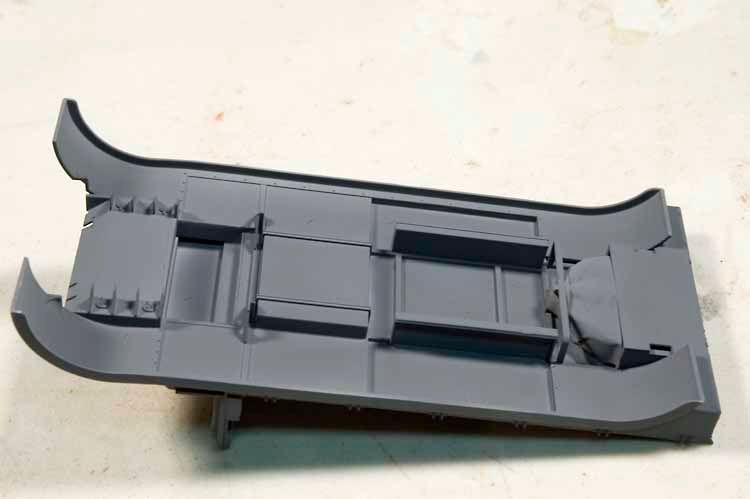
The rear deck/fenders and driver's compartment are assembled in multiple pieces. 


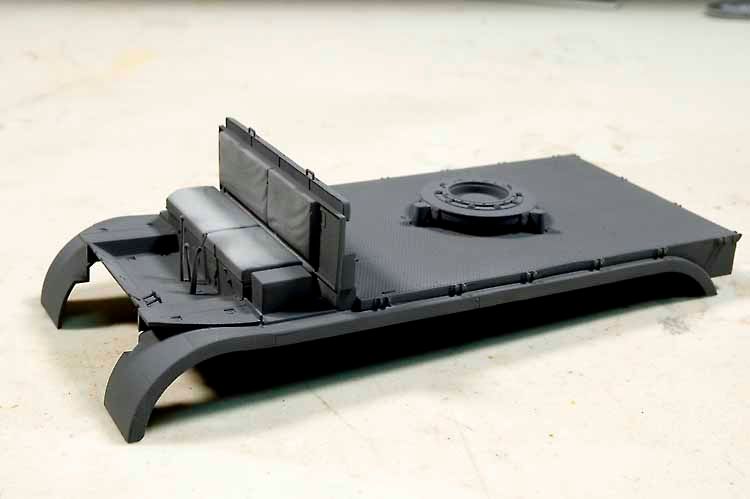
The spare tire compartment is also built on the underside of the rear decking.  The spare itself is still masked here.


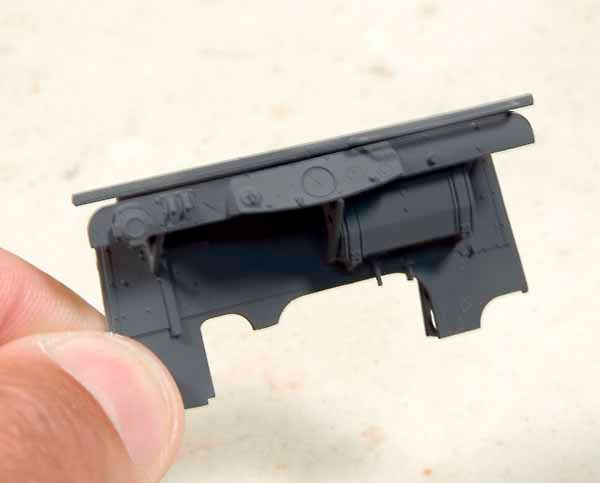
The instructions then show the assembly of the engine firewall and dash board and call for gluing this to the rear deck/fenders.  The steering wheel support is molded solid but can be easily drilled out using the appropriate sized bits. 


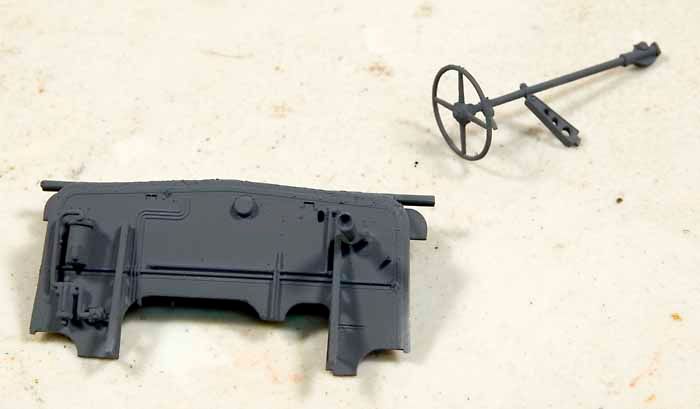
The dash itself has some fine detail in the guages, but I'm planning to use some Archer dry transfers to detail the guage faces.  The dash supports are a bit fiddly; line them up and let them dry thoroughly before continuing with the dash plate itself.


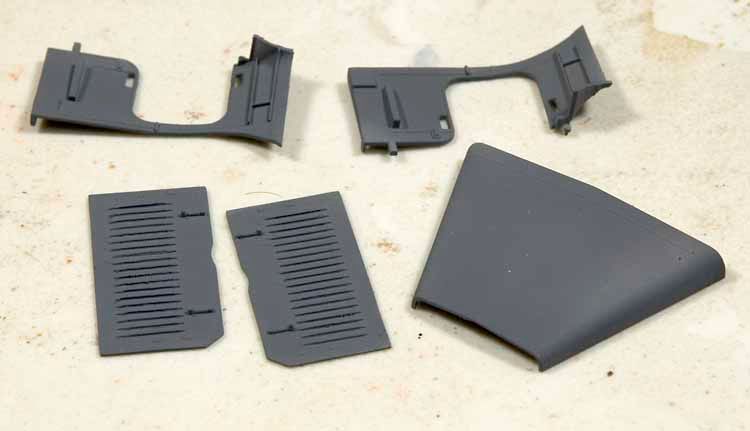
The vented side engine panels are also molded solid.  I used a sharp dissecting needle to undercut each vent to give them a little better definition.


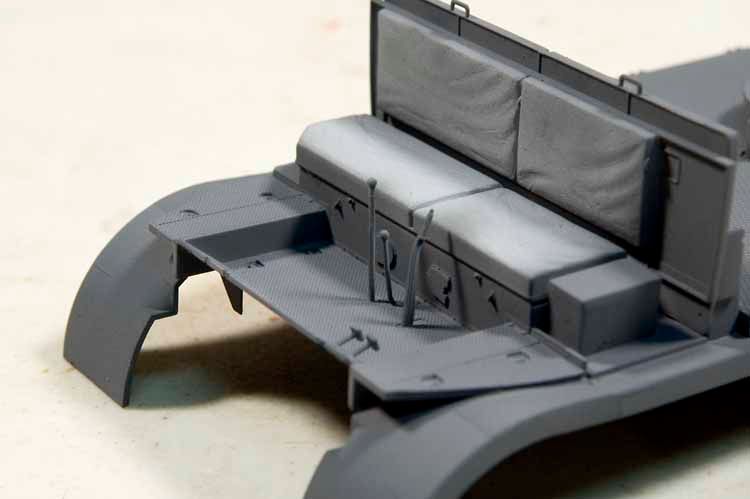
As stated above, the instructions call for gluing the dash assembly to the driver's assembly  prior to fitting to the chassis.  But dry fitting the rear deck to the chassis suggested that this would be a problem if done as per the instructions.  I'm not sure yet whether this arises from something that I did or is just a very dificult fit, but I found that I could more easily fit the rear deck and then fit the dash/firewall afterwards.  So for now, proceed with caution here and I'll try to get a better grip on what is going on as I do the final assembly.

 Don


  • Member since
    July 2004
  • From: Texas
Posted by wbill76 on Monday, June 1, 2009 9:12 AM
Sharp work (no pun intended!) all around Don particularly on those vent slits. Glad to see you were able to get in some build time after your travel delays. Thumbs Up [tup]
  • Member since
    October 2007
  • From: Louisville, KY
Posted by pordoi on Monday, June 1, 2009 4:28 PM

 wbill76 wrote:
Sharp work (no pun intended!) all around Don particularly on those vent slits.

Thanks, Bill.  Just gotta mention that the tool used on those vents is the sole survivor of my old College Biology Lab dissecting kit, ... circa (should I really admit it..) 1973-4.  A real handy little thing that has now found a permanent place in my modeling tool box.

 Don


  • Member since
    October 2007
  • From: Louisville, KY
Posted by pordoi on Saturday, August 15, 2009 6:15 PM

     Hey folks, just an apology for dropping the ball on this one.  A variety of things conspired to keep me away from the bench for a period of about 6 weeks in June/July.  But during that period, I was busy reading Samuel Eliot Morison's 15 volume History of the US Naval Operations in WWII.  Next thing you know, I'm pulling out the unfinished Trumpeter P-38 Lightning 1/32 that I started a year ago and gave up on (Trumpeter fit issues) and planning on finishing it is USAAF garb.  And then on a whim, I purchased the Revell 1/144 Fletcher Class destroyer and the Eduard 6 fret PE detail set for that Shock [:O] with visions of DD-450 USN O'Bannon maneuvering up The Slot in '42-'43.  It seems that my unit has been transferred to the PTO, at least temporarily.  I'll eventually return to the ETO and complete this.  C'est la guerre!

 Don


  • Member since
    June 2006
  • From: Netherlands
Posted by Grem56 on Sunday, August 16, 2009 1:09 AM
 gingermeggs wrote:

What a wonderfull source of information is the internet. I am so glad I found your build as I have ordered this model from Dragon USA and am awaiting its arrival.

As I am a marine builder and this is my first armour project your build will be invaluable to me.

I was wondering if maybe I was a little too ambitious with this choice but I will be pleased to learn from yours.

Regards Les 

Hi Les, welcome to the dark side,

cheers,

Julian


illegal immigrants have always been a problem in the United States. Ask any Indian.....................

Italeri S-100: http://cs.finescale.com/FSMCS/forums/t/112607.aspx?PageIndex=1

Isu-152: http://cs.finescale.com/FSMCS/forums/t/116521.aspx?PageIndex=1


  • Member since
    June 2006
  • From: Netherlands
Posted by Grem56 on Sunday, August 16, 2009 1:10 AM

Really looking so far, can't wait to see the vierling get fitted,

cheers,

Julian Thumbs Up [tup]


illegal immigrants have always been a problem in the United States. Ask any Indian.....................

Italeri S-100: http://cs.finescale.com/FSMCS/forums/t/112607.aspx?PageIndex=1

Isu-152: http://cs.finescale.com/FSMCS/forums/t/116521.aspx?PageIndex=1


JOIN OUR COMMUNITY!

Our community is FREE to join. To participate you must either login or register for an account.

SEARCH FORUMS
FREE NEWSLETTER
By signing up you may also receive reader surveys and occasional special offers. We do not sell, rent or trade our email lists. View our Privacy Policy.