SEARCH FINESCALE.COM

Enter keywords or a search phrase below:

SdKfz 234/1 Completed 5/10/12

8817 views
44 replies
1 rating 2 rating 3 rating 4 rating 5 rating
  • Member since
    July 2004
  • From: Texas
Posted by wbill76 on Saturday, September 8, 2012 10:36 AM

Nice job on the figs and the replacement antenna bin. Hopefully your crew will fit inside successfully without modifications...but you never know until you try to squeeze them in...not the roomiest of accomodations inside that turret mount!

  • Member since
    April 2005
  • From: Piscataway, NJ!
Posted by wing_nut on Saturday, September 8, 2012 3:36 PM

Ahhhh paint.  Looks good.  the uniforms really look nice too.

Marc  

  • Member since
    September 2006
  • From: Australia
Posted by Blitzwing on Sunday, September 16, 2012 6:59 AM

I've painted the model and here it is. I used Lifecolour paints although they didn't want to behave for some reason or another but we got there in the end. This is my first attempt at hard edged camo with an airbrush. 
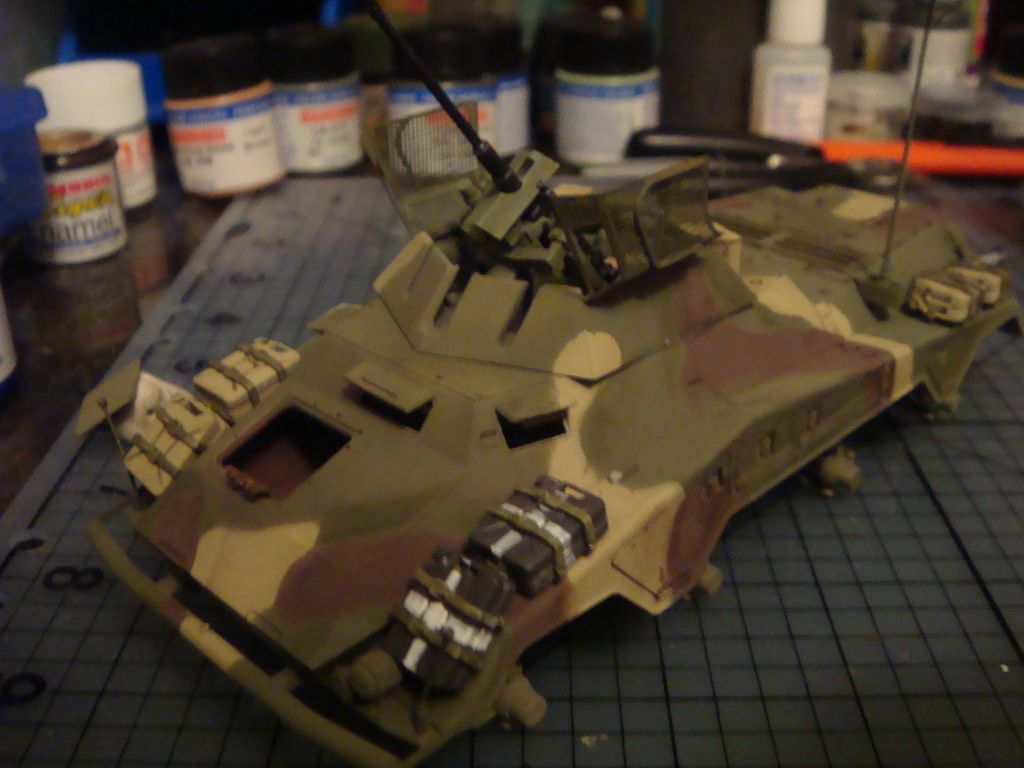
It's a bit streaky but I'm thinking of doing a dot filter to weather so it should add to the difference in tones. It's funny because before I got my airbrush hard edge camo was my bread and butter finish with a normal brush, but now with an airbrush I can really appreciate how difficult it is. 

The turret has been completed. Fat chance fitting another figure into this. 
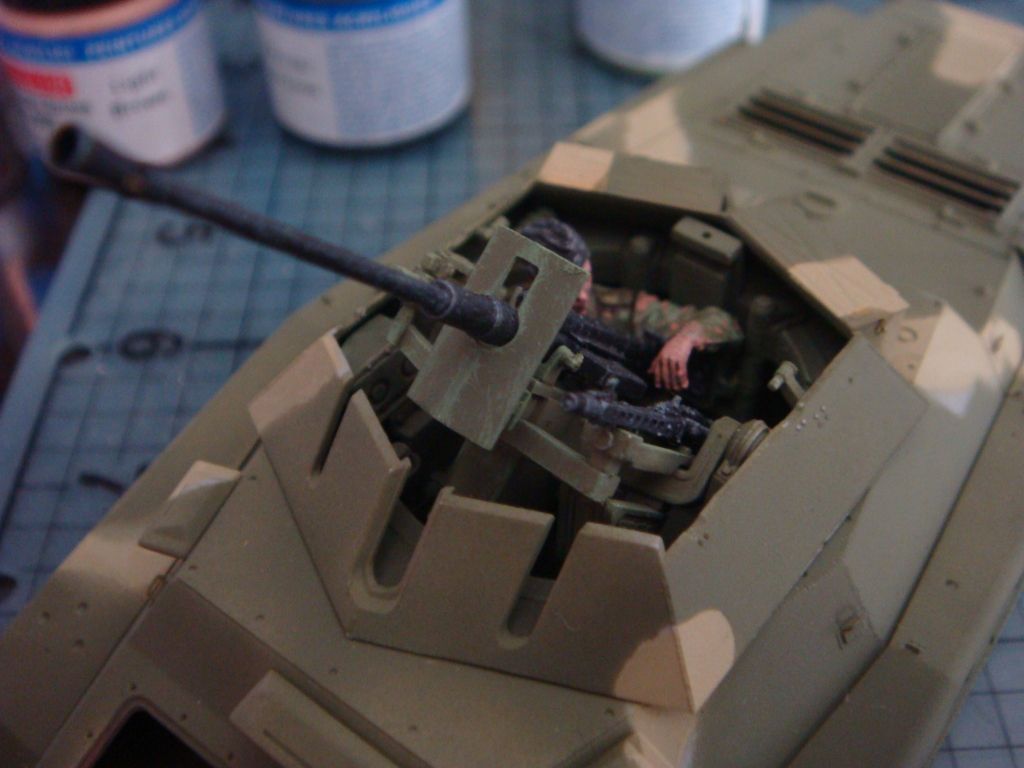
Almost there. 

URL=http://picasion.com/]

  • Member since
    April 2005
  • From: Piscataway, NJ!
Posted by wing_nut on Sunday, September 16, 2012 8:23 AM

Now you have a great looking vehicle to go with thsoe uniforms.Yes

Marc  

  • Member since
    April 2009
  • From: Carmel, IN
Posted by deafpanzer on Sunday, September 16, 2012 10:33 AM

Nice work on the camo!!!  You are almost there...

Andy

  • Member since
    July 2004
  • From: Texas
Posted by wbill76 on Sunday, September 16, 2012 11:06 AM

Hard-edge with the AB is a challenge but you've pulled it off. Definitely agree there's no way you'd get a 2nd figure into that turret but having the one in there does give it some life. Yes

  • Member since
    September 2006
  • From: Australia
Posted by Blitzwing on Tuesday, October 2, 2012 4:51 AM

I finally got around to applying the dot filter and added the wheels and this is how it turned out. 

The dot filter did give me some tense moments though as I was under the impression that using an oil based wash wouldn't affect the acrylic undercoat, but it did eat through some areas of the paint. Luckly with hard edged camo, it was a pretty easy fix with a brush. 

I just need a few little finishing touches and hopefully I will be able to post some better quality pictures tomorrow.

URL=http://picasion.com/]

  • Member since
    December 2004
  • From: ohio
Posted by vonryan on Tuesday, October 2, 2012 5:39 AM

oh yea you nailed that camo BlitzwingYes really fun watching this one come together. i got jammed on my 234/4 if i'd get close to your's i'd be happy. again awesome buddy.

Clay

  • Member since
    September 2006
  • From: Australia
Posted by Blitzwing on Wednesday, October 3, 2012 7:20 AM

Thanks heaps Clay, I'm glad you liked it although I really must confess it turned out quite a bit different to what I had originally envisioned. I think I'd have a hard time replicating it if someone asked me to, but I'll still take it. Thanks again.

URL=http://picasion.com/]

  • Member since
    August 2012
  • From: Parker City, IN.
Posted by Rambo on Wednesday, October 3, 2012 6:27 PM

did you clear coat before the filter? I think it looks great anyway gives it a nice worn look like it wasn't the 1st camo it has had on her

Clint

  • Member since
    July 2004
  • From: Texas
Posted by wbill76 on Wednesday, October 3, 2012 7:28 PM

Not all acrylic paints are as tough as others...so depending on how aggressive you were in the wash application, it's still possible for the paint to fall victim if it's not sealed beforehand. Despite that, it looks good from here...and sometimes the best results are the ones you can't explain or easily replicate! Beer

  • Member since
    September 2006
  • From: Australia
Posted by Blitzwing on Thursday, October 4, 2012 2:12 AM

Thanks Rambo and Bill really appreciate the comments. I guess the old adage of preferring to be lucky rather than skillful really is true. 

I added the rearview mirror and bolt cutters so here are the final completed pictures. 

URL=http://picasion.com/]

  • Member since
    July 2004
  • From: Texas
Posted by wbill76 on Friday, October 5, 2012 2:39 PM

That last pic sums up the cramped nature of the turret on this guy very nicely! Big Smile Good job all around. Yes

  • Member since
    October 2009
Posted by PANZERWAFFE on Friday, October 5, 2012 5:59 PM

That is a really cramped turret, do like the addition of the figure.  Nice looking build Yes

Rob

  • Member since
    September 2006
  • From: Australia
Posted by Blitzwing on Friday, October 5, 2012 9:15 PM

Thanks for the compliments Bill and Rob.

It's almost ironic now when you look at that turret and think of the complaints that would arise if a modern vehicle was designed with a turret like that.

URL=http://picasion.com/]

JOIN OUR COMMUNITY!

Our community is FREE to join. To participate you must either login or register for an account.

SEARCH FORUMS
FREE NEWSLETTER
By signing up you may also receive reader surveys and occasional special offers. We do not sell, rent or trade our email lists. View our Privacy Policy.