SEARCH FINESCALE.COM

Enter keywords or a search phrase below:

FINISHED PICS--Russian S51 by Trumpeter; -- BRRRR!!!

24167 views
176 replies
1 rating 2 rating 3 rating 4 rating 5 rating
  • Member since
    November 2009
  • From: SW Virginia
Posted by Gamera on Wednesday, December 17, 2014 11:56 AM

Looks great Karl, studying your work here to try to learn a little something for my own stuff.

I might have to pick up some of the dark brown filter for olive drab, I really like the results you got there. Have you used and would recommend his shadow washes?

"I dream in fire but work in clay." -Arthur Machen


  • Member since
    January 2007
Posted by the doog on Wednesday, December 17, 2014 11:21 AM

Hi all,

Got a weathering update here: I started off by using Adam Wilder's "Nitro Line" filter, choosing "Vibrant Green Filter" to add some color variation and depth to the finish.

A close-up of the results...

The gun shields showing the color gradient..

I then added some pinwashes with Black oil...

Detail...you can see it on the treaded walkway

Next, I mixed some Tamiya Buff with Light Gray, and airbrushed this on the suspension and bottom hull...

I also sprayed some on the walkway as the crew's shoes would have tracked it here...

...and misted it up over the hull bottoms. The underside is also coated in it, of course.

The tracks got it too..lightly...

Next, I used MIG's 502 oils of "Light Mud, Industrial Earth", and Grumbacher Dark Umber to make a mud potion in various shades and applied that by stabbing a brush on the model top.

I also put it on the bottom hull near the bottom and top, and pulled it in the opposite direction to make a nasty look. I also used some of Wilder's "Orange Rust" as a medium to mix the oils into. In this way, I got all this variance of color and shades. This takes less than 5 minutes to do if you do it right. Just keep dabbing into a different color and slop it on.

Of course the tracks and wheels got exactly the same treatment..

Here's where I am now....leaving off for a day or two to let those oils dry...then comes pigments..

I'll try to get to the figures next while everything is drying.  Thanks for looking in, and following along!

  • Member since
    January 2007
Posted by the doog on Wednesday, December 17, 2014 11:03 AM

Thanks, Hugo--you're just in time for another update! While these oils are drying, it will be a good time to do the figures tutorial. Stay tuned!

  • Member since
    March 2013
  • From: Puebla, Mexico
Posted by garzonh on Wednesday, December 17, 2014 7:30 AM

My man!, what can I say....it is not complete and it already looks amazing. I really like the difference in the colors from dark to light...I have tried so many times to get this right....

Also, your tutorial on painting figures would be very very much appreciated!!

As you know, I cannot paint a decent figure, not to mention faces......

Keep us posted on the figure painting.

See you around.

  • Member since
    January 2007
Posted by the doog on Monday, December 15, 2014 7:04 PM

Thanks, Bill! It will be good to get back to the dirt and grime after that pristine Tomcat that I put together! Yeee-HAAAWWW!!

  • Member since
    January 2007
Posted by the doog on Monday, December 15, 2014 7:03 PM

Johan, ha ha, that's true about my little "Doxie". SOmetimes I swear he has just as MUCH power as a Viper, the way he tears around here. It's quite a sight to see this fuzzy little low tube of doogness blazing around the couch in circles.

Color modulation is a cool trick, but it takes practice to get right. I"m only now starting to feel like I have a handle on it. :)

  • Member since
    January 2007
Posted by the doog on Monday, December 15, 2014 7:00 PM

Thanks Bish, yeah, I was actually surprised at myself for not seeing that sooner. Just goes to show how spoiled as a modeler I've become! Nowadays you don't even think of checking the undersides of the fenders unless you're building an oldie!

  • Member since
    July 2004
  • From: Texas
Posted by wbill76 on Monday, December 15, 2014 3:45 PM

Really starting to come alive now Karl, on to the real fun with the whitewash and weathering! Beer

  • Member since
    April 2005
  • From: Gothenburg
Posted by JohanT on Monday, December 15, 2014 2:14 PM

Hi the doog,

Very nice work and a lot of useful tips as always!

Will definitely try your color modulation formula.

Very Best Regards

Johan

PS. Gotta love the Dachs, the ratio of dog to kilo is like with HP in a Dodge Viper :)

  • Member since
    December 2002
  • From: Bury St Edmunds, Suffolk, England
Posted by Bish on Monday, December 15, 2014 12:51 PM

Looking sweet there Karl. Looks like you caught the underside of the fenders just in time.

I am a Norfolk man and i glory in being so


On the bench: Airfix 1/72nd Harrier GR.3/Fujimi 1/72nd Ju 87D-3

  • Member since
    January 2007
Posted by the doog on Monday, December 15, 2014 11:22 AM

jibber

Doog you've done one great job on that paint, the modulation between those colors jumps off the page. Very nice. The figures looks like they won't be an easy job, theres a lot going on there but one great build Doog. Love your little buddy...

Thanks, Jibber, I appreciate the kind comments!

And my little modeling boddy is doing fine too..his hair is getting long--the "long-haired Dachshund" part of him starting to show. He's looking positively rebellious now. lol

  • Member since
    January 2007
Posted by the doog on Monday, December 15, 2014 10:50 AM

Thanks, Gamera! I appreciate it!

  • Member since
    January 2007
Posted by the doog on Monday, December 15, 2014 10:50 AM

Thanks, Steve. It's good to be back at the bench!

  • Member since
    January 2007
Posted by the doog on Monday, December 15, 2014 10:49 AM

Thanks for looking in, RX7850. Glad to have you along, and happy to share!

  • Member since
    July 2003
  • From: On my kitchen counter top somewhere in central North Carolina.
Posted by disastermaster on Monday, December 15, 2014 10:33 AM

And as sure as what I said.....

 "The real magic is (as always) when  you do the paint".

 https://i.imgur.com/LjRRaV1.png


  • Member since
    January 2013
Posted by jibber on Monday, December 15, 2014 8:17 AM

Doog you've done one great job on that paint, the modulation between those colors jumps off the page. Very nice. The figures looks like they won't be an easy job, theres a lot going on there but one great build Doog. Love your little buddy...

  • Member since
    November 2009
  • From: SW Virginia
Posted by Gamera on Monday, December 15, 2014 7:54 AM

Looks great as usual Karl, really enjoy following along with your work.

"I dream in fire but work in clay." -Arthur Machen


  • Member since
    December 2012
Posted by RX7850 on Sunday, December 14, 2014 8:10 PM

This is coming along real nice. Appreciate the insights to your painting technique.

  • Member since
    January 2007
Posted by the doog on Sunday, December 14, 2014 7:11 PM

OK, painting is 75% finished. What I mean is, there will be a whitewash, eventually. But here's what I got this weekend.

I got it primered with Tamiya Gray primer decanted and airbrushed, then realized---DUH?--I should have blocked off under the fenders. Yeah, can you believe that? The Trumpeter kit goes "retro" on the missing fender/hull fills.

The blanks cut from .040 styrene sheet were 144mm x 15.5 mm. and laid on braces under the hull sides.

And then here's the paints I used.

First I did an overall black base coat.

... here's the first two applications: the Black-Green base coat with the first highlight coat of JA Green.

And here's the last highlight coat added from Olive Green + Yellow. Note how the gun shields were "color modulated" by careful masking.

The wheels got all but the final highlight coat...

The tracks got a coat of black, plus my own "Tracks" mixture of Brown + Black, and then I mixed Red Brown and Orange to get a Rust color, which I sprayed around the edges, leaving the insides of the tracks darker.

The figures; I'm going to do a short tutorial on skin tones here. They start off with a Tamiya Gray prinmer coat, followed by a White coat sprayed from above to leave some shadows, They will be then painted with acrylics from Windsor & Newton.....more on that later...

Thanks again for looking in, guys. Any comments always welcomed, and I'll promise to respond in a more timely fashion!  Wink

  • Member since
    January 2007
Posted by the doog on Sunday, December 14, 2014 6:53 PM

I have to admit that I"m a little freaked out that I didn't reply to all these posts here; I must have gotten to traveling and got busy...I'm sorry for the poor manners., guys. Coulda sworn I"d replied...

Steve, I normally don't put the tracks on before painting, but this was easy to do the tracks on this model, and they're pretty solid. So I thought the photo would be cool... Smile

Josiah, Sprue, and Bill, thanks for looking in, and forgive my tardiness in replying! Embarrassed

  • Member since
    July 2003
  • From: On my kitchen counter top somewhere in central North Carolina.
Posted by disastermaster on Sunday, November 23, 2014 3:11 PM

Hey Karl,

  http://www.les7pechesdumotard.fr/MillanNet/indubitablysmile.gifEverything here appears to be in cut and proper order. 

    The real magic is (as always) when http://fun.resplace.net/Emoticons/Magic/Fairy.gifyou do the paint.


Oh, just wonderinghttp://www.freesmile.ir/smiles/318219_hush1.gif. I thought you painted in progression

      http://noisen.com/Smileys/cyna/unsure.gif rather than after the construction is complete .

          http://www.sherv.net/cm/emoticons/thanksgiving/happy-thanksgiving.gifHave a great Holiday........

                             http://www.iheart70s.com/bumpers/deer-hunter.jpg

                                                                            http://emoticoner.com/files/emoticons/smileys/fainting-smiley.gif

 https://i.imgur.com/LjRRaV1.png


  • Member since
    July 2004
  • From: Texas
Posted by wbill76 on Sunday, November 23, 2014 1:41 PM

Looks big and mean while waiting for paint there Karl! Have fun hunting and feasting with the fam! Wink

  • Member since
    October 2004
  • From: Northern Virginia
Posted by ygmodeler4 on Saturday, November 22, 2014 10:00 PM

Great progress Karl...make sure to post pics when you get back, both of this thing painted and anything you may find in the woods while you are away!

-Josiah

  • Member since
    January 2006
  • From: California
Posted by SprueOne on Saturday, November 22, 2014 9:40 PM

Serious detailed mods and progress, Doog.

… and new Doog Big Smile

Anyone with a good car don't need to be justified - Hazel Motes


Iron Rails 2015 by Wayne Cassell Weekend Madness sprueone

  • Member since
    January 2007
Posted by the doog on Saturday, November 22, 2014 8:28 PM

Red Green

Hi Karl. Just a note about the road wheel spacing,they are off-set because the torsion bars are nearly as long as the hull is wide.Take a look at the Panther 2's road wheel config. for each side  byrden.com/.../WheelSpacings2.html. Awsome looking Tomcat by the way!

I meant to thank you for that nifty link, Red Green! Lots of cool info there! And thanks for the props on the "cat!

The model is finished an ready for paint!

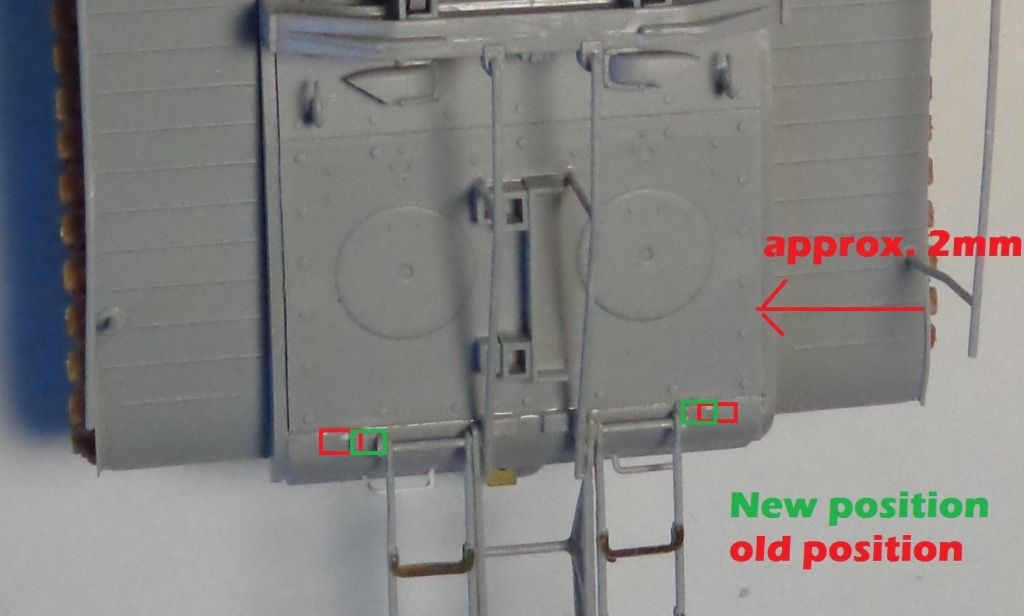
Here is a shot of the modification that I had to do to the rear ladder mounts. The mounts for them are just too far apart. I had to cut the molded-on mounts off with a single-edge razor, and re-attach them about 2mm closer on both side. It was impossible to get the ladder edges to meet them where they were supposed to join. I had all this documented in photos, but my memory card got screwed up and I lost the photos in the re-formatting! Angry

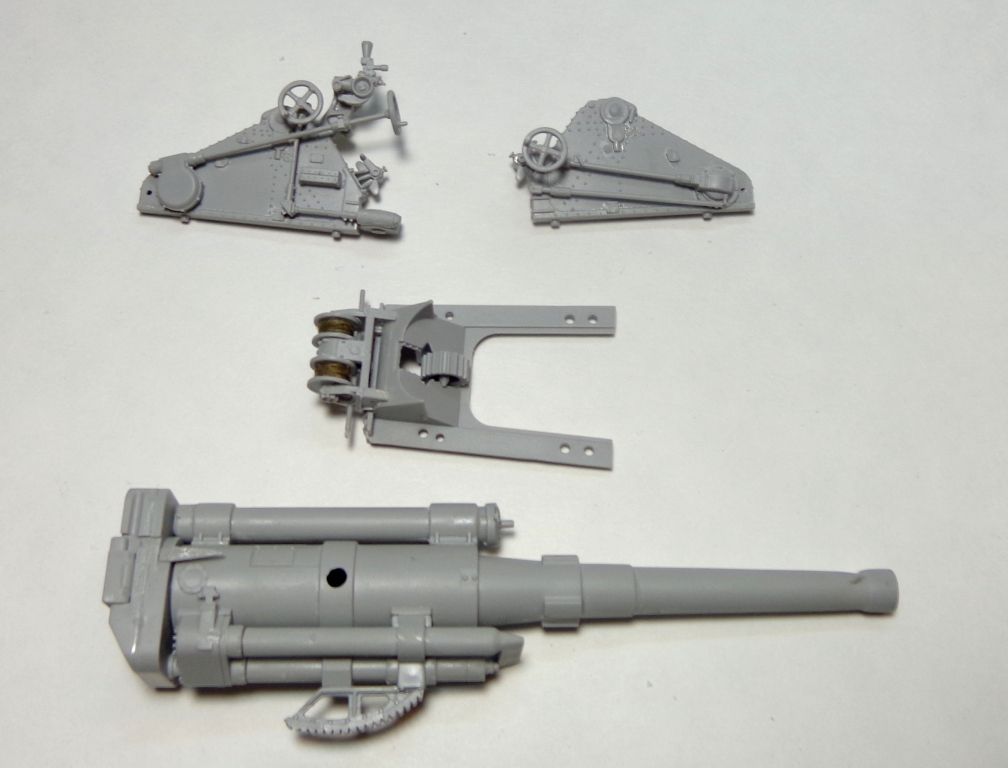
The gun parts un-assembled.

This gun cradle has a gear that engages the gun's undercarriage, and "rope" that is wound around the wheels. This is twine, which comes in the kit. I wet it somewhat with white glue, and wrapped it around while still wet. I'll have to mask it somehow when I paint it.
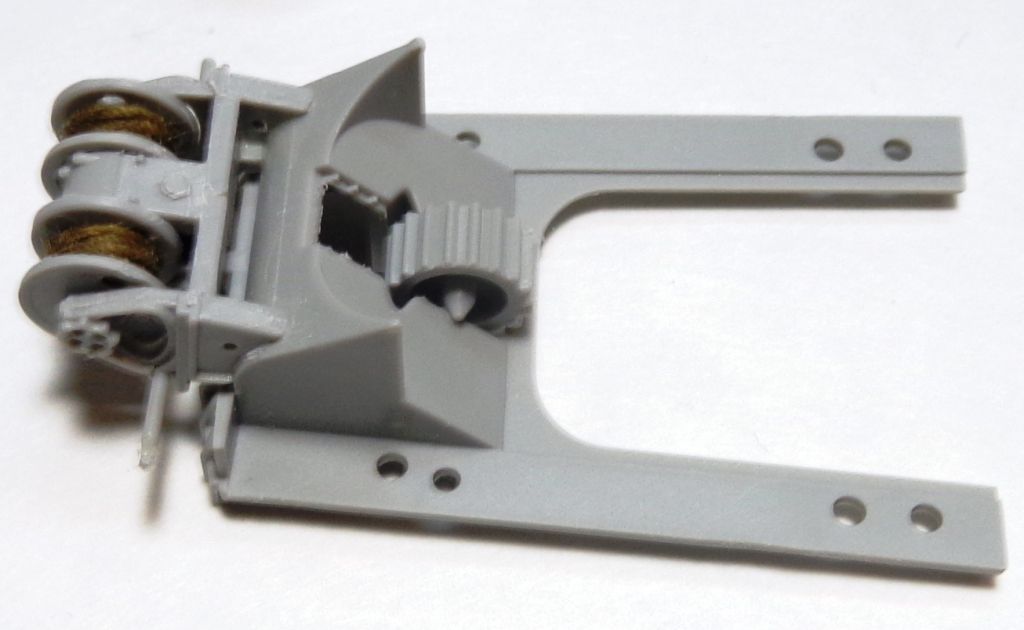
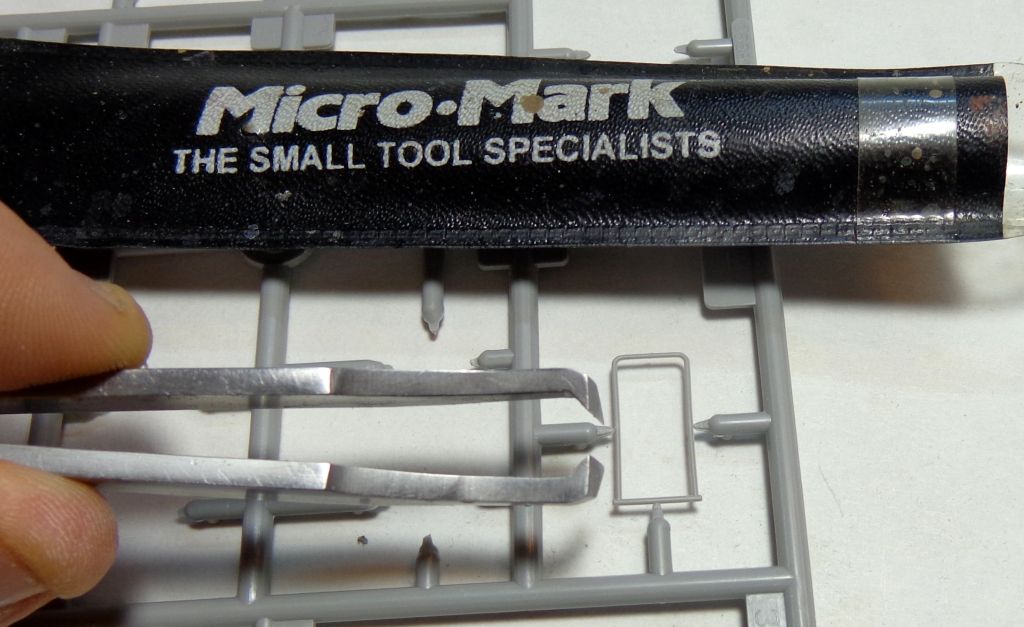
Don't know what I would do without this Micro-Mark precision cutter when removing delicate parts like these leg braces for the front shields! A "MUST have" for every modeler!
By the way, if you want to position the front shields "down", they act as "floor pans" for the crew when lowered. Check it out here: and you can also store the "ladders" on the other end UP if you want, for travel.
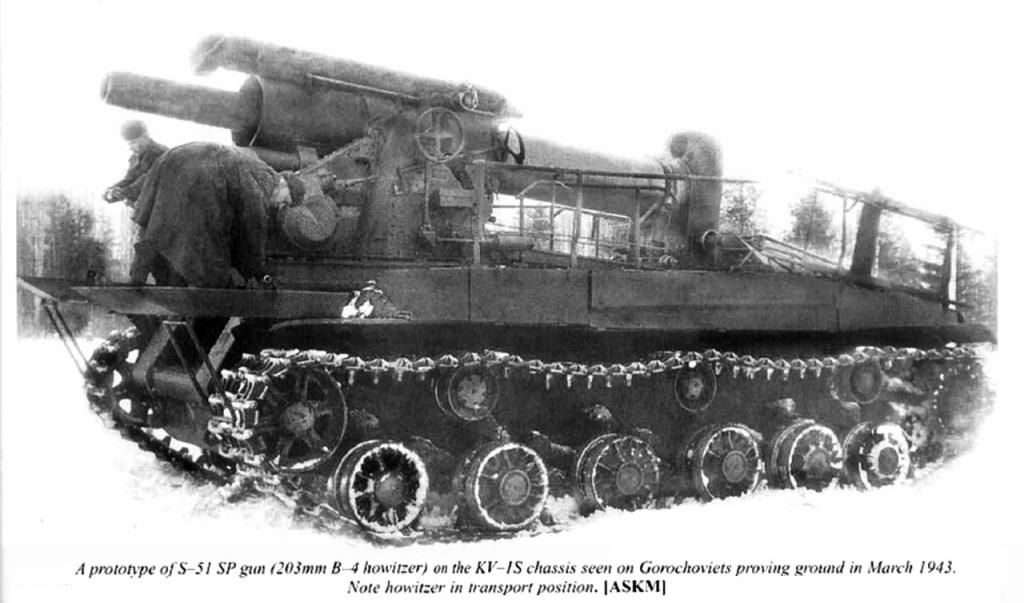
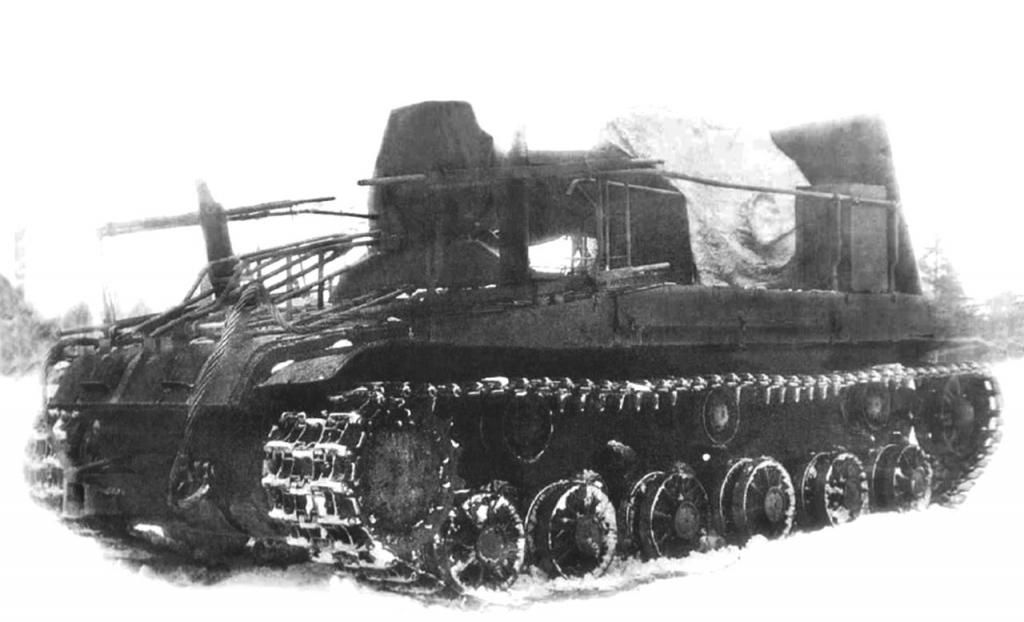
Here's the model, finished. Notice that there is a pesky circular PE piece in the barrel that simulates the grooving in the barrel. Two figures from Helo Miniatures will finish this one off.
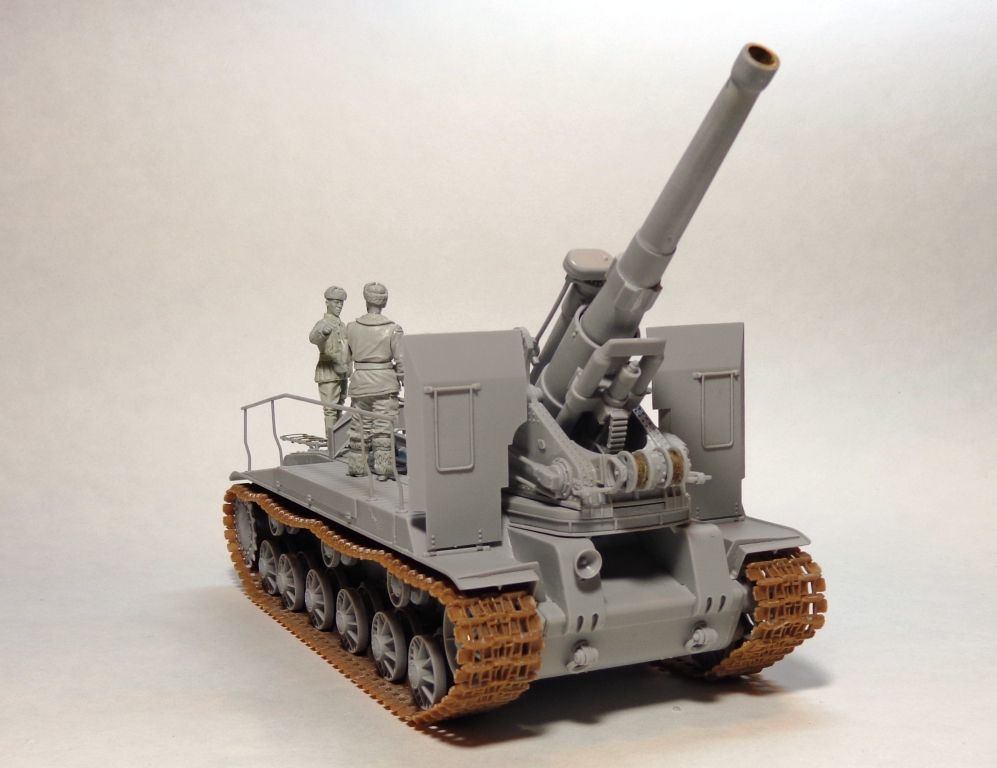
I have to say that I found the plastic used in this kit to be somewhat unexpectedly brittle. I actually broke two different pieces in half--they rather "crumbled" when I applied some force to them to better fit or make them "seal" against each other with glue. I don't know if this is just an anomaly with my kit, or if others will experience the same strange quality?
The only thing missing is the two tow cables, which will be added after painting.
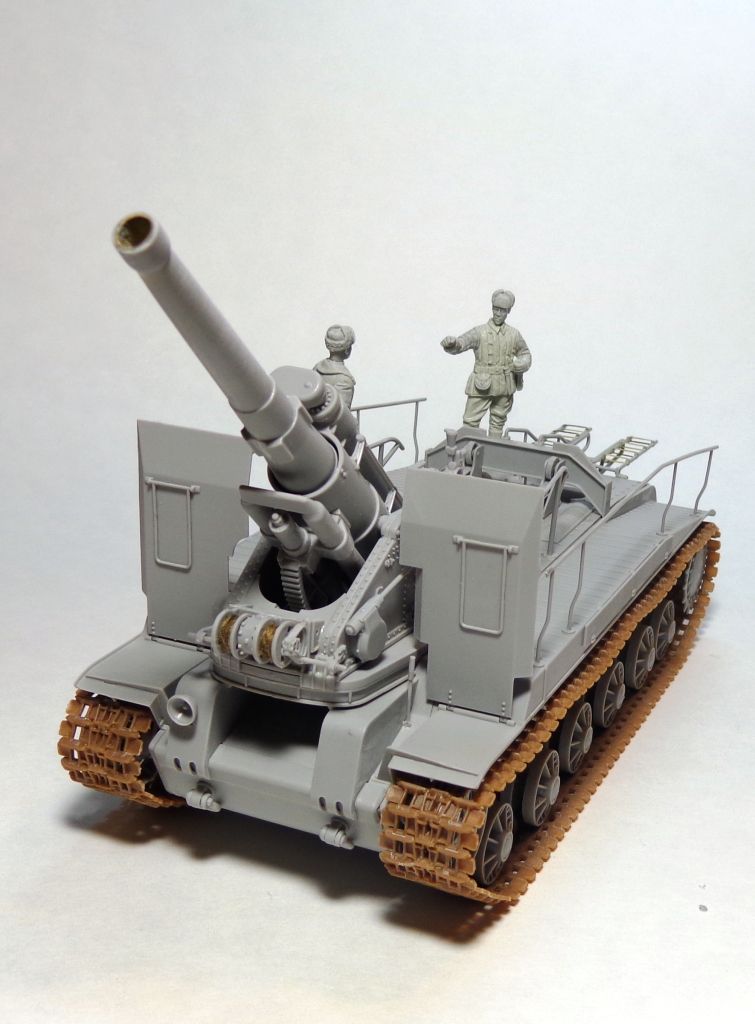
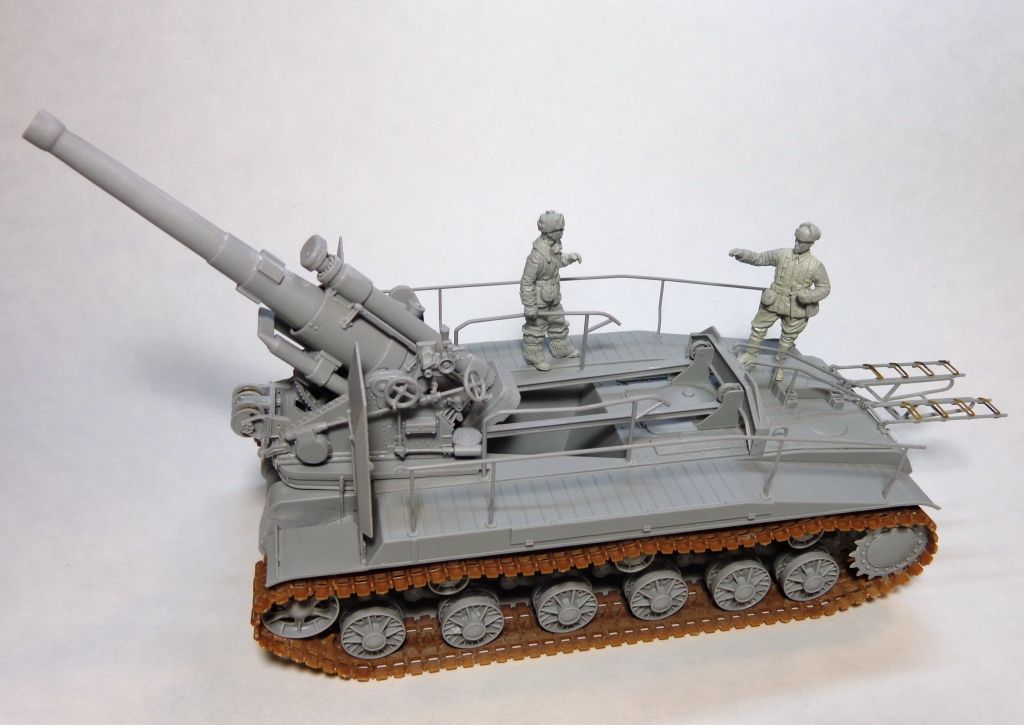
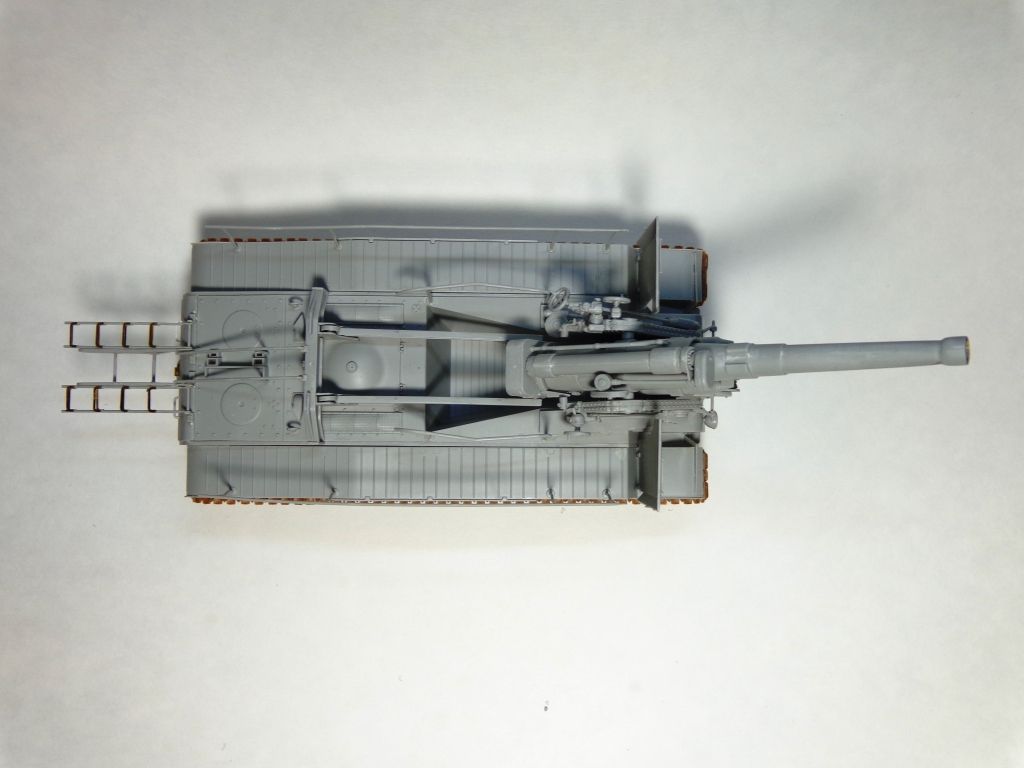
Note the extended "ladders" on the rear. I have no idea what they were actually for, or how they functioned.
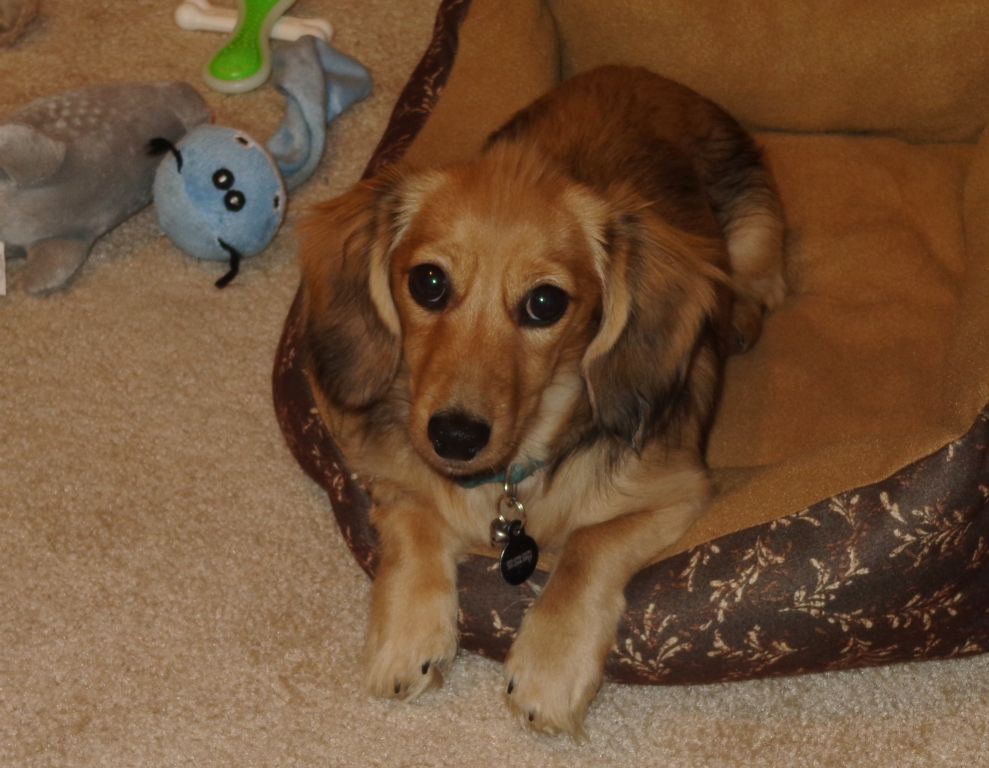
Gratuitous "modelling buddy" photo...Big Smile

Well, I'm dying to get painting on this, but it'll have to wait two weeks until I return home from up North. Thanksgiving visits and deer hunting with Dad. I can't wait to get started! A winter scheme is going to look awesome on this big beast!

Comments always welcomed! Have a Happy Thanksgiving, all! Smile

  • Member since
    January 2007
Posted by the doog on Saturday, November 22, 2014 2:50 PM

Thanks, all of you guys, for the comments and the information!

I should be done with it and ready for paint in a few hours! Pics to come!!!

  • Member since
    March 2012
  • From: Delta Labs 4
Posted by Red Green on Saturday, November 22, 2014 10:08 AM

Hi Karl. Just a note about the road wheel spacing,they are off-set because the torsion bars are nearly as long as the hull is wide.Take a look at the Panther 2's road wheel config. for each side  byrden.com/.../WheelSpacings2.html. Awsome looking Tomcat by the way!

  • Member since
    November 2009
  • From: SW Virginia
Posted by Gamera on Thursday, November 20, 2014 7:54 PM

Very cool Karl, some of the German paper panzers were wild but I'm very happy to see some of this crazy Soviet stuff that's been coming out recently.

And congrads on the new doog too!!!

"I dream in fire but work in clay." -Arthur Machen


  • Member since
    September 2006
  • From: Dripping Springs, TX, USA
Posted by RBaer on Thursday, November 20, 2014 5:49 PM

Neat build, doog. I like the look of that thing, and it's not hard to see why it never made it into production....

Apprentice rivet counter.

  • Member since
    April 2006
  • From: Denver, Colorado
Posted by waynec on Thursday, November 20, 2014 5:12 PM

the doog

Wayne, Wow, a "Railroad" GB, now that's ambitious!

Congratulations on your Unimog triumphs! That's great!!! Next step is to take it to a regional, or National contest! Or better yet, an AMPS! YesBeer

 1/35 choo choos are big and have lots of pieces. i don't think they are anymore complicated than some of the truck frames i build

In local contests this year it took a 1st, 2nd, and a 3rd in commercial trucks in three local contests and a first in commercial trucks in  region 10 regional. time to retire it until nats next year. and send some pics into FSM.

Никто не Забыт    (No one is Forgotten)
Ничто не Забыто  (Nothing is Forgotten)


JOIN OUR COMMUNITY!

Our community is FREE to join. To participate you must either login or register for an account.

SEARCH FORUMS
FREE NEWSLETTER
By signing up you may also receive reader surveys and occasional special offers. We do not sell, rent or trade our email lists. View our Privacy Policy.