SEARCH FINESCALE.COM

Enter keywords or a search phrase below:

WIP: M2A2 ODS, 3-15 IN, 2 BDE, 3 ID OIF 1 - Meng M3A3 backdate.

8650 views
95 replies
1 rating 2 rating 3 rating 4 rating 5 rating
  • Member since
    April 2014
Posted by Sandbox on Wednesday, November 25, 2015 10:04 AM

As always, an impressive build.  Also, the pictures are very impressive.  What do you use for a camera?

  • Member since
    December 2002
  • From: Valrico, FL
Posted by HeavyArty on Wednesday, November 25, 2015 9:06 AM

Gamera - Yup, the kits are pretty much the same size so parts can easily be interchanged.  There is a guy at Armorama adding some of the better Meng interior parts to a Tamiya M2 to make a detailed, original M2A0.  It is coming along nicely.  That and another M2A0+ build post on Armorama pushed me along to start this one.

Gino P. Quintiliani - Field Artillery - The KING of BATTLE!!!

Check out my Gallery: https://app.photobucket.com/u/HeavyArty

"People sleep peaceably in their beds at night only because rough men stand ready to do violence on their behalf." -- George Orwell

  • Member since
    November 2009
  • From: SW Virginia
Posted by Gamera on Wednesday, November 25, 2015 7:34 AM

Very cool, I had no idea that the Meng kit and the older Tamiya/Academy ones were anywhere near compatable. I'll be following this too. 

"I dream in fire but work in clay." -Arthur Machen


  • Member since
    December 2002
  • From: Valrico, FL
Posted by HeavyArty on Wednesday, November 25, 2015 7:13 AM

Mike - Thanks for following along.  Hope you enjoy the ride.

Stik - Thanks for checking in as well.  The Academy kit will build into a OIF 1 Bradley out of the box.  Some (mainly in 1 BDE and 3 BDE) Bradleys were the later model, new-build M2A2 ODS versions as depicted by the Academy kit.  You will just need to swap out the old tracks on it for newer, square-block tracks though.

Gino P. Quintiliani - Field Artillery - The KING of BATTLE!!!

Check out my Gallery: https://app.photobucket.com/u/HeavyArty

"People sleep peaceably in their beds at night only because rough men stand ready to do violence on their behalf." -- George Orwell

  • Member since
    July 2004
  • From: Sonora Desert
Posted by stikpusher on Wednesday, November 25, 2015 3:27 AM

I need to watch as well. I have the Academy M2A2 to build in my stash one day and I would like to do it as an OIF1 Bradley also. 


F is for FIRE, That burns down the whole town!

U is for URANIUM... BOMBS!

N is for NO SURVIVORS...

       - Plankton

LSM


  • Member since
    January 2015
  • From: Tumwater, WA.
Posted by M. Brindos on Tuesday, November 24, 2015 9:18 PM

Okay, this is obviously going to another really cool coversion blog. Count me in for the ride, Gino.  :)

- Mike Brindos "Lost Boy"

  • Member since
    December 2002
  • From: Valrico, FL
WIP: M2A2 ODS, 3-15 IN, 2 BDE, 3 ID OIF 1 - Meng M3A3 backdate.
Posted by HeavyArty on Tuesday, November 24, 2015 9:14 PM

I have finally started a project I have been thinking about for a while. I thought about backdating a Meng M2A3 or M3A3 back to an OIF 1 era M2A2 ODS Bradley with interior.  I decided on using the M3A3 since it has the headlight mounts w/out the ERA blocks under them and the standard rear stowage boxes on it. 

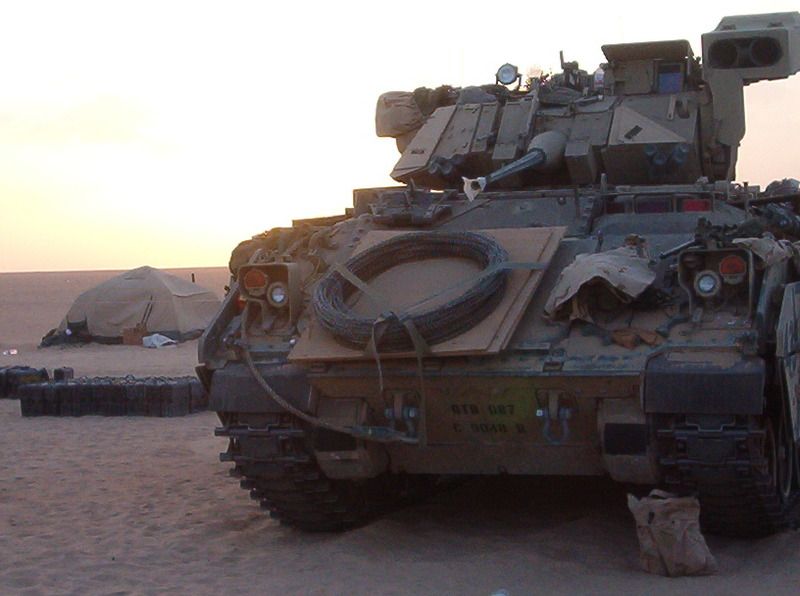
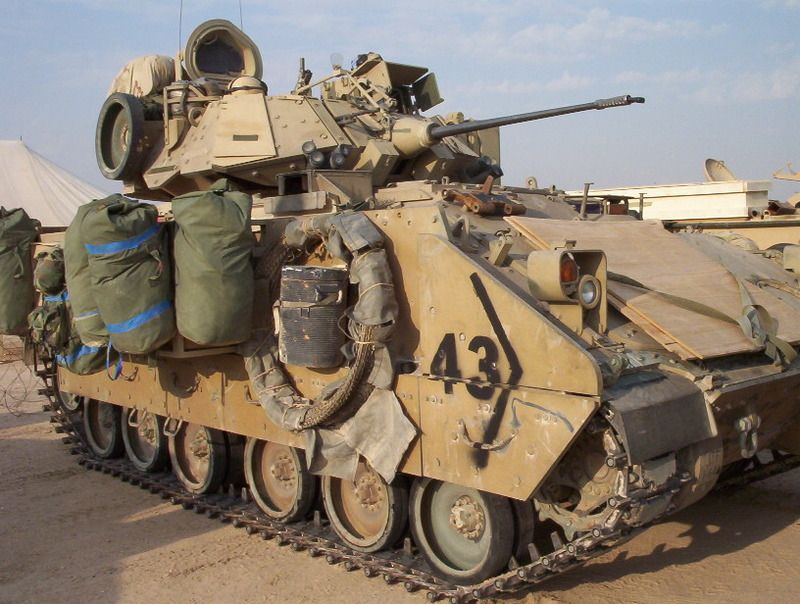
The Brad will represent one from 3-15 IN, 2 BDE, 3 ID in OIF 1 (invasion, March '03).  These vehicles were drawn from Pre-Positioned (PrePo) stocks in Kuwait and had locally made side storage racks.  They were also older M2A2s that had been updated to ODS standards.  As such, they had a lot of older features, along with the new ones.


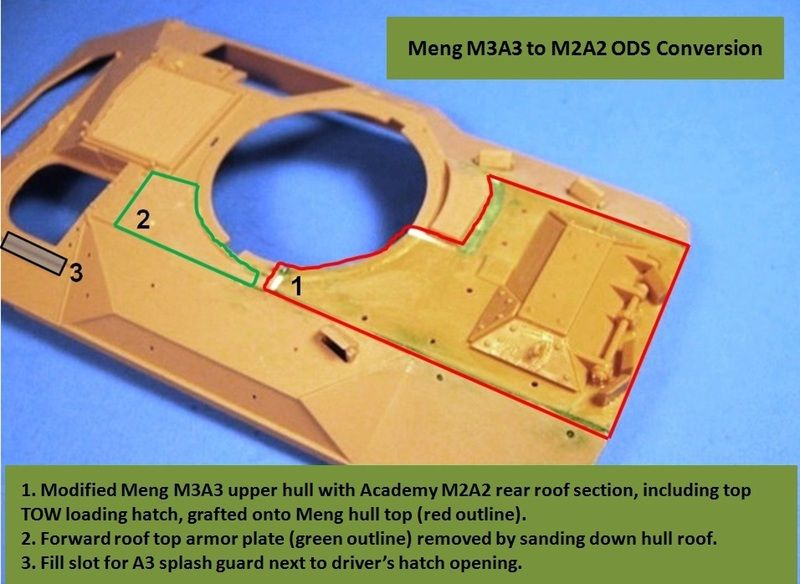
I started by taking the rear roof section from an Academy M2A2 and grafting it onto the Meng hull.   I found this easier than trying to sand all the added armor hull plates off the top of the Meng hull.  It also shows that the Tamiya and Academy parts are the same basic size and can be interchanged with the Meng parts with little effort.

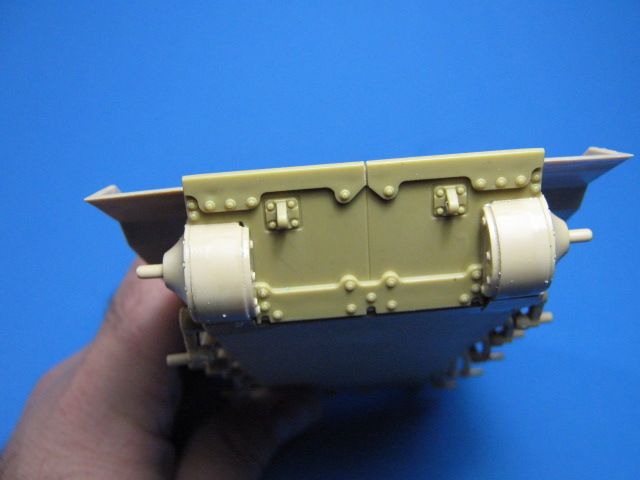
I reworked the lower front hull by replacing the kit's newer, one piece armor plate with an older-style  Tamiya, multi-piece armor plate.  I also reworked the final drive covers by removing the second lift ring attachment and adding bolt heads back to them.

I added the old swim barrier attachment bolts (red dots) and hinges (PE) back to the front glacis plate.  I reshaped the mud flap openings to the proper, larger shape too.

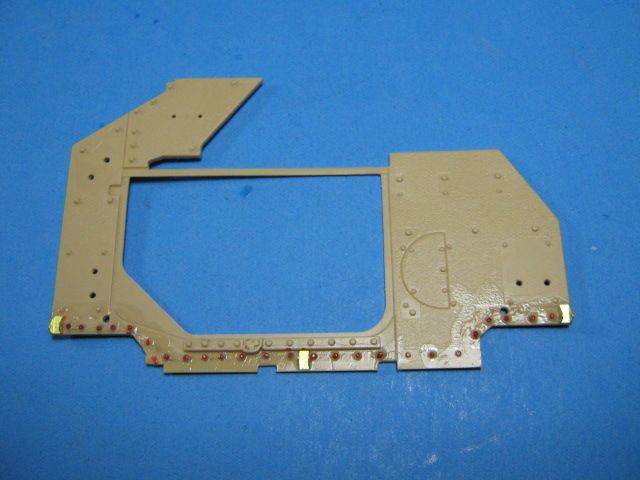
I added the older-style flat mud guards from the Academy kit.  I also added the armor plate on the left of the driver's hatch from an Eduard PE set.

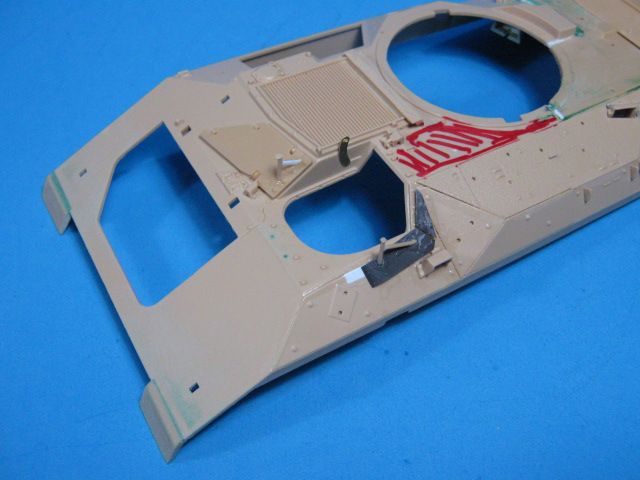
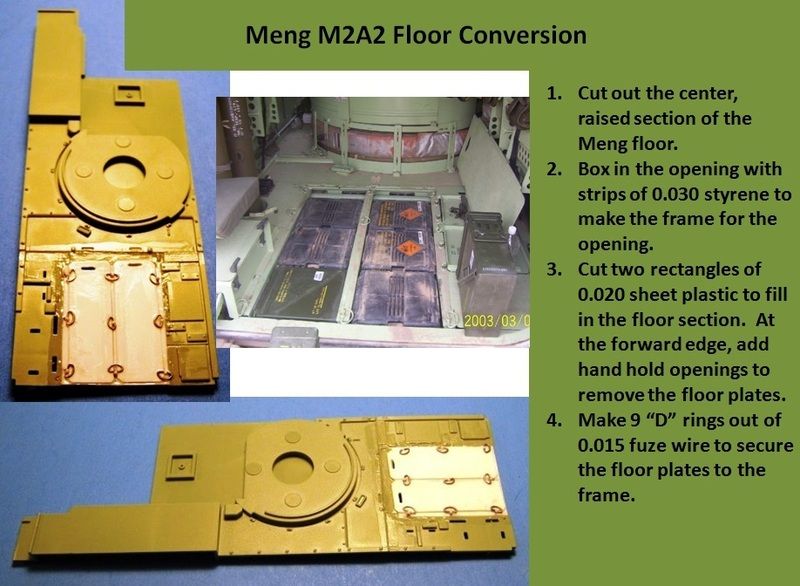
Lastly (for now) I also started reworking the interior by replacing the large floor panel and adding two smaller plates for the M2A2 ODS version.

That's it for now.  More to come later.

Gino P. Quintiliani - Field Artillery - The KING of BATTLE!!!

Check out my Gallery: https://app.photobucket.com/u/HeavyArty

"People sleep peaceably in their beds at night only because rough men stand ready to do violence on their behalf." -- George Orwell

JOIN OUR COMMUNITY!

Our community is FREE to join. To participate you must either login or register for an account.

SEARCH FORUMS
FREE NEWSLETTER
By signing up you may also receive reader surveys and occasional special offers. We do not sell, rent or trade our email lists. View our Privacy Policy.