SEARCH FINESCALE.COM

Enter keywords or a search phrase below:

Tamiya's stug III B *WIP* FINISHED

12997 views
95 replies
1 rating 2 rating 3 rating 4 rating 5 rating
  • Member since
    January 2005
  • From: in the tank factory in my basement
Posted by biffa on Wednesday, May 28, 2008 2:50 PM

Geist awesome pic man i saved that one for reference thanks for posting it,

Treadster my man good to see ya bro and its good to be back at the bench Smile [:)]

as always guys your interest and comments are appreciated i have just a small update for now as most of the time is spent waiting on washes etc to dry, i did some weathering on the lower hull and running gear while the washes were drying on the upper deck, using pigments mixed with alcohol i sprayed them around the wheels and lower hull, gotta be careful with this as it looks like theres nothing there but when it dries it will be covered heh, after it dried i gave it a wash or two and this is where its at right now 

the upper hull after a few more washes the weathering is building up nicely 


Ron g.
  • Member since
    April 2005
  • From: Piscataway, NJ!
Posted by wing_nut on Wednesday, May 28, 2008 6:30 AM

Like Randy Quaid says.. 

"HELLO boys, I'm Baaaack"

OK, so I didn't know you were gone... that's not the pointWink [;)]

You are back in fine style.  That's looks really sharp.  It would terrific with the dog chilling on top like in the photo.

Marc  

  • Member since
    July 2007
  • From: Ohio
Posted by Geist on Wednesday, May 28, 2008 5:34 AM

 sgtsauer wrote:
I have the DML kit in my stash but it isn't nearly as nice as the Tamiya Stug III B.


I built mine not to long ago. Its nice for its age. I had a lot of fun building it. 

On the bench: Italeri Leopard 1A2 correction build with Perfect Scale turret and Eduard PE

  • Member since
    December 2002
  • From: Jefferson City, MO
Posted by sgtsauer on Tuesday, May 27, 2008 10:29 PM
I have the DML kit in my stash but it isn't nearly as nice as the Tamiya Stug III B.
  • Member since
    November 2005
Posted by Anonymous on Tuesday, May 27, 2008 10:17 PM
 sgtsauer wrote:
Great job on the model so far. That looks like a beautiful kit. Too bad Tamiya didn't do an "A" model. I would love to build a kit this nice as Michael Wittman's "A" model.
DML issued one w/ the Wittman scheme---think it is in my stash...
  • Member since
    December 2002
  • From: Jefferson City, MO
Posted by sgtsauer on Tuesday, May 27, 2008 8:32 PM
Great job on the model so far. That looks like a beautiful kit. Too bad Tamiya didn't do an "A" model. I would love to build a kit this nice as Michael Wittman's "A" model.
  • Member since
    September 2005
  • From: beacon falls , Ct.
Posted by treadwell on Tuesday, May 27, 2008 7:46 PM
heya RonSmile [:)]---another 'tour de force'---nice to see ya back ay it dudeTongue [:P]-------treadCool [8D]


  • Member since
    July 2007
  • From: Ohio
Posted by Geist on Tuesday, May 27, 2008 5:40 PM

That looks great. I've got a pic of that exact StuG too.


*The top picture, of course* 

On the bench: Italeri Leopard 1A2 correction build with Perfect Scale turret and Eduard PE

  • Member since
    January 2005
  • From: in the tank factory in my basement
Posted by biffa on Tuesday, May 27, 2008 5:22 PM

thanks chaps glad you guys approve of the progress Smile [:)]  

Guy, the future was done in one session with just a couple of passes making sure everywhere got a coat it kinda looks glossier than it really is because of the lighting, i am going to dull it down as soon as that last wash as dried so i can begin weathering, as far as PSI goes i dont know heh i dont have a gauge on my compressor, lol i've been using a Testors mighty mini blue since i began modeling some 4+ years ago now and its still pumping away so i guess the psi is quite low Smile [:)]     

Ron g.
  • Member since
    November 2005
Posted by Anonymous on Tuesday, May 27, 2008 4:51 PM
Stugilicious !!! That is a very colorful scheme you chose ! Nice...
  • Member since
    February 2007
  • From: Bournemouth UK
Posted by Luftwoller on Tuesday, May 27, 2008 4:45 PM

Wow, super work Ron. Why am i always the last at the party. Just finished reading through the whole thread. Stugly looks fantastic my friend. I want one now. I think the question about the colour is subjective. I love the lighter greys and the darker ones so its hard for me to give my fav. Id probably mix a 'Special'.

I love the glossy future finish you have. Heres a question. How many coats do you give her and what pressure do you spray it at?

Cant wait to see it finished. Thx again for the great post.

...Guy

..'Your an embarrassment to the human genus, makes me ashamed to call myself Homo'.
  • Member since
    May 2007
Posted by Specter on Tuesday, May 27, 2008 4:39 PM
Ron the interior looks perfect and the paint is awsome Big Smile [:D]
Seth
  • Member since
    January 2005
  • From: in the tank factory in my basement
Posted by biffa on Tuesday, May 27, 2008 3:18 PM

Thanks you all for the continued encouragement, a pretty big update here,


first up, everything was masked off ready for paint

having already built a stug C/D and painted it in the light blueish colour i decided for this one i was going to go with the dark look i thought it would look very cool espesially with the selected markings.

the paint was followed by a coat of future in preparation for the decals which were then applied (lots of them on this scheme)


this was followed by a couple of washes and then the details were painted and more washes applied (the last wash is still wet in the pics)

next its time to begin the weathering, im not sure what look i am aiming for yet but i really like the contrast the model as so far.


Ron g.
  • Member since
    March 2003
  • From: Rain USA, Vancouver WA
Posted by tigerman on Monday, May 26, 2008 3:36 PM
You haven't missed a beat Ron.

   http://i7.photobucket.com/albums/y269/wing_nut_5o/PANZERJAGERGB.jpg

 Eric 

  • Member since
    September 2007
  • From: Fredrikstad, Norway
Posted by Stampede on Monday, May 26, 2008 2:23 PM

Great work as usual, Ron! Big Smile [:D]

Love those Griffon clasps, can't wait to see this one finished!

If electricity comes from electrons, does morality come from morons?
  • Member since
    April 2014
Posted by Carves on Monday, May 26, 2008 10:27 AM

Nice progress there Ron. As always top notch.

It seems that now days I see people doing red oxide color as primer. Very interesting.

---
Ben

  • Member since
    November 2006
  • From: Coastal Maine
Posted by dupes on Monday, May 26, 2008 8:22 AM

Man Biffa, flying as usual! Big Smile [:D]

It's a shame that you can't see more of that interior work...just need some bigger hatches, I guess. Wink [;)]

  • Member since
    July 2006
  • From: New Jersey
Posted by redleg12 on Sunday, May 25, 2008 9:00 PM

Ron

Nice build, love the interior work. It amazes me the speed at which you move and the quality you attain. But then again....it would not be a Biffa build unless it was fast and beautiful.

Can't wait to see it finished.

Rounds Complete!!

"The Moral High Ground....A Great Place to Emplace Artillery."

  • Member since
    July 2004
  • From: Texas
Posted by wbill76 on Sunday, May 25, 2008 8:53 PM
Coming along nicely Ron, it's a shame the StuG didn't allow for more of the interior to be shown but you've done a great job on what's visible through the hatches. Thumbs Up [tup]
  • Member since
    November 2005
Posted by Anonymous on Sunday, May 25, 2008 8:46 PM
Sweet...nice job so far on the interior...those stick grenades are too cool...
  • Member since
    January 2005
  • From: in the tank factory in my basement
Posted by biffa on Sunday, May 25, 2008 7:56 PM

Thanks guys, painting has begun,

I started by painting everything in red oxide primer (generic rattlecan) then the lower hull recieved a basecoat of grey mixed using Modelmaster acrylics then i gave it a light dusting here and there with brown to lay the base of some weathering, i painted the tracks brown then after painting the tires on the road wheels and giving everything a light drybrushing with "shadowed steel" the tracks were added and everything got a wash of "van dyke brown" oil paint.

next i painted the interior white and applied the usual chipping and washes using oils and acrylics, after dry fitting it all together earlier i knew very little could really be seen so it wasnt critical that everything was perfect although i may leave the top loose so that it can be removed to see,,mmm not sure yet.  

and with the gun

and what can be seen!


Ron g.
  • Member since
    April 2014
Posted by Carves on Saturday, May 24, 2008 9:20 AM

Ron, that Griffon tool claps really look sharp. Thanks for posting them.

Great build so far, now lets see it some mud.

---
Ben

  • Member since
    April 2005
  • From: Piscataway, NJ!
Posted by wing_nut on Saturday, May 24, 2008 3:18 AM
Looking very sharp biffa. Those clasps really add to the overal look.  I am gonna have to pick up one of those sets.  Looking forward to the paint

Marc  

  • Member since
    January 2005
  • From: in the tank factory in my basement
Posted by biffa on Saturday, May 24, 2008 12:39 AM

Thanks for the drawing Manny i wished i had that earlier would have saved me some time on other things, as for the cables i decided on a different route and think i am going to go with something later perhaps during "Barbarosa" and have a field mod stowage rack just for something different i think it looks quite good .

i think this one is ready for the paintshop.  


Ron g.
  • Member since
    November 2005
Posted by Anonymous on Friday, May 23, 2008 10:50 PM

Wow, tiny clasps!!! Food for the CARPET MONSTER !!! maybe this diagram will help with the cable holders...looks like there are metal channels and brackets that hold 'em in place:

  • Member since
    January 2005
  • From: in the tank factory in my basement
Posted by biffa on Friday, May 23, 2008 9:21 PM

Correct Manny that was the dragon C/D kit i do so like these little guys :)

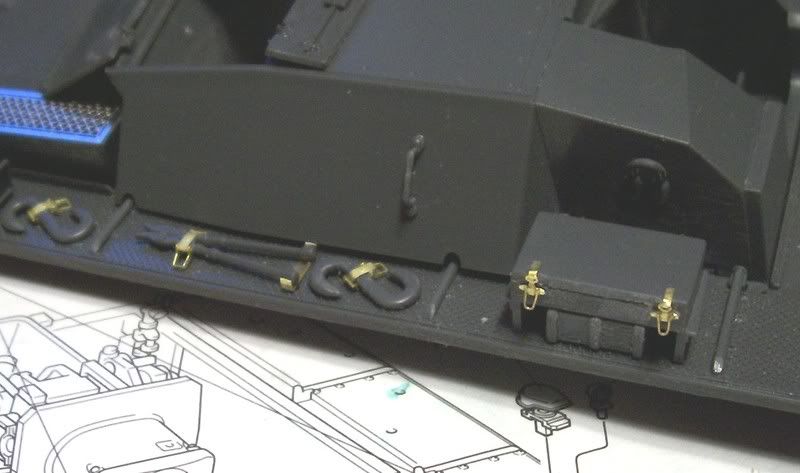
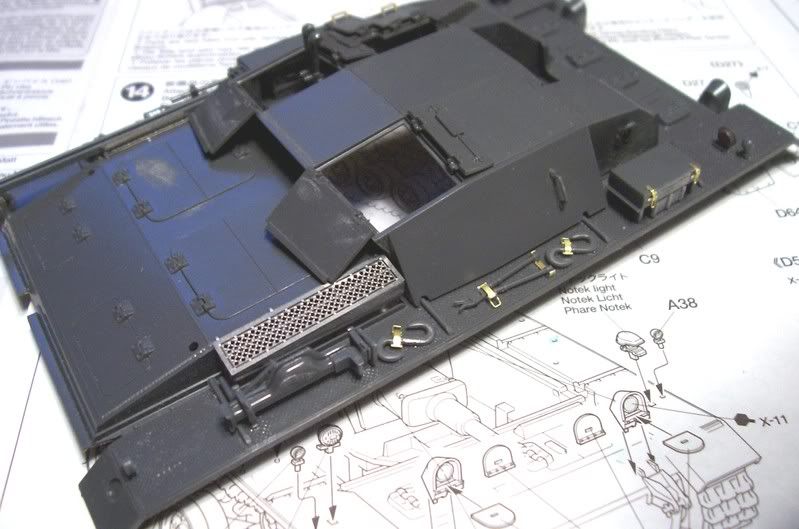
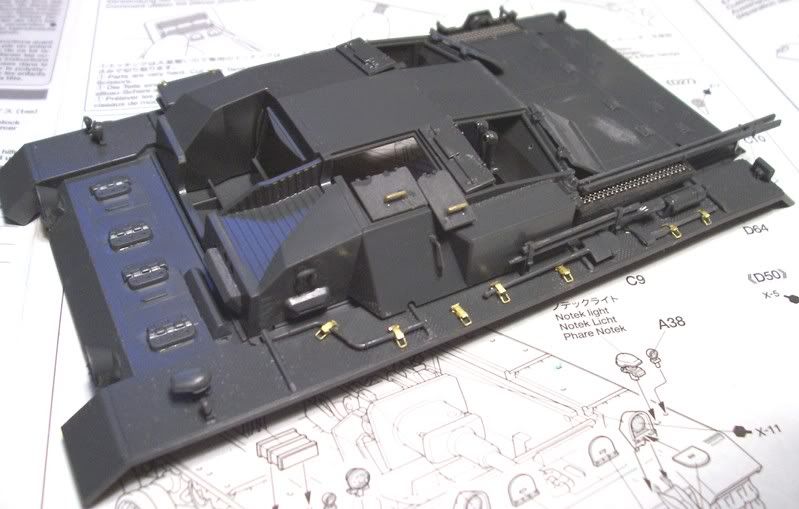
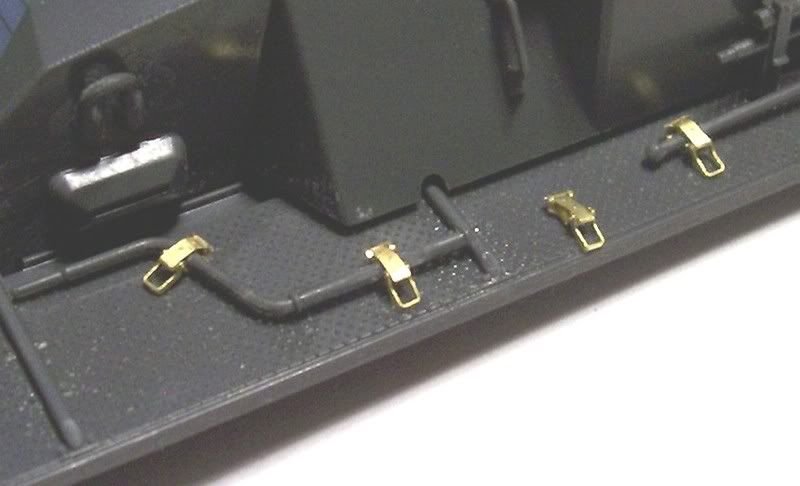
Well as far as a step by step goes i kinda failed on this one for the simple reason there is nothing much other than following the instructions to it so its just a case of cut it clean it and glue it heh, i did use the griffon clasps which are the easiest i have tried yet even my fat fumbling fingers can make them look somewhat decent, each set has early and late in 2 different sizes also clasps for tool boxes

the pe fret and instructions 
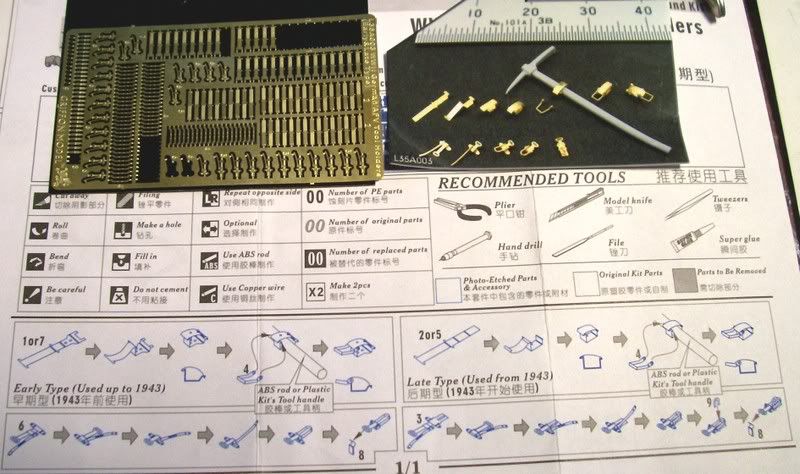
 

pic shows the size compared to my fat fingers which are more suited to an hammer than tiny pe clasps,
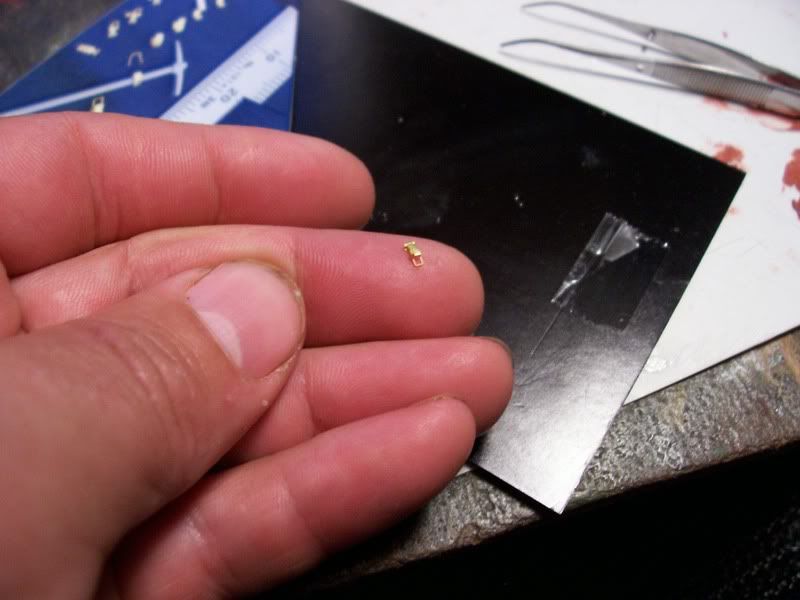
 

and how they look on
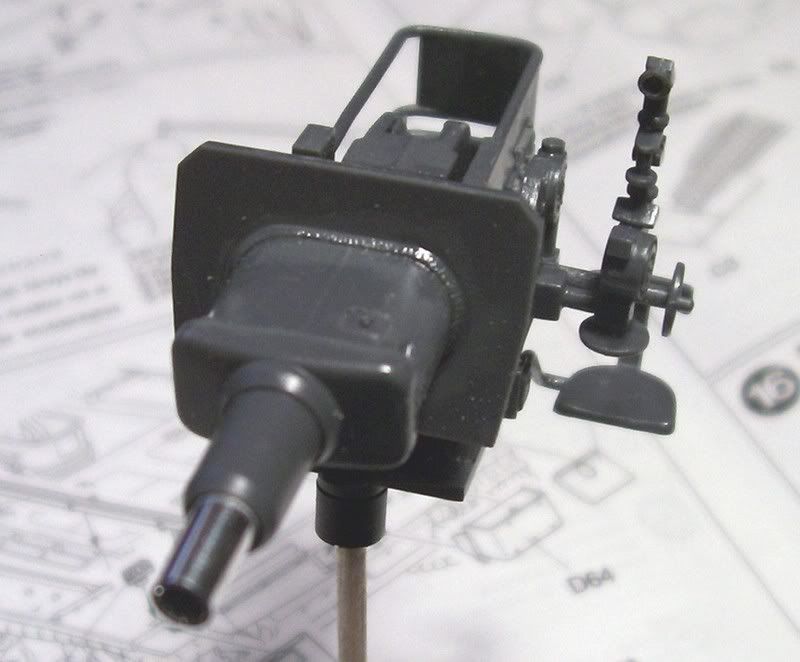
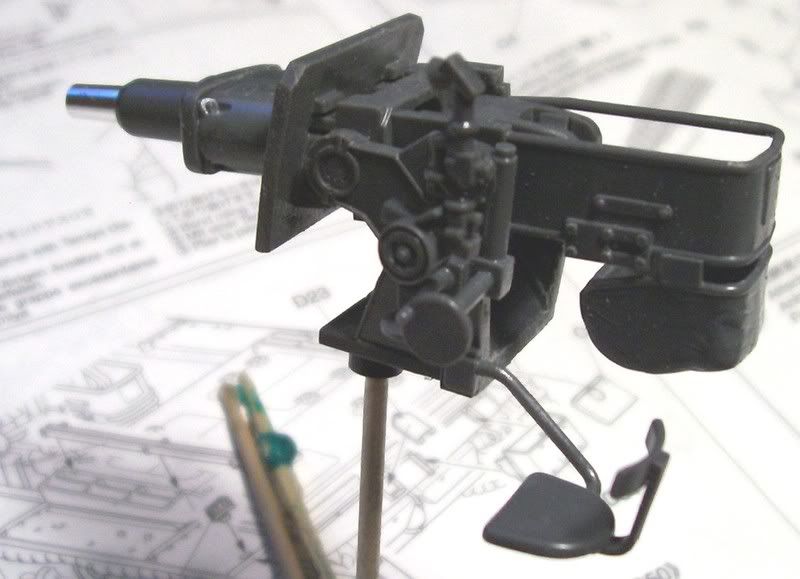
the gun assembly was painless and works very nicely and hopefully should look cool although very little will be seen even with all the hatches open
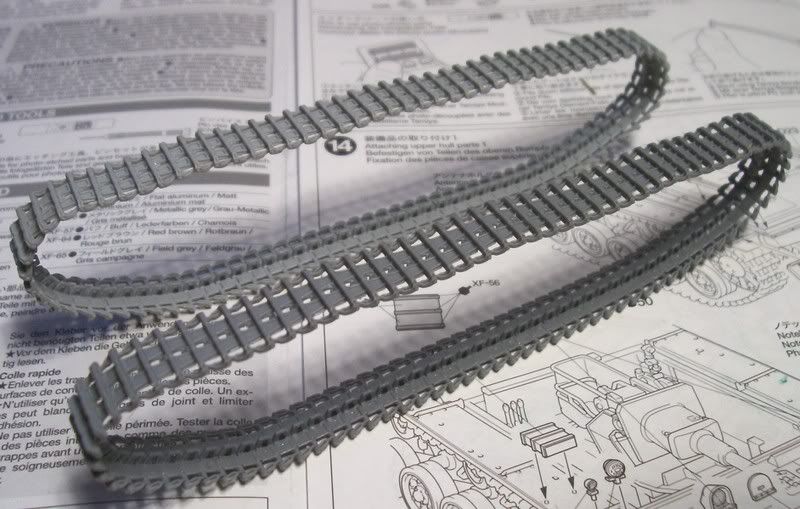
lastly the tracks off ready for paint all that remains is replacing the molded towcables Tamiya supplies the ends and some string which i will replace with wire i just need to figure out what the brackets look like.


Ron g.
  • Member since
    July 2007
Posted by dragos on Friday, May 23, 2008 6:24 PM

Manstein's revenge:

...as far as the DAK pic, the harsh lighting probably makes the tank appear darker than it actually is...

True. This reminds me of a debate on the so called "hoax" photo why there are no stars visible on the moon landing :)

  • Member since
    November 2005
Posted by Anonymous on Friday, May 23, 2008 5:04 PM

Panzer Blues...

  • Member since
    November 2005
Posted by Anonymous on Friday, May 23, 2008 4:41 PM
 dupes wrote:

Biffa - love those older builds. Don't think I've seen those before.  Thumbs Up [tup]

Looking forward to more progress on this monster!!! 

Ditto...that StuG is the cat's pajamas !!! Looks like the C version...DML?
  • Member since
    April 2005
  • From: Piscataway, NJ!
Posted by wing_nut on Friday, May 23, 2008 4:17 PM
Both of those look real nice.  I like the blackish one better and think that will look nice on the stug.

Marc  

JOIN OUR COMMUNITY!

Our community is FREE to join. To participate you must either login or register for an account.

SEARCH FORUMS
FREE NEWSLETTER
By signing up you may also receive reader surveys and occasional special offers. We do not sell, rent or trade our email lists. View our Privacy Policy.