Thanks for the votes of confidence guys. I still have a ways to go to where I'm totally comfortable with my paint but it's been a process over time for the last 4-1/2 years. My first paint job in auto modeling was nothing more than pure chance or a great mistake. Everything just went perfect. After that for a while everything was a PIA in trying to acheive the quality of that first paint job. My process is not hard at all. The changes I made over time to my current methods are:
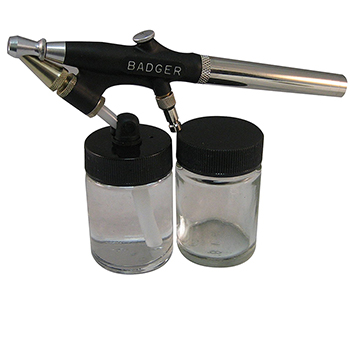
1. I use an entry level AB-Say a Badger 350. Here's the exact set up I use:

2. Those paint bottles that you see are to be kept surgically clean. That means a thorough cleaning and before you use them BLOW ANY DUST out of them using canned air or compressed air from the AB. Just make sure they don't have any dust/ debris in them.
3. I tend to use ONLY the Testor's One Coat Lacquer System in a can for all my exterior paints. That includes color and clears. For clear coats on Stock/ O.E.M. vehicles I'll just stick to an ordinary Gloss. Most of the time I build custom cars so those get Testor's Wet Look Clear Lacquer. This stuff gives PERFECT results every time when decanted(more on that in just a sec). I've had very little luck just spraying this stuff from the can due to all the dang air bubbles that comes out of the can. Every once in a while I'll stray to a Tamiya color if I can't get a particular shade I like and then I'll use a Tamiya clear over that. Different folks will use different stuff but this is what works for me.
Unless there's been a whole lot of filler putty I don't use any primer coat. For OOB bodies I'll merely clean up all the flash and seam lines and go from there.
4. This is the point in which I'll decant the color/ clear into the paint jar. BEFORE this is done though, make dang sure you've got adequate ventilation. I also make sure I've got a good dust free environment to work in. Dogs, cats and other furry creatures must be out of the room for dust AND health reasons. You can't get a paint respirator on 'em so get 'em the heck out of there. After all that I'll decant the paint into the jar. I make sure that I decant it inside the paint booth so I don't make a mess all over the place. After decanting place the lid loosely on top of the jar and wait 3-5 minutes for the air bubbles to work themselves out. After that I'm ready to start shooting paint. For car bodies it's important to be able to turn them constantly during the painting process. So here's what I use The paint stand. I bought two pipe fittings. Donn Yost (I'll send you a link on point #2 to his website) uses pipe fittings as paint stands and they work great. I bought two plastic ones but they allow a one handed ability to turn the model while painting with ease so I use plastic pipe fittings for a paint stand.
Just put tape across the top in an "X" pattern so the model won't move while on top of the fitting like so:

and then simply put the car body on top of the fixture and press down on the roof to get good adherence and you're off to the races.
Now that I've got the body on the fixture and my paint decanted, it's time to start laying some color. I'll always start by misting the color on in layers starting at the bottom of the body all the way around. In the past I've gotten what I thought was the perfect color/ gloss coat only to find out that I totally missed the lower panels of the body  and that my friends..............is a bummer!
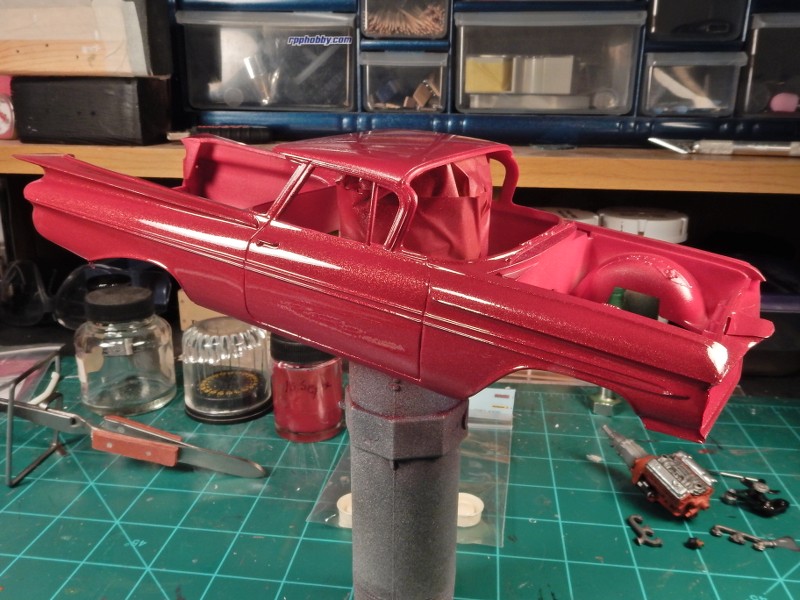
I keep misting and building paint until I get what I feel is a good coating of the color onto the body making SURE I get all the nooks and crannies. At that point I open the air brush up and get a decent wet coat going without going overboard. By overboard I mean so thick that the paint starts to run. You don't want that. If I do get a hair or big piece of dust in the paint I'll try to flick it out with my X-Acto knife. If it's being stubborn to get out....I leave it in the paint. Don't worry, it's easier to wet sand out than it is to bolloch up a paint job trying to get it out while the paint is still wet. After I get my color coat on to my liking I put it in an enclosed spot and LEAVE IT ALONE for 2-3 days and don't jack with it at all.
The results are like below and this is just the color coat.

It's after the 2-3 days gas out time that I'll spot any debris/ dust or whatever in the paint and 99.9% of the time I can wet sand it out of the color coat.
5. After this comes the clear coat. For this car I used Testor's Wet Look Lacquer decanted into a paint jar. Wet Look has a NASTY habit of foaming/ bubbling right out of the can and will surely ruin a color coat if sprayed from the can. The same thing, however, holds true with the decanting method. I just decant it into the paint jar and wait 3-5 minutes for all the air bubbles to disappear. I use the same process for the clear as I did the color coat for applying it to the model. I apply mist coats starting from the bottom of the body and working my way around-KEEPING THE BODY MOVING around as I coat. Again when its fairly well covered in a base mist coat open the AB up and I start with my wet coat while keeping the body moving round and round. Hair, dust strand or debris can be picked out with the X-Acto knife but again.......if the piece is going to be stubborn then WAIT til it's dry.When I'm satisfied with my coat I put it into the "dust free zone" in my drying chamber and then I don't touch it for 3 days.
It's after this process that I'll start my wet sanding and polishing process as mentioned in the above post to bring it out to an even higher shine.
And that's the whole process in a nut shell folks. Hopefully this has been helpful to you guys.