SEARCH FINESCALE.COM

Enter keywords or a search phrase below:

1966 Beetle Rallye Car

8639 views
69 replies
1 rating 2 rating 3 rating 4 rating 5 rating
  • Member since
    July 2015
Posted by MR TOM SCHRY on Tuesday, February 15, 2022 4:53 PM

Great progress and beautiful color choice!

TJS

TJS

  • Member since
    December 2008
  • From: UK
Posted by PatW on Tuesday, February 15, 2022 4:30 PM

Super Job! our family had five Beetles over about 15 years.

Remember , common sense is not common.

  • Member since
    February 2022
Posted by TechEd29 on Monday, February 14, 2022 7:09 PM

Here's my next challenge:

...tomorrow, maybe.Sleep

  • Member since
    February 2022
Posted by TechEd29 on Monday, February 14, 2022 7:04 PM

Practice spoon & front hood - Wet 4000 > 6000 > 8000 > 12000 > 2x Novus 2:

So far so good... Geeked

  • Member since
    February 2022
Posted by TechEd29 on Monday, February 14, 2022 3:46 PM

I decided to use automotive lacquer from Paint Scratch again. I ordered Volkswagen Sea Blue L360; the colour of my first Beetle. Instead of using their 2-stage base & clear as on the Type 2 Pinball Van, I got their single stage in hopes for less spray booth time. As before, the instructions stated that wet sanding and polishing would be necessary for a gloss finish.

As usual, getting my Michigan winter garage up to temperature for airbrushing was problematic, and the final coat settled with the same level of orange peel as on the van. Under interior lighting, the shade is also a bit darker than I remember. Apparently, VW Sea Blue is notorious for having a myriad of different supplier formulas for 1:1, but does look a lot closer to what I remember as a 16-year old when it's under sunlight.

Following are WIP shots as of today's date.

Chassis/Interior module with detail enhancements. Camber compensator installed along with fabbed Bursch 60's Porsche style exhaust:

Chassis/Interior module showing fabbed co-driver's footrest and race harness mounting plates. The floor mats are band-aid fabric painted semi-gloss black... a great hack becasue they're self adhesive.  

Fabbed and added a diesel locomotive horn as well as the cardboard luggage compartment and interior instrument panel wiring covers:

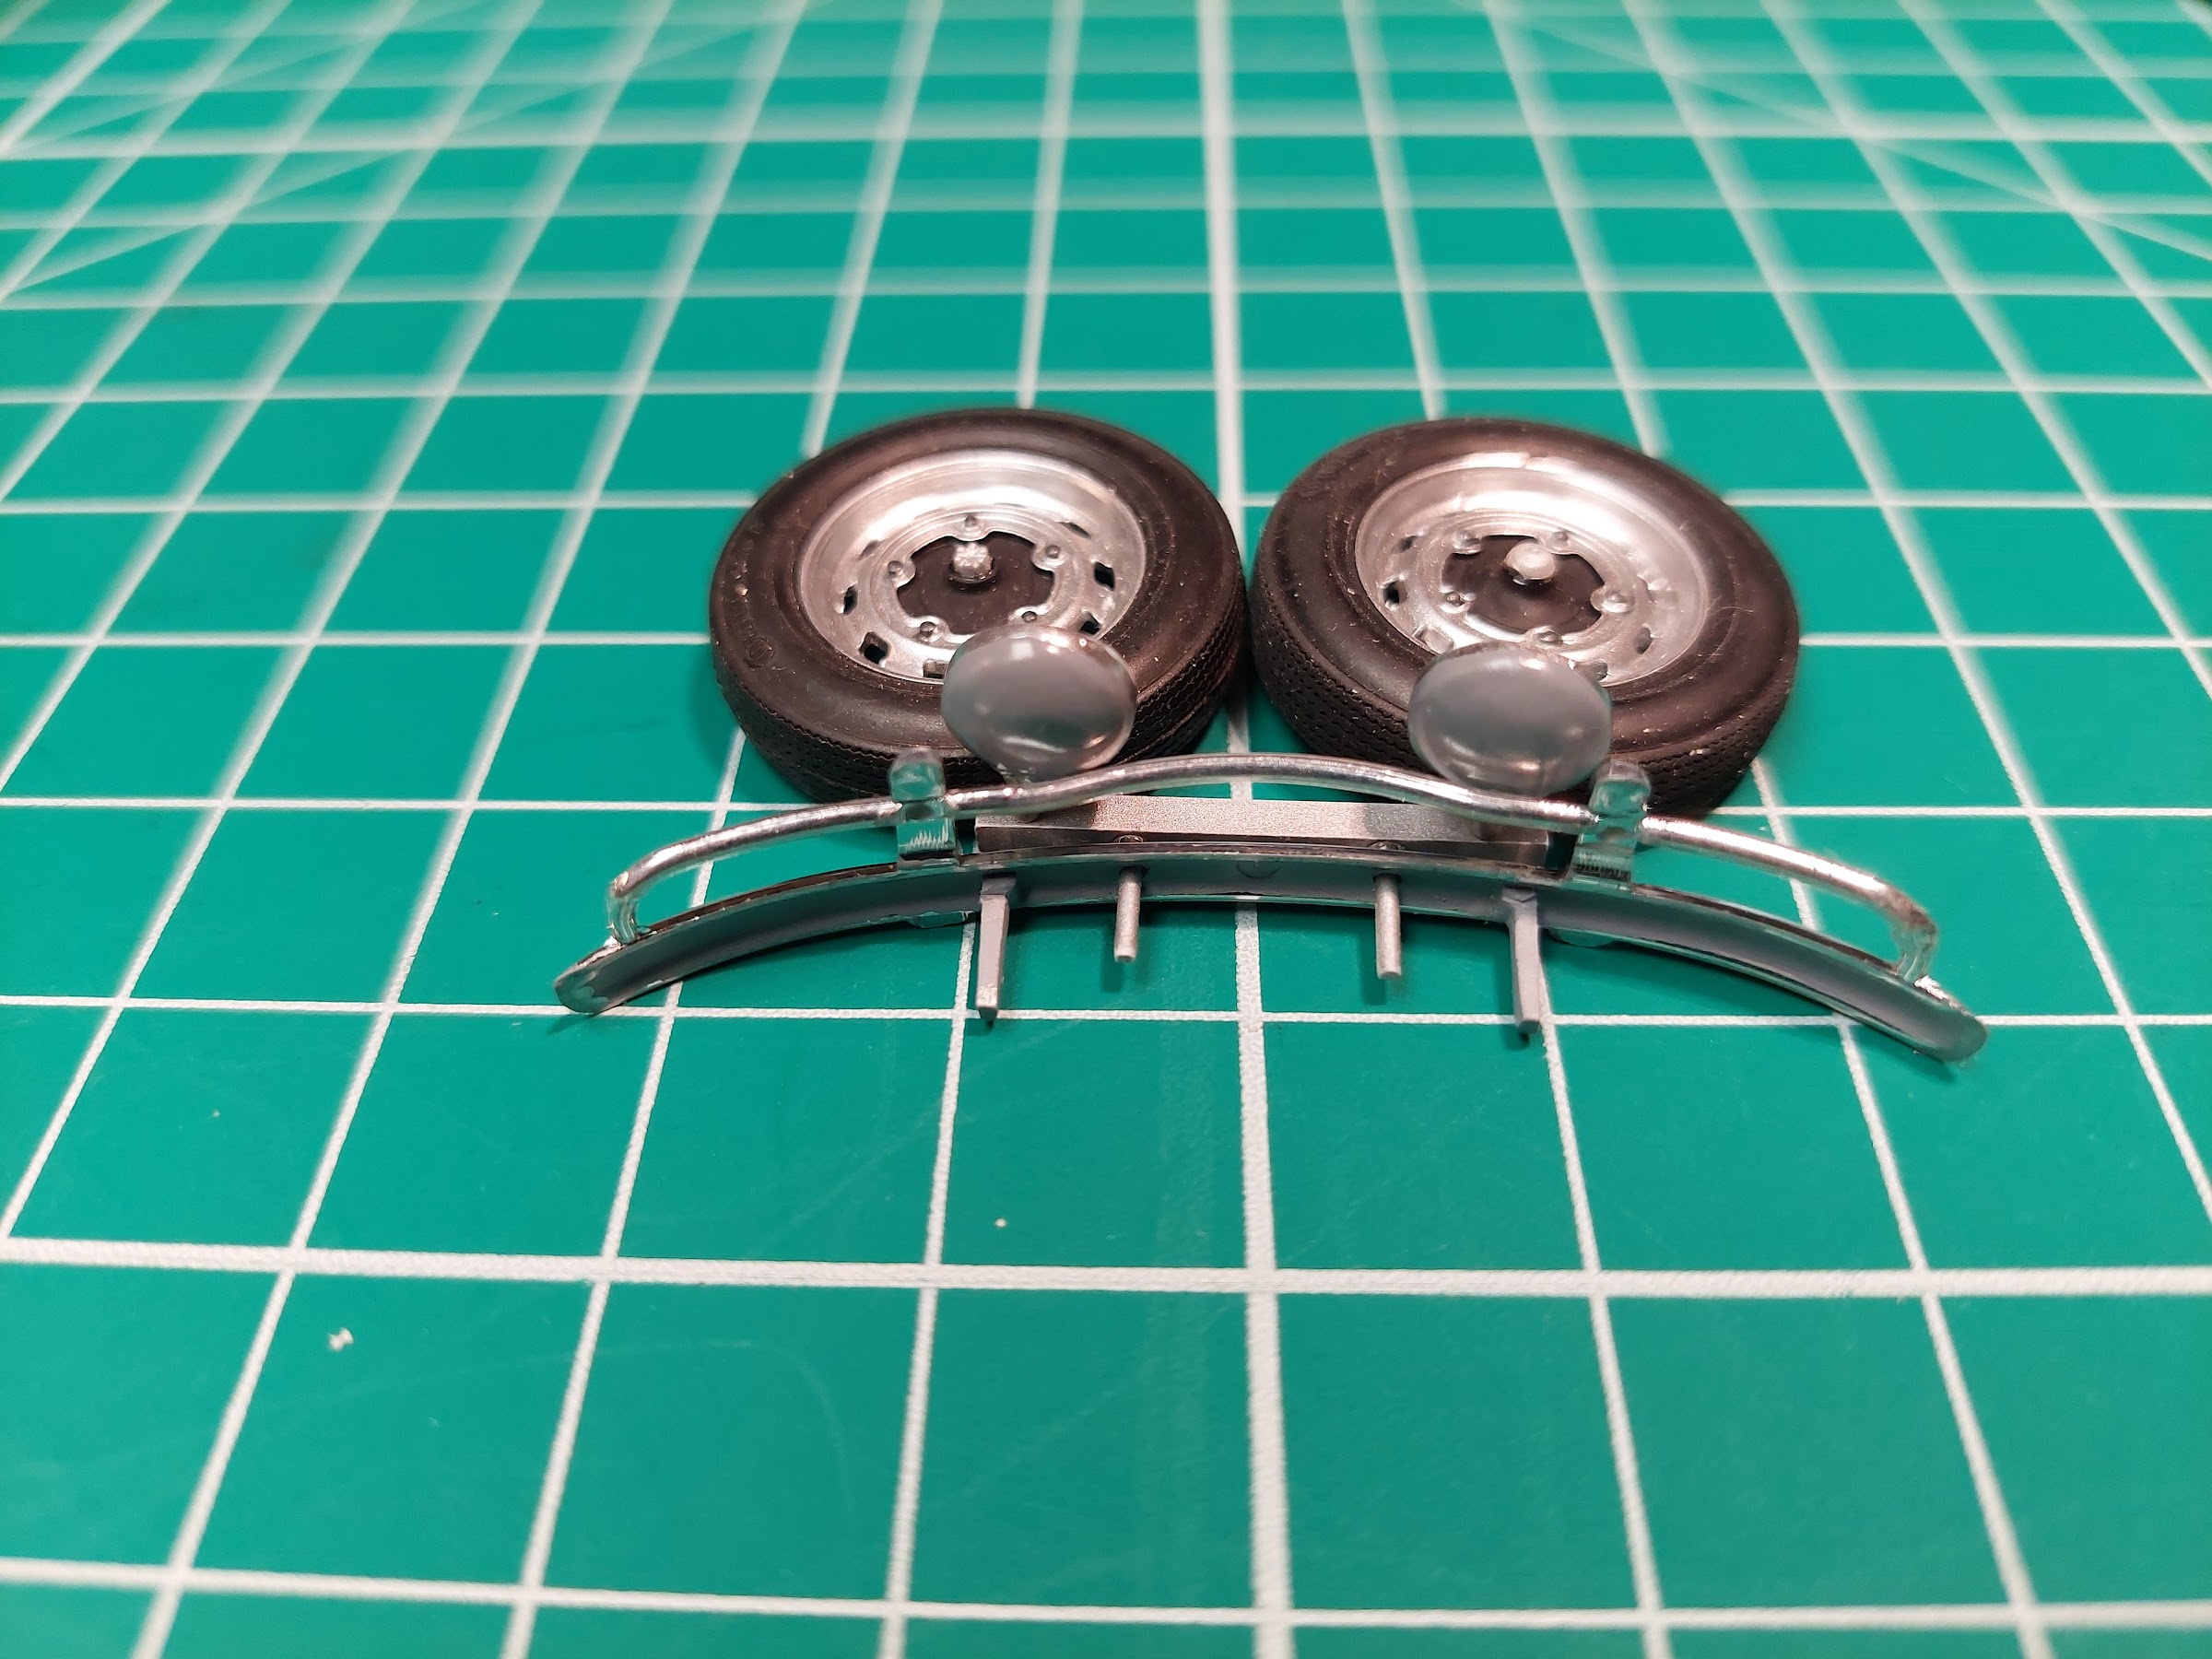
Auxiliary lights mounted, wheels detailed:

Mockup. Body ready for wet sanding and polishing adventures... lot's of curved surfaces and raised details to preserve:

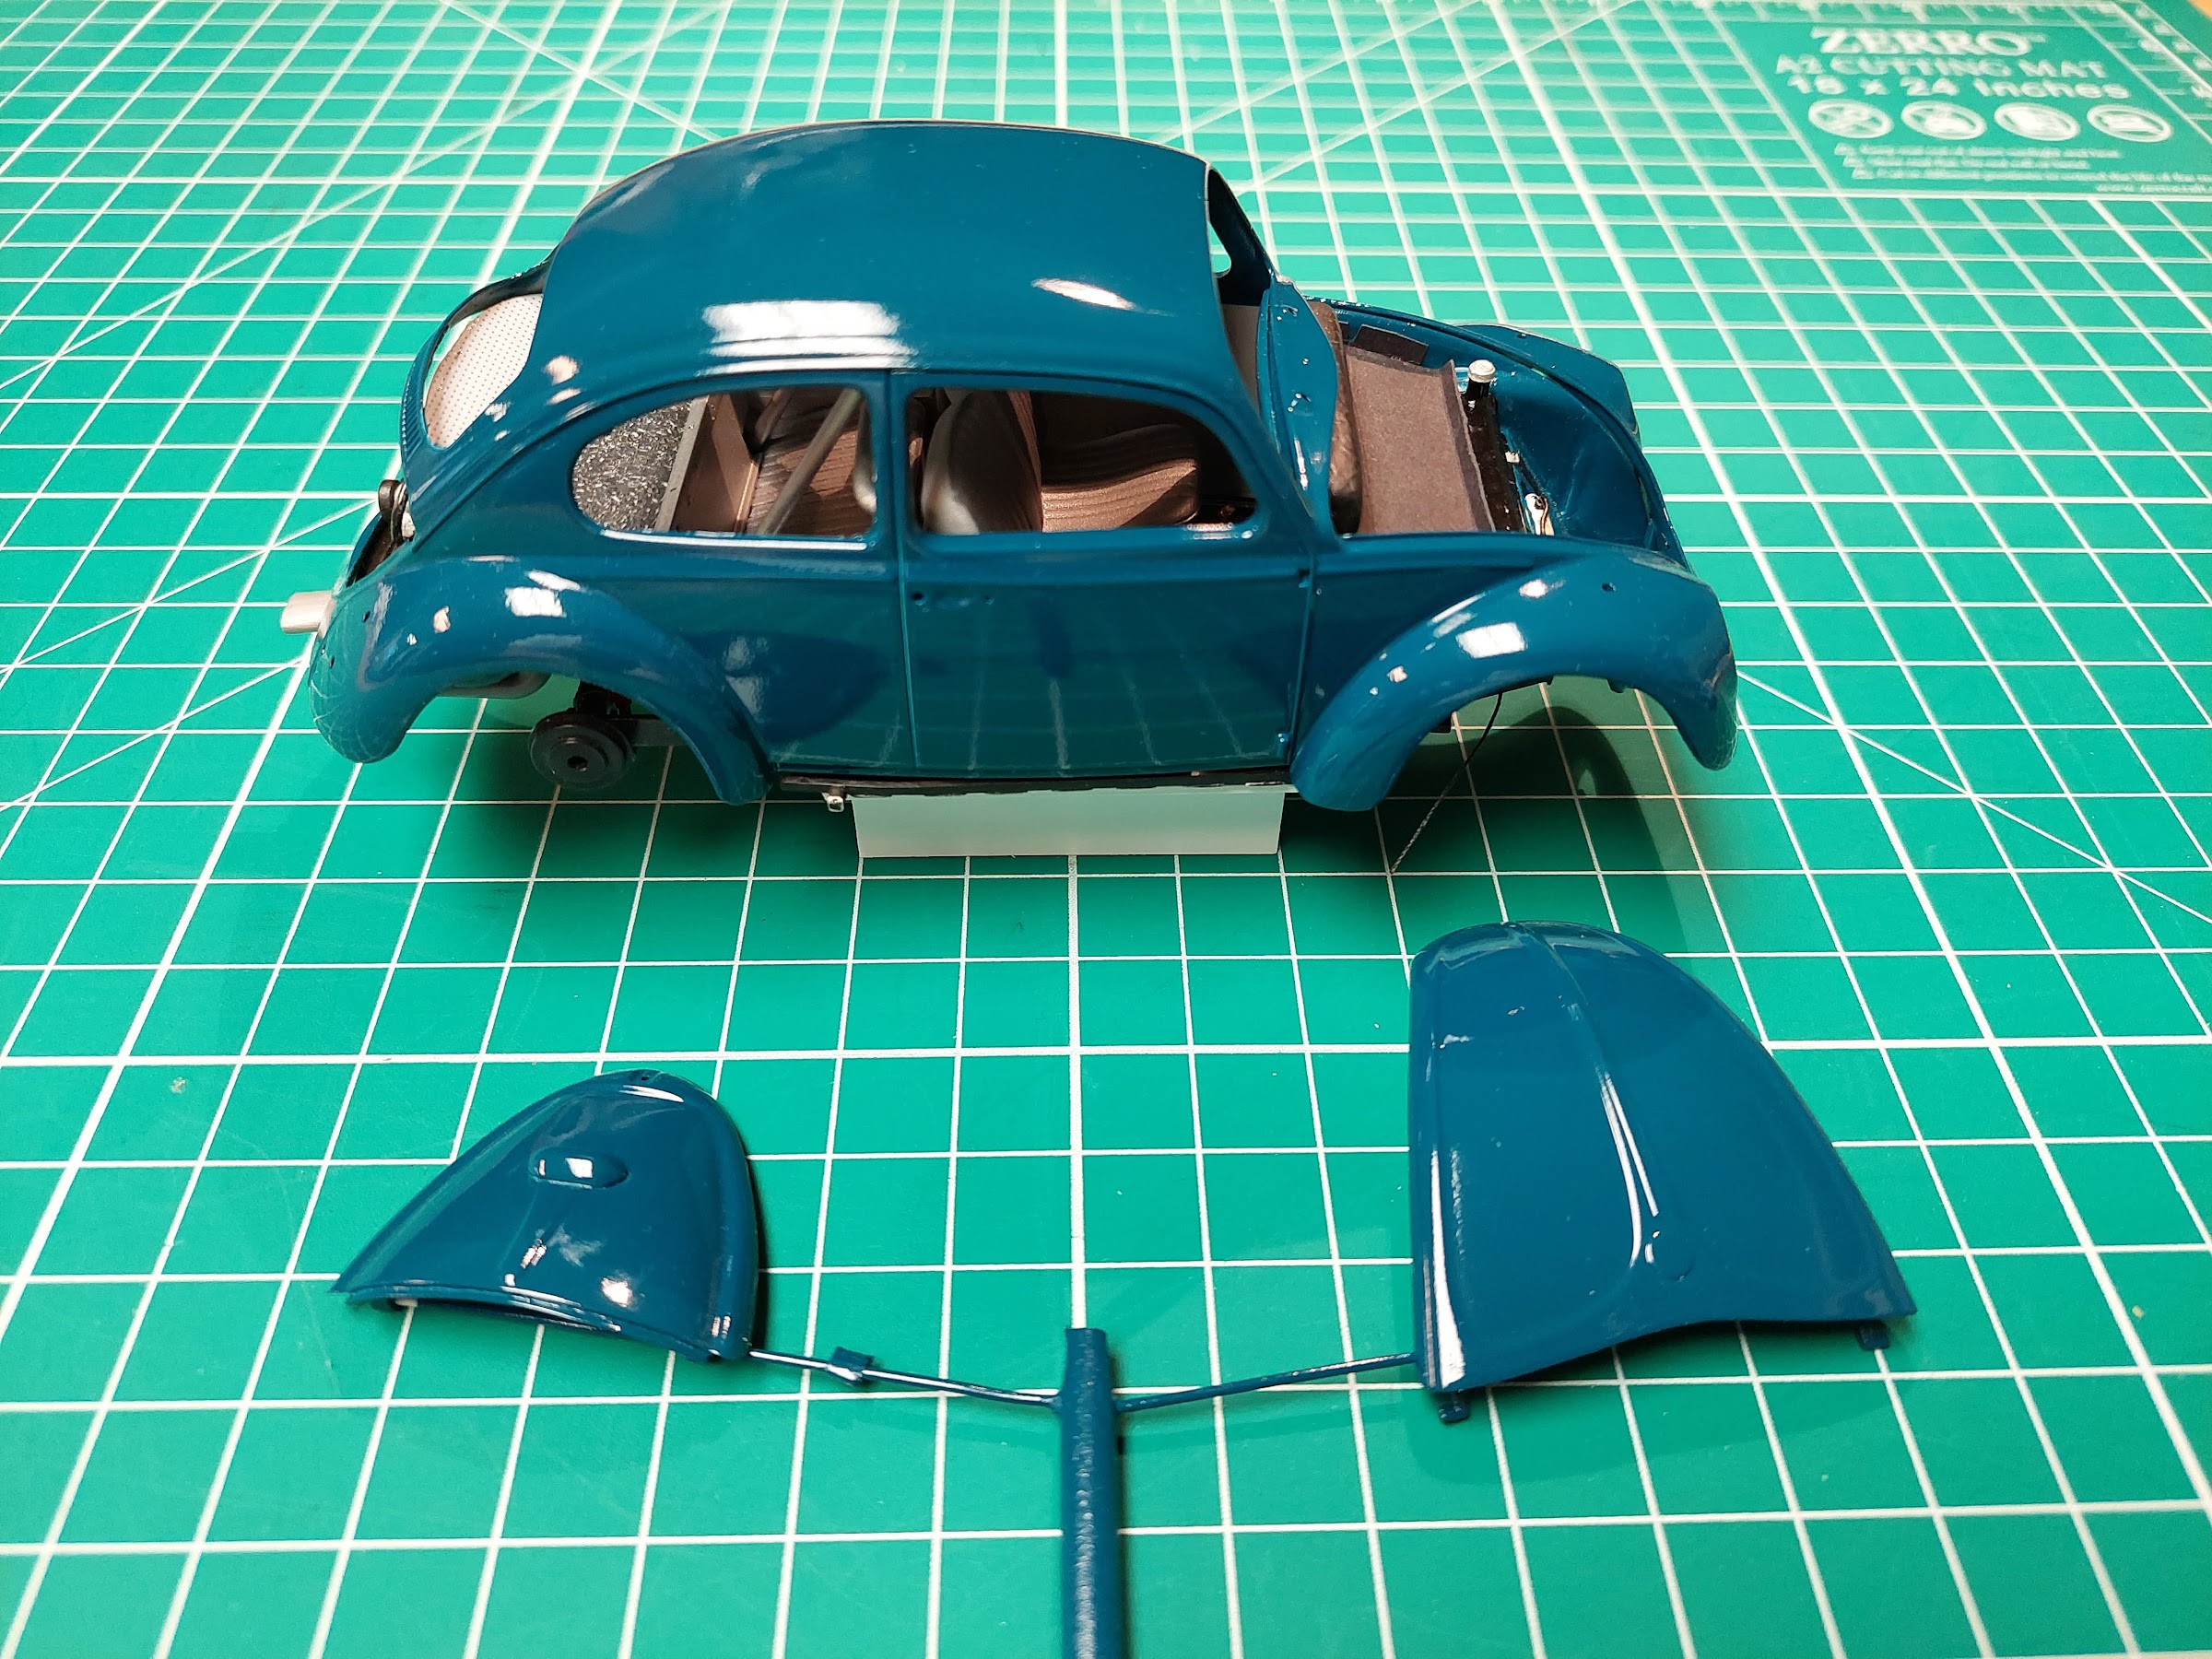
More to come.

  • Member since
    February 2022
Posted by TechEd29 on Friday, February 11, 2022 1:11 PM

As we're on the subject of lights, A Rally Car needs a good pair of high power auxiliary lights. In the 60s, this usually meant one 100W spotlight and one 100W driving light (with a spread beam pattern). I decided to make my own from a set of Beetle headlights that I was not using (my Drag Beetle project has a tilt front end that does not include lights):

Messy workspace showing test fitment of the auxiliary light bracket on the front bumper, and the rear interior tub where I had started on the roll bar and interior detailing:

The rear interior module is modified to eventually accept the spare tire; rear seat removed with lateral brace added. The roll bar is made from soft aluminum tube that I shaped with one of those craft store pin benders for jewellry etc. I created the unique VW headliner by arranging as series of dots in a grid in a Word document. After many tries at rearranging size of the grid and dots and downscaling, I think I nailed it. It's printed on white decal paper:

Ready to move on to body paint.

More to come.

  • Member since
    July 2015
Posted by MR TOM SCHRY on Friday, February 11, 2022 1:04 PM

Great idea for your build!  Love the old VW Beetles so I'll be following closely.

TJS

TJS

  • Member since
    February 2022
Posted by TechEd29 on Friday, February 11, 2022 12:32 PM

While Tamiya is one of the best when it comes to technical accuracy, I wonder why they goofed on the Beetle's front axle.

When the axle beams on 1966 models changed from king/link pins to ball joints, the tower for the upper shock absorber mounting bolt/nut changed from horizontal to vertical. The axle from the kit represents the earlier design (pre 66). Whats also strange is that Tamiya added two additional frame head braces between the torsion tubes (the heavy vertical braces), with the center pair being too close together; note where they are supposed to bolt onto the tabs at the frame head. As the axle was essentially correct for my 64 model, I decided to overlook the goofs.

During body to frame mockups, I saw that the wheel gap in the front fenders was too high. I raised the beam by opening up the slot in the frame head and adding some locating pins (note the fabbed brake lines with frame bracket):

I'm guilty of going overboard sometimes, but as Tamiya did a great job with the headlights, I thought they deserved enhancing. I whittled down bits of clear sprue for the small running lights at the bottom of the headlight enclosures:

More to come.


  • Member since
    February 2022
Posted by TechEd29 on Wednesday, February 9, 2022 2:23 PM

I filed-down the riduculously thick bumper brackets as much as I could without resorting to cutting and replacing with styrene stock. I also added the upper bumper overrider brackets that Tamiya elected not to render in order to keep build complexity reasonable:

More to come.

  • Member since
    February 2022
Posted by TechEd29 on Wednesday, February 9, 2022 2:04 PM

I had already finished the engine and transmission module before I put everything away. All it needed was to add the reinforcement tabs for the heat exchangers, enhance the weathering and beef up the swing axle tubes to scale:

As this is a 60's VW Rally Car, I fabricated a rear suspension "camber compensator". This was a popular VW aftermarket device that controled swing axle tuck-in to improve handling back in the day:

More to come.

  • Member since
    February 2022
1966 Beetle Rallye Car
Posted by TechEd29 on Tuesday, February 8, 2022 6:13 PM
Most of my builds of late have been personal in nature. This one is no exception. I wanted to build my first car; a Sea Blue 1964 Beetle that was a trade-in at the Canadian VW dealer where my father worked (and where years later I would start as an apprentice). I was sixteen at the time, and it got me to school and work later on. I loved it.
 
So, about fifteen years ago I picked up the Tamiya 1966 Beetle kit and started an enhanced stock build that progressed through a completed engine and chassis... about halfway done. In the meantime, increased work travel and other issues meant that the whole shebang and other kits I had started got boxed up put away. familar story, I'm sure.
 
Here’s where the fate takes its usual wacky turn. As things at work settled down, and retirement loomed on the horizon, I reopened the box with the half-built Beetle and kinda stared at the bits for a while. That morning I had talked with my brother on the phone about the “good ‘ole days”. In particular how, instead of selling my Beetle after a few years to turn a profit, we had planned to prepare it as a Rally Car to do local CASC Ontario Region events. My father strictly forbade us to do it, and, well, it’s that car that I’m building now.
 
Here's the inspiration:
 
The bits as they came out of the box:
 
More to come.
 
Cheers,
 
Juergen

JOIN OUR COMMUNITY!

Our community is FREE to join. To participate you must either login or register for an account.

SEARCH FORUMS
FREE NEWSLETTER
By signing up you may also receive reader surveys and occasional special offers. We do not sell, rent or trade our email lists. View our Privacy Policy.