SEARCH FINESCALE.COM

Enter keywords or a search phrase below:

1/32 Gee Bee R-2 - COMPLETED 12/24

11791 views
38 replies
1 rating 2 rating 3 rating 4 rating 5 rating
  • Member since
    September 2013
Posted by DeafAviator on Wednesday, November 13, 2013 1:28 PM

Hey guys! Now that I finished that Huey, my focus has shifted back to this fat little bird. Made a good chunk of progress over the past couple days on this. 

Bought a soldering iron and started teaching myself how to solder in order to do the wiring on the motor, and I learned that you can solder more than just wires - so I ripped apart the crappy little smash job I did on extending the prop shaft and re-did the whole thing by soldering tube & rod together to make a pretty nice little shaft extension. Okay so it looks a little mickey-moused, but it works really well and is pretty balanced and straight!

Next step was to come up with a mounting solution... which was accomplished with some foam core board...

With some more tweaking, here's the end-result of the silly-looking soldering attempt on my shaft extension, equally silly-looking engine mount, the engine with a brass rod lining for the shaft, all put together! (dry fit only at this stage). The mount will be installed just before closing up the fuselage, using epoxy.

Hole for the wires made with files - angled for a sleek exit of the wires. Fits my two wires like a glove!

Preliminary look at my "rough draft" of the base/diorama. Just going to do a very basic hangar wall - possibly with a door but I am not sure on that yet. Still trying to figure out how I will set up the switch/wiring at this point... but you can just barely see the wires behind the rudder.

I've come up with the solution for placement of the motor switch - I am going to install an electrical safety switch box with the plane's motor switch disguised as the electrical box's power switch.  Sort of like this one:

So here's what I came up with...

I know, I know... not exactly accurate for 1930's but I had to come up with something, and wanting to be creative, that's my best idea.

As for the wiring, which I have not started yet, what I think I am going to do is drill a hole through the base directly below the rudder of the aircraft, run the wires down, then through a channel to a battery box behind the hangar wall, then up to the electrical box. This way the only sign of wiring is about 1/8th of an inch or less directly underneath the rudder - however I am thinking of doing a grass layout, so I will probably just add a touch of tall grass around the wires to conceal them.

'Til next time, gents!
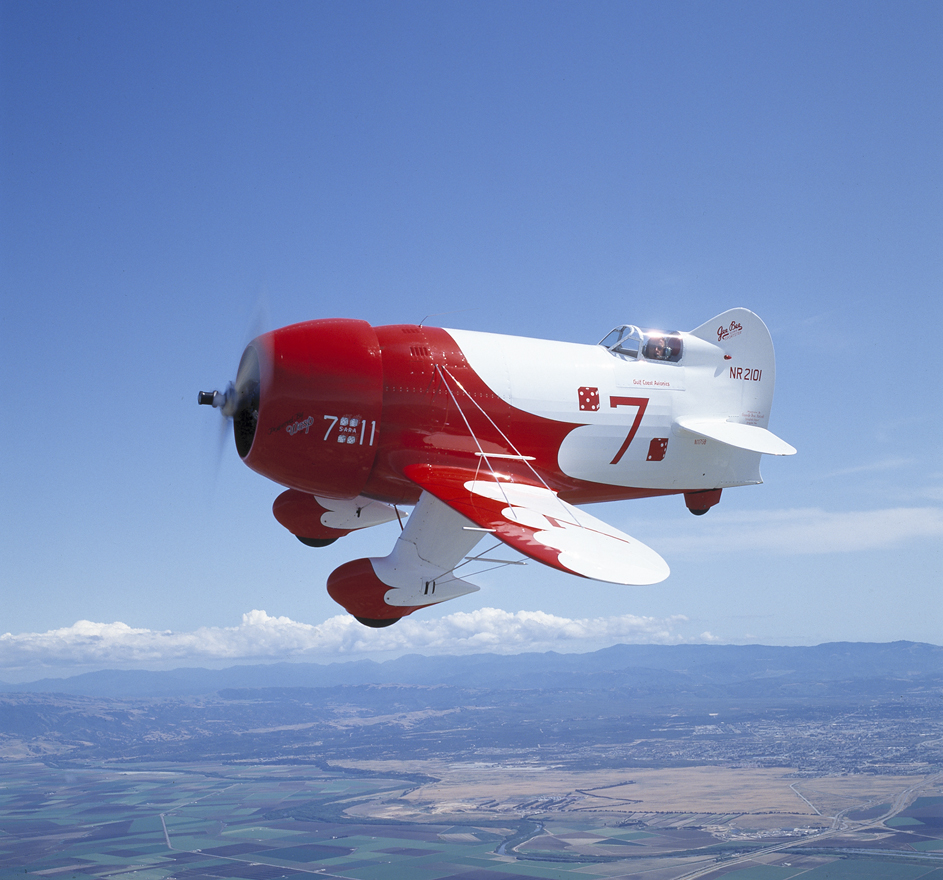

Todd Barker - Colorado Springs, CO

Current Projects:

  • 1/48 Beechcraft Bonanza - N51HM (Commission)
  • 1/48 B-25 Mitchell - Back Burner/Scheme TBD
  • Member since
    September 2013
Posted by DeafAviator on Thursday, October 10, 2013 9:32 AM
Would like to see that Z.

Duster, the more I think about it, I think I'm just gonna tweak the tabs and sand it flush.

Todd Barker - Colorado Springs, CO

Current Projects:

  • 1/48 Beechcraft Bonanza - N51HM (Commission)
  • 1/48 B-25 Mitchell - Back Burner/Scheme TBD
  • Member since
    August 2007
  • From: back country of SO-CAL, at the birth place of Naval Aviation
Posted by DUSTER on Wednesday, October 9, 2013 11:49 PM

DeafAviator

Wings fit pretty good - theres a little bit of an offset so I may end up chopping off the locating tabs and installing them flush. Not sure I want to do that though as that would mean much weaker wing roots. I may try carving away part of the tab instead. Anyways - starting to resemble something like a Gee Bee but the real prize will be when the cockpit and engine is installed and the two halves come together.

That would be your best bet, if possible, to make the stronger joint .

Another technique is to drill two holes in each wing root and wing,  insert brass tube or heavy gage copper wire to act as the support,  in place of the now missing tab. 

Steve

Building the perfect model---just not quite yet  Confused

  • Member since
    January 2005
  • From: Cave City, KY
Posted by Watchmann on Wednesday, October 9, 2013 1:57 PM

I've got their Gee Bee Z partially complete.  I'm gonna have to redo my engine after seeing yours. :)

  • Member since
    September 2013
Posted by DeafAviator on Wednesday, October 9, 2013 1:15 PM
Thanks guys!

The kit is Williams Brothers. Not a bad little kit at all! Worst issues, to me, are rough/out of scale panel lines, no instrument panel detail (single black/white decal, and a couple of sink marks. Not bad for what I think is a limited run kit.

Todd Barker - Colorado Springs, CO

Current Projects:

  • 1/48 Beechcraft Bonanza - N51HM (Commission)
  • 1/48 B-25 Mitchell - Back Burner/Scheme TBD
  • Member since
    January 2005
  • From: Cave City, KY
Posted by Watchmann on Wednesday, October 9, 2013 12:27 PM

Who makes this kit, DA?

  • Member since
    November 2009
  • From: Twin Cities of Minnesota
Posted by Don Stauffer on Wednesday, October 9, 2013 8:50 AM

Looking great!

Don Stauffer in Minnesota

  • Member since
    May 2004
  • From: Mount Bretherton Model Aircraft Observatory
Posted by f8sader on Tuesday, October 8, 2013 11:57 PM

Great work on the engine!  

Lon-ski

  • Member since
    January 2005
  • From: Cave City, KY
Posted by Watchmann on Tuesday, October 8, 2013 5:58 PM

Nice!

  • Member since
    September 2013
1/32 Gee Bee R-2 - COMPLETED 12/24
Posted by DeafAviator on Tuesday, October 8, 2013 3:52 PM

Made a little bit of progress today. Been stuck on trying to solve the issue of getting the engine mounted and figuring out where to put the battery box with the on/off switch. After several hours of trying different things, I finally got the electric motor shaft extended through the engine block and spacer and ready to mount - I think... Whistling

It's not a great job but I believe it will do. At least it is functional and seems to be stable. Now the real issue is solving where/how to mount the battery box (Too big to keep everything in the fuselage and no way to change the batteries if I did that). I am thinking about doing a diorama base of the aircraft sitting on a patch of grass with the battery box hidden behind the aircraft "underground" with just the switch exposed, and the wires, probably exiting the fuselage at the tail near the ground, hidden by tall grass at the tail. Will need to make sure the box is still somehow accessible to change out the batteries. 

Also did a little bit more work on getting the panels filled in to correct them from an R-1 model to an R-2. This is my first experience here with Mr. Surfacer - great stuff! 

And test fitting the wings/stabs

Wings fit pretty good - theres a little bit of an offset so I may end up chopping off the locating tabs and installing them flush. Not sure I want to do that though as that would mean much weaker wing roots. I may try carving away part of the tab instead. Anyways - starting to resemble something like a Gee Bee but the real prize will be when the cockpit and engine is installed and the two halves come together.


Todd Barker - Colorado Springs, CO

Current Projects:

  • 1/48 Beechcraft Bonanza - N51HM (Commission)
  • 1/48 B-25 Mitchell - Back Burner/Scheme TBD
JOIN OUR COMMUNITY!

Our community is FREE to join. To participate you must either login or register for an account.

SEARCH FORUMS
FREE NEWSLETTER
By signing up you may also receive reader surveys and occasional special offers. We do not sell, rent or trade our email lists. View our Privacy Policy.