I have received many requests on how I am doing the fiber optic lighting on my 1/350 USS Carl Vinson aircraft carrier. This is a step by step on installing the fiber optic lines. This can be done on any model. The first step is to drill a hole where you want the light to be. I am using 0.5 mm optic lines. The holes are drilled with a 0.5mm drill bit and are at a 45* angle so the lines will be flush to the surface on the bottom side.


The next step is to bend the fiber optic line at a 45* angle with a pair of round tip needle nose pliers. You will need to bend the lines first. If you install the line without pre-bending they will not sit flat to the surface. You want the line to stick up around .2" above the surface on the light side. This is done so that the surface can be painted and weathered first. Once the surface is painted/weathered the fiber(s) can be trimmed flush.


To install the line, first make sure the line slides into the hole easily. The lines are glued in using acrylic gel medium. Do not use Cryo/superglue. The superglue is too stiff and causes the fiber optic line to become extremely brittle and crack easily. The acrylic gel dries clear and has some flex to it. This allows you to route/move the lines to the LED source without applying stress to the lines. I dip the entire end of the fiber into the gel and insert it into the hole. I then use a toothpick to make a nice fillet around the hole for strain relief. Finally a piece of tape to hold the line down into position until the gel cures.


Here is the acrylic gel medium I use. It is available and many local arts/crafts stores.


Here is a picture of the lines after the acrylic gel has cured:


The lines are then placed in a bundle taped and trimmed flush. A piece of 7mm shrink sleeving is cut and a 5mm LED is inserted into the sleeving. The fiber optic bundle is inserted into the other side flush to the top of the LED. The sleeving is then shrunk. NOTE: be very careful and apply heat quickly to shrink the sleeving. If you hold the heat gun too long you risk melting the fiber optic lines.


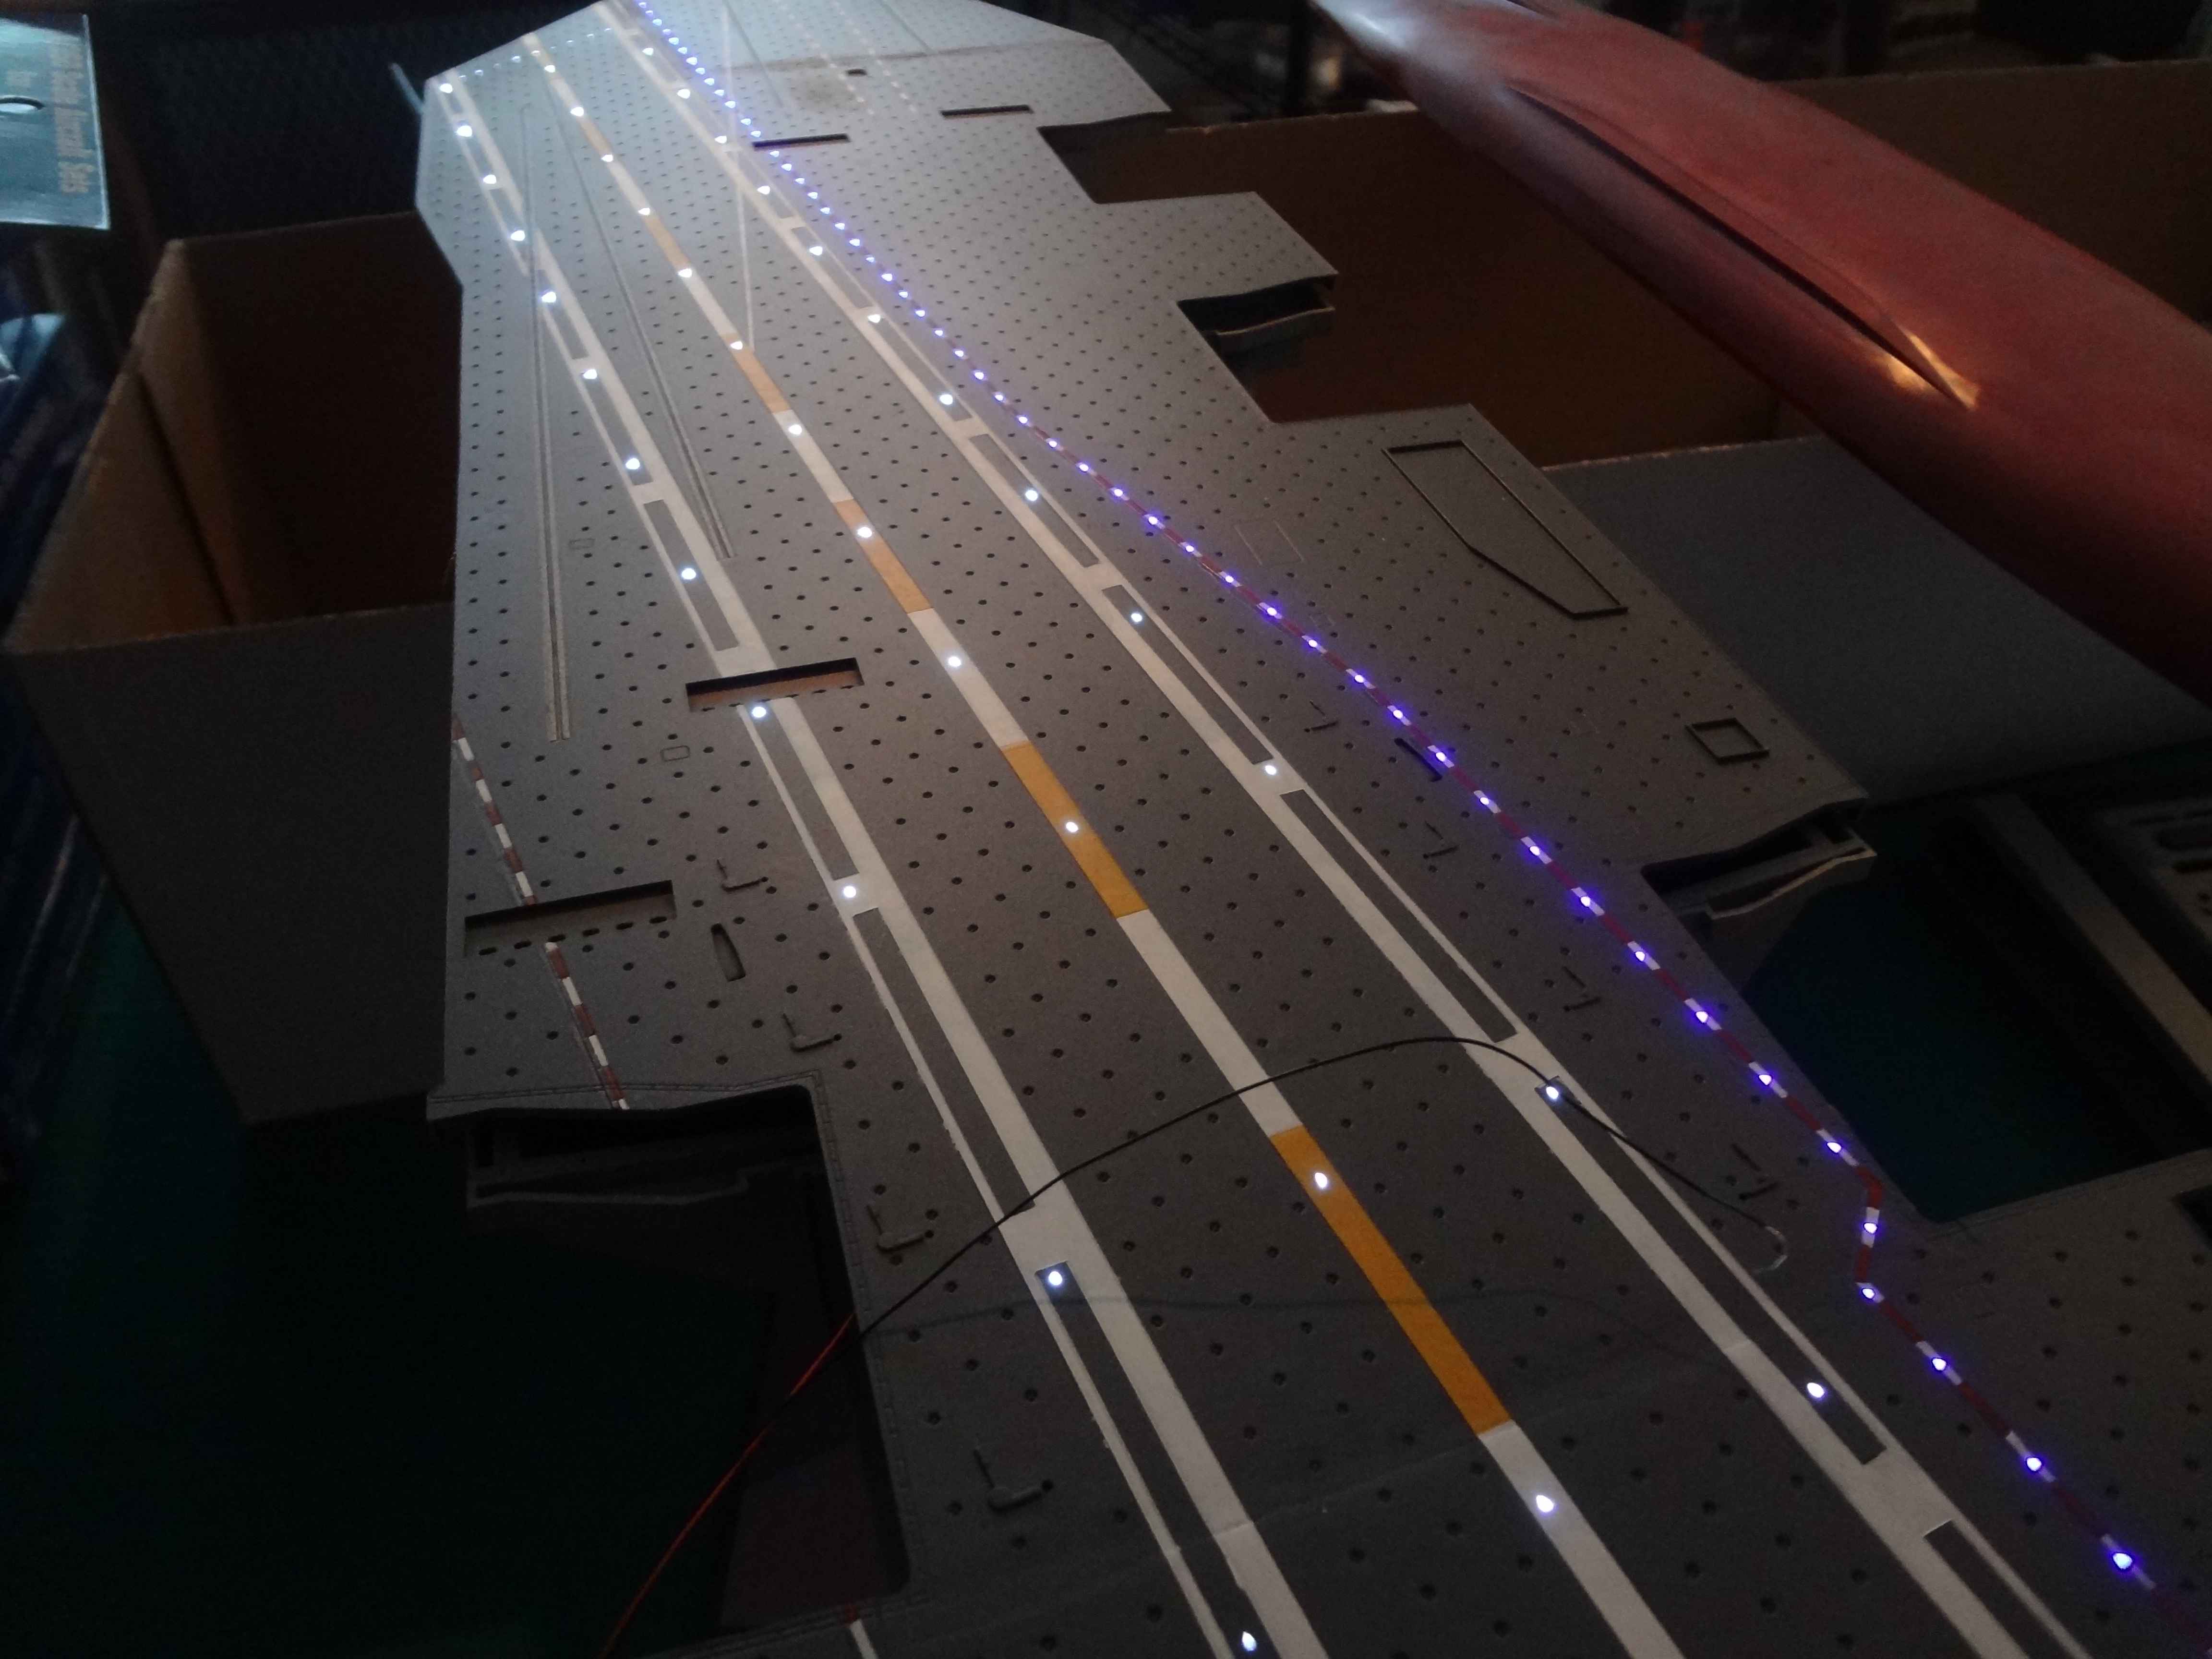
Finally apply power to the LED and admire your results. Here is a picture of the flight deck runway and foul line. This is over 250 feet of fiber optic lines and 4 LED's (1 blue and 3 white) In the picture I have not trimmed the lines flush since the deck still needs to be painted and weathered. Also due to the camera and light levels, the optic lights appear much brighter then actual.


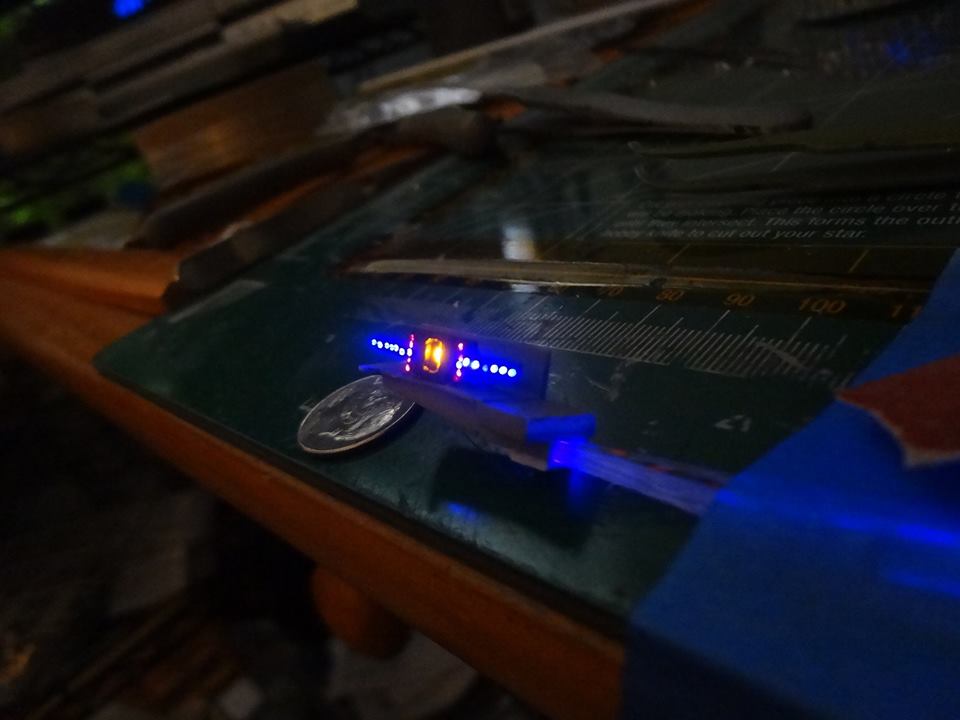
To show an example on using fiber optics and a micro LED, Here is the frensel lights for the carrier I made:


I bought all my LED's from: http://www.modeltrainsoftware.com/ledlights1.html
All fiber optic lines were from: http://thefiberopticstore.com/
They have many sizes from 0.25mm up to 3.0mm
I hope this information will help you if you want to illuminate your model.
I am still learning tips and tricks for lighting, I will answer any questions that I can.
UPDATE: 05/28/2020- I linked the photos from another source. The previous one went away and so did the photos. Since I originally posted this I completed the ship.
https://davidsscalemodels.com/gallery/uss-carl-vinson-project/
I also created a "How To" CD with more detailed info including how to wire it all up for Flagship Models. You can get the CD at https://flagshipmodels.com/collections/how-to-cds-and-photo-albums/products/how-to-cd-lighting-ship-models-by-dave-kopielski
Please feel free to contact me thru my website at https://davidsscalemodels.com/