SEARCH FINESCALE.COM

Enter keywords or a search phrase below:

Special Hobby CH-37 done

4137 views
6 replies
1 rating 2 rating 3 rating 4 rating 5 rating
  • Member since
    January 2009
  • From: hamburg michigan
Posted by fermis on Monday, November 2, 2009 2:00 PM

 Very nice build. Can't say that I've evr seen one built up!

 Such an ugly bird, you have to love it!!!

 Nicely done!!!


    FERMIS

  • Member since
    December 2002
  • From: Northern California
Posted by jeaton01 on Monday, November 2, 2009 12:36 PM

Thanks, everyone, I appreciate the comments.  Yes, Bill, you better get going on the CH-46.  I am watching you!

The power eggs have good glue area to the stub wings, and I did the joint filling there with superglue so strength was not a problem.  I assembled each stub wing to the egg, and when all the filling was done I slipped the wings into the assembled fuselage and made the join with the wings with superglue.  Finally I glued the wings to the fuselage, using my eyeballs and some faint panel lines on the wings to get the assembly square with the fuselage.  The eggs are strong when done but getting all the nacelle and screen parts together properly took some concentration. 

I thought some about doing mesh screens, but there would be some pretty complex forming to do so I did the paint method instead.  I only have a few pictures close up of the engines in the screen area, but what is visible is the accessory section with the generator and other parts, and a lot of twisted up exhaust piping coming up around to the top of the nacelle to feed into the oil cooler plenum chamber.  You can't see any cylinder detail at all as I recall, unless the front cowl is opened up.


John

To see build logs for my models:  http://goldeneramodel.com/mymodels/mymodels.html


  • Member since
    April 2008
  • From: SE Alabama
Posted by Retired Gunpilot on Friday, October 30, 2009 8:00 PM

Very nicely done John. I have two kits also and plan on starting one soon. I am going to attempt to cut out all the loded screen area and add screen (Crossed fingers). I have the aftermarket engines from a A-26 I believe and hopefully everything will come out the way I'm wishing. Anyway, Again a very nice build and I hope mine comes out at least as nice as yours.

Charlie

  • Member since
    September 2015
  • From: The Redwood Empire
Posted by Aaronw on Friday, October 30, 2009 12:53 PM

It is great to see one of these done, I think yours is only the second I've seen built. 

Did you have any issues with the power eggs as far as a need for any additional support? I've been watching your progress but didn't see any mention of that. I'm just wondering because that looks like a potential weak spot the way everything is supported on fairly small connections.


It looks good, and should look right at home next to your UH-34.

  • Member since
    February 2003
  • From: East Bethel, MN
Posted by midnightprowler on Friday, October 30, 2009 10:05 AM
She's a beauty!

Hi, I am Lee, I am a plastiholic.

Co. A, 682 Engineers, Ltchfield, MN, 1980-1986

1 Thessalonians 4:13-18 1 Corinthians 15:51-54

Ask me about Speedway Decals

  • Member since
    March 2007
  • From: Carmel, CA
Posted by bondoman on Thursday, October 29, 2009 11:37 PM
Very fine model, John. A face only a C-124 could love. I need to start my CH-46 soon, you have inspired me!
  • Member since
    December 2002
  • From: Northern California
Special Hobby CH-37 done
Posted by jeaton01 on Thursday, October 29, 2009 9:13 PM

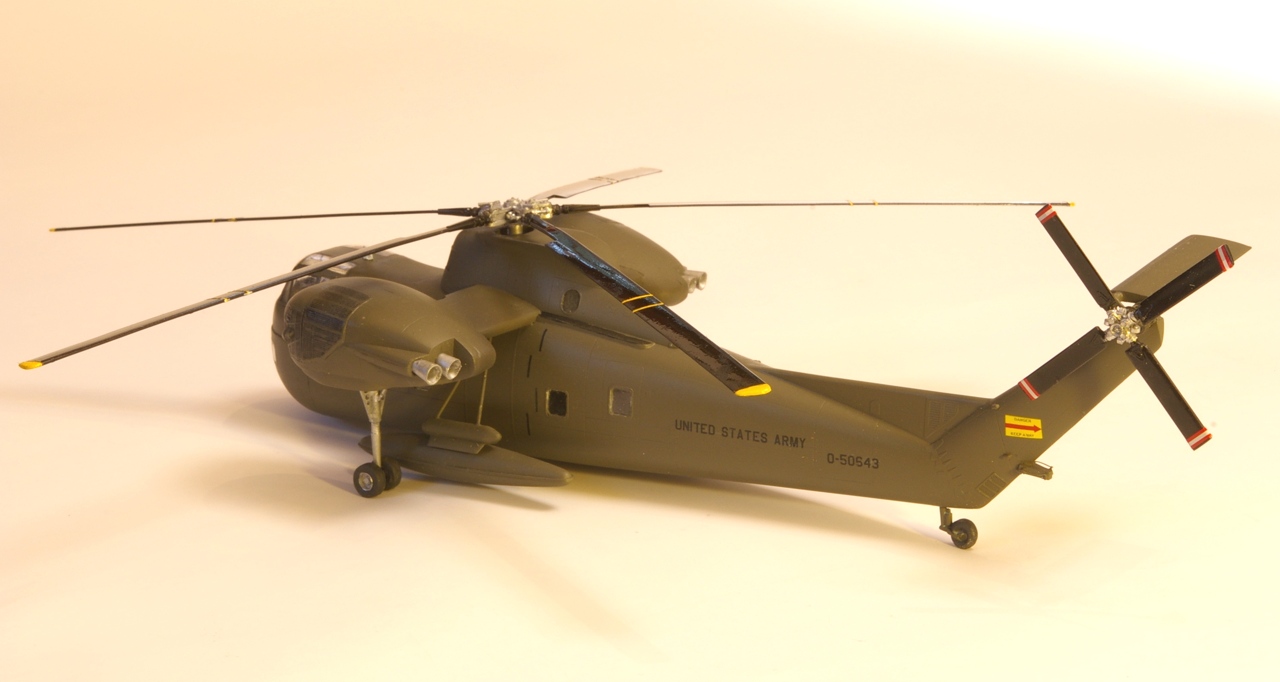
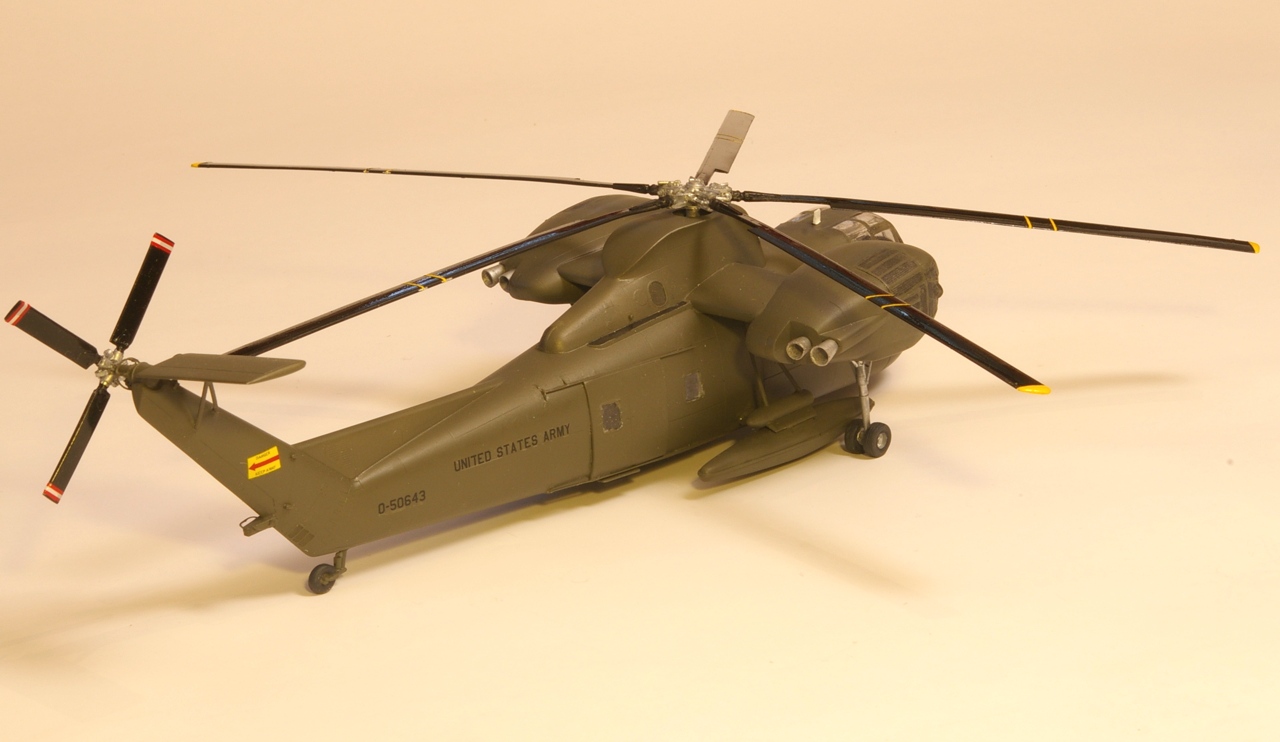
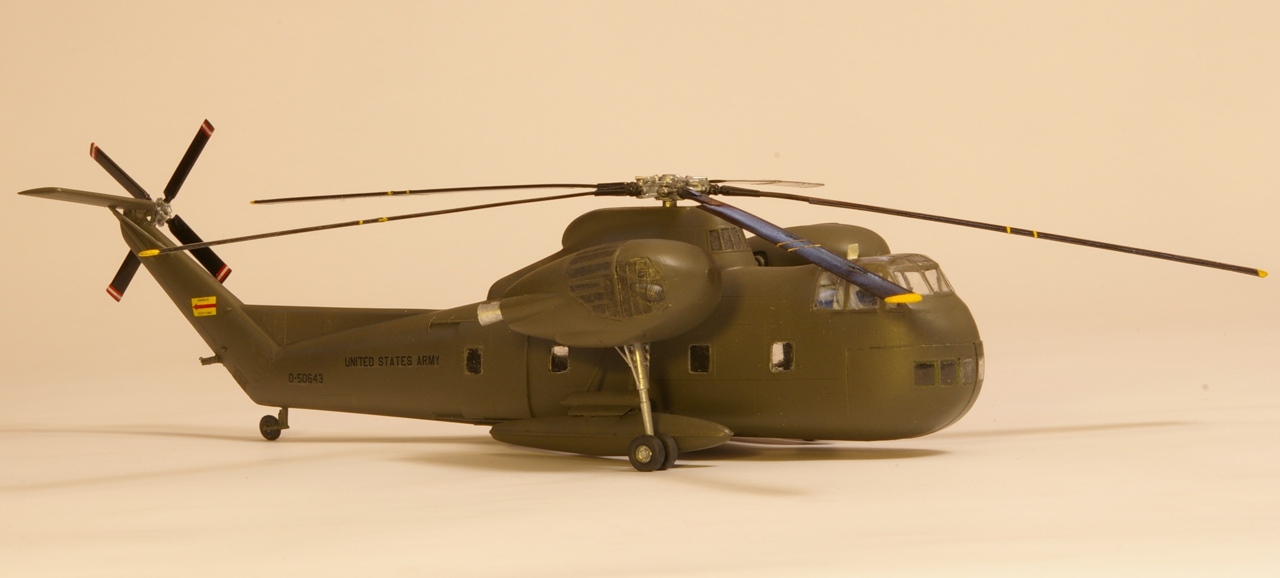
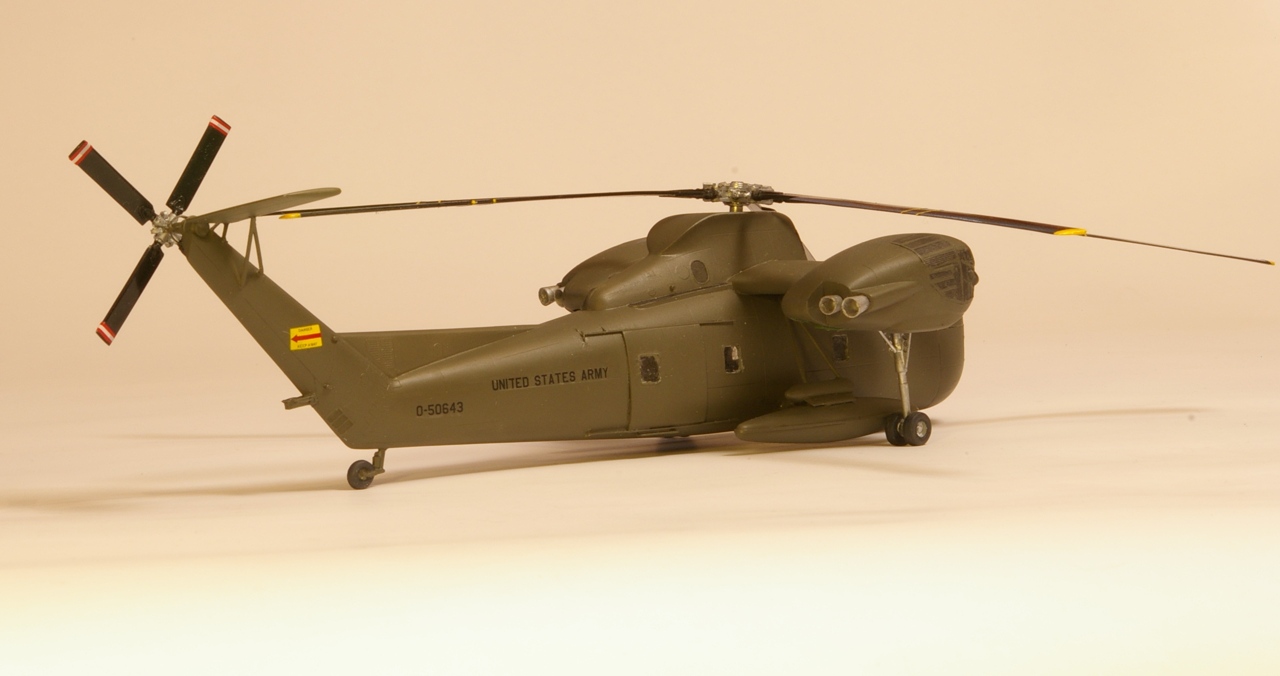
I'm calling this one done, and I think it does evoke what a CH-37 looks like.  Menacing to those who worked on and flew it, if not to the enemy, though they did do time in Viet Nam until the Skycrane and Chinooks were available for heavy lift. 

I put in the markings of one I worked on in 66 to 71 in the Cal ARNG 49th Avn Bn at Stockton, 0-50643 after it was repainted in the newer non gloss OD.  I used ANA 613, looks close to what I remember.  What minimal decals needed were done on my Alps MD-1000 after drawing them in Corel X4.

I think Special Hobby did a fine job of capturing the shapes and the fit was pretty good.  The cockpit assembly was too wide for the fuselage, especially at the seat tops.  As usual I did not use all of the PE parts, to fiddly and unlikely to be seen if they are on, like all the climbing handles.  I know they are there on the real thing but I can't see them in most photos.  Assembly was made more difficult by weak instructions as to placement and no definite fits on complex assemblies where errors can become additive.  And then I lost two of the augmentor tubes and had to make a two part mold and cast replacements in order to bring things to a timely close. 

More pictures of the build at the Helicopter GB in progress now.


John

To see build logs for my models:  http://goldeneramodel.com/mymodels/mymodels.html


JOIN OUR COMMUNITY!

Our community is FREE to join. To participate you must either login or register for an account.

SEARCH FORUMS
FREE NEWSLETTER
By signing up you may also receive reader surveys and occasional special offers. We do not sell, rent or trade our email lists. View our Privacy Policy.