SEARCH FINESCALE.COM

Enter keywords or a search phrase below:

Academy MH-53 Sea Dragon 1/48 WIP

27578 views
32 replies
1 rating 2 rating 3 rating 4 rating 5 rating
  • Member since
    April 2011
Academy MH-53 Sea Dragon 1/48 WIP
Posted by Fatalgrace on Wednesday, February 8, 2012 7:00 PM

This has been a fun build so far. Good fit and I love the content. These fly over my house all the time. If I ever need to check a color, I can just look outside!


I plan on using the Eduard Big Ed set and the Cobra Company resin interior parts. Its my first time using resin parts so I look forward to breaking most of them but oh well.....


Rotor head put together and all plumed up. Highlighted with Alclad Duraluminum.


Just this assembly is like 50 parts!


Next up masking the blades. 

  • Member since
    March 2010
  • From: Democratic Peoples Republic of Illinois
Posted by Hercmech on Wednesday, February 8, 2012 7:02 PM

That rotor head is fantastic!


13151015

  • Member since
    April 2011
Posted by Fatalgrace on Wednesday, February 8, 2012 7:21 PM

Thanks. I used annealed copper wire and heated the tips so as to melt it into the plastic so it would hold better. 

  • Member since
    April 2011
Posted by Fatalgrace on Sunday, February 12, 2012 6:49 PM

Rotors masked, painted, assembled. Next: resin interior. 


  • Member since
    March 2010
  • From: Democratic Peoples Republic of Illinois
Posted by Hercmech on Monday, February 13, 2012 9:02 AM

So you are going with the folded rotor option?


13151015

  • Member since
    July 2004
  • From: Sonora Desert
Posted by stikpusher on Monday, February 13, 2012 2:02 PM

Hercmech

So you are going with the folded rotor option?

A wise choice for display space purposes... plus they look really cool when they are all folded up including the tail.


F is for FIRE, That burns down the whole town!

U is for URANIUM... BOMBS!

N is for NO SURVIVORS...

       - Plankton

LSM


  • Member since
    April 2011
Posted by Fatalgrace on Monday, February 13, 2012 2:06 PM

Yup! all folded up. I dont have near enough space for the flight version. also it makes it easier to put on a tidy little dio base.

  • Member since
    March 2010
  • From: Democratic Peoples Republic of Illinois
Posted by Hercmech on Monday, February 13, 2012 3:34 PM

Fatalgrace

Yup! all folded up. I dont have near enough space for the flight version. also it makes it easier to put on a tidy little dio base.

I can imagine they would be pretty big. Good that they have the option!


13151015

  • Member since
    January 2009
  • From: San Antonio
Posted by paintsniffer on Monday, February 13, 2012 5:41 PM

Hercmech


 Fatalgrace:


Yup! all folded up. I dont have near enough space for the flight version. also it makes it easier to put on a tidy little dio base.


I can imagine they would be pretty big. Good that they have the option!


I have the Super Stallion hanging over my computer, it has a ceiling footprint bigger than a 1/48 F-4

Excuse me.. Is that an Uzi?

  • Member since
    October 2008
  • From: italy
Posted by bsyamato on Tuesday, February 14, 2012 5:19 AM

Following the wip of my favourite copter Stick out tongue it's huge! 

Black stallions group are the same i occasionally see fliyng over my sea ,he's take off from sigonella base


  • Member since
    April 2011
Posted by Fatalgrace on Tuesday, February 21, 2012 10:25 PM

More progress. Im using resins for the first time so its taking me forever. Also used the "hairspray" technique for the first time. Not sure that it looks quite right, but this was my fifth stripping and repaint try. 

  • Member since
    March 2010
  • From: Democratic Peoples Republic of Illinois
Posted by Hercmech on Tuesday, February 21, 2012 10:40 PM

I really like the seat cushion detail and the cargo floor weathering is awesome too.


13151015

  • Member since
    April 2011
Posted by Fatalgrace on Tuesday, February 28, 2012 8:55 PM

Coming along more this past weekend. I also bought a Tamiya "Handy Drill". that was an excursion in and of itself. 


  • Member since
    June 2011
  • From: Iola, KS
Posted by MrRabbit on Wednesday, February 29, 2012 8:08 PM

The detail your putting into this thing is amazing...  


  • Member since
    October 2008
  • From: italy
Posted by bsyamato on Thursday, March 1, 2012 10:02 AM

Fatalgrace

Coming along more this past weekend. I also bought a Tamiya "Handy Drill". that was an excursion in and of itself. http://i1207.photobucket.com/albums/bb464/gracemodels/acbcd7b5.jpg

LOL

Great updates there

  • Member since
    April 2011
Posted by Fatalgrace on Monday, March 5, 2012 10:22 PM


Ok, so REALLY enjoying this build. So, I put alot of detail into the interior but of course when I test fit the fuselage, all that disappeared. Then I got it in my head that maybe I should light it. I spent a couple of days figuring out how and googling, etc. I have NEVER worked with any kind of electronics before today. It was actually easier than it was made to seem. 

Step #1: goto Radio Shack. Find the nerd and ask him how to set up a simple LED. 

Step #2: buy the Breakaway Breadboard, LEDs of whatever color, and Battery Pack that he/she gives you. If they are nice they will set it up for you in the store.

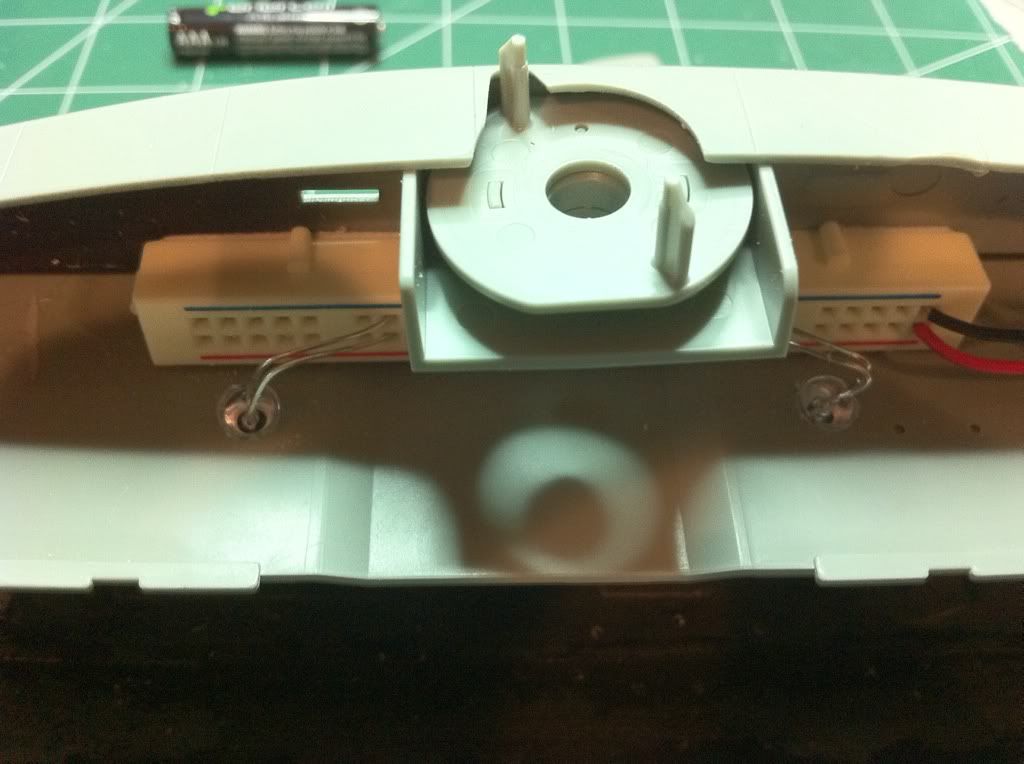
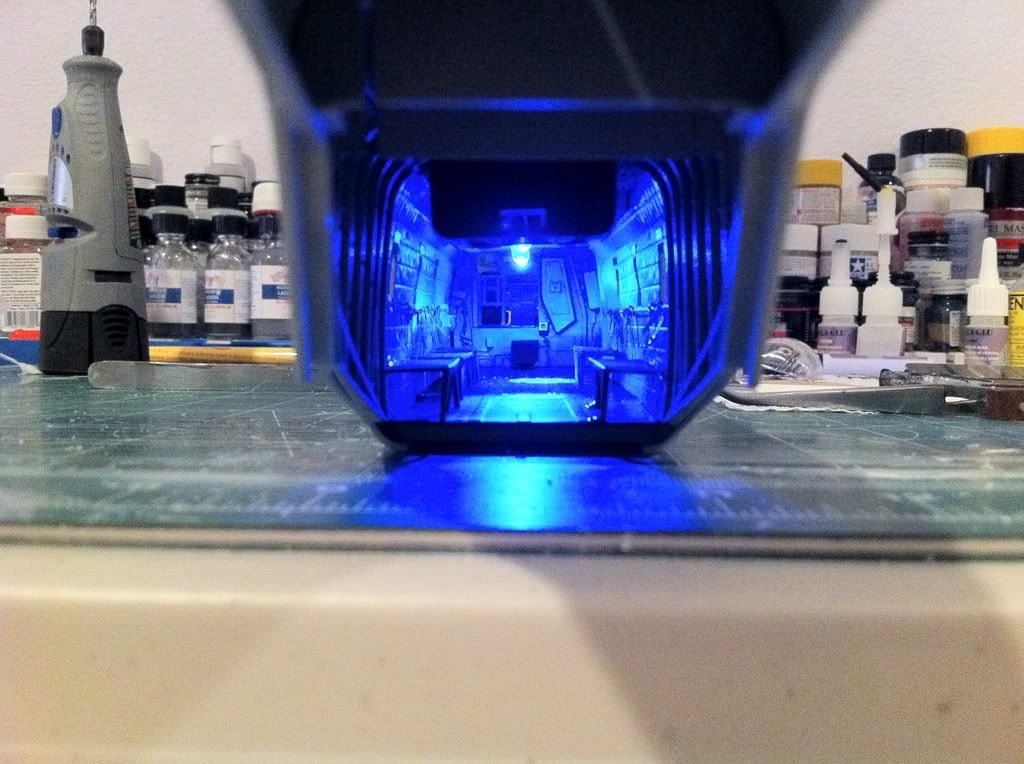
Here's what i came up with in the end after a couple hours planning and drilling.

this is the breadboard with the LEDs in series. all you have to do is plug them in the same way (one pole is longer than the other). Plug the battery pack in to match red-red, black-black (pos/neg). I drilled holes in the "ceiling" on the interior with a Dremel and a bigger-ish drill bit. The holes were made to fit the LEDs perfectly.

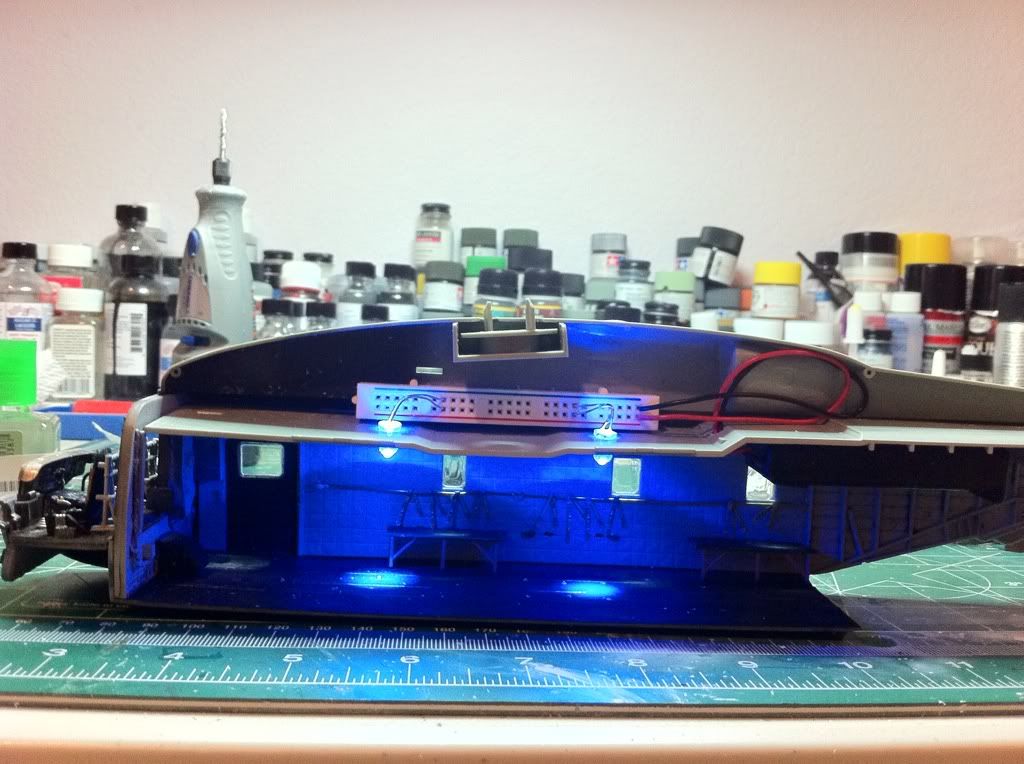
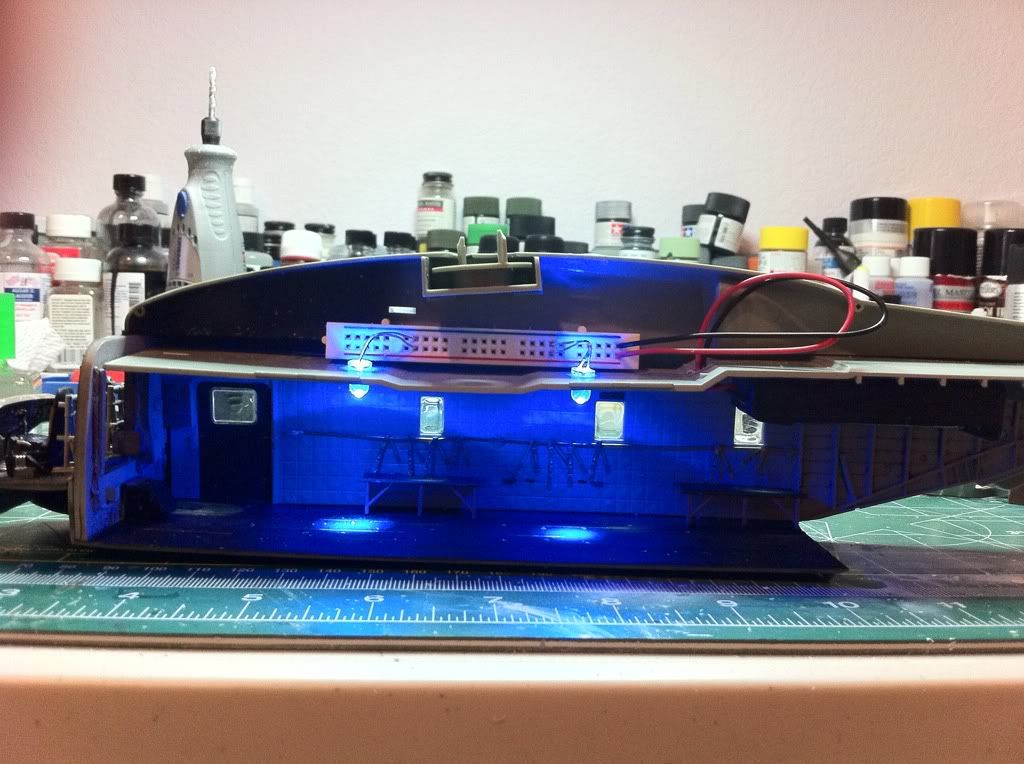
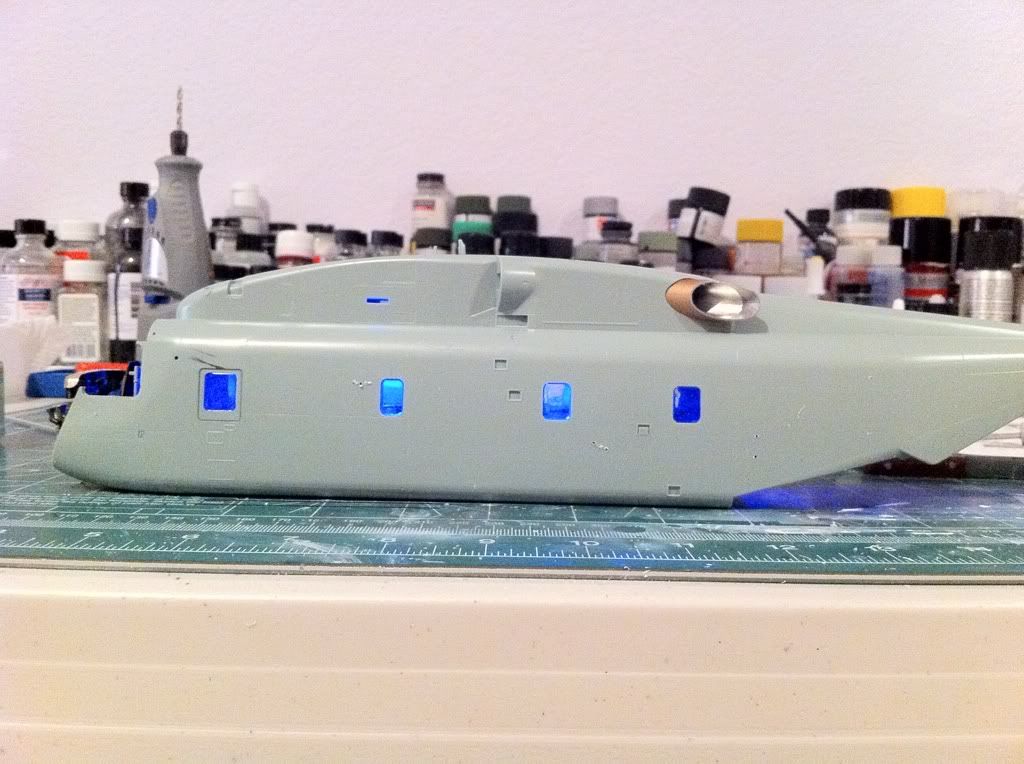
Here's the basic effect. I put the battery pack underneath the roof. It fit nicely (lucky) and it looks like a piece of internal equipment to the helicopter.

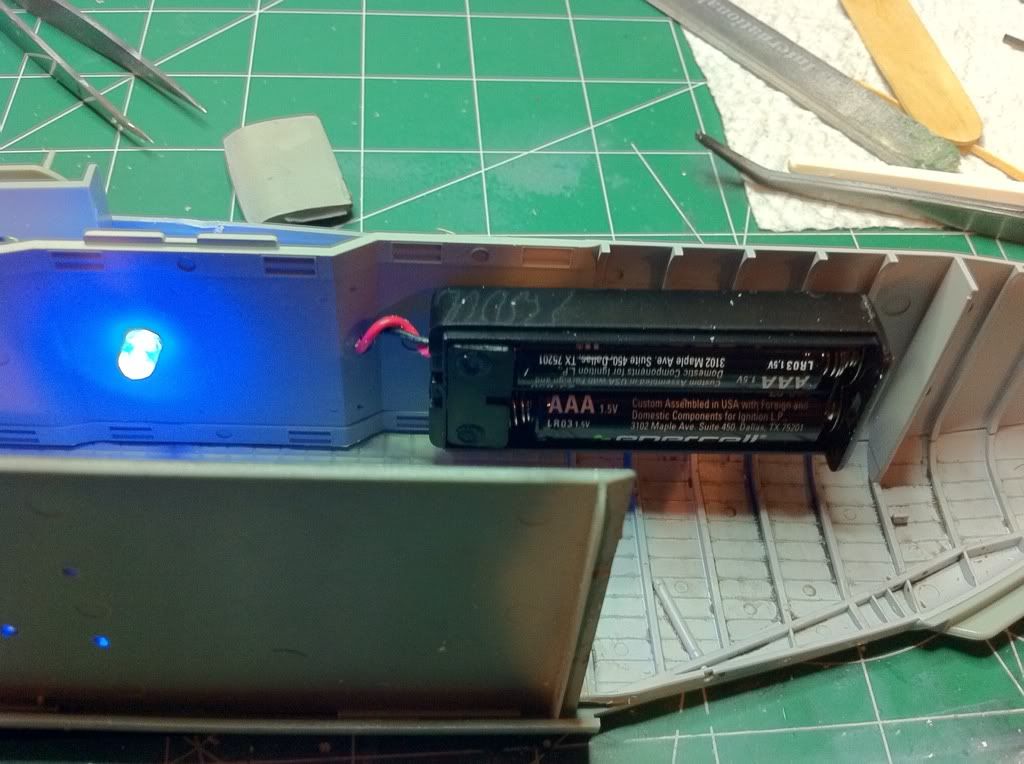
I put the battery pack in such a place where I can take the battery out easily and within reach of fingers. 

  • Member since
    October 2008
  • From: italy
Posted by bsyamato on Tuesday, March 6, 2012 4:19 AM

LOL blue lights Cool

Best way was to put batteries in the central piece back the rotor head with a sort of door

  • Member since
    March 2010
  • From: Democratic Peoples Republic of Illinois
Posted by Hercmech on Tuesday, March 6, 2012 9:14 AM

Very cool mod with those lights!


13151015

  • Member since
    April 2011
Posted by Fatalgrace on Monday, April 9, 2012 4:47 PM

Been awhile. Some updates from the weekend. Main assembly together, all the photoetch pieces on (Eduard interior, seatbelts,exterior set used). So many little fiddly PE parts...

Primed, masked, and preshaded.


Hopefully I'll get paint laid down sometime this week.


Thanks for critique!

  • Member since
    October 2008
  • From: italy
Posted by bsyamato on Tuesday, April 10, 2012 10:02 AM

no critics ,just wishing one Stick out tongue

  • Member since
    March 2010
  • From: Democratic Peoples Republic of Illinois
Posted by Hercmech on Wednesday, April 11, 2012 2:15 PM

That is one cool looking bird so far!


13151015

  • Member since
    April 2011
Posted by Fatalgrace on Sunday, April 15, 2012 8:05 PM

Painted and construction 99% done. I used a mix of Tamiya Dark Green, Light Ghost Grey, Black. I "dusted" the middle of the panels by adding some flat white to the mix.

Landing gear done in Nato Black and Testors Burnt Metal. Rescue hitch in some Alclad, Gunmetal, Flat Yellow, Insignia Red.


  • Member since
    April 2011
Posted by Fatalgrace on Sunday, June 24, 2012 4:53 PM

Forgot to post finished pictures


  • Member since
    March 2004
  • From: Kincheloe Michigan
Posted by Mikeym_us on Sunday, June 24, 2012 9:10 PM

Looks pretty good but I was suprised nobody suggested using red LED's instead of the blue as red lights are used on real aircraft to preserve night vision.

Fatalgrace

Forgot to post finished pictures

http://i1207.photobucket.com/albums/bb464/gracemodels/f77a75dd.jpghttp://i1207.photobucket.com/albums/bb464/gracemodels/10041f84.jpghttp://i1207.photobucket.com/albums/bb464/gracemodels/7194022d.jpg


http://i1207.photobucket.com/albums/bb464/gracemodels/b35b6423.jpg


On the workbench: Dragon 1/350 scale Ticonderoga class USS BunkerHill 1/720 scale Italeri USS Harry S. Truman 1/72 scale Encore Yak-6

The 71st Tactical Fighter Squadron the only Squadron to get an Air to Air kill and an Air to Ground kill in the same week with only a F-15   http://photobucket.com/albums/v332/Mikeym_us/

  • Member since
    April 2011
Posted by Fatalgrace on Sunday, June 24, 2012 9:19 PM

Agreed, but I had to give into the "that's what color my kid likes best" technique. 

  • Member since
    October 2008
  • From: italy
Posted by bsyamato on Monday, June 25, 2012 5:55 AM

Awesome work Toast

  • Member since
    March 2010
  • From: Democratic Peoples Republic of Illinois
Posted by Hercmech on Wednesday, June 27, 2012 9:07 AM

Came out great...those decals really added to the scheme, and I for one like the blue lights.


13151015

  • Member since
    June 2007
  • From: Germantown, Wisc.
Posted by Hartmann352 on Wednesday, June 27, 2012 4:46 PM

Looks great, love these helos. If I had found this thread in time, I would have suggested red in the 'pit at least, if he was feeling ambitious.

Nice to see the color, I have a CH in the stash that I am going to be doing up as my old squadron, HC-1.

BTW not sure if this can get corrected, but it appears that your exhausts for the 2 forward engines, are backwards. They should be pointing away from the fuselage.

Here is a photo of the starboard side.

upload.wikimedia.org/.../US_Navy_021217-N-4953E-002_Sailors_aboard_the_Harry_S._Truman_offload_a_jet_engine_from_a_CH-53_Sea_Stallion_helicopter_assigned_to_Helicopter_Combat_Support_Squadron_Four_Two_(HC-42).jpg

Not trying to be a kill-joy, just trying to help.

Cheers,

Dave

"Yesterday is history, Tomorrow a mystery, but Today is a gift. That is why it is called the "present".


  • Member since
    June 2006
  • From: Patterson, CA
Posted by SoD Stitch on Tuesday, November 13, 2012 1:33 PM

I noticed that, too; I thought it might be a recent Navy "mod" in order to help reduce the IR signature of the exhausts, but I guess not. I have that model, too, and the exhausts are actually "keyed" to go in the housings one way only, not sure how they got put on backwards.

1/48th Monogram A-37 Dragonfly: 95% (so close!); 1/35th Academy UH-60L: 90%; 1/35th Dragon "Ersatz" M10: 75%; 1/35th DML E-100 Super Heavy Tank: 100%; 1/48 YF-12A, 95%; 1/48 U-2R: 90%; 1/48 B-58 Hustler: 50%; 1/32 F-117, 50%; 1/48 Rafale M: 50%; 1/48 F-105D: 75%; 1/48 SOS A-1H Skyraider: 50%; 1/48th Hobby Boss Su-27: 50%; 1/16th Revell Lamborghini Countach: 75%; 1/12th Otaki Lamborghini Countach: 25%; Tamiya 1/35th M3 Bradley Cavalry Fighting Vehicle: 25%

  • Member since
    November 2009
Posted by artworks2 on Tuesday, November 13, 2012 3:24 PM

Beautiful Model!!!

JOIN OUR COMMUNITY!

Our community is FREE to join. To participate you must either login or register for an account.

SEARCH FORUMS
FREE NEWSLETTER
By signing up you may also receive reader surveys and occasional special offers. We do not sell, rent or trade our email lists. View our Privacy Policy.