SEARCH FINESCALE.COM

Enter keywords or a search phrase below:

1/72 Hobbyboss MiL 24 V

15406 views
27 replies
1 rating 2 rating 3 rating 4 rating 5 rating
  • Member since
    April 2010
1/72 Hobbyboss MiL 24 V
Posted by Theuns on Monday, June 4, 2012 9:44 AM

Hi all. This kit looks pretty darn well detailed in the box :-D

I will do it out the box except for adding seatbelts and using AM decals for either Angolan or Mozambique Air Force.

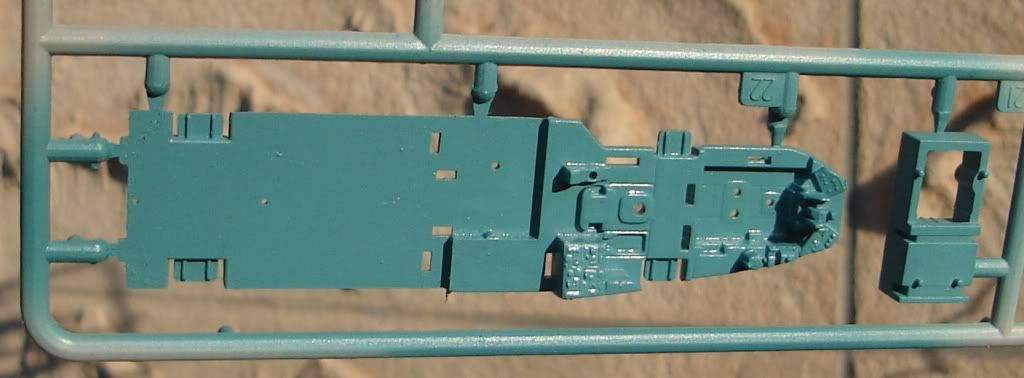
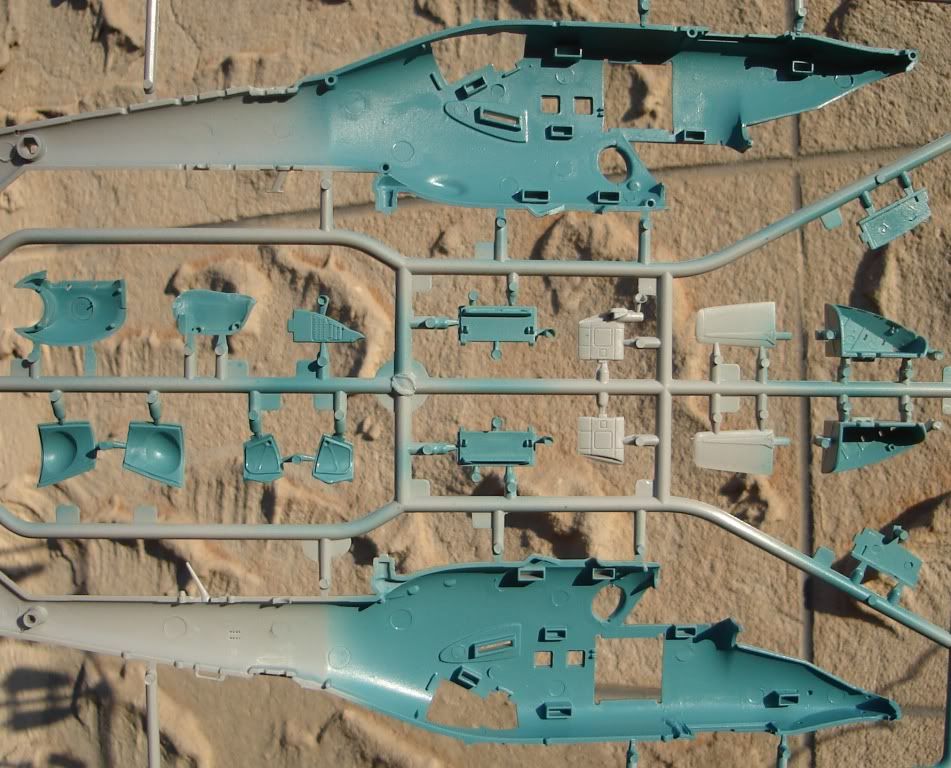
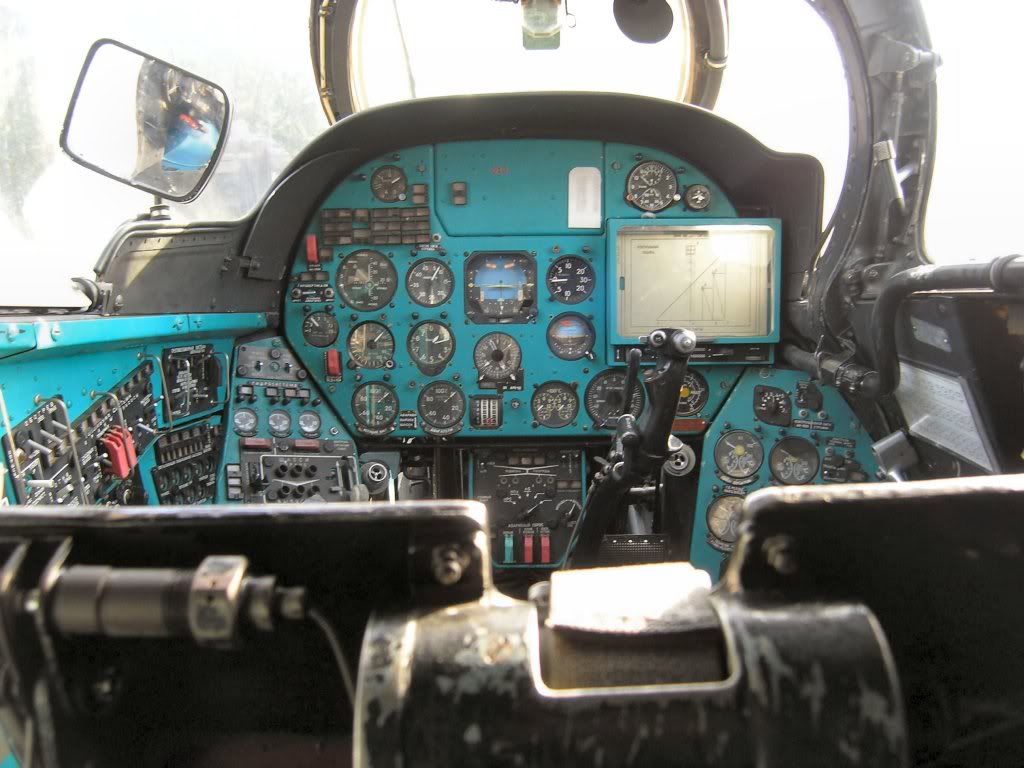
I couldn't find a standard interior blue /green so I mixed up some from what I had at hand (all enamels) I know it is not presicely correct, but I understand there were huge variation depending on the era the heli was made ect.

What I was aiming for....MiL 24 Cockpit colour
What I ended up with ....Hobbyboss 1/72 MiL 24 V

Hobbyboss 1/72 MiL 24 V

A tad greener, but close enough I think (my first mix was 95% correct but it just looked to blue, just goes to show -never doubt a gut feel LOL!)

Any comments and advice will hbe great, especially how to droop the blades without damaging them.

Theuns

  • Member since
    December 2002
  • From: Bury St Edmunds, Suffolk, England
Posted by Bish on Monday, June 4, 2012 9:49 AM

That colour is pretty damn good. Xtracolour has a Soviet interiour colour and you ain't far off that.

I am a Norfolk man and i glory in being so


On the bench: Airfix 1/72nd Harrier GR.3/Fujimi 1/72nd Ju 87D-3

  • Member since
    March 2010
  • From: Democratic Peoples Republic of Illinois
Posted by Hercmech on Monday, June 4, 2012 9:49 AM

Nice looking color match. As far as the blades...warm water and small weights should do it.


13151015

  • Member since
    April 2010
Posted by Theuns on Monday, June 4, 2012 10:25 AM

When I was the the shop I actually saw the extra colour stand with the "russian interior green" but needless to say no stock !

I thought about making a template from alluminium sheet to the shape of the droop so that all blades droop the same, but how hot must the water be to do so without malting/warping the plastic?

There is a Hind A close to where I work so I can get a good idea of the correct droop.


Theuns

  • Member since
    December 2002
  • From: Bury St Edmunds, Suffolk, England
Posted by Bish on Monday, June 4, 2012 10:27 AM

Typical on the paint.

I did see an item somewhere, i think it may be been in the reader tips of FSM, about dropping Helo blades. I think they used a curved wooden block or something.

I am a Norfolk man and i glory in being so


On the bench: Airfix 1/72nd Harrier GR.3/Fujimi 1/72nd Ju 87D-3

  • Member since
    April 2010
Posted by Theuns on Monday, June 4, 2012 10:40 AM

I am fairly hapy to make the template from something like balsa, but I am totally unsure of the "hotness" needed for the water...


Theuns

  • Member since
    December 2002
  • From: Bury St Edmunds, Suffolk, England
Posted by Bish on Monday, June 4, 2012 10:46 AM

I would say warm rather than boiling. But i have never tried it myself so not 100% certain.

I am a Norfolk man and i glory in being so


On the bench: Airfix 1/72nd Harrier GR.3/Fujimi 1/72nd Ju 87D-3

  • Member since
    April 2010
Posted by Theuns on Monday, June 4, 2012 11:03 AM

I will give it a try, thanx guys.


Theuns

  • Member since
    April 2010
Posted by Theuns on Sunday, June 10, 2012 9:58 AM

Here is the cockpit basically done, the cabin will follow

1/72 MiL 24

1/72 MiL 24

Note the light blue cabin, not same as the cockpit.

Theuns

  • Member since
    August 2009
  • From: Borlando Fla home of the rat
Posted by TREYZX10R on Sunday, June 10, 2012 11:02 AM

Theuns that office looks great and at that scale even more amazing! Nicely done. For blade droop I use a large beach ball and tape the root end of the blades at a center point on the ball with them fanned out equally then gently use a hair drier on them tell they all sag them same arc.

  • Member since
    December 2002
  • From: Bury St Edmunds, Suffolk, England
Posted by Bish on Sunday, June 10, 2012 3:07 PM

Ye, nice looking pit.

Nice idea TREY. Luckily the Hase MiL 24 i have has the blades pre dropped. But i will keep that idea in mind.

I am a Norfolk man and i glory in being so


On the bench: Airfix 1/72nd Harrier GR.3/Fujimi 1/72nd Ju 87D-3

  • Member since
    April 2010
Posted by Theuns on Monday, June 11, 2012 9:57 AM

Cool idea that !

I just got yhe Hobbyboss 1/72 H34-Chocktaw and interestingly it has the rotors moulded with the droop.

Looks like a nice kit :-)


Theuns

  • Member since
    April 2010
Posted by Theuns on Saturday, June 23, 2012 12:36 PM

Interesting ,I just heard that the rotor direction for the mains and the tail is in the wrong direction for the Chocktaw on the 1/72 Hobbboss kit! What a pitty :-(

As for the Mil, here is the laters.

The cabin roof does seem very low Huh?

1/72 MiL 24

Fuse joined

1/72 MiL 24

1/72 MiL 24

Theuns

  • Member since
    October 2005
  • From: New Port Richey
1/72 Hobbyboss MiL 24 V
Posted by deattilio on Sunday, June 24, 2012 10:00 AM

Your Hind is building-up nicely.  I picked this kit up, along with the Eduard PE after reading the book Gunship Ace, The Wars of Neall Ellis, Helicopter Pilot and Mercenary by Al Venter.  Along with the Hind there are a couple other helos in the book I would like to model if my Hind comes out satisfactorily as I typically build planes and AmTracs.

Watching your progress to look for any challenges that may arise when my Hind gets its turn on the hobby desk.


WIP:
Trying to get my hobby stuff sorted - just moved and still unpacking.


"Gator, Green Catskill....Charlie On Time"


  • Member since
    April 2010
Posted by Theuns on Sunday, June 24, 2012 10:36 AM
The only fit issue I had sofar was the top front section of the cockpit left sidewall that needed to be cut down about 0,5mm inorder to fit inside the left fuselarge. The other area was the main wheelwells that fouled against the rear cabin bulkhead. There is no real way of building it "scew" so I think it might just ba a kit thing. I just cut and filled the front section of the well to fit in behind the bulkhead, luckely the plastic there is quite thick. There are/were a number of ex South African Air crew flying Mils up in Siera Leone aswell. Ironic as the same crews were flying against Angolan AF Mils back in the 70's and late 80's LOL! Theuns
  • Member since
    April 2010
Posted by Theuns on Tuesday, July 3, 2012 5:05 AM

Latest update. Now I need to replace the antenas I "lost" during sanding.

1/72 MiL 24

1/72 MiL 24

Except for a few minor fit issues and the cabin roof it is not a bad kit atall.

Theuns

  • Member since
    April 2010
Posted by Theuns on Tuesday, July 17, 2012 11:43 AM

A little more colourfull now, some exhaust stains added with pastels.Ready for pannel wash and decals.

It is in the Angolan AF sceeme

1/72 MiL 25

1/72 MiL 24

Theuns

  • Member since
    February 2003
  • From: Rothesay, NB Canada
Posted by VanceCrozier on Tuesday, July 17, 2012 12:19 PM

Nice looking camo colours on that machine.

On the bench: Airfix 1/72 Wildcat; Airfix 1/72 Vampire T11; Airfix 1/72 Fouga Magister

  • Member since
    March 2010
  • From: Democratic Peoples Republic of Illinois
Posted by Hercmech on Tuesday, July 17, 2012 1:09 PM

Very nice camo...I would be ready to redo those exhaust stains. They may disappear after a good dull coat.


13151015

  • Member since
    October 2008
  • From: italy
Posted by bsyamato on Wednesday, July 18, 2012 10:13 AM

Theuns great work!! this is one missing  in my copter collection :(

  • Member since
    February 2008
  • From: Chicago, IL
Posted by mike_espo on Thursday, July 26, 2012 1:35 PM

Beautiful work! Really excellent. Yes

Haven't built a helocopter in almost 40 years since the ol' Monogram Huey!

Been thinking about getting the Zvezda 1/72 Mi-24/35. I usually do 1/48. Is this enough kit? Is it impressive enough and detailed enough?


thanks

On the workbench:

Trumpeter 148 MiG -21F 

  • Member since
    April 2010
Posted by Theuns on Friday, July 27, 2012 10:48 AM

I can't comment on the Zevzda as I only built the hobbyboss, but for me the level of detail is quite enough and there certainly it "enough" kit to build!

I am still waiting for my decals before I can complete it. Alteast I have built up the rotor assembly ready for paint.

Theuns

  • Member since
    April 2010
Posted by Theuns on Saturday, March 23, 2013 4:15 AM

Alright then! It is finally done after waiting 6 weeks for a postal strike to pass before I got my decals :-(

In the colors of the Angolan Air Force MiL-35

I will have to re-ro the cabin windows, they look BAD.

MiL 35 photo models145_zpsa1550957.jpg

1/72 Angolan AF MiL 35 photo models149_zpsb92b8256.jpg

 photo models147_zpse3d5b5eb.jpg

Thanx for looking

Theuns

  • Member since
    December 2002
  • From: Bury St Edmunds, Suffolk, England
Posted by Bish on Saturday, March 23, 2013 6:18 AM

Forgotten about this one, nice to see it all wrapped up. Looks good.

I am a Norfolk man and i glory in being so


On the bench: Airfix 1/72nd Harrier GR.3/Fujimi 1/72nd Ju 87D-3

  • Member since
    August 2009
  • From: Borlando Fla home of the rat
Posted by TREYZX10R on Saturday, March 23, 2013 12:06 PM

Yes! A most excellent looking Hind Theuns! Very nicely done Sir!

  • Member since
    April 2014
Posted by ricmac on Thursday, January 24, 2019 5:16 PM
I use a little trick I learned a while back. Try using extra hot water (NOT BOILING, MAY MELT PLASTIC OR DEFORM IT). Use a container that will hold the heat of the water for a while. soak parts in the water until it changes the flexibility of the plastic. When you think they will bend, support blades against an object with correct height you want. Put a bow in the blades and put some weight in the middle of blades to hold the same bend for all blades involved, let cool. Try using of old parts of an older model so you can practice the procedure. I get good results using this method. good luck....ric
  • Member since
    December 2002
  • From: Valrico, FL
Posted by HeavyArty on Friday, January 25, 2019 12:49 PM

Really??? The completed build post is from almost 6 years ago.  Do you really think he is still wondering what the best way to shape the blades is?

Gino P. Quintiliani - Field Artillery - The KING of BATTLE!!!

Check out my Gallery: https://app.photobucket.com/u/HeavyArty

"People sleep peaceably in their beds at night only because rough men stand ready to do violence on their behalf." -- George Orwell

  • Member since
    July 2018
  • From: Ficksburg, Free State, South Africa
Posted by Andrew on Monday, January 28, 2019 5:33 AM

Hi Theuns.

Assuming you live in SA - where is that Hind A? I live in the Free State but am often in Pta/Jhb - would love to see that as I'm busy with a Hasegawa Hind A. 

Were or are you an Ops Medic too?

Regards

JOIN OUR COMMUNITY!

Our community is FREE to join. To participate you must either login or register for an account.

SEARCH FORUMS
FREE NEWSLETTER
By signing up you may also receive reader surveys and occasional special offers. We do not sell, rent or trade our email lists. View our Privacy Policy.