SEARCH FINESCALE.COM

Enter keywords or a search phrase below:

Airfix Merlin HC3 1/48

5297 views
0 replies
1 rating 2 rating 3 rating 4 rating 5 rating
  • Member since
    January 2009
  • From: San Antonio
Airfix Merlin HC3 1/48
Posted by paintsniffer on Monday, May 6, 2013 11:21 AM

So I have actually started mine and felt a need to go past the in box reviews that rave about the fit of this thing.

I was rather impressed when I was playing with mine before assembly started. when the cement came out and things got real my impression changed a little.

I will preface this by saying I am no master modeller, and with little to go on I am sticking pretty close to the instructions.

The instructions start with building up a very strong structure under the floor which the main wheels attach to. There is no good way to avoid putting on the mains early in construction even though this seems like a really bad idea. It also calls for attaching the nose gear around the same time. I have already broken mine almost off. Things go together well at this stage, which is the first clue something is wrong. if I were to do this again I would avoid mating the fuselage underside to everything until I can dry fit it the same time as the sides. i think the floor tolerances are too tight, some parts are too big, or I flat don't know what the hell I am doing.

I built up the interior. The folded seats go together well. The unfolded ones not so much. This one is going to have an Airfix Land Rover slung underneath so the hole is temporarily taped shut.

Rear view

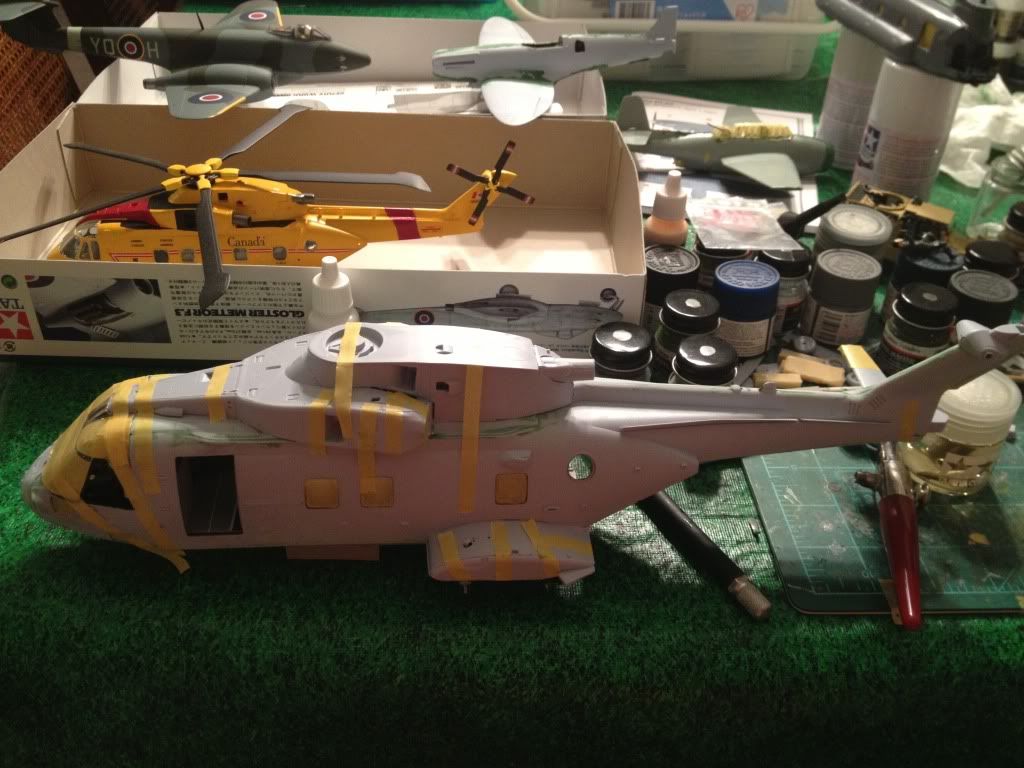
Sides on. I had some pretty big gaps on the fuselage sides and on the roof line. Totally correctable though, just not as tight as I thought.

This was the worst of the gaps.. Which is really pretty massive. I filled it before attaching the windscreen, which in spite of the mismatch seemed to fit against the frame pretty nicely. That leads me to believe it may not be lack of skill on my part.

Here it is with the Engine/Transmission housings on, and the sponsons. The engine and trans housing is complex and fit poorly. A little jockying and putting it together completely before the glue set helped tremendously. build all your subassemblies before you start putting any part of this on the helo. I started doing it in sections and it didn't go as well as I would have liked. I have some gaps in some very tricky places now. Oh, the sponsons fit well against the fuselage but leave horrible gaps where the parts meet. Brace yourselves. I had to do some trimming on the bulkheads inside the wheel wells to make it work at all.

The clear parts are very clear but also very brittle. The small windows in the cockpit do not fit well and I cracked or broke all 4 of mine.

In short, this kit looks the part, but if you go in expecting a Tamiya build you aren't going to get it. I had a lot of warpage to contend with along with the fit issues. Not a bad kit, but modeling skill required. If someone has had a different experience let me know. I had this kit within 24 hours of it hitting the US distributors so I know I have a very early pop.

Excuse me.. Is that an Uzi?

JOIN OUR COMMUNITY!

Our community is FREE to join. To participate you must either login or register for an account.

SEARCH FORUMS
FREE NEWSLETTER
By signing up you may also receive reader surveys and occasional special offers. We do not sell, rent or trade our email lists. View our Privacy Policy.