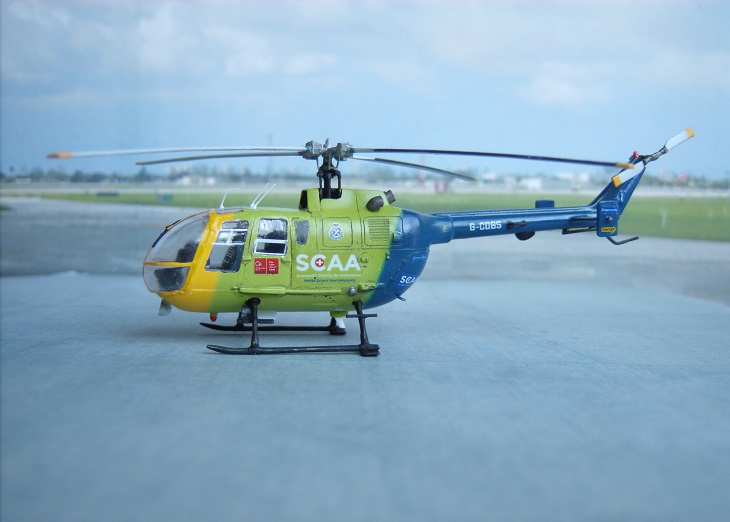
I herewith present the Ukrainian company A-Model's 1/72 MBB Bo105CBS, in the eye-catching markings of Scotland's Charity Air Ambulance (SCAA). This aircraft performed its life-saving mission for the people of Scotland until 2015, when it was able to be replaced with the more-capable EC-135.
For those interested, a mini-review and build details follow the photos below.


Being a big fan of building 'first responder' -type aircraft, I was delighted some time ago to discover that A-Model had released a new-tool series of the stalwart twin-engine MBB Bo105 helicopters -- including a 'dedicated' version of the stretched -CBS model so often used (world-wide) in the vital role of air ambulances. Scant information seemed available on the 'net...and I could find no actual reviews. But the price seemed very reasonable, and I happily placed my order and started whipping up the decal art for this long-hoped-for project [which I still mean to do someday in 1/32 scale...though that's a story for anther time].
Quality-wise the kit is eerily reminiscent of the ancient Airfix short-fuselaged version of the Bo105, though perhaps with somewhat finer exterior detail. Interior detail is deja-vu basic, but fairly complete: seats (without headrests or harnesses), softly-molded sticks/pedals/collectives, a featureless flat instrument panel (with no kit-supplied decal), and a center console with a few molded switches and such (but no hint of any overhead console). The air ambulance boxing had only a 'nod' to that mission: a rear bulkhead with two small instrument boxes molded in -- both with prominent sink-holes -- and an old-fashioned pole-type stretcher, with a set of gurney-type wheels to attach beneath it. The clam-shell doors at the rear of the fuselage are molded as a single separate (and rather thick) piece...but it fits fairly well, and is definitely a convenient option (compared to taking saw to fuselage parts) if one chooses to detail and display them open.
Clear parts are of 'medium' thickness but clear and cleanly-molded. Two front 'bubbles' are thoughtfully provided -- one with a single wiper set-up, and one with the double -- and as one who has previously done surgery on delicate clear parts to remove an errant wiper, I can say I really appreciate the option. One could wish they had molded front and rear cabin doors separately...but it's not exactly brain surgery to separate them if one so-chooses.
For those unfamiliar with the general run of Eastern-European-produced kits, it should be noted that sprue attachment points for most parts are big and chunky, even for delicate rods and such. Fortunately the plastic is reasonably soft and not at all brittle; I clipped most delicate pieces off with a new single-edged razor blade, and didn't suffer a single casualty.
Fit...with one glaring exception...is overall quite good, but that 'exception' is a major PITA: both front 'bubbles' supplied are wider than the fuselage by nearly 3mm. As this was a late-in-the-game discovery...a rookie mistake, to be sure...I briefly considered re-splitting and 'wedging' the fuselage to match...but in the end weenied out, and left it 'as is.' Having thought it over since, the 'easiest' fix would be annoying, but not catastrophic: since there is 'structure' all the way down the center-line, the bubble could be fairly-easily sawed in half, then trimmed and rejoined before attachment. Something for next-time.
For this build, I added a few details but realized not much would be visible through the thick-ish clear parts. Since I was home-printing my decals anyway, I added a few 'medical' details...placards, monitor faces and such, based on internet photos...and added a set of omni-present oxygen tanks. For the cockpit instruments, I cut up a 'spare' from my recent Twin Otter build. A few belts, an upper console and a few dangling coiled headset cords from thin wire, and I buttoned up the interior.
External changes consisted of slightly-reworking the steps on the skid struts to match photos of the real a/c, and adding assorted antennae and spotlights, none of which were supplied with the kit.
Paints were my usual mixes of Tamiya acrylics...in this case, matched as closely as possible to the already-printed decal graphics to minimize necessary retouching.
All in all a fun little project...and a great 'dry run' for a more detailed build in the future. I've got quite a few more keen air ambulance liveries on the 'wish list!'