SEARCH FINESCALE.COM

Enter keywords or a search phrase below:

Little Bird Progress (Pics)

1138 views
9 replies
1 rating 2 rating 3 rating 4 rating 5 rating
  • Member since
    December 2002
  • From: Modeling anything with "MARINES" on the side.
Little Bird Progress (Pics)
Posted by AH1Wsnake on Tuesday, December 12, 2006 12:58 AM

Hey all, just wanted to post an update and show what is occupying what little free time I have left lately:.....(this is the 1/35th Dragon kit, by the way)

I scratchbuilt most of the instruments on the instrument panel from round stock. Some of the control panels are from a hacked up Apache console and the MFD is from a Tomcat. Too much sanding wore away the fine detail of Dragon's instruments, so I had to go about making my own. Some instrument faces were cut from the 1/35 Panda Huey decal IP, and a drop of Future was applied on top of each to simulate glass.

The fuselage is still without most of its antennae until final assembly. I trimmed the skids to match references, added wiring to the radio stack, and scratchbuilt the housings and antennas for the APR-39 RWR.


The miniguns are out of the box, airbrushed with Model Master titanium metallizer. I just had the color laying around, decided to try it, and really like the convincing color it produced, with just enough metallic sheen. Otherwise, the guns are nothing special. I apologize for the poor photo.
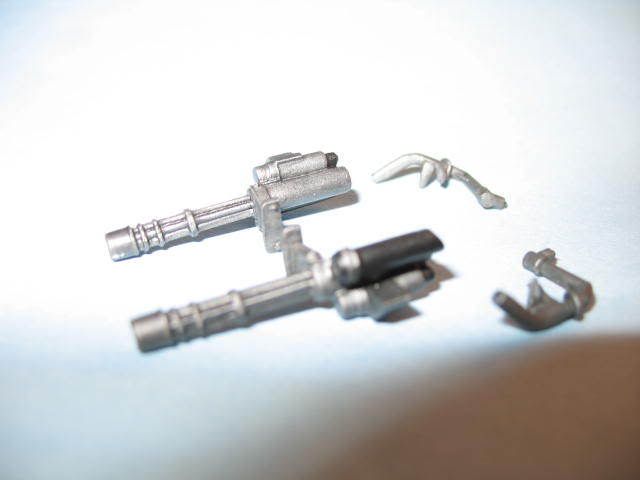
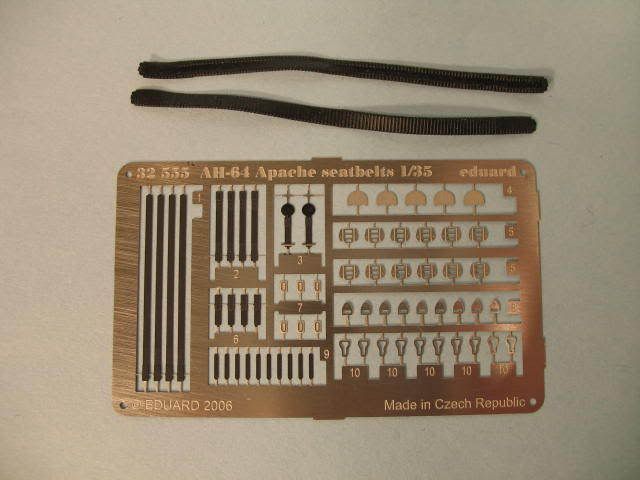
I scrapped the impossible kit feed chutes and will be using a rubber set from the MRC Heavy Hog. Finally, you see the (first ever) photoetch set I will be using for the seat harnesses. I decided that the interior was just to open to avoid detailing it.
Comments welcome. Hoping I can finish it before the new year!


"There are only two kinds of people that understand Marines: Marines and those who have met them in battle. Everyone else has a second-hand opinion."
  • Member since
    June 2003
  • From: Caput Mundi
Posted by Avus on Tuesday, December 12, 2006 1:52 AM

Well, what to say looks great so far!

Maybe the guns are a little too shiny (looks like polished steel while it should be more like burnt iron), but that could be the picture (flash?).

Keep us posted on your progress.

Klaus

Thanks to ImageShack for Free Image Hosting

  • Member since
    April 2003
  • From: Seattle, WA
Posted by RonUSMC on Tuesday, December 12, 2006 2:37 AM
Now thats a nice one.
http://finescalegallery.com Active Kits: 1/48 AM Avenger 1/35 Sd.Kfz 251 Ausf C
  • Member since
    November 2005
  • From: Southport, North West UK
Posted by richgb on Tuesday, December 12, 2006 3:35 AM

Hi,

Looks prety darn good to me. Excellent detailing. Let me know how you get on trying to put in the canopy. I built a loach a couple of years ago and that canopy was an absolute ********. I made a real pigs ear of it.

Keep us all posted.

Rich

...this is it folks...over the top!
  • Member since
    November 2003
  • From: Oklahoma
Posted by chopperfan on Tuesday, December 12, 2006 10:43 AM
What an inspiration!!  Makes me wanna dig out my OH-6A and get on it!!! Thumbs Up [tup]Thumbs Up [tup]
Randie [C):-)]Agape Models Without them? The men on the ground would have to work a lot harder. You can help. Please keep 'em flying! http://www.airtanker.com/
  • Member since
    March 2006
  • From: Boyertown, PA, USA
Posted by Dubau on Tuesday, December 12, 2006 11:00 AM

Now that's looking Good!

Bud

" You've experienced a set back, and without set backs and learning how to fix them you'll never make the leap from kit builder to modeler "
  • Member since
    August 2006
Posted by RobBrown on Thursday, December 14, 2006 10:25 AM
looks good.  final produst should be nice
  • Member since
    January 2004
  • From: Peru, IN
Posted by leadsled on Tuesday, December 19, 2006 2:42 PM
That looks awesome! Keep up the good work.
  • Member since
    December 2002
  • From: Modeling anything with "MARINES" on the side.
Posted by AH1Wsnake on Tuesday, December 19, 2006 11:15 PM

Thanks for all the comments, guys. I am excited to get this one done. When school lets up for winter break, I'll finish her off, and post some completed pics. I love the kit so far. We'll see if I still think that when I get around to attaching the canopy!


"There are only two kinds of people that understand Marines: Marines and those who have met them in battle. Everyone else has a second-hand opinion."
  • Member since
    January 2006
  • From: Baton Rouge, Snake Central
Posted by PatlaborUnit1 on Wednesday, December 20, 2006 5:59 AM

Snake

Nice one! Looks darned near like mine, even the way you have wired it in the radio rack in the back.  I agree on the antennas, I made the fastrope rig for mine , just the fueselage mount clips, and they keep getting knocked off.

On the canopies, I have built a bunch of these easter eggs over the years:

you will need to dry fit the canopy repeatedly; one end, i dont remember if it is top or bottom, will need some shimming while the other end will need some sanding to fit right. 

I nail one end down first, then when that is dry, nail down the other end. I use 5 minute epoxy to get the sides of the window locked in, arguably the most difficult part of the windsheild, and this will most likely take a bit of Mr. Surfacer 1000 in the end.

HTH you can check mine out with some in progress pics at http:www.angelfire.com/ca4/hlmp/melbarticle.html .

This is a great kit and looks fantastic when its done. Your doing great, please post more! :)

David


Build to please yourself, and don't worry about what others think! TI 4019 Jolly Roger Squadron, 501st Legion
JOIN OUR COMMUNITY!

Our community is FREE to join. To participate you must either login or register for an account.

SEARCH FORUMS
FREE NEWSLETTER
By signing up you may also receive reader surveys and occasional special offers. We do not sell, rent or trade our email lists. View our Privacy Policy.