Well I've been on the forum now for a while discussing and learning about the UH-1. I am very greatful for all the info I have accumulated. I fugure it's time to actually BUILD something! I thought I would start out by trying to fix the undersized Italeri UH-1B rotors.
THe problem: The UH-1B had a rotor length of 44 ft. The Italeri kit scales out to just over 40 ft. Also, the Italeri rotors lack trim tabs on their leading edges. I was pleasently suprised to find that Italeri's 1/72 Hueys have rotors that rotate correctly (counterclockwise) as apposed to their 1/48 helos whose rotors turn backwards to US helos.
Here is a photo of a UH-1B rotor blade from the top showing the trim tab (where white begins near end of blade):
[img]http://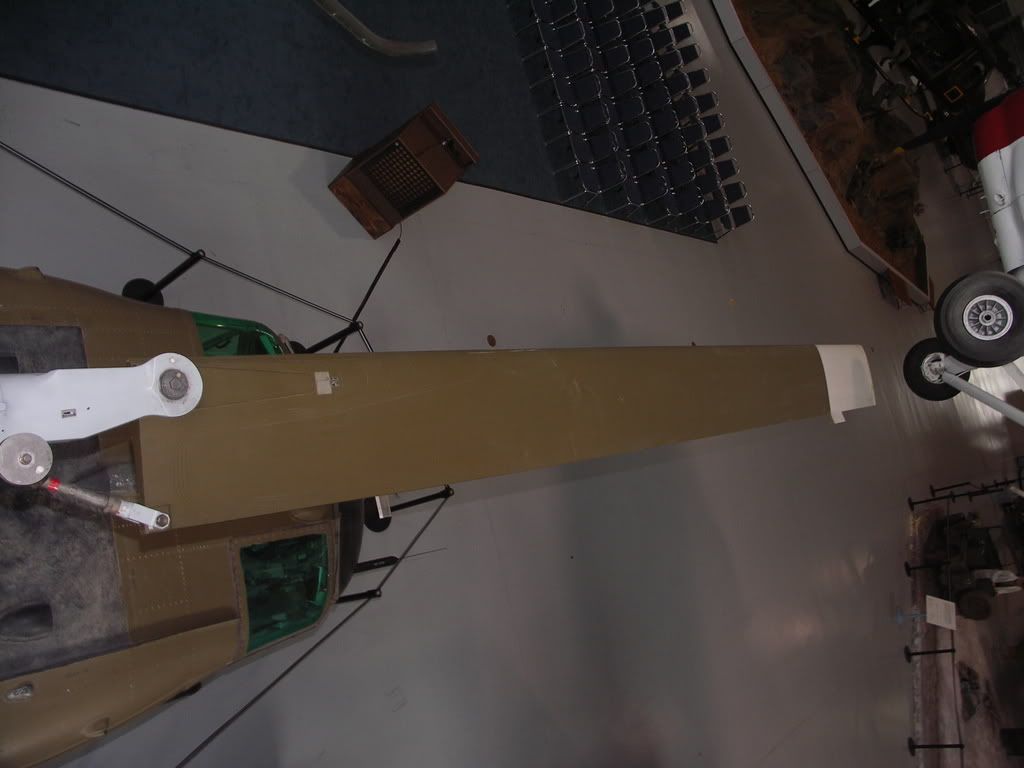
Which model to use: There are several 1/72 Hueys from which replacement rotors could be taken. However, Italeri's UH-1B (no. 040), UH-1C (No. 050), UH-1F (No. 1229), and AB 204B (No.1201) ALL have the SAME rotors. No help there. The Tamiya UH-1B (item 60722) is a rebox of the Italeri kit. The Russian Maquette UH-1B (MQ-7253) is a very bad recast of the Italeri kit as well. Hasegawa has released several different versions of the UH-1D/H over the years. They all have the same rotors with the stabalizer bar molded onto the rotor head (it should be above the rotor head). Also the rotors appear to thick to me. The Revell 1/72 UH-1H "Gunship" (kit 04407) is a rebox of the Hasegawa kit. That leaves the Esci UH-1D "Huey Hog" (Kit 9009). This kit was also reboxed by AMT/ERTL as UH-1D HUEY (kit 8850) and most recently by Italeri as UH-1D "Slick" (kit 1247). This kit has a couple of things going for it. First, the blades have trim tabs and are not overly thick. Second, this kit is a great source for miniguns and M157 7 shot rocket pods. Other 1/72 Hueys kits come with weapons, but these have the most potential for modification. So I decided to use the ESCI/AMT/Italeri UH-1D for this kitbash.
Equipment: Below is a photo of all the supplies I used for this project. as you can see it's not a complicated conversion:
[img]http://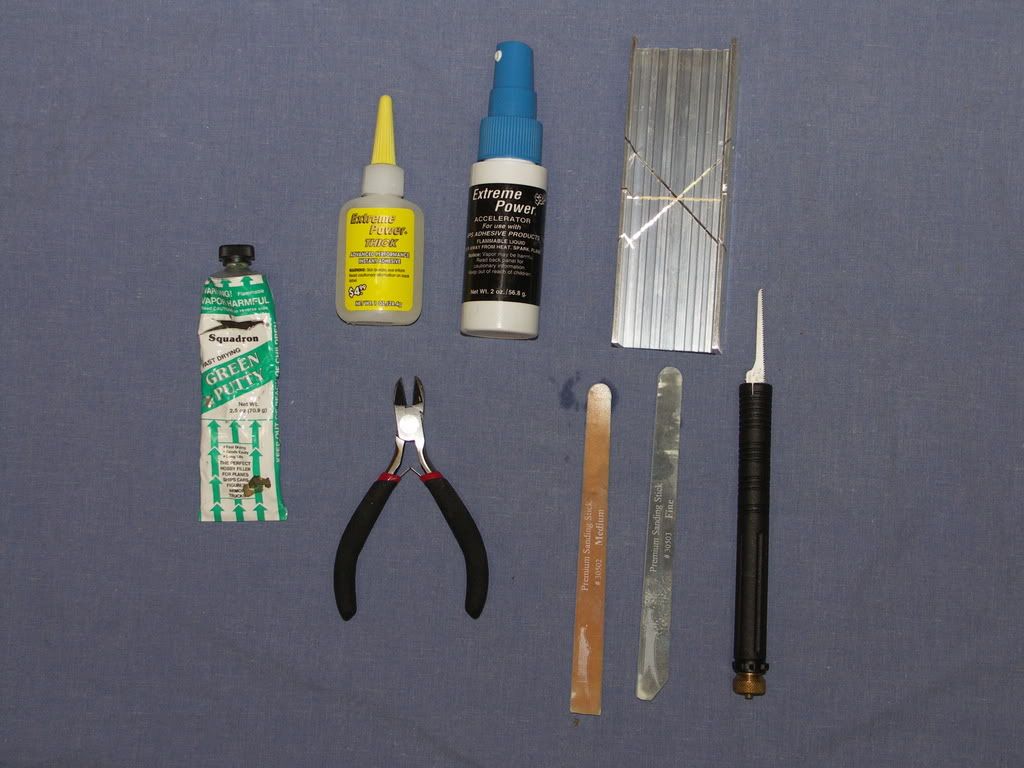
The kits: Here is a photo of the Italeri UH-1B on the sprue:
[img]http://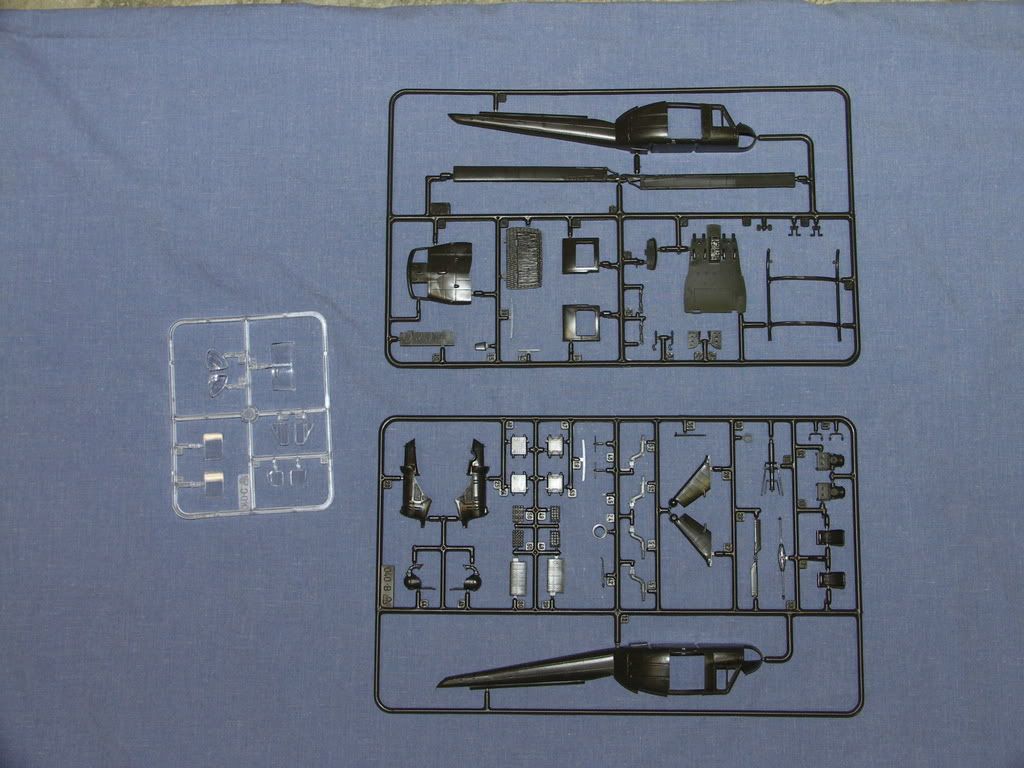
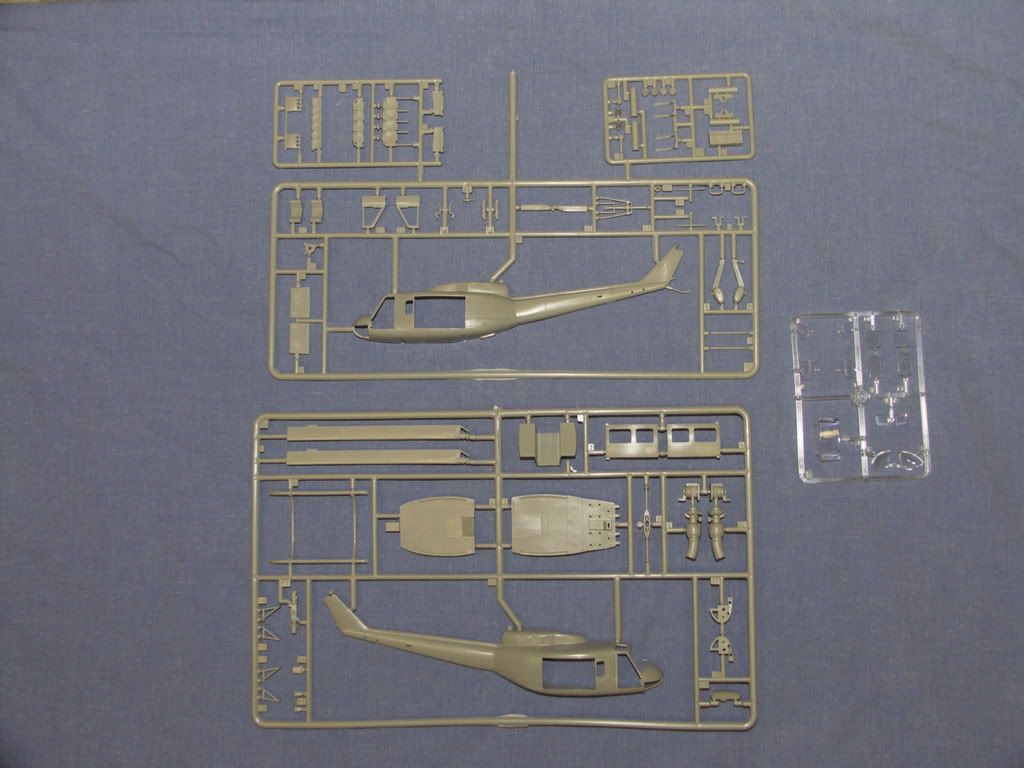
Here's the AMT/ESCI/Italeri UH-1D. I chose one molded in gray to contrast the two parts:
The process:
First I had to decide which rotorhead to use (UH-1B or UH-1D). After comparing them to the real thing I chose the UH-1B rotorhead as it looked to be molded more accurately. Below is a comparison of the kit part to the actual rotorhead on a UH-1B (note that I reversed the photo of the actual helo since the kit prt was laid out upside down):
[img]http://
It turns out that about .8 cm blade extensions are needed. Since I wanted to maintain the position of the trim tabs relative to the end of the rotor blade, I had to cut both sets of blades. This meant that I had to cut the UH-1B rotors, use a section of the UH-1D that was 2 scale feet longer each and connect the UH-1D rotor to the UH-1B rotors. I chose to cut the UH-1B rotor along a raised line in the center of the blade. see below:
[img]http://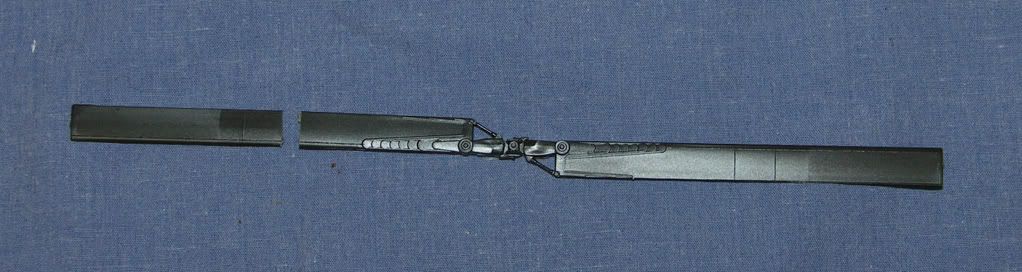
I laid the cut UH-1B rotor on the UH-1D blade and added .8 cm to the cut end. I then marked the proper location of one Uh-1D blade and used this blade to mark the other blade.
[img]http://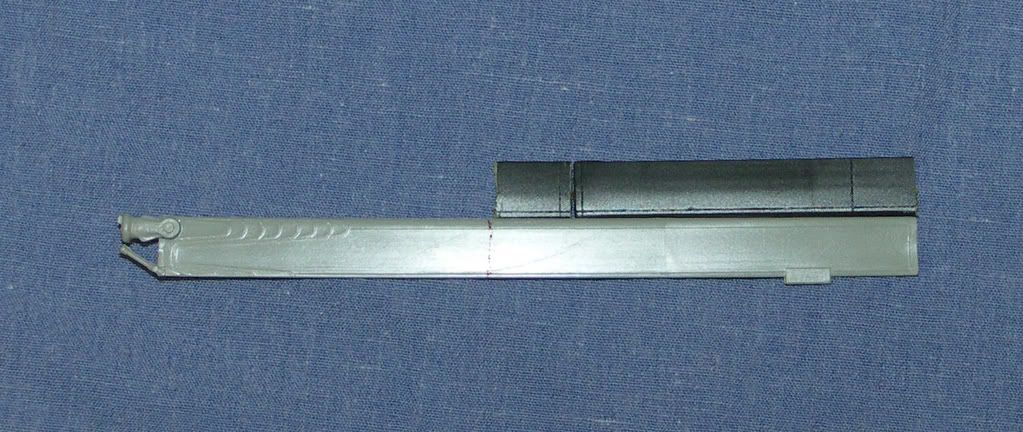
I then cut both UH-1D blades and glued them to the UH-1B rotorhead with superglue. You can see below the result and the comparison with the old UH-1B rotor. It turns out that the UH-1D rotor is a little thicker than the UH-1B rotor. I realized this after gluing the first one and thinned the second one to better match them up before gluing. I used the green putty to fix any mismatched areas and there you go.
[img]http://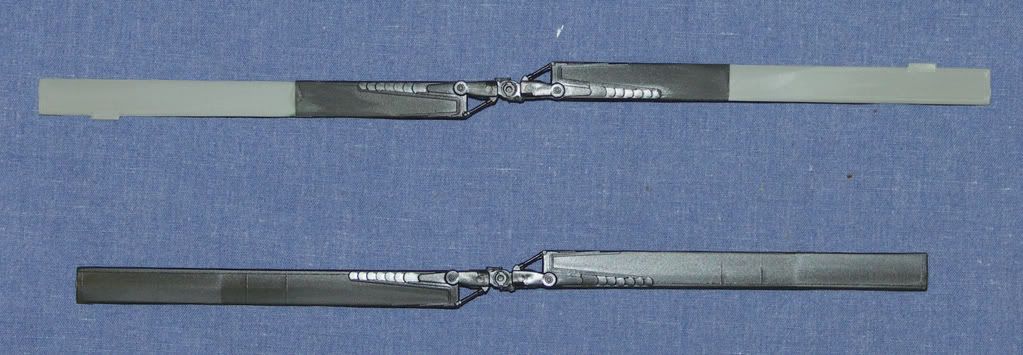
This is my first attempt at this sort of thing. Now to trick out that rotorhead! I welocme any comments or criticisms that would help me do a better job next time.
Ray