SEARCH FINESCALE.COM

Enter keywords or a search phrase below:

My Academy 1/48th CH-53E build

23706 views
62 replies
1 rating 2 rating 3 rating 4 rating 5 rating
  • Member since
    May 2008
My Academy 1/48th CH-53E build
Posted by doupnik on Sunday, June 8, 2008 5:14 PM

Hi


This site has been very helpful in improving this kit, so I thought I should post by build pics. A really big thanks to RidleUSMC for the ideas for the rotor head. I am using Cobra Company's update kit along with some Eduard's pe and some scratch-building.


I started by adding rivets, a BIG omission by Academy.


Then I started the rotohr head. I used with RiddleUSMC's idea, but was having sooo much fun I kept adding lines.

Here it with some primer,

and some wash


The IP started here,

and with some added decals


I added the reinforcement panels to the tail rotor, sheet styrene sanded abit thinner. It's not quite scale, but I think it looks better.


Finally I have Cobra Company's cool crew box.


Thanks for looking, and thanks for posting your build pics they have been very helpfull.


mason 

  • Member since
    August 2004
  • From: Australia
Posted by wooty on Monday, June 9, 2008 4:50 AM

Great start Doupnik

I built one of these monsters a while back but mine was straight out of the box, i hope to do another soon with all the added extras, right now i am saving / spending all my extra dollars on a 1/35 CH-47A with heaps of extras.

Again keep up the good work.

Robert

Rob..

  • Member since
    August 2006
  • From: Neenah, WI
Posted by HawkeyeHobbies on Monday, June 9, 2008 9:06 AM
Are you going to open up all of those vents and replace them with either PE or brass mesh?

Gerald "Hawkeye" Voigt

http://hawkeyes-squawkbox.com/


"Its not the workbench that makes the model, it is the modeler at the workbench."

  • Member since
    May 2008
Posted by doupnik on Monday, June 9, 2008 11:40 AM

 HawkeyeHobbies wrote:
Are you going to open up all of those vents and replace them with either PE or brass mesh?

 Probably not this time, I'll save that for the next build.

 mason

  • Member since
    July 2003
  • From: Cincinnati, Ohio
Posted by ridleusmc on Monday, June 9, 2008 1:11 PM

Great work,

I love that rivet detail.  It looks spot on.  The rotor head detail is looking great as well.  Congradulations and we look forward to seeing more. 

Semper Fi,

Chris

  • Member since
    May 2008
Posted by doupnik on Monday, June 9, 2008 1:37 PM
 ridleusmc wrote:

Great work,

I love that rivet detail.  It looks spot on.  The rotor head detail is looking great as well.  Congradulations and we look forward to seeing more. 

Semper Fi,

Chris


Chris - thanks for your note, as I mentioned your build has been very helpful to me on mine.


I am looking into filling the cabin and I was wondering about the pendants. You mentioned trailer hitches from a 1/35 Sherman, do they all have the trailer hitch, or better yet, is there aftermarket trailer hitches around?


Thanks,


mason 

  • Member since
    July 2003
  • From: Cincinnati, Ohio
Posted by ridleusmc on Monday, June 9, 2008 11:51 PM

No, sorry I don't have any of those trailer hitches around.  I think their technical name is "towing pentles," or something like that.  They were often removed from Sherman tanks, trucks or halftracks for various reasons.  I haven't built any armor in a while, and I don't have any of those hooks in my spares box.  It's a little funny that they look like lifting hooks for a helicopter.  Maybe there are some guys over on the armor forum that are able to help you out.  

Good luck with your 53.  It's a great machine and your model is looking awesome.  

You've inspired me to order a rivet tool (for models). 

Semper Fi,

Chris   

  • Member since
    May 2008
Posted by doupnik on Wednesday, June 11, 2008 1:35 PM

A quick update.


The rotor head is together and almost done.


And the EAPS are pretty much done. 


Thanks for looking,


mason  

  • Member since
    June 2005
  • From: San Tan Valley,AZ
Posted by smokinguns3 on Wednesday, June 11, 2008 6:18 PM
Awsome job so far, i have this kit in my stash and was disapointed they didnt add the rivets. How did you get the rivet info? 
Rob I think i can I think i can
  • Member since
    January 2005
  • From: California
Posted by Heloguy on Wednesday, June 11, 2008 11:08 PM
Great work on the rivets!  Your progress is awesome so far, I can vouch that those rivets are no easy task, but add so much realism.  We all look forward to more progress pics.
"You scratched my anchor!"
  • Member since
    May 2008
Posted by doupnik on Thursday, June 12, 2008 12:05 PM

Thanks a lot. Most of the detail is on the model. If you look really closely, you can see faint line where the rivets should be. It's like they changed their mind and filled in someone's work.


I also have a lot of detail pics that I have taken for over a year getting ready for this build. Checking my references and the model itself, I was able to get most of it done. It isn't 100% accurate, but it helps a lot.


The Landing Zone book on the 53 was also quite helpful with lots of detail pics.


Hope this helps,


mason 

  • Member since
    May 2008
Posted by doupnik on Sunday, June 15, 2008 11:58 AM

Here's an update. The cockpit is close to done along with the cabin floor. Cockpit floor and seats are Cobra Company.


Extra bits are also CC.


Thanks for looking,


mason 

  • Member since
    February 2006
  • From: Oregon
Posted by rescuehawk on Sunday, June 15, 2008 10:37 PM
Mason,

This CH-53E is looking fantastic.

Are you using a wheeled rivet tool?

If so, what do you use for a guide.

Thanks,

Pete
  • Member since
    July 2003
  • From: Piedmont Triad, NC (USA)
Posted by oldhooker on Sunday, June 15, 2008 10:45 PM

Hello Mason,

    Bow [bow] You have done outstanding work with this build, sirBow [bow], and apologize for not finding it sooner, but will certainly be following it now!        Thanks for the excellent coverage!

    Take care,

    Frank  Smile [:)]

  • Member since
    May 2008
Posted by doupnik on Monday, June 16, 2008 1:17 AM

Thanks for the comments, guys. 

I am using the smallest pounce wheel in this set from Micro Mark.  http://www.ares-server.com/Ares/Ares.asp?MerchantID=RET01229&Action=Catalog&Type=Product&ID=15200 

I am using a lot of Dymo tape to keep everything straight. For the actual lines, I am following the lines that are already in the kit, but barely visible, and a lot of reference pics. 


mason 

  • Member since
    May 2008
Posted by doupnik on Monday, June 23, 2008 12:59 PM

Got some things done this weekend. After a false start, here are my cargo area seats, half will be up, half down. And they are a bit fragile, definitely not crashworthy.


Here are my pendants.


My exhausts.


The bits for the cargo area are coming along, here's my raft.


And the cargo area sides.


Thanks for looking,


mason 

  • Member since
    May 2008
Posted by doupnik on Sunday, June 29, 2008 12:02 PM

Got some more work done. The second test fit of the fuselage was fairly sucessful.


And then I worked on the interior some more. The cargo area walls are almost done.


Thanks for looking,


mason 

  • Member since
    December 2002
  • From: Modeling anything with "MARINES" on the side.
Posted by AH1Wsnake on Sunday, June 29, 2008 7:19 PM

Those seats, belts, and interior walls look awesome!!!!
You should really keep those cargo doors open to help show them off.

Andy


"There are only two kinds of people that understand Marines: Marines and those who have met them in battle. Everyone else has a second-hand opinion."
  • Member since
    July 2003
  • From: Piedmont Triad, NC (USA)
Posted by oldhooker on Sunday, June 29, 2008 10:02 PM

Hi Mason,

   Bow [bow] The beautiful detail you're creating and putting together on that plastic is awe inspiring! Bow [bow]

   It looks like you could walk up to the ramp and smell the hydraulic fluid!

     Thank you for the updates!!  Wink [;)]

     Take care,

     Frank


  • Member since
    May 2008
Posted by doupnik on Monday, June 30, 2008 12:15 PM

Thanks for the comments guys. I will be leaving the rear doors open, you just can't see anything otherwise.


I got the fuselage glued together. I probably should have done some more test fits as I ended up with some gaps on the bottom panel. I cleaned them up and it's starting to look like a helicopter.


And the interior:


Thanks for looking,


mason 

  • Member since
    November 2013
Posted by intruder_bass on Monday, June 30, 2008 12:46 PM

  Wow! Nice job on the interior!

 Thanks for sharing!


Andy

  • Member since
    July 2003
  • From: Cincinnati, Ohio
Posted by ridleusmc on Monday, June 30, 2008 12:53 PM

Oh wow,

That looks real.  I had some problems with the fit of the underside of the fuselage too.  I guess it's just a tricky part of that model.

 Great work,

Semper Fi,

Chris

  • Member since
    October 2004
  • From: League City, Texas
Posted by sfcmac on Monday, June 30, 2008 3:33 PM
Looks like you could walk in and sit right down. Thumbs Up [tup]
  • Member since
    May 2008
Posted by doupnik on Sunday, July 6, 2008 9:59 PM

Thanks a lot for the comments guys!


Got a little more done, sponsons are on and the blades are drooped, but I may work on that some more. I am also thinking about dropping the rotor head down a bit.

 Pics, 


Of course it pays to be very careful when taking the blades off, Censored [censored]


I also got the exhaust pipe covers done, now I can put the engines together. RBF tags will be added later.


Thanks for looking,


mason 


  • Member since
    July 2003
  • From: Piedmont Triad, NC (USA)
Posted by oldhooker on Monday, July 7, 2008 5:42 PM


   SWEET!!

  • Member since
    May 2008
Posted by doupnik on Monday, July 21, 2008 1:58 PM

Got some work done. Wired the IP, I used some artistic license here, I am trying to get the feel of the cable spagetti here.


Finally got most of the pieces together, it's looking like a 53 now. I also lowered the rotorhead a bit and re-drooped the blades.


Thanks for looking,


mason 

  • Member since
    July 2007
Posted by scorpr2 on Monday, July 21, 2008 9:58 PM

WOW!!!  She's looking great!  She's a real beauty.  Keep up the great work and keep us posted!

  • Member since
    June 2006
Posted by KennyB on Saturday, August 9, 2008 8:39 PM

Awesome job! I don't frequent this forum much because !. 1. I'm not much into building helicopters, although I have a few in my stash, and 2. there usually isn't much to look at here. Most of the time it's a lot of questions, but not many builds. I'll be watching this one. Great job.

                                                                                   Ken
 

  • Member since
    February 2004
  • From: Quantico, VA
Posted by Yamafreak72 on Sunday, August 10, 2008 12:55 PM
Looks good!  I did one of these a couple months after looking at RiddleUSMC's build and enjoyed the kit immensely.  So much so that I just ordered another kit for $39.99 online.  I did a gray bird all opened up rotors extended last time, this one I think will be in our HMX-1 green and folded.  Don't think I'll spring for as much PE detail as before because you can't really see it IMHO.  Just gotta find someplace to do custom HMX decals for me without breaking the bank.  Anyway, nice build and can't wait to see it finished.
Status: Nastro Azzurro NSR 500- finis!
  • Member since
    May 2008
Posted by doupnik on Monday, August 18, 2008 11:32 AM

Thanks a lot for the comments, guys. Having fun with this one so far.


Started working on the main rotors, added foil and wire to liven them up.


This is my test blade. I am going to mask it off, then paint it dark gray and weather it darker.


Added lines to the refueling probe.


It's on now and the lines are finished.


The rear fuselage has most of the antennas on, it's looking like a good, warty Marine helo now.


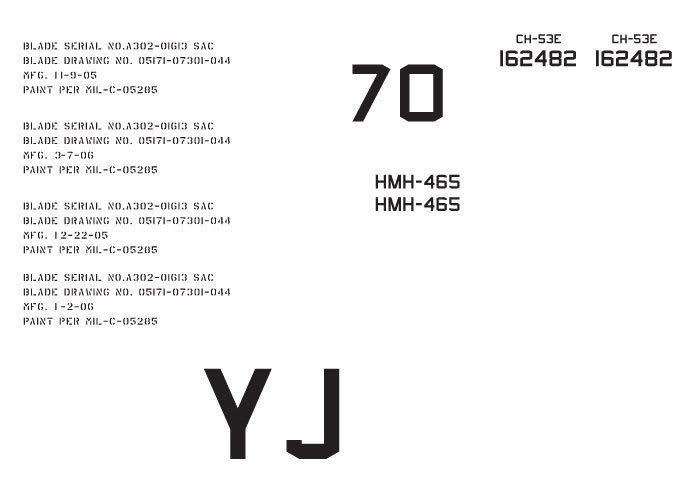
I started on my decals. There aren't too many to do, they are black now, they will be 35237, right? The tail rotor stencils will be yellow. I am probably going to use the same people that RidleUSMC used.
 

Here are closeups of the blade tiedowns and the nose door art. I will be adding more depth and detail to the tiedown.


Thanks for looking,


mason 

JOIN OUR COMMUNITY!

Our community is FREE to join. To participate you must either login or register for an account.

SEARCH FORUMS
FREE NEWSLETTER
By signing up you may also receive reader surveys and occasional special offers. We do not sell, rent or trade our email lists. View our Privacy Policy.