SEARCH FINESCALE.COM

Enter keywords or a search phrase below:

NEW WIP! Team Fortress 2 Dustbowl area 1!

10284 views
27 replies
1 rating 2 rating 3 rating 4 rating 5 rating
  • Member since
    April 2008
  • From: Philadelphia PA
Posted by smeagol the vile on Monday, October 20, 2008 7:23 AM
Yea.  The scout, so far... The head and top torso are that of (unknown maker or set) german radioman.  The head was HEAVILY moddified, to give it a single ear cap, a headset microphone, and baseball cap.  The arms are from a Tamiya russian Tank rider, the legs are from that same set, but a differnt figgure.  The bat is a sprue I stuck IN my dremel, and used like one of those things they use to spinn wood to carve it.  The strap, which will have a bag (not yet decided how to do that one) was a piece of left over vacuform plastic from that miniart kit I did (that plastic is AMAZING to use for scratching) I just glued it down, as thick as it was, then sanded it all down untill it was as thin as it is, it worked wonders.


  • Member since
    June 2008
  • From: Iowa
Posted by Hans von Hammer on Sunday, October 19, 2008 10:11 PM
Good to see that you finally took a stab at figure conversions...

  • Member since
    April 2008
  • From: Philadelphia PA
Posted by smeagol the vile on Sunday, October 19, 2008 6:34 PM
Nah, im not pinning.  Im just using the glue.  At the moment im not even using any putty, the pieces are falling together on their own.


  • Member since
    November 2005
  • From: WA
Posted by airtrans Crash on Sunday, October 19, 2008 5:40 PM

Looks good so far man, I have played TF2.. good luck with making the heavy and the engineer... I kicked *** setting up the autocannons


 A man's country is not a certain area of land, of mountains, rivers, and woods, but it is a principle; and patriotism is loyalty to that principle. ~George William Curtis
  • Member since
    April 2008
  • From: Philadelphia PA
Posted by smeagol the vile on Sunday, October 19, 2008 4:53 PM

Here are some more reference shots. 

For the medic 


sans the red dots.


  • Member since
    June 2008
  • From: Iowa
Posted by Hans von Hammer on Sunday, October 19, 2008 4:33 PM
Ahh... So far, so good.. You usin' wire to join the figures' joints? It'll help re-enforce the joint when you apply the putty and also allow some leeway in fine-tuning poses...

  • Member since
    April 2008
  • From: Philadelphia PA
Posted by smeagol the vile on Sunday, October 19, 2008 4:28 PM
Its a level on said game 'Team fortess Two.'  Im more looking for feedback on the hack/scratching I am doing for the figures.


  • Member since
    June 2008
  • From: Iowa
Posted by Hans von Hammer on Sunday, October 19, 2008 4:21 PM
You need to be a bit farther down the road for much feedback, Smeagol...  Especially since I have no idea what the subject is about... The "Dustbowl" to me was in Oklahoma, Texas, and New Mexico in the 30's...

  • Member since
    April 2008
  • From: Philadelphia PA
Posted by smeagol the vile on Sunday, October 19, 2008 4:18 PM
No replies or comments?  Come on guys, I really need feedback with this.  I'm using a bomb/missle thingy from a corsair kit for the propane tank, working well)


  • Member since
    April 2008
  • From: Philadelphia PA
Posted by smeagol the vile on Saturday, October 18, 2008 2:38 AM

Here is the latest update.  The scout is almost finished!!

please pardon the cropping in the photo, didnt want to have to link 3 different images


The other figure is the start of the medic.


  • Member since
    April 2008
  • From: Philadelphia PA
Posted by smeagol the vile on Wednesday, September 17, 2008 7:45 AM
I need to thin the guy's face out a bit, its to fat around the bottom.  Any suggestions besides taking my file to it again (Crap I love that file set I got, dunno how I lived without it (and without my dremel.  They got more work in this project then any of my other tools EVER)


  • Member since
    April 2008
  • From: Philadelphia PA
Posted by smeagol the vile on Sunday, September 14, 2008 6:01 PM


Thats the fire, sans the blue at the bottom. 

The styro foam is going to be the base.  The bottom piece is the floor, as in, wont be touched, the top two will have a revene cut into it and will be built on.

The scout so far.  You have the head with the headphones and Mic.  Baseball bat.  Dog Tags (hard to make) torso w/ strap for courier bag, and legs.


  • Member since
    November 2005
  • From: WA
Posted by airtrans Crash on Friday, September 12, 2008 10:30 PM
awesome. My little brother introduced me to TF2 and I enjoy the pyro more than any other character... course I got pretty good with the engineer too.
 A man's country is not a certain area of land, of mountains, rivers, and woods, but it is a principle; and patriotism is loyalty to that principle. ~George William Curtis
  • Member since
    April 2008
  • From: Philadelphia PA
Posted by smeagol the vile on Friday, September 12, 2008 5:42 PM
Thanks.  I wont need to cover any of it, its all bare wood, sort of like a really, really large structure built like a run down shack.


  • Member since
    May 2006
Posted by Zen-Builder on Friday, September 12, 2008 5:13 PM

Not much on tools.

Small hacksaw, sharp knife and a metal ruler. Balsawood is a very soft and springy wood.

Very often used on wooden RC gliders, etc.

Standard white/wood glue will bond it nicely, maybe a few small nails or tacks to help keep larger pieces togeher. 

If you want to cover the wood texture(might be needed in some cases) to make like a plaster wall finish I use texturing Gel, quiet a variety at the arts supply store.

HTH.

  • Member since
    April 2008
  • From: Philadelphia PA
Posted by smeagol the vile on Friday, September 12, 2008 4:13 PM
Thanks zen.  What kind of tools would I need to work with for the balsa wood, like to cut it and glue it and such


  • Member since
    May 2006
Posted by Zen-Builder on Friday, September 12, 2008 2:38 PM

If you want wood texture than wood is your best choice.

Just make sure you get one where the wood texture/grain matches in scale. I found Balsawood good for this. Lightweight, easy to cut and work with and very cheap.

Trying to paint the wood-grain on plastic is quiet an undertaking and time-consuming.

IMO & IME, plastic works great to reproduce metal structures but not for wood.

HTH.

  • Member since
    April 2008
  • From: Philadelphia PA
Posted by smeagol the vile on Friday, September 12, 2008 11:40 AM

Pics for this once I get home.

I have taken a break from sanding down that styrene to make it into a cylinder (see above) to try and work on the fire itself from the flame thrower.

I decided to go with the cotton ball method.  I took one ball and sliced it with a razor (not through it, just to loosen the connections and to make it less ball'y)  I then pulled and stretched it (ended up sort of looking like a claw, I kept it that way, looks cool)  But I realised that it didnt fit what the flame thrower does.  So I took a Q-tip and cut the end off one (so it fit into the nozzle of the flame thrower)  I glued the first cotton ball to the non cut end, then covered the Q-tip is stretched and pulled appart cotton balls.  I
(and my fingers) got their first coat of orange last night.  Im going to use something darker (dont have ANY red) im going to try rust tonight to give it a layered look then I will hit the base with a blue (lightly) where the wire that the gnition flame is touched where the gas comes out.


Now, I have a question for you modeling geniouses out there.  I want to build a building for this, but the building is made of wood.  Should I use styrene, or go out and get wood to do it? or how should I do this?  Tips, advice, and instruction all welcome! 


  • Member since
    April 2008
  • From: Philadelphia PA
Posted by smeagol the vile on Wednesday, September 10, 2008 7:48 AM

Since that was posted in haste (while said game was loading) Ill explain what I did, I cut styrene into about 8 squares, about the same size.  I glued them all together as centered as I could.  Once I did that I let it dry, once it dried I took my zona saw (the one that claimed so much of my fingertips) and cut down the sides untill they were even.

Once they were even I started sanding them down untill it was semi smooth then I cut the corners to make it a octagon sort of.  For easy rounding.  Then I took my file, you can see the handle (I love that file set) and started filing it down and down and down.  One side is sort of round, its going to take ALOT of sanding, but I can get it exactly how I want it.

I decided to do this after scowering an entire MASSIVE flea market for anything taht could be used to scratch this without massive putty and modding, I couldnt.  so, I decided to go this rout.  Lets hope it works out!  Wish me luck boys


  • Member since
    April 2008
  • From: Philadelphia PA
Posted by smeagol the vile on Tuesday, September 9, 2008 7:48 PM

This is called 'screw it, im doing it the hard way' scratch built propane tank from layers of styrene sheets


  • Member since
    April 2008
  • From: Philadelphia PA
Posted by smeagol the vile on Monday, September 8, 2008 7:27 PM
Yea, the scout is simple, and since he is my second profession (everyone in a class based game has atleast one profession, a class they are just as goddly at that they are ever going to be, mine are Medic, Scout then Engineer not to say I only play them)  I know how he moves what his clothes look like, all of that.


  • Member since
    July 2003
  • From: Toronto, Ontario, Canada
Posted by zokissima on Monday, September 8, 2008 7:22 PM

Hey, at least on the plus side, for the characters you don't really have too much to worry about as far as folds in clothing and that sort of stuff is concerned. Really curious to see what you're gonna do with this guy.

  • Member since
    April 2008
  • From: Philadelphia PA
Posted by smeagol the vile on Monday, September 8, 2008 6:44 PM
Thanks.  Im working my butt off for the scout.  Its hard to get these russian soldier's legs thin enough to fit the thin build of the scout (and the torso I have)


  • Member since
    July 2003
  • From: Toronto, Ontario, Canada
Posted by zokissima on Monday, September 8, 2008 11:11 AM
lol now this is something different. Hopefully you'll pull it off well, and nail the characteristics of all the combatants. Will be watching with interest.
  • Member since
    April 2008
  • From: Philadelphia PA
Posted by smeagol the vile on Saturday, September 6, 2008 10:24 AM

Not a bad idea, but noone in my family smokes cigars so that would be a problem.

As far as the size of the thing, it will be done on a styrofoam block I have (I have tons of them) there an inch thick, 12 inchs vertical, 20 inches horisontal.


I am going to use one as the bottom of the thing and then stack maybe three up (depending on how I measure everything), then there will be whatever buildings I put up on it, and if I put up any back walls (cliffs)


that is a general view of the area I am going to build. 


  • Member since
    April 2004
  • From: Boston MA
Posted by vespa boy on Saturday, September 6, 2008 9:12 AM
Nice work taking on such a challenging job. One thought for the propane tank...the aluminium tubes that some cigars come in have a domed end on them. If you got two of them and cut them to size and joined them you would have a pretty convincing start to your propane tank.

http://public.fotki.com/nkhandekar

This ain't no Mudd Club, or C.B.G.B.,
I ain't got time for that now

  • Member since
    January 2007
  • From: BC
Posted by Deputy_Brad on Saturday, September 6, 2008 3:27 AM
Very cool, it's nice to see a change of pace instead of the same old Tiger done over and over again (no offense, still just as cool everytime, just doesn't get any cooler). How large are you planning on making the base? I have The Orange Box but I never play TF 2, maybe Ill have to go check out this map now.
My real name is Cam. Interest: anything 1/72, right now mostly sci-fi and modern In progress: 1/72 Sci-fi diorama (link in my web) 1/72 Leopard 2A5 1/72 APC Conversion to a MEGA DESTROYER
  • Member since
    April 2008
  • From: Philadelphia PA
NEW WIP! Team Fortress 2 Dustbowl area 1!
Posted by smeagol the vile on Friday, September 5, 2008 9:21 PM

I have been asking Qs about this around diffrent parts of this forum.

This project is majorly a scratch build/hack build and its even more difficult because of the way the characters are, there alittle exagerates at points (the heavy's stomach, the size of the weapons, etc). 


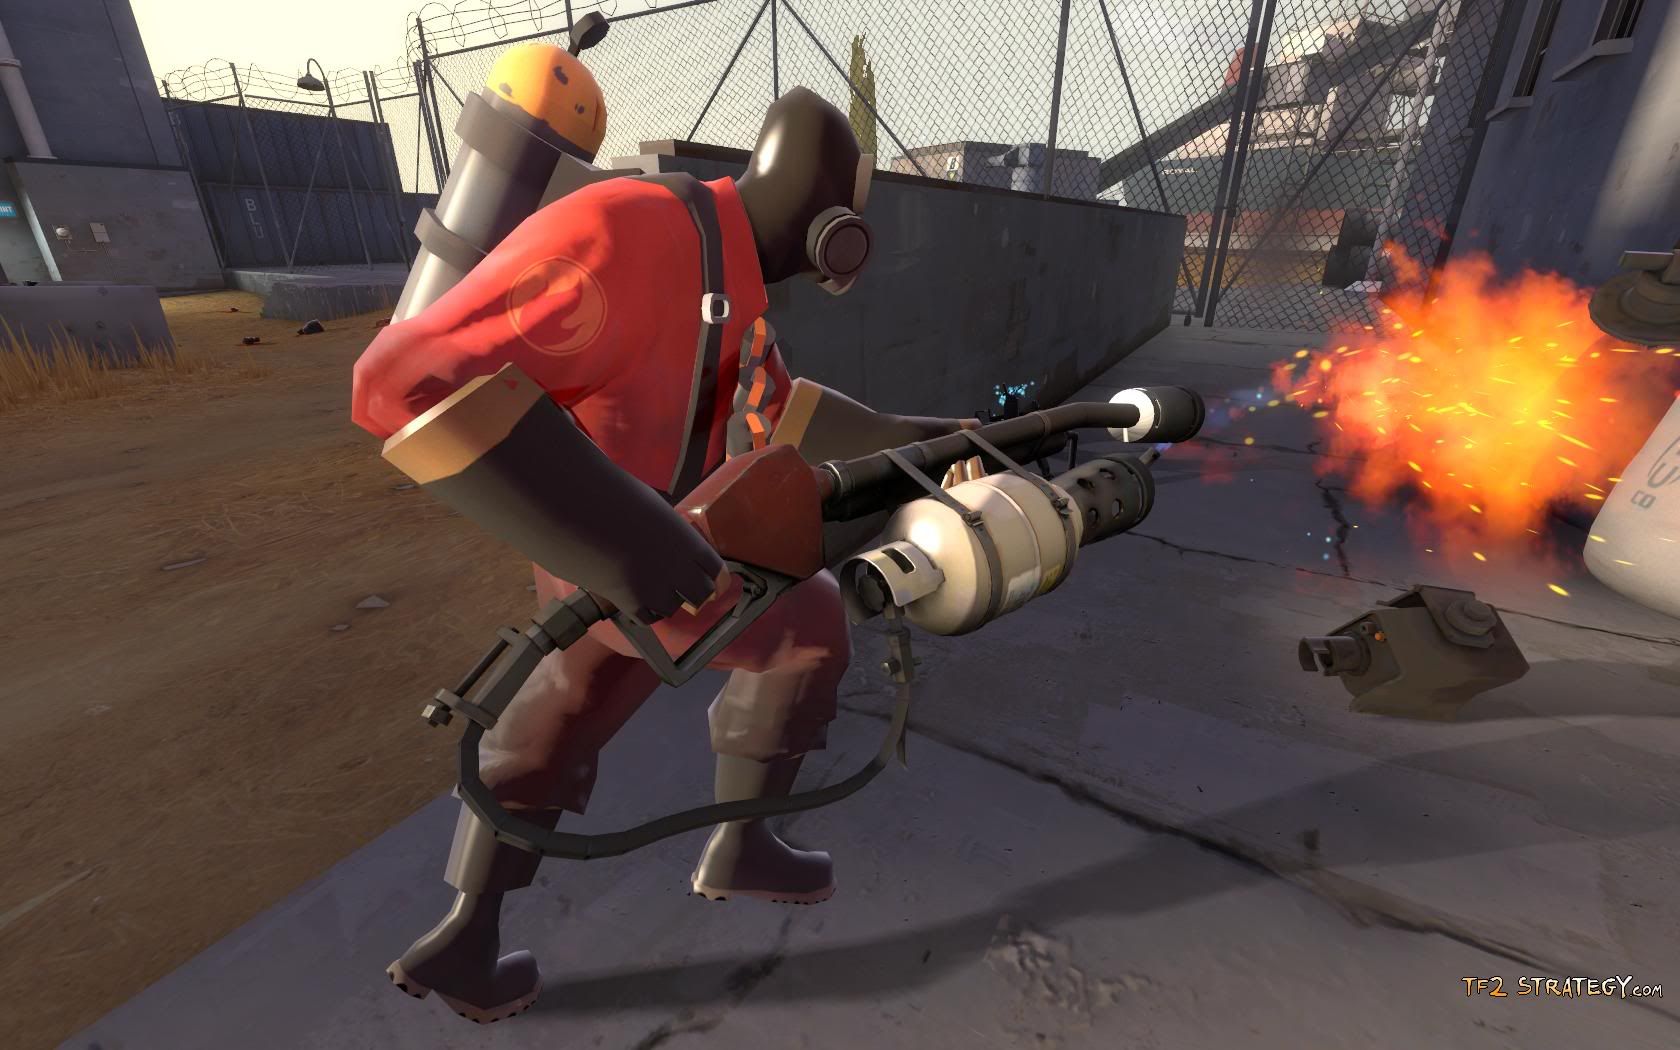
First, as is my trend, I will post alot of my WIP shots as well as my reference shots, reference first.


I have started with some of the weapons, items, and characters that I could start.  So far you will see the beginnings of the scouts (from a 1/35 scale russian soldier running and a 1/35 german radioman as well as a Baseball bat modded from a sprue) The bit of wire sticking up from the head isnt bent yet beacuse the glue is setting, it is going to be a microphone.

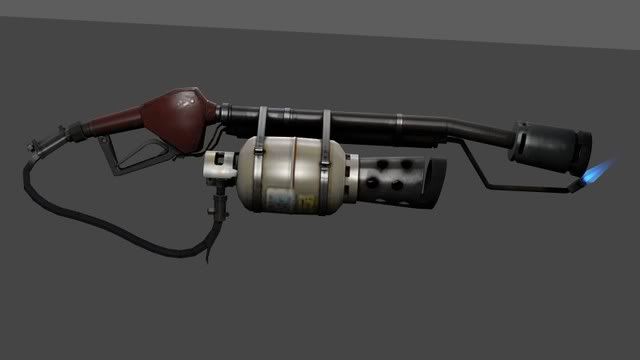
I have the majority of the Pyro's flame thrower built, I am struggling with the Propane tank, cant seem to find something that will work for it (to mod or scratch).

Here is the Sapper, an item that the spy class uses to disable enemy sentury guns, dispensers, and teleporters.


JOIN OUR COMMUNITY!

Our community is FREE to join. To participate you must either login or register for an account.

SEARCH FORUMS
FREE NEWSLETTER
By signing up you may also receive reader surveys and occasional special offers. We do not sell, rent or trade our email lists. View our Privacy Policy.