SEARCH FINESCALE.COM

Enter keywords or a search phrase below:

1/48 Lancaster Dio

2790 views
7 replies
1 rating 2 rating 3 rating 4 rating 5 rating
  • Member since
    July 2017
1/48 Lancaster Dio
Posted by crazypat on Sunday, January 7, 2018 1:50 AM

this is my first time posting one of my finished dios. the photos are under the Lancaster section on the blog on my website https://collinsp19.wixsite.com/thehobbymodelingguy. please feel free to offer critcilsm and advice. all coments are welcome i need help to hone my skills. i created the website as a free way to host my pictures. look forword to hearing what you have to say.

thanks

  • Member since
    May 2009
  • From: Poland
Posted by Pawel on Sunday, January 7, 2018 5:15 AM

Hello!

I think you should post some photos, too:

I like the grass and the hangar. Then again I think the concrete is too clean and doesn't have enough cracks. The model itself could use some more detailing, too - 1:72 could be better for something like that. Thanks for sharing and have a nice day!

Paweł

All comments and critique welcomed. Thanks for your honest opinions!

www.vietnam.net.pl

  • Member since
    July 2017
Posted by crazypat on Sunday, January 7, 2018 1:24 PM

Pawel

Hello!

I think you should post some photos, too:

I like the grass and the hangar. Then again I think the concrete is too clean and doesn't have enough cracks. The model itself could use some more detailing, too - 1:72 could be better for something like that. Thanks for sharing and have a nice day!

Paweł


thankyou verry much pawel. what sort of detailing are you thinking on and what would be the the easyist way to dirty up the concrete and put cracks in it.

thanks

  • Member since
    July 2017
Posted by crazypat on Sunday, January 7, 2018 1:30 PM
also could anyone tell me how to post my photos thanks
  • Member since
    November 2009
  • From: SW Virginia
Posted by Gamera on Thursday, January 11, 2018 11:02 AM

Oh gee, how did I miss this!?! Nice work there. 

If you want oil/grease stains on the tarmac the easy way is just to mix up some very thin paint just like you would a wash, dip a paintbrush in it and then flick it onto the tarmac. You'll want to try this with a spare piece first to get the feel of it before you do the real thing. It's a bit of juggling to get the right amount of paint to thinner and get the flicking motion down pat. 

And you can always apply just a dab of glue along a few places where the tarmac sections meet and then sprinkle on some static grass to give the impression of cracks with grass growing though them. 

"I dream in fire but work in clay." -Arthur Machen


  • Member since
    July 2017
Posted by crazypat on Friday, January 12, 2018 2:12 AM
thanks gamera i'll give it a go
  • Member since
    May 2009
  • From: Poland
Posted by Pawel on Friday, January 12, 2018 7:01 AM

Hello Pat,

sorry for the delay.

As for the detailing, I was thinking about things like thinning the covers of the engines so that they dont look too heavy:

Look at the edges of the opened covers and the air intakes - they need work. You could also add some wiring and plumbing to the engines in 1:48. And the ladder could use some use marks - the steps of the ladder, for example are more worn on their topside and relatively fresh on their underside, unless the ladder is completely new, of course.

Concrete is easy - if you mix some acrylic black paint with water, you can put such black wash on the concrete and then you get nice discolorations and dirt. Cracks can be pencilled in, too. Here's what I've done using only acrylic putty and black wash for concrete:
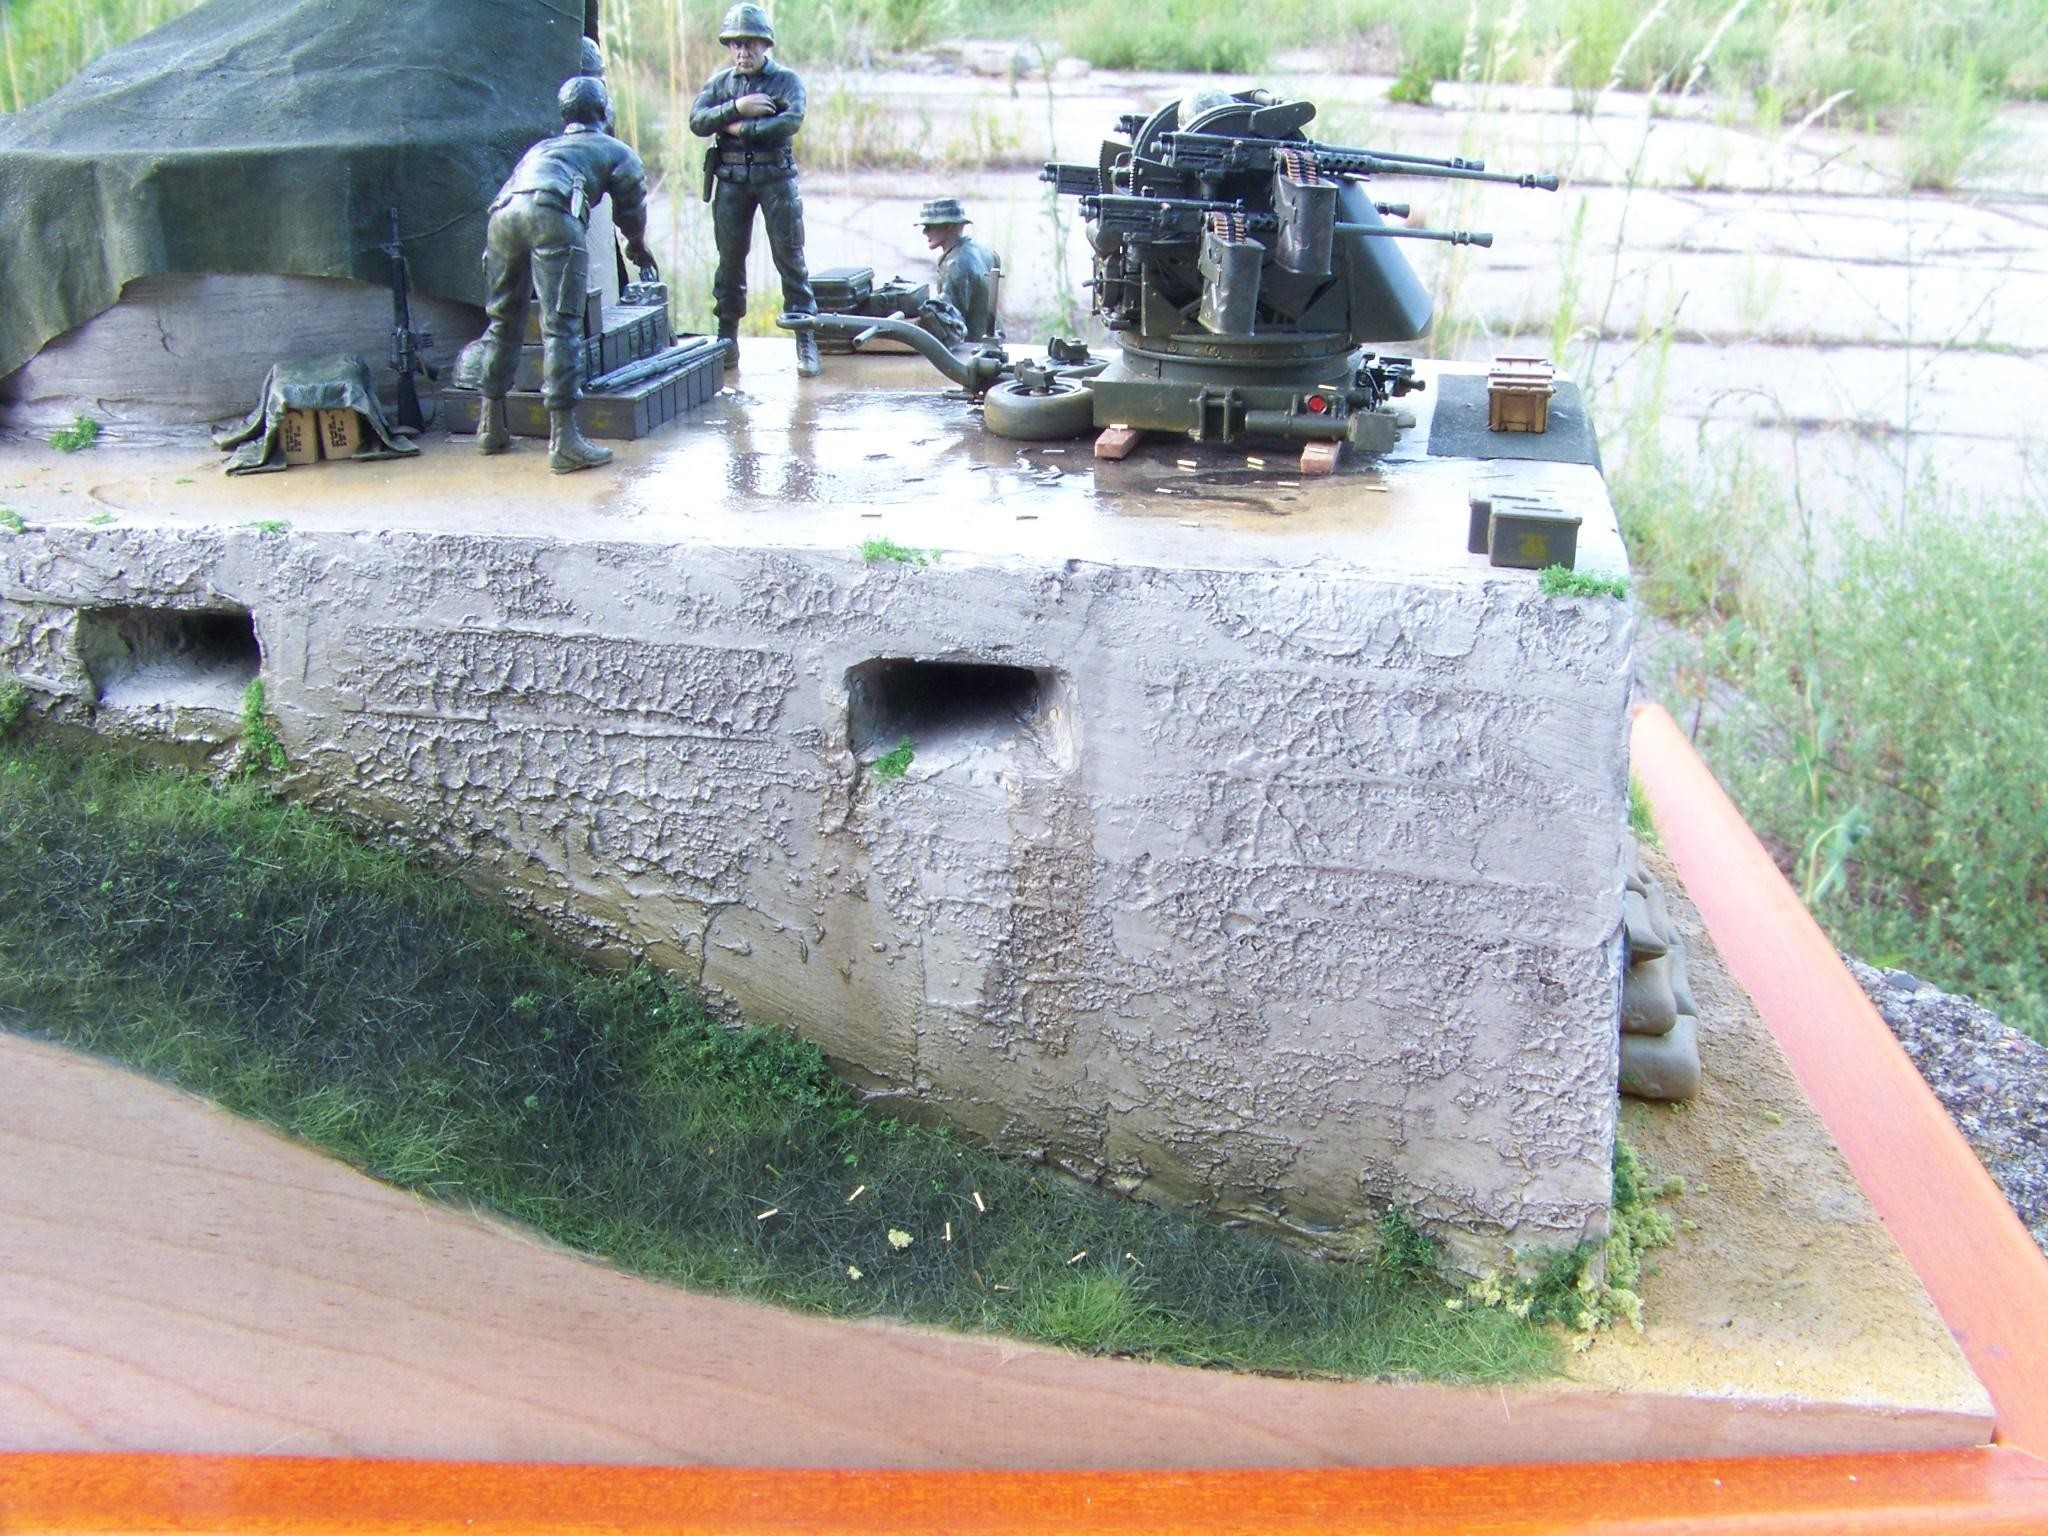
1:35 M55 Quad 50 diorama by Pawel

Posting pictures is easy when you alredy got them on the net. Just visit your page, select a picture and right-click it, choose "Copy image url" or something to this effect, depending on your browser. You want the URL of this image (http://...../....jpg). Then, editing a post, you've got this icon (insert/edit image) between "the chain" (insert/edit link) and "the movie"(insert/edit video). Click the icon and paste your image's URL, click OK and there you go.

I hope this helps, have a nice day

Paweł

All comments and critique welcomed. Thanks for your honest opinions!

www.vietnam.net.pl

  • Member since
    July 2017
Posted by crazypat on Friday, January 12, 2018 4:48 PM

Pawel

Hello Pat,

sorry for the delay.

As for the detailing, I was thinking about things like thinning the covers of the engines so that they dont look too heavy:

Look at the edges of the opened covers and the air intakes - they need work. You could also add some wiring and plumbing to the engines in 1:48. And the ladder could use some use marks - the steps of the ladder, for example are more worn on their topside and relatively fresh on their underside, unless the ladder is completely new, of course.

Concrete is easy - if you mix some acrylic black paint with water, you can put such black wash on the concrete and then you get nice discolorations and dirt. Cracks can be pencilled in, too. Here's what I've done using only acrylic putty and black wash for concrete:

1:35 M55 Quad 50 diorama by Pawel

Posting pictures is easy when you alredy got them on the net. Just visit your page, select a picture and right-click it, choose "Copy image url" or something to this effect, depending on your browser. You want the URL of this image (http://...../....jpg). Then, editing a post, you've got this icon (insert/edit image) between "the chain" (insert/edit link) and "the movie"(insert/edit video). Click the icon and paste your image's URL, click OK and there you go.

I hope this helps, have a nice day

Paweł


thanks heaps Pawel thanks heaps for the reply will give it a go and see how it turns out

thanks again

JOIN OUR COMMUNITY!

Our community is FREE to join. To participate you must either login or register for an account.

SEARCH FORUMS
FREE NEWSLETTER
By signing up you may also receive reader surveys and occasional special offers. We do not sell, rent or trade our email lists. View our Privacy Policy.