There are a lot of ways to do it and this is how I do mine. Probably not the best method there is but I find this method simple and less messy.
Materials:
1.) 6mm (1/4 inch) Foam Board. Comes in black or white but I had the black one. It is basically medium density foam sandwiched by thick paper (not really cardboard) Note other thickness are available but this is the most common in the art supplies stores here.
2.) White glue
Tools: (well I don't have to but I'll just list them down just the same... )
1.) Cutter
2.) Ruler or Straight Edge
3.) Pencil
4.) Cutting mat (or whatever that will prevent my wife yelling at me when she sees that I scratched the dining table again...)
5.) Pins
Procedure:
1.) Draw the desired form of structure wall (include the doors, windows, etc.). You may need some 1/35 scale ruler to get better dimensions. Do this for each wall face you need.
2.) Cut off the entire wall face from the board. Also cut off the openings like doors and windows.
3.) Draw outlines of the plaster.
4.) With the cutter retrace the outlines lightly just through that the covering paper. Do not cut any deeper.
5.) Peel off the paper on ares where you want the bricks to be exposed.
6.) When you peel off the cover paper, you will have a surface of foam. Draw lines to represent the bricks. Do this in all exposed foam areas. Retrace the lines with the cutter cutting only about 1mm into the foam. Be careful as the foam is very soft and can be cut easily.
7.) retrace all the cut lines with a ball-point pen. This is to widen the gap a bit to accept the white paint (simulating mortar paste) during painting.
8.) Add all the other things like ledges, canopies, etc.
9.) Joint all wall faces together. Use the pins as nails to hold the faces together while the glue dries.
10.) Now you have the basic structure of a ruin.
The street was done by simply cutting lines on the foamboard surface and retracing the said lines using a ball-point pen.
Here are some sample pics:
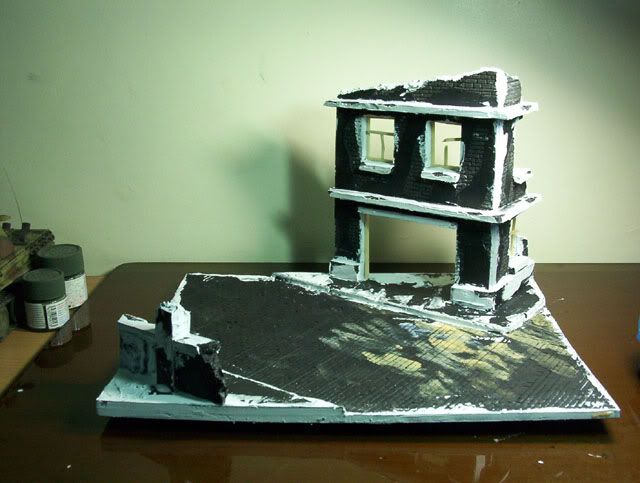
http://img.photobucket.com/albums/v626/Dwight_Ta-ala/Model%20Pictures/100_2332.jpg
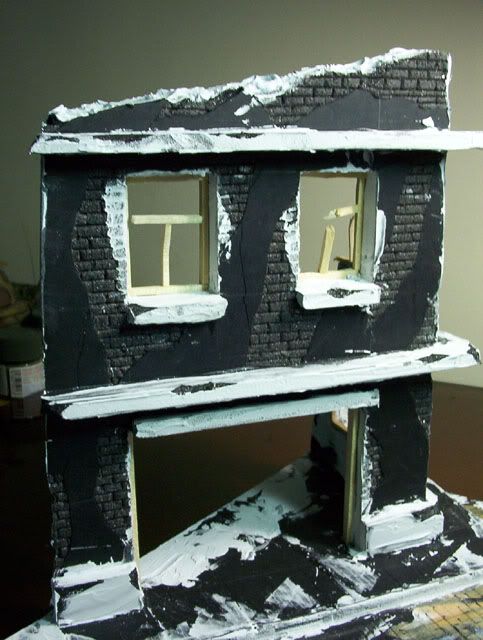
http://img.photobucket.com/albums/v626/Dwight_Ta-ala/Model%20Pictures/100_2330.jpg
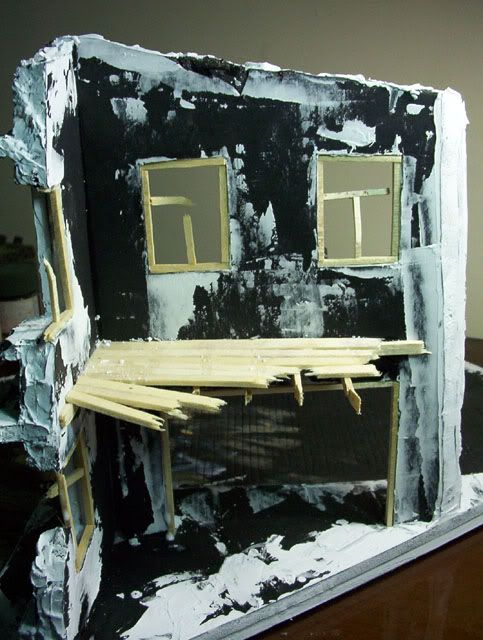
http://img.photobucket.com/albums/v626/Dwight_Ta-ala/Model%20Pictures/100_2329.jpg
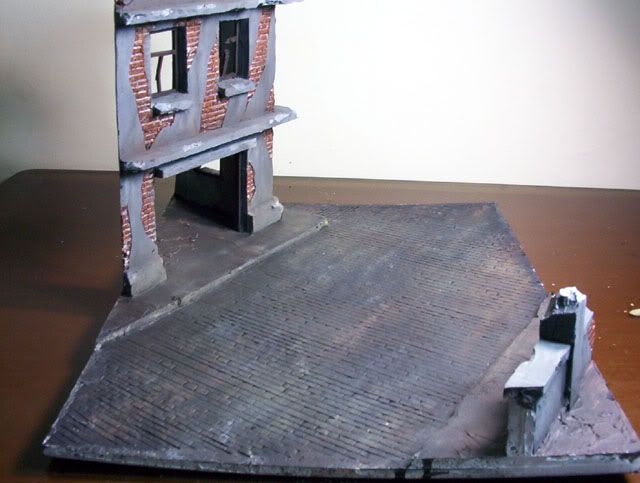
http://img.photobucket.com/albums/v626/Dwight_Ta-ala/Model%20Pictures/100_2333.jpg
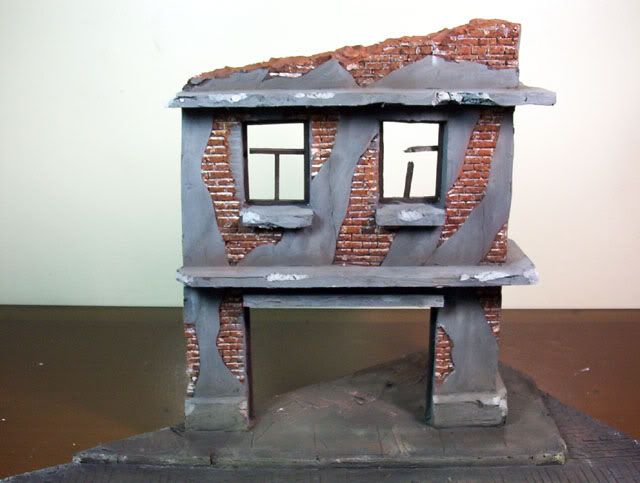
http://img.photobucket.com/albums/v626/Dwight_Ta-ala/Model%20Pictures/100_2335.jpg
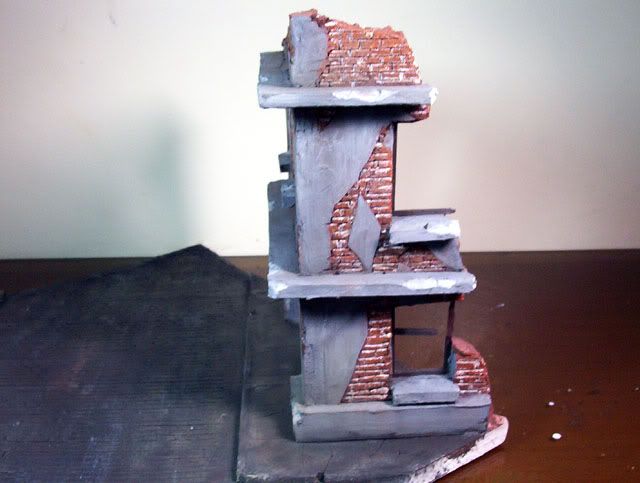
http://img.photobucket.com/albums/v626/Dwight_Ta-ala/Model%20Pictures/100_2336.jpg
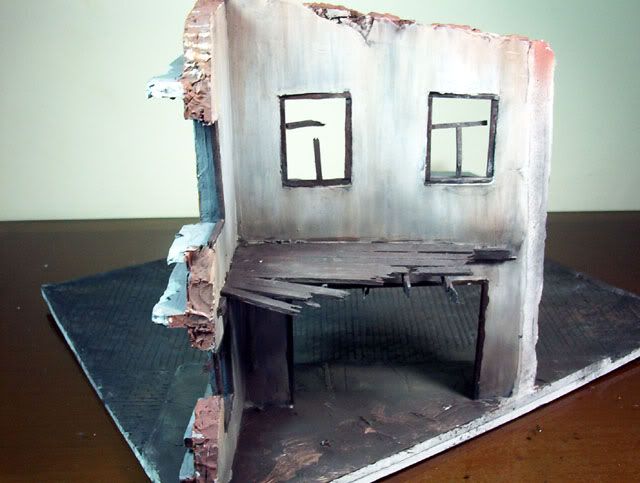
http://img.photobucket.com/albums/v626/Dwight_Ta-ala/Model%20Pictures/100_2337.jpg
The above ruin was finally used in one of my previous dioramas. Click the link below if you want to check it out.
http://www.finescale.com/FSM/CS/forums/374412/ShowPost.aspx
Good luck.