SEARCH FINESCALE.COM

Enter keywords or a search phrase below:

Diorama No. 15: Roadblock

1215 views
14 replies
1 rating 2 rating 3 rating 4 rating 5 rating
  • Member since
    July 2003
  • From: Philippines
Posted by Dwight Ta-ala on Thursday, February 9, 2006 4:55 PM
 archangel571 wrote:
 Dwight Ta-ala wrote:

In making the grass, I used some paint brushes. I airbrushed the bristles with a variation of green tones. Then I cut the bristle into small lengths. I mixed all the bristles together and applied it on the base using white glue.

i know woodland scenics grass are kinda more costly in a pack... but how many brushes did u actually go through just to get that bit of grass??


I used 2 wide chinese brushes. The width of each brush is about 25mm or 1 inch and a length of 40mm or 1-1/2 inch.

  • Member since
    June 2005
  • From: NJ 07073
Posted by archangel571 on Thursday, February 9, 2006 12:37 PM
 Dwight Ta-ala wrote:

In making the grass, I used some paint brushes. I airbrushed the bristles with a variation of green tones. Then I cut the bristle into small lengths. I mixed all the bristles together and applied it on the base using white glue.

i know woodland scenics grass are kinda more costly in a pack... but how many brushes did u actually go through just to get that bit of grass??

-=Ryan=- Too many kits... so little free time. MadDocWorks
  • Member since
    November 2004
  • From: Canada
Posted by sasd on Wednesday, February 8, 2006 2:29 PM
Love the layout Dwight,building,wagon wheel,wheelbarrel etc.are all excellent, what do you do with old paint brushes,why you make grass out of em,very effective! Overall a very nice piece,not too,too overly fussy on the croundcover but that`s just me.Gotta love that building though!!
"Battleing Bastards of Bastogne"
  • Member since
    May 2004
  • From: Dallas
Posted by KINGTHAD on Wednesday, February 8, 2006 12:11 PM

Nice looking dio. I have used the same formula for grass, your grass came out great.


Thad

  • Member since
    December 2003
  • From: Montreal
Posted by buff on Wednesday, February 8, 2006 10:17 AM
I had never thought of doing grass that way.  What a great idea, Dwight. 

On the bench: 1/32 Spit IXc

  • Member since
    December 2005
  • From: Alabama USA
Posted by davew6003 on Tuesday, February 7, 2006 6:07 PM
I like the grass!! I think i will try that method next time.Thanks for the new ideas. Nice job.
  • Member since
    July 2003
  • From: Philippines
Posted by Dwight Ta-ala on Tuesday, February 7, 2006 5:04 PM

Thanks for the comments and tips guys.

I agree with the track marks. Actually it was a big mistake on my part. The ground was made from wall putty and I usually allow it to dry a little bit (when it is not too soggy) before I put impressions. This time I was really putting attention to it because of some recent problems that I have. I left it to dry too long. I'll see what I can do about it.

In making the grass, I used some paint brushes. I airbrushed the bristles with a variation of green tones. Then I cut the bristle into small lengths. I mixed all the bristles together and applied it on the base using white glue.


Thanks for the comments and tips guys.


  • Member since
    April 2003
  • From: CANADA
Posted by Kelly_Zak on Tuesday, February 7, 2006 2:49 PM
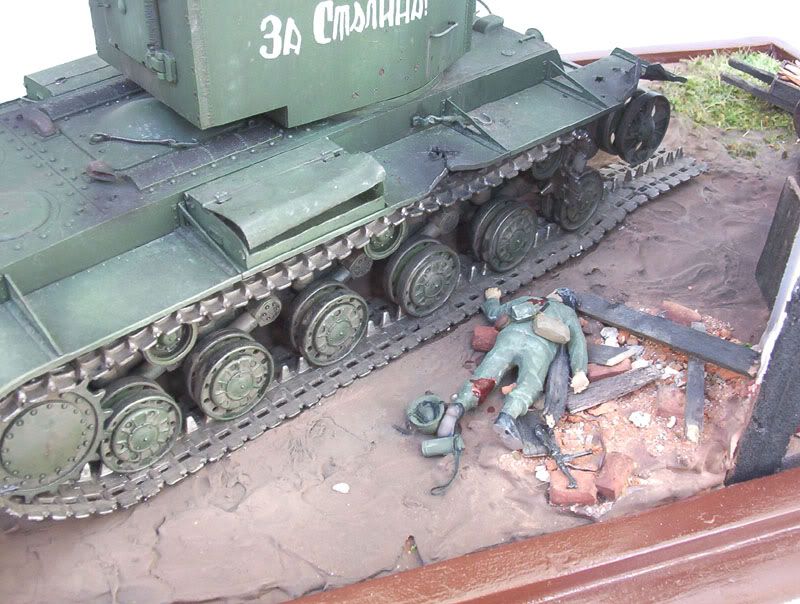
Way cool, Dwight, KV looks excellent, nice building, that German doesn't look like he's long for this world, excellent dio!
"There you go with those negative waves again!"
  • Member since
    May 2004
  • From: Portugal
Posted by madspaniard on Tuesday, February 7, 2006 2:12 PM

Very good job on the dio,Ilike it a lot

Pedro

Fw 190 A-3 Richtofen JG
  • Member since
    July 2013
Posted by DURR on Tuesday, February 7, 2006 1:30 PM
the uniform /tank combo is fine
  • Member since
    November 2005
Posted by Anonymous on Tuesday, February 7, 2006 1:04 PM
By the looks of it, I'd place my money on the Russians at this point. lol
Nice work.
  • Member since
    December 2002
  • From: Valrico, FL
Posted by HeavyArty on Tuesday, February 7, 2006 1:03 PM
Looks good.  Good layout and tells the story well.  Agree on the track marks though.  Grass looks good, what is your new technique?

Gino P. Quintiliani - Field Artillery - The KING of BATTLE!!!

Check out my Gallery: https://app.photobucket.com/u/HeavyArty

"People sleep peaceably in their beds at night only because rough men stand ready to do violence on their behalf." -- George Orwell

  • Member since
    July 2003
  • From: Toronto, Ontario, Canada
Posted by zokissima on Tuesday, February 7, 2006 12:59 PM
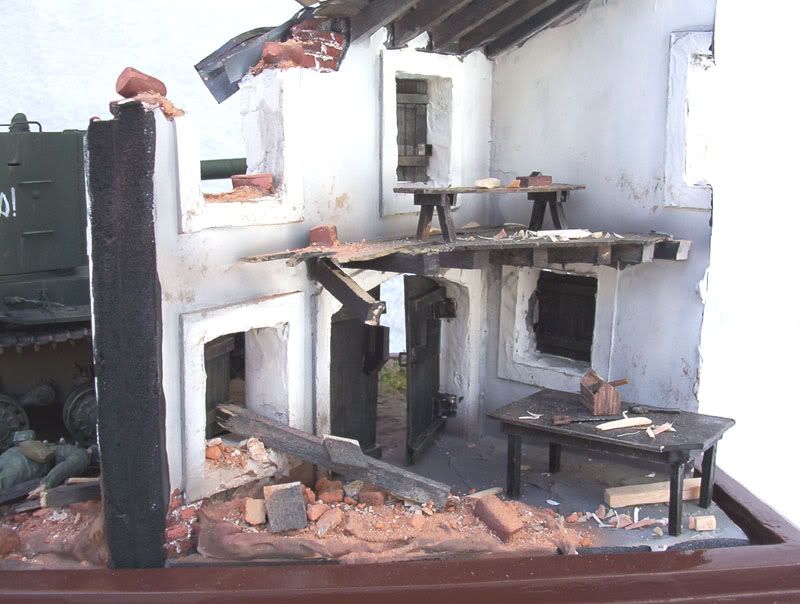
Nice to see this one finished Dwight. That building looks just awesome.
  • Member since
    March 2003
  • From: Rain USA, Vancouver WA
Posted by tigerman on Monday, February 6, 2006 11:06 PM

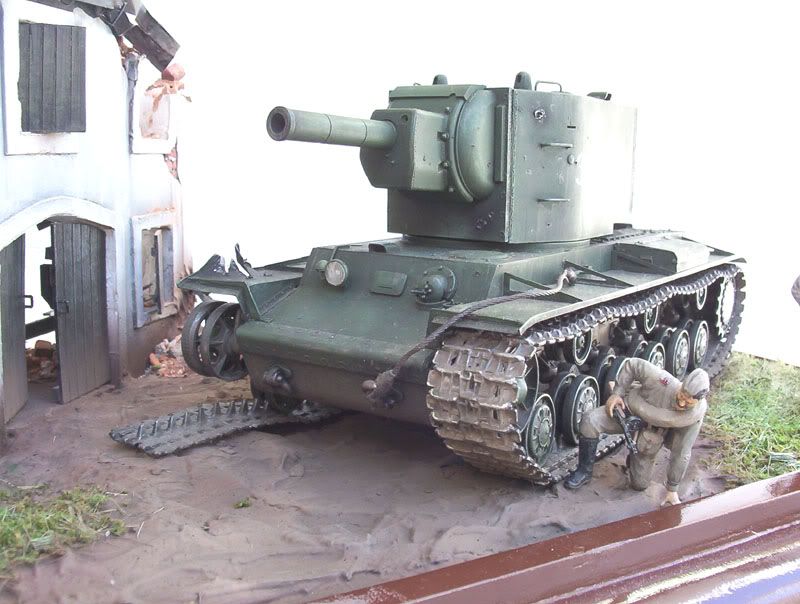
A pleasure as always to view your diorama Dwight. As usual, a neat set up story to accompany it. Fine job on the shop and the tank. Hard to believe your building is scratched. My only critique might be that the tracks should have left some imprints or torn up the dirt more in the rear. The ground looks really soft. Perhaps the tracks should be a bit more "mudded" up also. Thanks for sharing.

   http://i7.photobucket.com/albums/y269/wing_nut_5o/PANZERJAGERGB.jpg

 Eric 

  • Member since
    July 2003
  • From: Philippines
Diorama No. 15: Roadblock
Posted by Dwight Ta-ala on Monday, February 6, 2006 6:05 PM

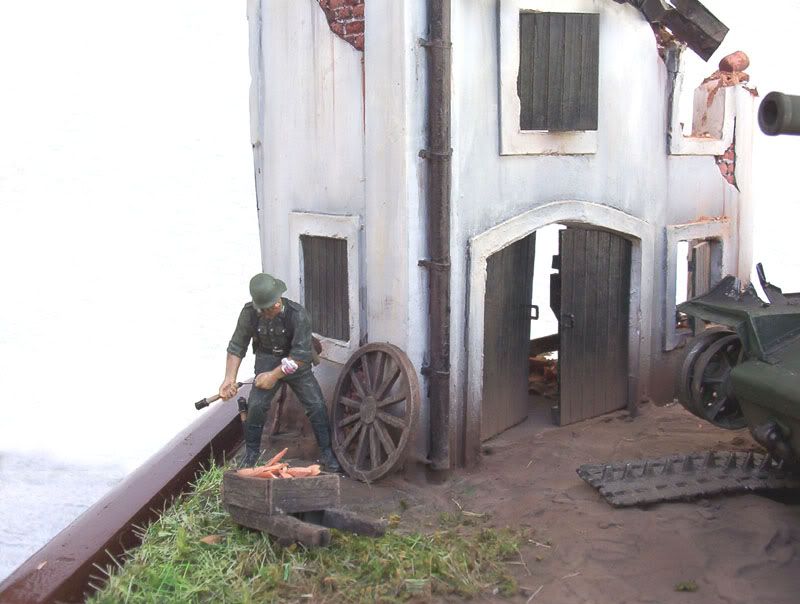
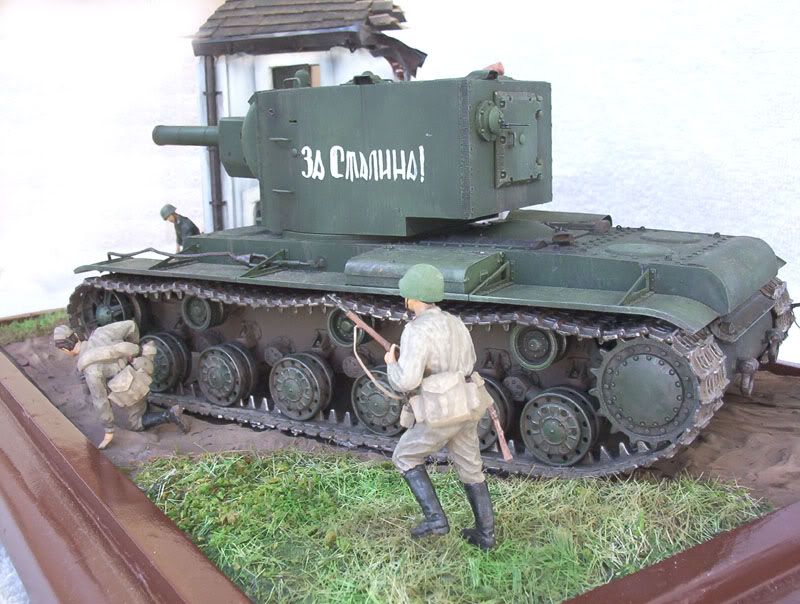
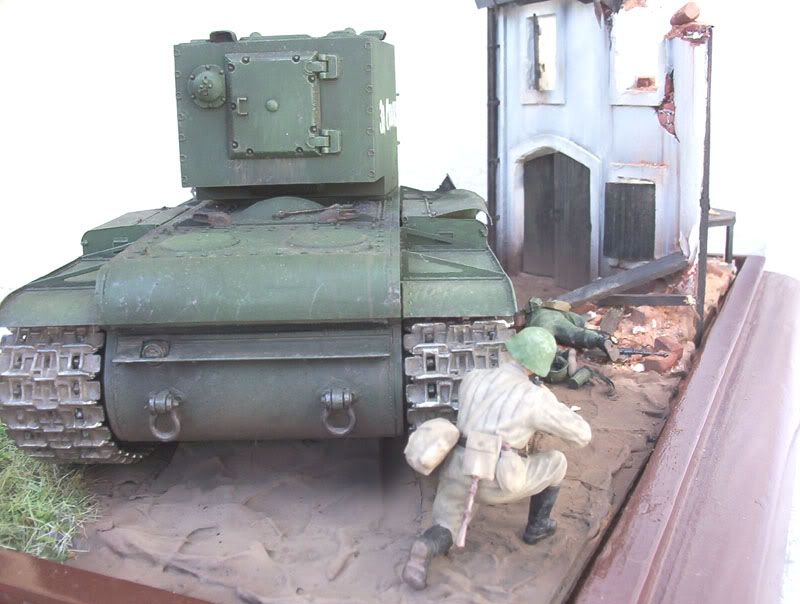
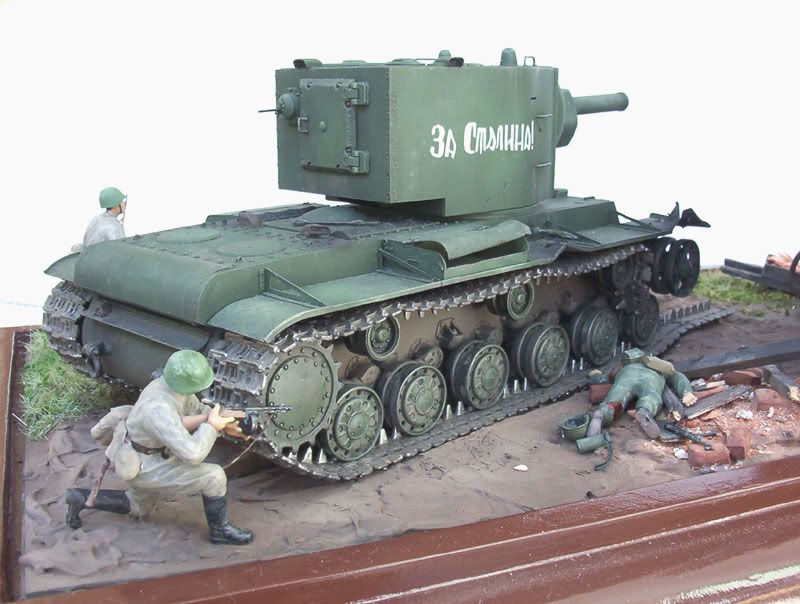
The germans' advance was suddenly held off by a KV-2 which stood beside a carpentry shop somewhere at the entrance of the town. Unable to knock out the monster from a distance, stormpioneers conducted a suicide run to take the tank out. While they were able to immobilize the tank, the russian infantry supporting the KV-2 are giving them a hard fight.
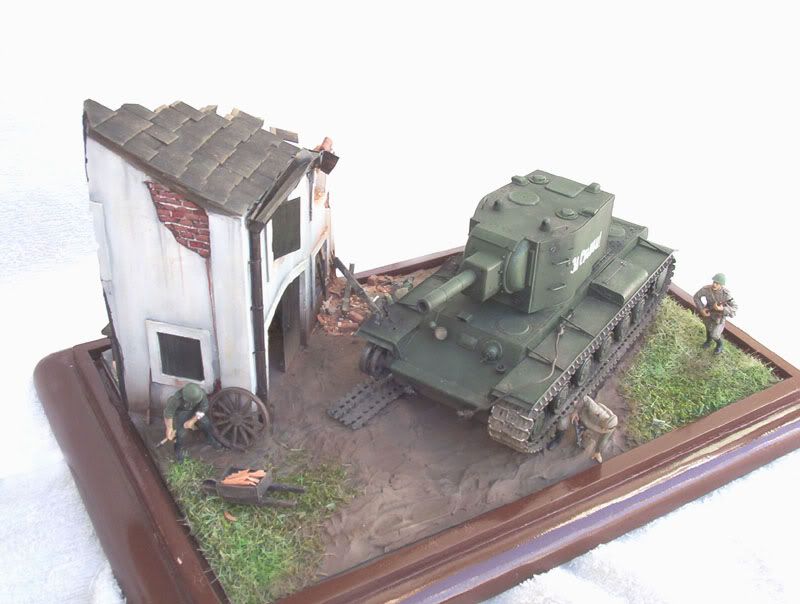
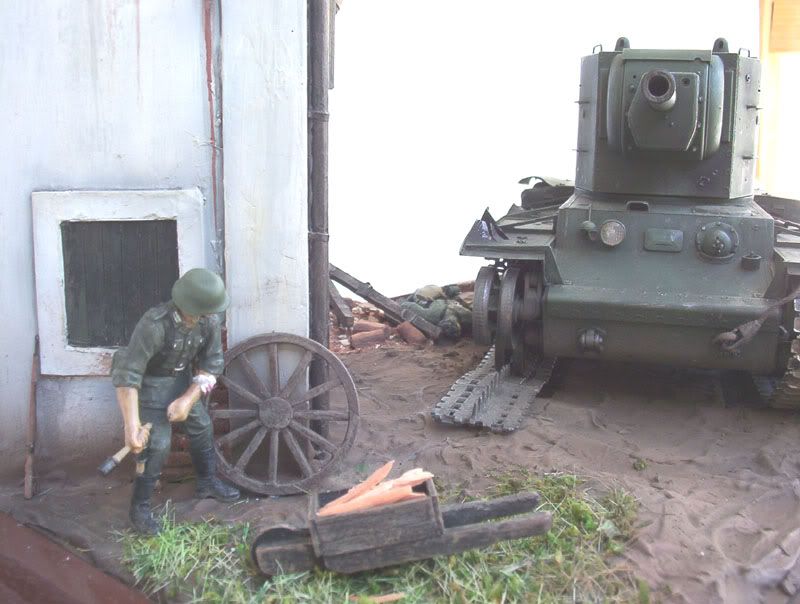
I took the picture outside and I believe there was too much light. The colors didn't come out right.

The ruin of a wood shop was built from scratch and so are the accesories within and around it. I tried a new formula for the grass and I think it is much better than the formula I previously used.

The russian soldiers are (maybe) out of time for the dio. The KV-2 served sometime from 1941 up to  1942 while this type of uniform (I believe) were used in 1943. Blush [:I]

Anyway...comments are very much welcome.Big Smile [:D]

JOIN OUR COMMUNITY!

Our community is FREE to join. To participate you must either login or register for an account.

SEARCH FORUMS
FREE NEWSLETTER
By signing up you may also receive reader surveys and occasional special offers. We do not sell, rent or trade our email lists. View our Privacy Policy.