SEARCH FINESCALE.COM

Enter keywords or a search phrase below:

Academy 1/72 F4F Wildcat WIP

3222 views
23 replies
1 rating 2 rating 3 rating 4 rating 5 rating
  • Member since
    December 2002
Academy 1/72 F4F Wildcat WIP
Posted by 7474 on Saturday, August 15, 2015 2:42 PM

My first model getting back into this. I've painted and assembled the engine, and am modifying the seat because the kit seat doesn't look like the bucket seat that was used. I'm taking scrap styrene to make the sides of the seat, will blend it in, clean up the bottom, ad some masking tape seats and I'll call it done. Next time I'm back at home the work will continue, hopefully I can scratch build some sort of a rudimentry cockpit, especially to not be able to look down from the top of the cockpit and see the landing gear. Sorry for the lousy cell phone pics, I'll take pics with my camera next time. Feels good to be getting back into this. :D I spent more to get set up with all the tools than the model :D


  • Member since
    June 2003
  • From: Cavite, Philippines
Posted by allan on Saturday, August 15, 2015 6:51 PM

Looks like you're quickly getting the groove back. Great work so far!


No bucks, no Buck Rogers

  • Member since
    August 2013
Posted by Jay Jay on Sunday, August 16, 2015 9:21 AM

Nice detail painting so far, not easy on 1/72 scale. I'll be following this one for sure.


 I'm finally retired. Now time I got, money I don't.

  • Member since
    November 2003
  • From: State of Mississippi. State motto: Virtute et armis (By valor and arms)
Posted by mississippivol on Sunday, August 16, 2015 2:51 PM
Rock on!
  • Member since
    September 2003
  • From: AandF in the Badger State
Posted by checkmateking02 on Sunday, August 16, 2015 5:17 PM
It builds up into a nice little kit. I like what you've done to the seat. Looks better than the supplied item.


  • Member since
    March 2015
  • From: Streetsboro, Ohio
Posted by Toshi on Sunday, August 16, 2015 5:46 PM

Welcome back sir, it seems you still have the touch after all these years.

Toshi

On The Bench: Revell 1/48 B-25 Mitchell


Married to the most caring, loving, understanding, and beautiful wife in the world.  Mrs. Toshi


  • Member since
    August 2009
  • From: MOAB, UTAH
Posted by JOE RIX on Sunday, August 16, 2015 6:26 PM

Welcome back to the hobby and welcome to the forums. Appears to me that you're off to an excellent start. Good work on dressing up the seat. Yeah, it sure is easy to drop a healthy load of cash on tools, paints, gizmos, etc.... so that we can thoroughly enjoy our styrene habit.Indifferent You're doing great. Keep it coming.

By the way, I love your avatar. I love the PBY. My father flew it during and after the war.

"Not only do I not know what's going on, I wouldn't know what to do about it if I did". George Carlin

  • Member since
    December 2002
Posted by 7474 on Monday, August 17, 2015 11:59 AM

Thanks guys, hopefully I can build it up to the quality that I've seen from others. I'll keep posting updates. Yeah the PBY is one of my favorites :D Would love to fly that instead of the stupid regional jet that I'm stuck in.


  • Member since
    December 2002
  • From: Bury St Edmunds, Suffolk, England
Posted by Bish on Monday, August 17, 2015 1:01 PM

A nice start back in the hobby, look forwrad to seeing more.

I am a Norfolk man and i glory in being so


On the bench: Airfix 1/72nd Harrier GR.3/Fujimi 1/72nd Ju 87D-3

  • Member since
    April 2015
  • From: New Hampshire, USA
Posted by UKguyInUSA on Tuesday, August 18, 2015 11:57 AM
A nice start on your return to the hobby! Enjoy the rest of your build and have fun doing it! Cheers- Martin : )
  • Member since
    December 2002
Posted by 7474 on Saturday, August 22, 2015 10:09 AM

Thanks everyone for the kind words, I really enjoy this hobby. Made some progress. I scratch build some sort of a bulkhead so that when viewed from the top, the landing gear couldn't be seen. I think the Wildcats had a system of gears to retract the landing gear, so using some spare sprue from the tree, I glued some pieces and cut them down to the proper height, also added some pieces to simulate strenghtening stringers, all of this was painted and washed, and using a silver Sharpie, added some chips. The cockpit received a pieces of sprue for an insturment panel and some sort of an electronics box. Also made seatbelts and a harness from masking tape. I know that my efforts are far from accurate, but I was a bit lazy to look at reference photos and I just wanted to make it look better than it was; hopefully my efforts have paid off. Wings and horizontal stabs were attached after the fuselage was closed up. Rescribed what sections of panel lines were erased due to sanding. My most used tools have been the contour gage, silver sharpie (detecting problems in the seams), Mr Surfacer 1000 (still trying to figure out how to properly use it) and Tamiya Extra Thin Cement (which I use to clean up the burs after rescribing). Here are the pics in no particular order.

Next task is prep for paint. I'm going to try to do some preshading. Just because I was out of this for a while, didn't mean I stalked this forum and watched a lot of How to videos on utube. I'm happy with this so far.

  • Member since
    August 2013
Posted by Jay Jay on Sunday, August 23, 2015 8:20 AM

Mr. 7474,

Your F-4F is looking very nice.

Very cool how you closed up the landing gear bay.   I'll file your solution for future referance if you don't mind because I have an F-6f in the stash.

I, like you, enjoy trying new techniques for the first time . I've been at this for about 2 years now and each model I build employs something I haven't tried before.  Thanks to the good people on here with their myriad of advice , each model is getting better than the one before.  I am struggling through an old monogram 1/48 B-26 kit and every step of the way I 'm receiving great how-to advice.   My "firsts' on this kit include the use of Miliput putty, dealing with difficult fit issues, re-doing raised panel lines,  and the use of extensive PE all completed semi-successfuly with the help of the experts here.   My next new technique to try is pre shading with an air brush . Wish me luck and I do the same for you and the F4-F.


 I'm finally retired. Now time I got, money I don't.

  • Member since
    July 2015
  • From: Los Angeles
Posted by Plastic_Aviator on Sunday, August 23, 2015 2:23 PM

This is one of those kits I always seem to put back on the shelf before I leave the hobby shop.  Im really looking forward to the completed build, maybe you'll change my mind so I can purchase it. lol


Great job with the little cockpit, the belts really do make a difference in the added detail.

  • Member since
    December 2002
  • From: Bury St Edmunds, Suffolk, England
Posted by Bish on Sunday, August 23, 2015 2:41 PM

Some nice scratch work there. She is coming on nicley.

I am a Norfolk man and i glory in being so


On the bench: Airfix 1/72nd Harrier GR.3/Fujimi 1/72nd Ju 87D-3

  • Member since
    January 2010
  • From: Nebraska, USA
Posted by CallSignOWL on Sunday, August 23, 2015 3:22 PM

ooooh, nice cratchbuilding on that gear bay. Very clever!

------------------------

Now that I'm here, where am I??

  • Member since
    August 2009
  • From: MOAB, UTAH
Posted by JOE RIX on Sunday, August 23, 2015 9:35 PM

Nicely done. Your scratchbuild efforts are quite effective and well executed. Looking forward to some paint going on.

"Not only do I not know what's going on, I wouldn't know what to do about it if I did". George Carlin

  • Member since
    December 2002
Posted by 7474 on Friday, August 28, 2015 1:52 PM

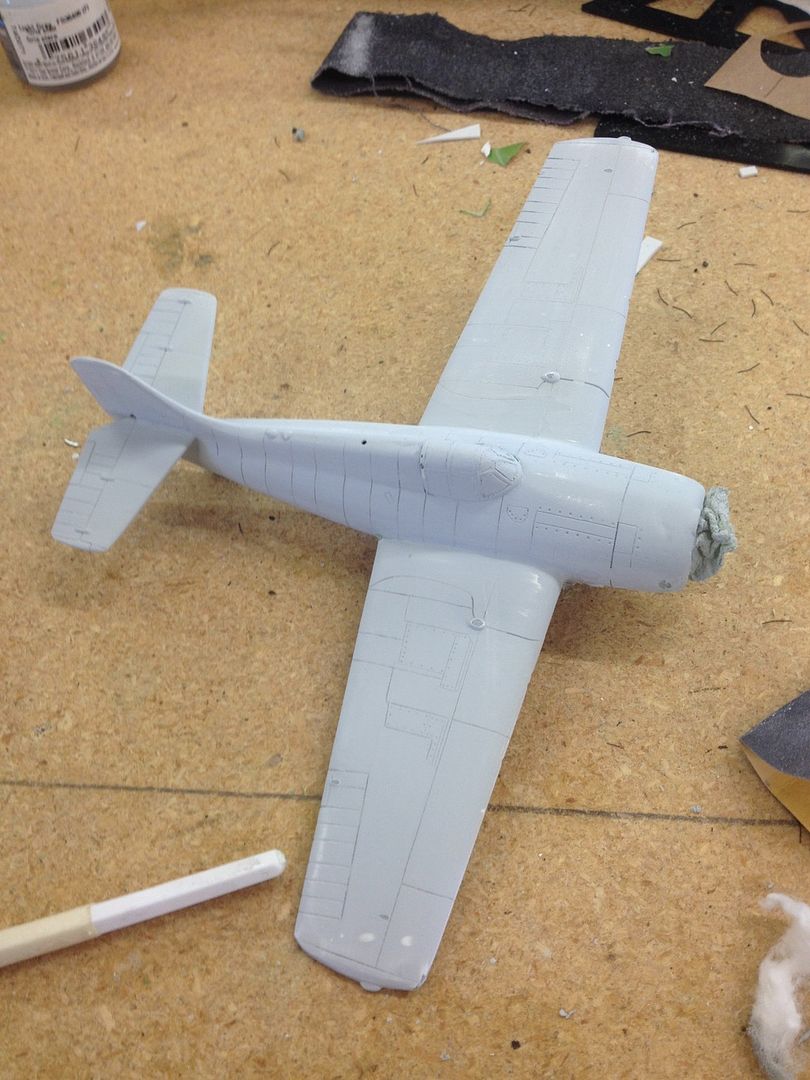
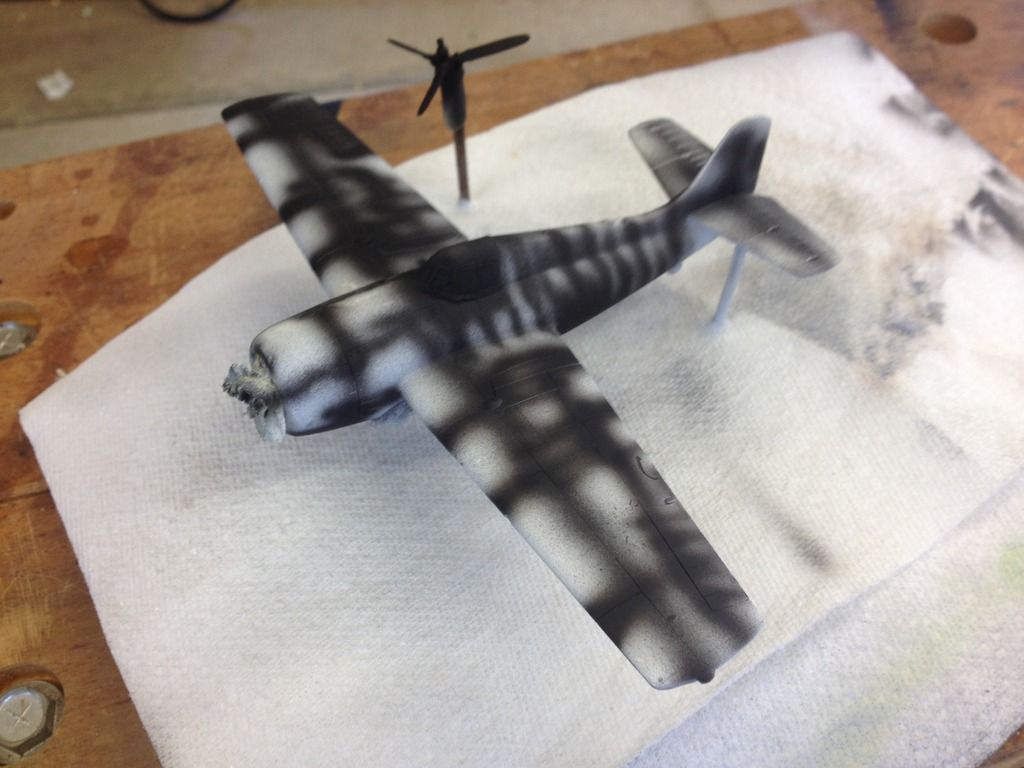
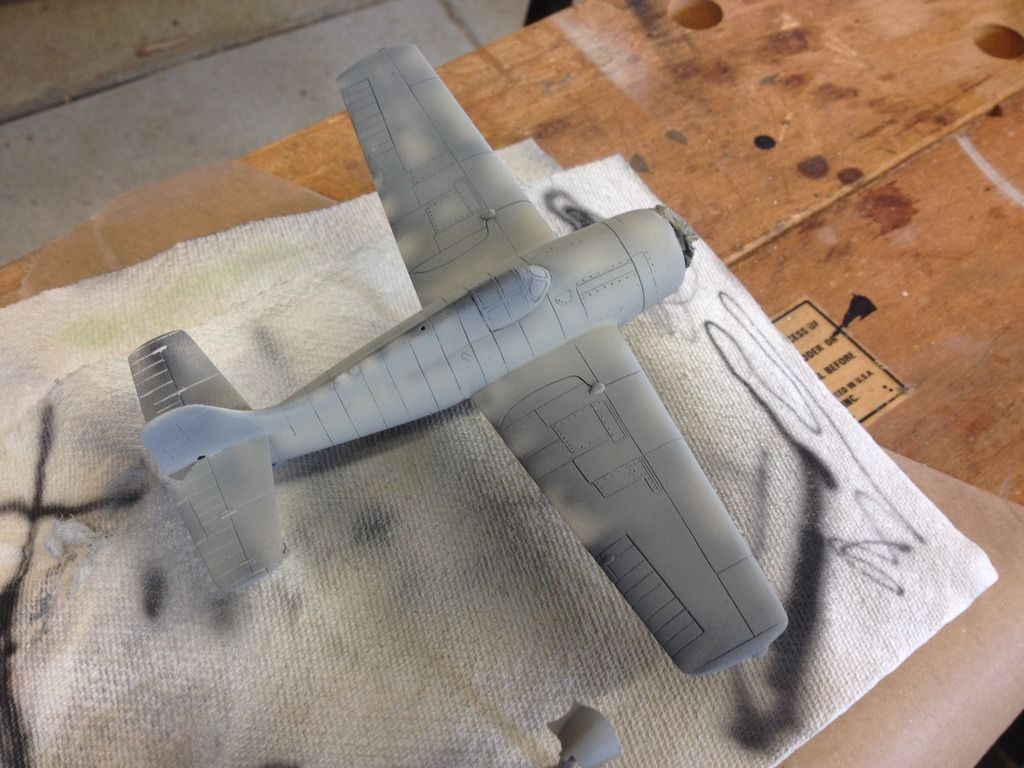
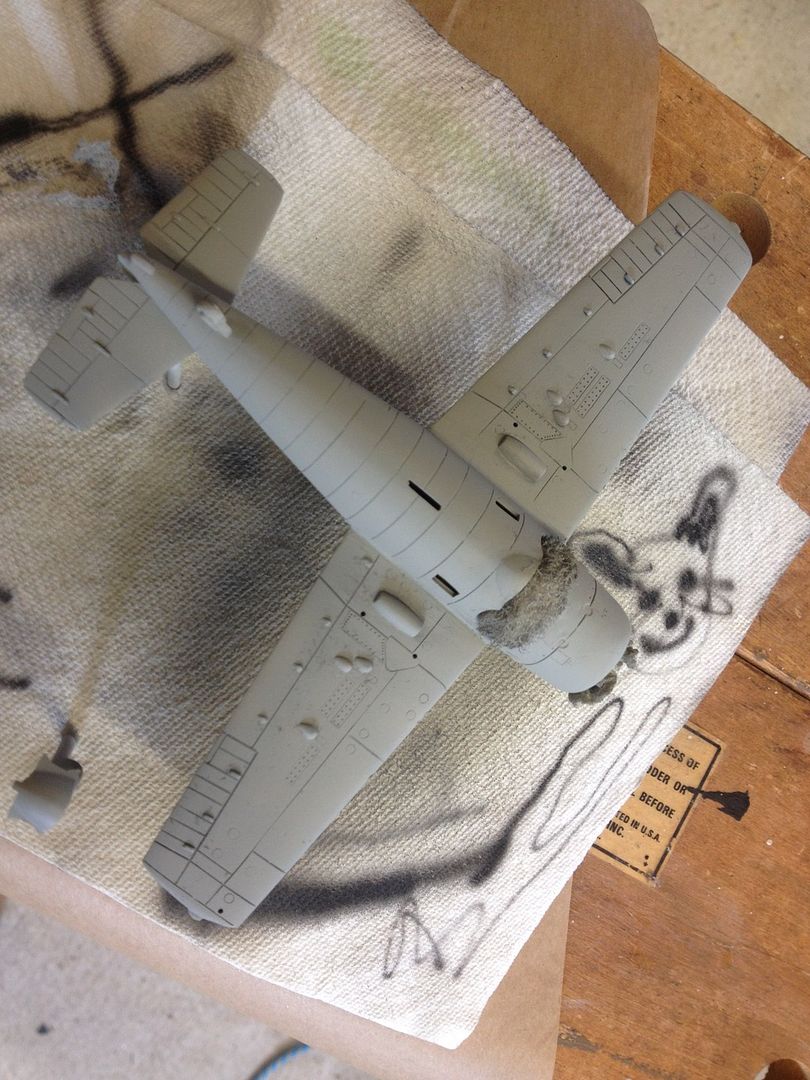
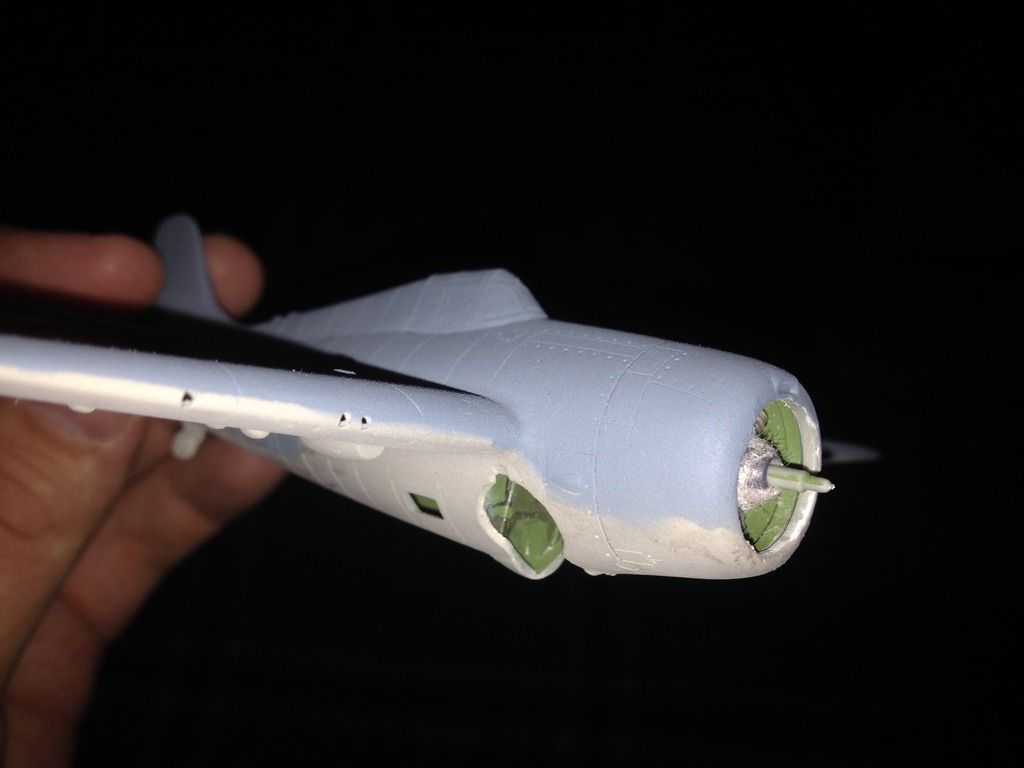
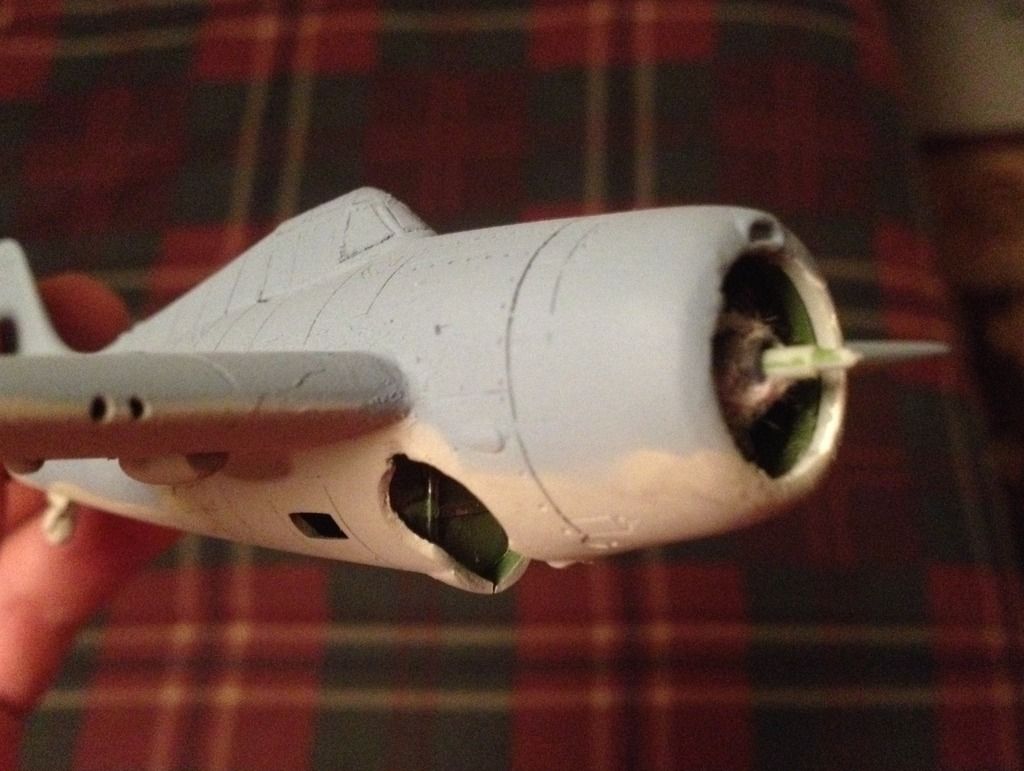
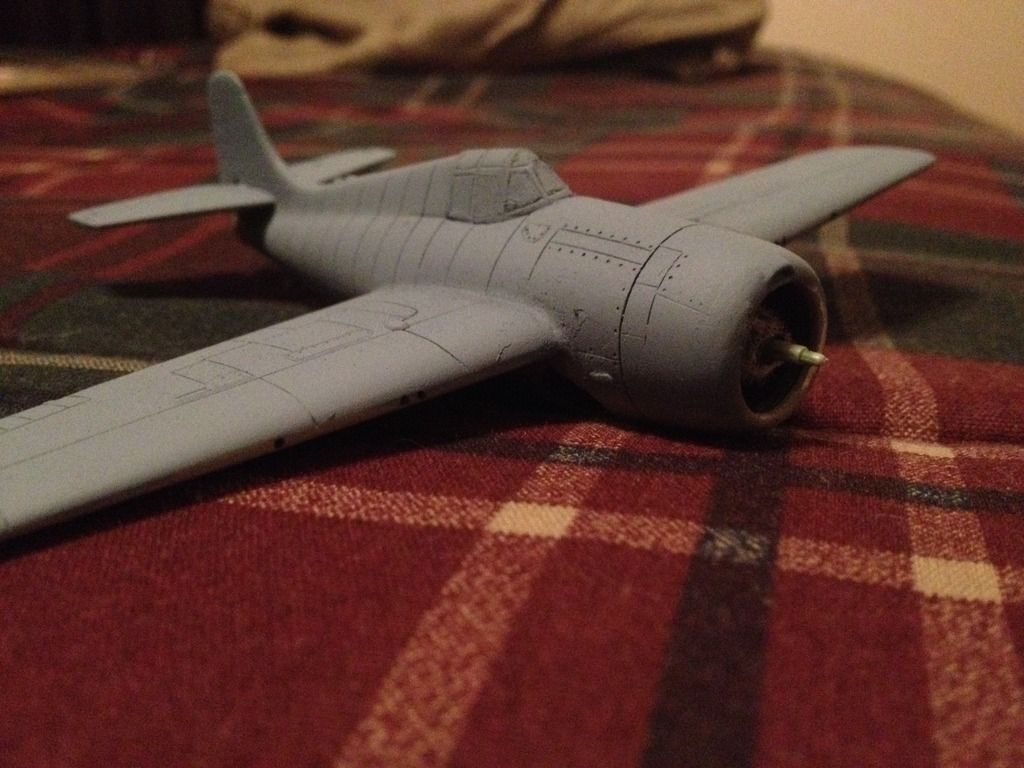
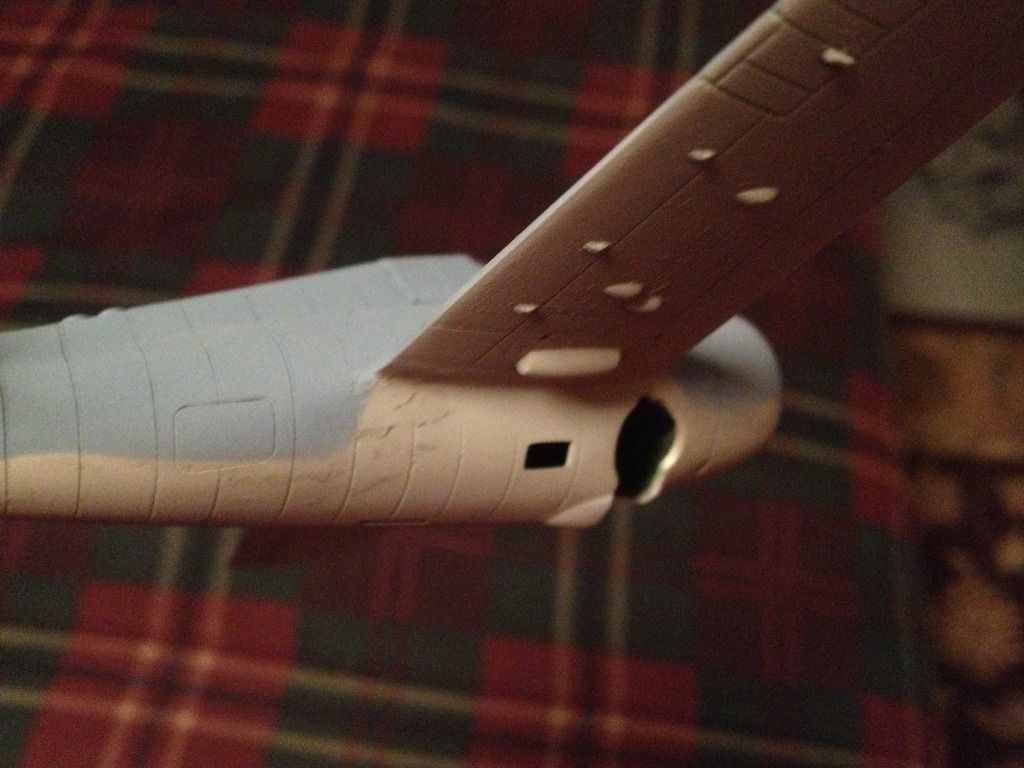
First, sorry for my posts being so photo heavy. I finally got some paint on, but however the primer I used is being very naughty, so I might end up stripping the whole thing and starting over. The paint flaked off in some areas pretty badly, and my desire to give everything the best effort and not accepting half assed work makes want to redo it. I tried for the first time to preshade the panels, which until I saw with my own eyes the effect, I didn't care for, but I think from now on I will do this.

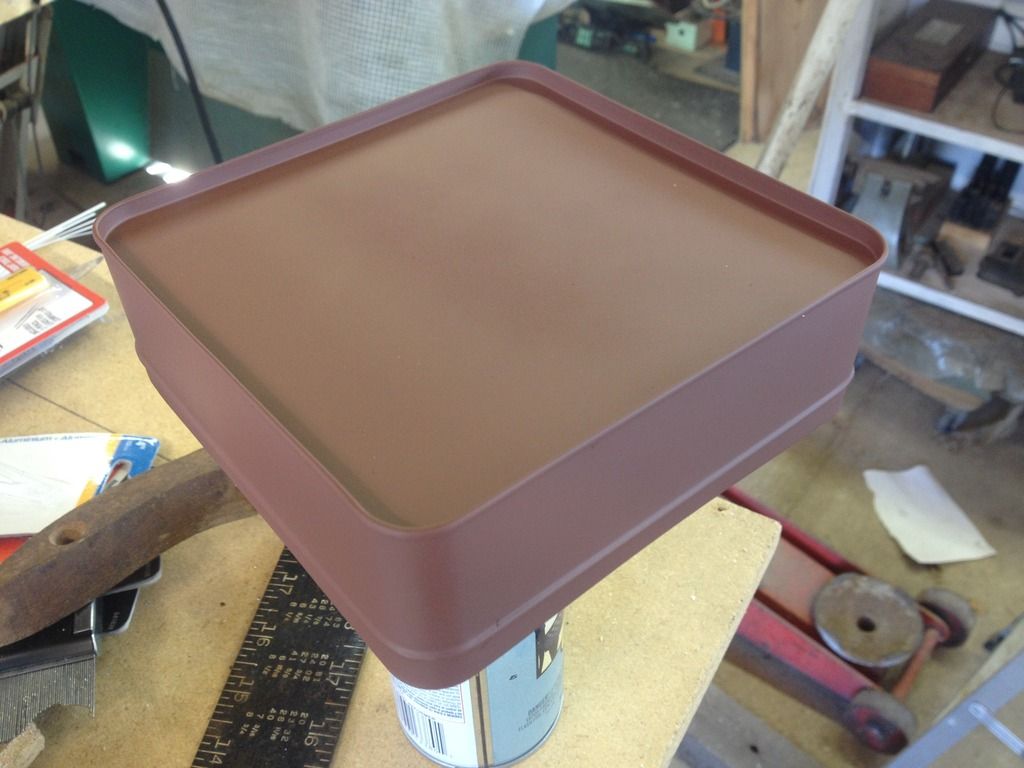
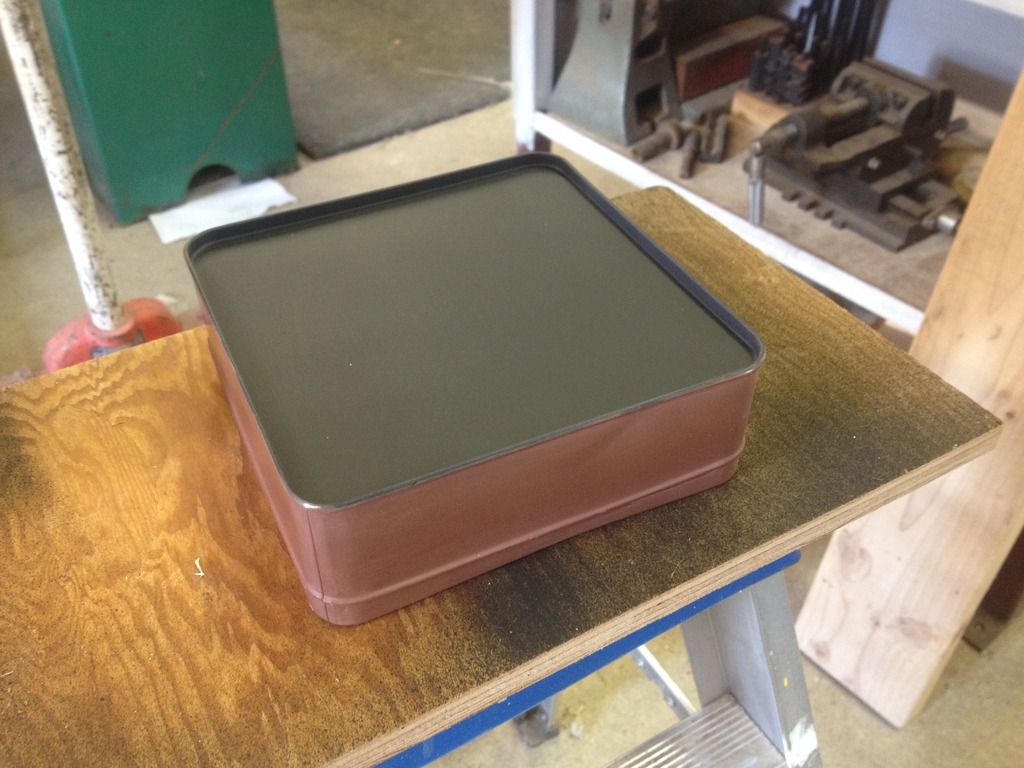
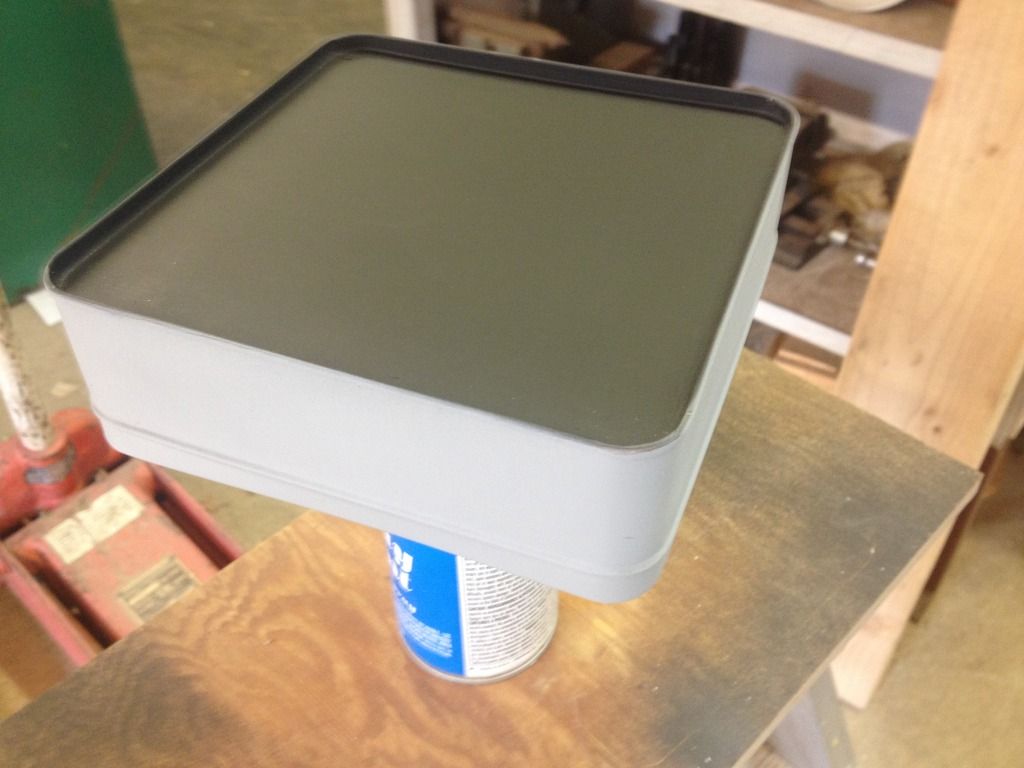
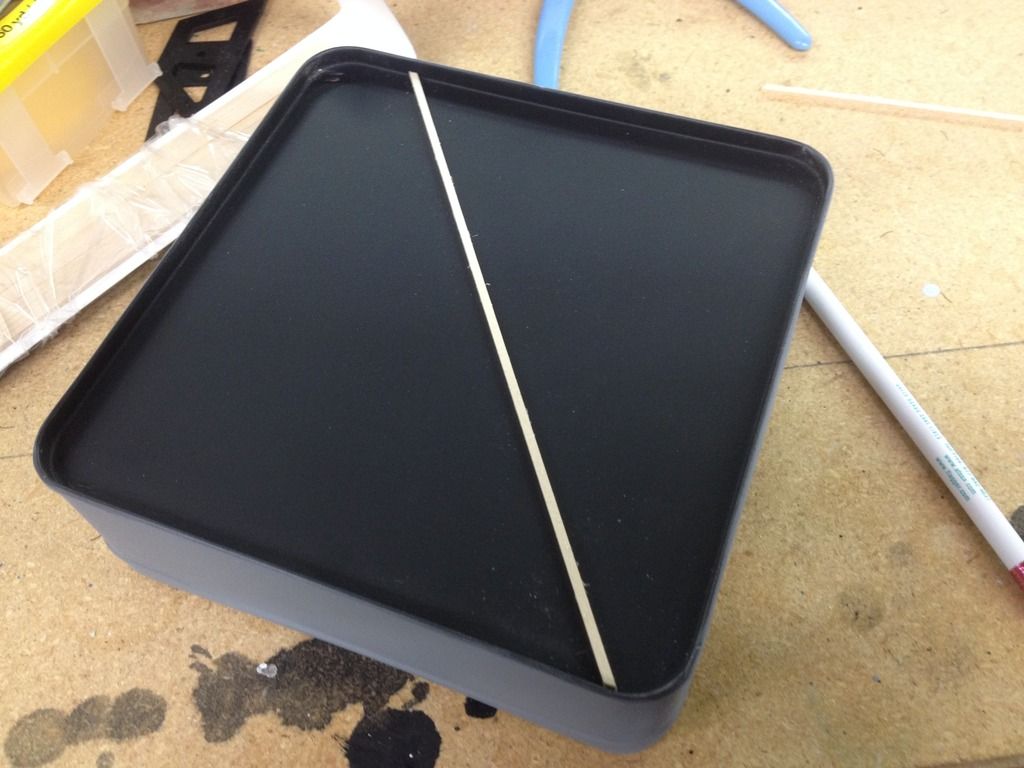
I attempting to scratch build a base that is supposed to be a section of flight deck of an aircraft carrier. I found this square tin at Hobby Lobby for $3, and some square .083" (which I believe is the correct scale width for timber decking on WW2 flight decks) and some light gray paint from a spray can that looked like the correct shade for the hulls of Navy ships. Used all Rustolem enamel spray cans, red/brown rusty metal primer, light gray, and black for the base beneath of the timbers. I'm not sure if someone makes tie down beams, but I'll look around. Also the timbers aren't thick enough, so I have to go back and raise the wood somehow to be even with the top of the lid.

I need to try to somehow weather the wood and the sides, make it resemble a ship, so I'll go to the ship forum and see what others are doing.

  • Member since
    February 2014
  • From: N. MS
Posted by CN Spots on Friday, August 28, 2015 2:55 PM

Great idea with the tin!  

  • Member since
    April 2015
  • From: New Hampshire, USA
Posted by UKguyInUSA on Saturday, August 29, 2015 7:45 AM

Great work so far, and, I'm intrigued to see how the "Tin" base idea works out! Smile

  • Member since
    August 2013
Posted by Jay Jay on Saturday, August 29, 2015 9:48 AM

So clever with the tin idea.  Thanks so much for sharing it wih us and your build is coming along nicely.

Just a small suggestion to maybe save some time.  Evergreen has styreene that resembles your slated decking in rectangular sheets..not sure on the size. But maybe you can simply cut the sheet for the tin box size you need and voila, a slated deck.


 I'm finally retired. Now time I got, money I don't.

  • Member since
    December 2002
Posted by 7474 on Saturday, September 5, 2015 9:44 PM

I got the Wildcat's paint stripped, reprimed (tamiya) and preshading done before I left for my flying trip. Hope to get it done when I get back in a few days, I got offered a First Officer position flying MD-11s with a class that starts on the 21st, so I want to get this and the C-47 I'm working on done before I leave to learn to fly the Trijet. To elevate the beams I found some foam board that with a few trips of a rolling pin and some boards, I squished it down to the thickness that would let the beams be even with the top of the tin. need to cut the beams then hot glue it all. Time for pics.

  • Member since
    August 2009
  • From: MOAB, UTAH
Posted by JOE RIX on Sunday, September 6, 2015 12:09 AM

Looks like you have a nice recovery going there. Trust me , I'm no stranger to stripping down a paint job and redoing it. In fact, I feel as though I've developed it as one of my skills. Not necessarily desired but, a skill nonetheless. Thus, in your case, I believe you will be happy that you chose to do a redo. I'm really excited to watch your base come to fruition. A very clever idea that ought to wield fantastic results. Good Luck on your new postion and training.

"Not only do I not know what's going on, I wouldn't know what to do about it if I did". George Carlin

  • Member since
    December 2002
Posted by 7474 on Thursday, September 17, 2015 7:31 PM

A little update, repainted this thing after the first attempt when the paint flaked off due to bad primer. Bought the Tamiya spray stuff, which I love and is worth the $. I'll never buy Testers acrylic bottled primers again, not worth the frustration. The wing walkways are painted, I'm happy as this is the first model I've painted without ridges in the paint. I heavily thinned the paint with Alcohol (1:1) and at about 10-15 PSI with light coats.

Sunday I will be in Miami for 3 months learning to fly the MD-11 for my new job, I have finally escaped the regional flying rut after 4 years. So I'll have to do the decal work and final weathering when I have a brand new type in December. I used a silver Sharpie for the paint flakes, happy with the results but they're too round. Hope you like it. I also didn't cover up the preshading.

As always, comments questions and suggestions are welcome. Not too bad for my first model in a few years, in my opinion


  • Member since
    June 2003
  • From: Cavite, Philippines
Posted by allan on Thursday, September 17, 2015 7:51 PM

Not too bad at all! Like you never stopped.  Goodluck on your MD-11 training. 

No bucks, no Buck Rogers

JOIN OUR COMMUNITY!

Our community is FREE to join. To participate you must either login or register for an account.

SEARCH FORUMS
FREE NEWSLETTER
By signing up you may also receive reader surveys and occasional special offers. We do not sell, rent or trade our email lists. View our Privacy Policy.