SEARCH FINESCALE.COM

Enter keywords or a search phrase below:

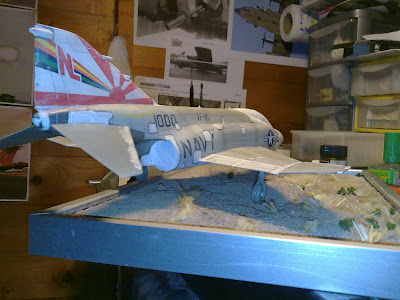
1/48 F-4B Phantom VF-111 Boneyard

14007 views
21 replies
1 rating 2 rating 3 rating 4 rating 5 rating
  • Member since
    January 2010
Posted by CrashTestDummy on Wednesday, June 8, 2011 3:55 PM

Wow.  That's taking a lemon and making lemon juice!!  Nice work.  When my Dad retired from the Air Force, and we were leaving Edwards for Texas, we stopped by the boneyard.  Every one of the B57's he flew a year-and-a-half before in Nam were there.  Very sad to see all the other iron, er, aluminum there baking in the sun.  You've honored all the birds there with that dio. 


Gene Beaird,
Pearland, Texas


G. Beaird,

Pearland, Texas

  • Member since
    August 2009
  • From: Toledo Area OH
Posted by Sparrowhyperion on Wednesday, June 8, 2011 11:24 AM

Looks good..  err....  bad...  err... Well you know what I mean.  Every time I see a veteran aircraft in a boneyard in that condition, it makes me want to cry or run out and save it...  If only I had the time and money...


Victor1983K2

Hello everyone

Well After a post I read recently about the Esci Phantom I decided I did not want to waist a good kit so what to do?

I was trawling through the web when I came across this picture.......
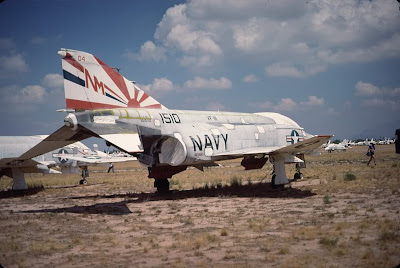
http://3.bp.blogspot.com/_JYa--5QiLm0/TMxm5oHu04I/AAAAAAAAAec/K79i8eqrW5w/s400/F-4N151510VF-111MASDC1981.jpg

Inspired by this picture I had an idea, I would use the Esci kit to make a model of a VF-111 Sundowners Phantom in the Davis Montham boneyard. Doing this with the kit overcomes the biggest problem the cockpit or the lack of it as the Phantom in the picture has the cockpit protected. The actual build should be very simple as there is no cockpit to paint or detail. 
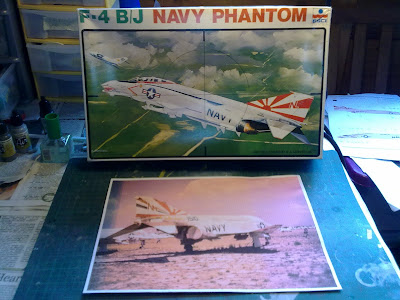
http://3.bp.blogspot.com/_JYa--5QiLm0/TMxaUaEf-8I/AAAAAAAAAcE/fxCJ7WABmy0/s400/30102010831.jpg


All the main parts are attached just some minor filling, the worst fit was of the canopy which need some patience...

/http://1.bp.blogspot.com/_JYa--5QiLm0/TMxaosIIQ3I/AAAAAAAAAc0/dTL1RkbyjH4/s400/30102010837.jpg
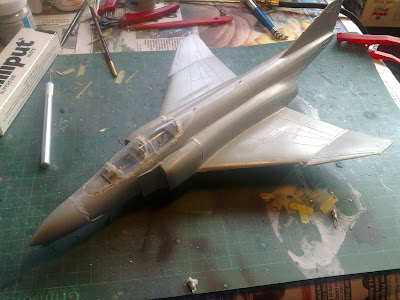
On the underside all the pylon holes need to be filled. This was done with plastic card..

http://1.bp.blogspot.com/_JYa--5QiLm0/TMxbVapZ2yI/AAAAAAAAAeU/r33v0g0ob_E/s400/30102010867.jpg

painted the metallic areas at the back first with Aclad jet exhaust to preshade then a coat of stainless steel and a few panels picked out aluminium......

http://2.bp.blogspot.com/_JYa--5QiLm0/TM9CpB3I13I/AAAAAAAAAg8/5phYQ7iP0Ew/s400/01112010884.jpg

Added a few bits to the base

http://1.bp.blogspot.com/_JYa--5QiLm0/TPKE0hyGYLI/AAAAAAAAApk/txTpQX7YUBQ/s400/281120101050.jpg

Not to sure if I like the foliage at the moment but I'm not sure why cant quite put my finger on it.

The CAM decals went on with no problems settling down nicely with help from Micro Sol over a coat of Klear

http://1.bp.blogspot.com/_JYa--5QiLm0/TPu--jLp3ZI/AAAAAAAAAp0/Qg3fLJ9lEac/s400/051220101068.jpg

Once the decals had fully dried (left overnight) another coat of Klear was brushed on to seal the decals and then Model Master flat coat was spayed on to prepare the the model for the weathering 

To give the model the dusty sun bleached look of being left in the desert I decided to do most of the weathering with pastels and pigments. To do this I covered the model in water then randomly applied the pigments and pastels.

http://2.bp.blogspot.com/_JYa--5QiLm0/TPu_air-B5I/AAAAAAAAAq0/2UdLqHi_mds/s400/051220101076.jpg

After the water dried and I was happy with the results I used a sharp pencil to bring out the panel lines and a very diluted coat of Tamiya Buff was sprayed all over the model to seal in the pigments and pastels. Finally certain panel lines were picked out eith heavily thinned Tamiya Smoke.

http://4.bp.blogspot.com/_JYa--5QiLm0/TPu_bH62zNI/AAAAAAAAAq8/EP6dxYZz3hI/s400/051220101077.jpg

http://4.bp.blogspot.com/_JYa--5QiLm0/TPu_2qf0MTI/AAAAAAAAArU/Y3yNw_BXVmE/s400/051220101080.jpg

http://1.bp.blogspot.com/_JYa--5QiLm0/TPvAu4MwiYI/AAAAAAAAAsk/N2G2zA0PmXs/s400/051220101091.jpg

So that is the progress so far its almost done any comments, criticism or ideas welcome!


In the Hangar: 1/48 Hobby Boss F/A-18D RAAF Hornet,

On the Tarmac:  F4U-1D RNZAF Corsair 1/48 Scale.

cml
  • Member since
    March 2007
  • From: Brisbane, Australia
Posted by cml on Tuesday, June 7, 2011 10:53 PM

That is a great dio.  Look forward to the completed pics.

It always amazes me how much work and effort is involved in making a model look old.  It takes quite a lot of skill and creativity.

Chris.

Chris

  • Member since
    May 2011
  • From: Honolulu, Hawaii
Posted by Real G on Tuesday, June 7, 2011 6:50 PM

Hoary crappu, that is so cool!  A really terrific idea for an out of date model.  It reminds me of the Shep Paine B-25 boneyard diorama.  Great job!!!

PS  Add a rattlesnake!  Big Smile

“Ya ya ya, unicorn papoi!”

  • Member since
    May 2009
  • From: Riverton, Wyoming
Posted by Andrew Magoo on Tuesday, June 7, 2011 6:37 PM

WoW, excellent work, Magoo

  • Member since
    June 2007
Posted by eagledocf15 on Tuesday, June 7, 2011 5:54 PM

Any more Progress on this one? Thanks

  • Member since
    December 2010
Posted by Victor1983K2 on Thursday, December 9, 2010 2:22 PM

Thank you all for you comments hopefully I should be able to get a little further with the build this weekend and more progress picks then!

  • Member since
    August 2004
  • From: Buffalo NY
Posted by Thehannaman2 on Wednesday, December 8, 2010 9:05 AM

I LOVE it!  Very well executed.  It almost has a narrative element to it too....  Thanks for sharing. 

Justen

"The distance between genius and insanity is measured only by success."

Member IPMS Niagara Frontier. "The BuffCon Boys."

IPMSUSA Member 45680 

  • Member since
    January 2006
  • From: Sarasota, FL
Posted by RedCorvette on Wednesday, December 8, 2010 7:56 AM

Excellent, creative work.  Very impressive job with the weathering!  I like the strategy of covering up that awful ESCI cockpit.

The only nitpicky comment I could offer is that the ESCI kit has the bulged wings of a -J and the VF-111 bird  is actually a thin-wing  -N.

Mark

FSM Charter Subscriber

  • Member since
    January 2003
  • From: 40 klicks east of the Gateway
Posted by yardbird78 on Wednesday, December 8, 2010 12:56 AM

Awesome work.

Darwin, O.F.  Alien

 ,,

The B-52 and me, we have grown old, gray and overweight together.

  • Member since
    August 2009
  • From: Borlando Fla home of the rat
Posted by TREYZX10R on Tuesday, December 7, 2010 5:58 PM

Wow talk about a convincing build,that is some awesome work!!!

  • Member since
    December 2009
  • From: Endicott, Va.
Posted by Bomber Boy on Tuesday, December 7, 2010 5:42 PM

Lookin' Good!!!! next to the B-17 The F-4  Phantom is a VERY close second. I love that you too are not scared to take a Beautiful Lady and show her age, or death. I will be lookin' forward to the conclusion of this build.

James

James Herndon II __-_-_/"\_-_-__

Endicott ,Va

beandawgartworks.com

  • Member since
    February 2003
  • From: A Spartan in the Wolverine State
Posted by rjkplasticmod on Tuesday, December 7, 2010 5:16 PM

Captures the look of the photo very well.  Nicely done.

Regards,  Rick

RICK At My Age, I've Seen It All, Done It All, But I Don't Remember It All...
  • Member since
    October 2010
  • From: Idaho Falls
Posted by vonBrakken on Tuesday, December 7, 2010 5:01 PM

Very cool! That is such a great idea. It is sad to see those proud birds rotting.

In the hanger: 1/48 Tamiya A6M2 Zeke

You hit somebody with your fist and not with your fingers spread. ~ Guderian 

  • Member since
    October 2009
  • From: South Carolina
Posted by jetmodeler on Tuesday, December 7, 2010 4:17 PM

WOW!!!!!!!

Excellent job. Looks just like the picture.Bow Down


  • Member since
    December 2006
  • From: N. Georgia
Posted by Jester75 on Tuesday, December 7, 2010 4:17 PM

Awesome work ,looks just like the real thing. Sad to see such a beautiful aircraft just wasting away...

Eric


  • Member since
    December 2010
Posted by Victor1983K2 on Tuesday, December 7, 2010 3:29 PM

dmk
Nice idea! I really like that. It's coming along nicely too. How did you do that white sealant? (What do they use on the real aircraft?)
 Victor1983K2:

Not to sure if I like the foliage at the moment but I'm not sure why cant quite put my finger on it.

It's too green

Thanks dmk,

Originally I used Mr Surfacer 500 but it didn't give enough relief so once painted and decalled I went over with typex and did the edges with grey pro marker. 

On the real aircraft they use a product called Spraylat which is like a spray on plastic.


  • Member since
    December 2010
Posted by Victor1983K2 on Tuesday, December 7, 2010 3:28 PM

dmk
Nice idea! I really like that. It's coming along nicely too. How did you do that white sealant? (What do they use on the real aircraft?)
 Victor1983K2:

Not to sure if I like the foliage at the moment but I'm not sure why cant quite put my finger on it.

It's too green

Thanks dmk,

Originally I used Mr Surfacer 500 but it didn't give enough relief so once painted and decalled I went over with typex and did the edges with grey pro marker. 

On the real aircraft they use a product called Spraylat which is like a spray on plastic.


  • Member since
    December 2010
Posted by Victor1983K2 on Tuesday, December 7, 2010 3:21 PM

fermis

WOW!!!  Definetely looks the part!Yes

Welcome Sign to the forum, hope to see much more of your work!Toast

Thanks fermis,  there shall be more in progress and completed builds soon............


dmk
  • Member since
    September 2008
  • From: North Carolina, USA
Posted by dmk on Tuesday, December 7, 2010 2:30 PM
Nice idea! I really like that. It's coming along nicely too. How did you do that white sealant? (What do they use on the real aircraft?)
Victor1983K2

Not to sure if I like the foliage at the moment but I'm not sure why cant quite put my finger on it.

It's too green
  • Member since
    January 2009
  • From: hamburg michigan
Posted by fermis on Tuesday, December 7, 2010 1:54 PM

WOW!!!  Definetely looks the part!Yes

Welcome Sign to the forum, hope to see much more of your work!Toast

  • Member since
    December 2010
1/48 F-4B Phantom VF-111 Boneyard
Posted by Victor1983K2 on Tuesday, December 7, 2010 1:46 PM

Hello everyone

Well After a post I read recently about the Esci Phantom I decided I did not want to waist a good kit so what to do?

I was trawling through the web when I came across this picture.......

Inspired by this picture I had an idea, I would use the Esci kit to make a model of a VF-111 Sundowners Phantom in the Davis Montham boneyard. Doing this with the kit overcomes the biggest problem the cockpit or the lack of it as the Phantom in the picture has the cockpit protected. The actual build should be very simple as there is no cockpit to paint or detail. 


All the main parts are attached just some minor filling, the worst fit was of the canopy which need some patience...

/

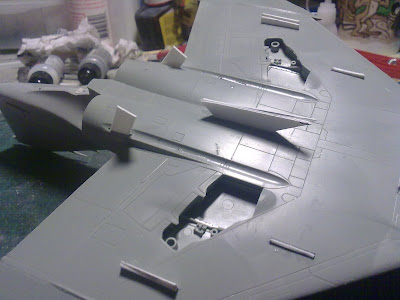
On the underside all the pylon holes need to be filled. This was done with plastic card..
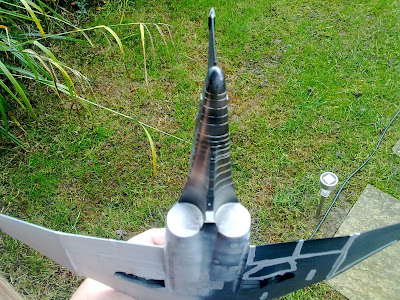
painted the metallic areas at the back first with Aclad jet exhaust to preshade then a coat of stainless steel and a few panels picked out aluminium......
Added a few bits to the base
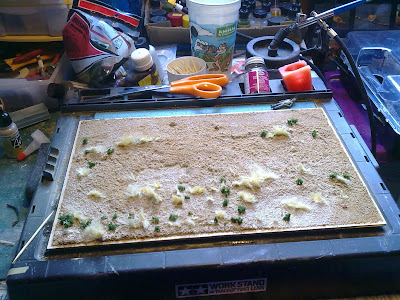
Not to sure if I like the foliage at the moment but I'm not sure why cant quite put my finger on it.

The CAM decals went on with no problems settling down nicely with help from Micro Sol over a coat of Klear
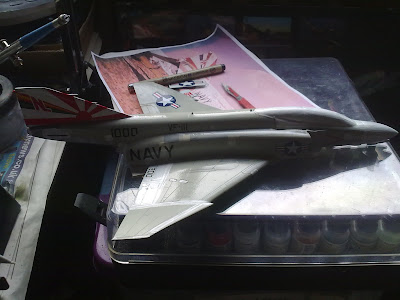
Once the decals had fully dried (left overnight) another coat of Klear was brushed on to seal the decals and then Model Master flat coat was spayed on to prepare the the model for the weathering 

To give the model the dusty sun bleached look of being left in the desert I decided to do most of the weathering with pastels and pigments. To do this I covered the model in water then randomly applied the pigments and pastels.
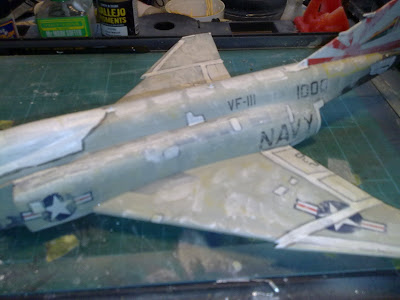
After the water dried and I was happy with the results I used a sharp pencil to bring out the panel lines and a very diluted coat of Tamiya Buff was sprayed all over the model to seal in the pigments and pastels. Finally certain panel lines were picked out eith heavily thinned Tamiya Smoke.
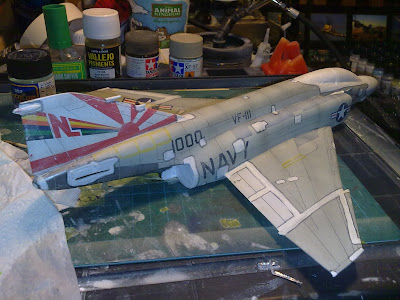
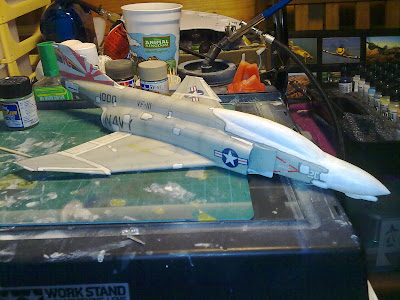
So that is the progress so far its almost done any comments, criticism or ideas welcome!


JOIN OUR COMMUNITY!

Our community is FREE to join. To participate you must either login or register for an account.

SEARCH FORUMS
FREE NEWSLETTER
By signing up you may also receive reader surveys and occasional special offers. We do not sell, rent or trade our email lists. View our Privacy Policy.