SEARCH FINESCALE.COM

Enter keywords or a search phrase below:

WW I Biplane wing rigging

13016 views
5 replies
1 rating 2 rating 3 rating 4 rating 5 rating
  • Member since
    October 2021
Posted by Slougo on Saturday, October 30, 2021 12:32 AM
I'd like to hear comments on using The Gaspatch metal turnbuckles. Particularly 1/48 biplane. Thanks
  • Member since
    April 2005
  • From: Piscataway, NJ!
Posted by wing_nut on Sunday, April 1, 2012 7:15 PM

I've been meaning to put this on my site and this was the little nudge I needed.  So here's the way I do it so you can take your pick of methods.  Most will be familiar of you read the posts before mine.

Rigging

Marc  

  • Member since
    June 2010
  • From: Austin, TX
Posted by DoogsATX on Sunday, April 1, 2012 2:07 PM

There's no "quick and easy" way per se. Biplane rigging is tedious work at best. But there are a few more or less foolproof ways.

This article's a great primer: http://www.austinsms.org/article_seaman.php

Personally, I use what I've started calling the "bolo" method:

Start with many eyebolts. I use a fine brass wire called Ultra Wire. Cut a length, double up the ends and clasp in a pair of pliers. Other end loops over a hook of thicker wire in a pin vise. Twist pin vise to twist the Ultra Wire save for the end looped over the thicker wire. Trim off excess when done. Instant eyebolt. Drill holes in the wing / fuselage, and attach the eyebolts with medium or thick CA.

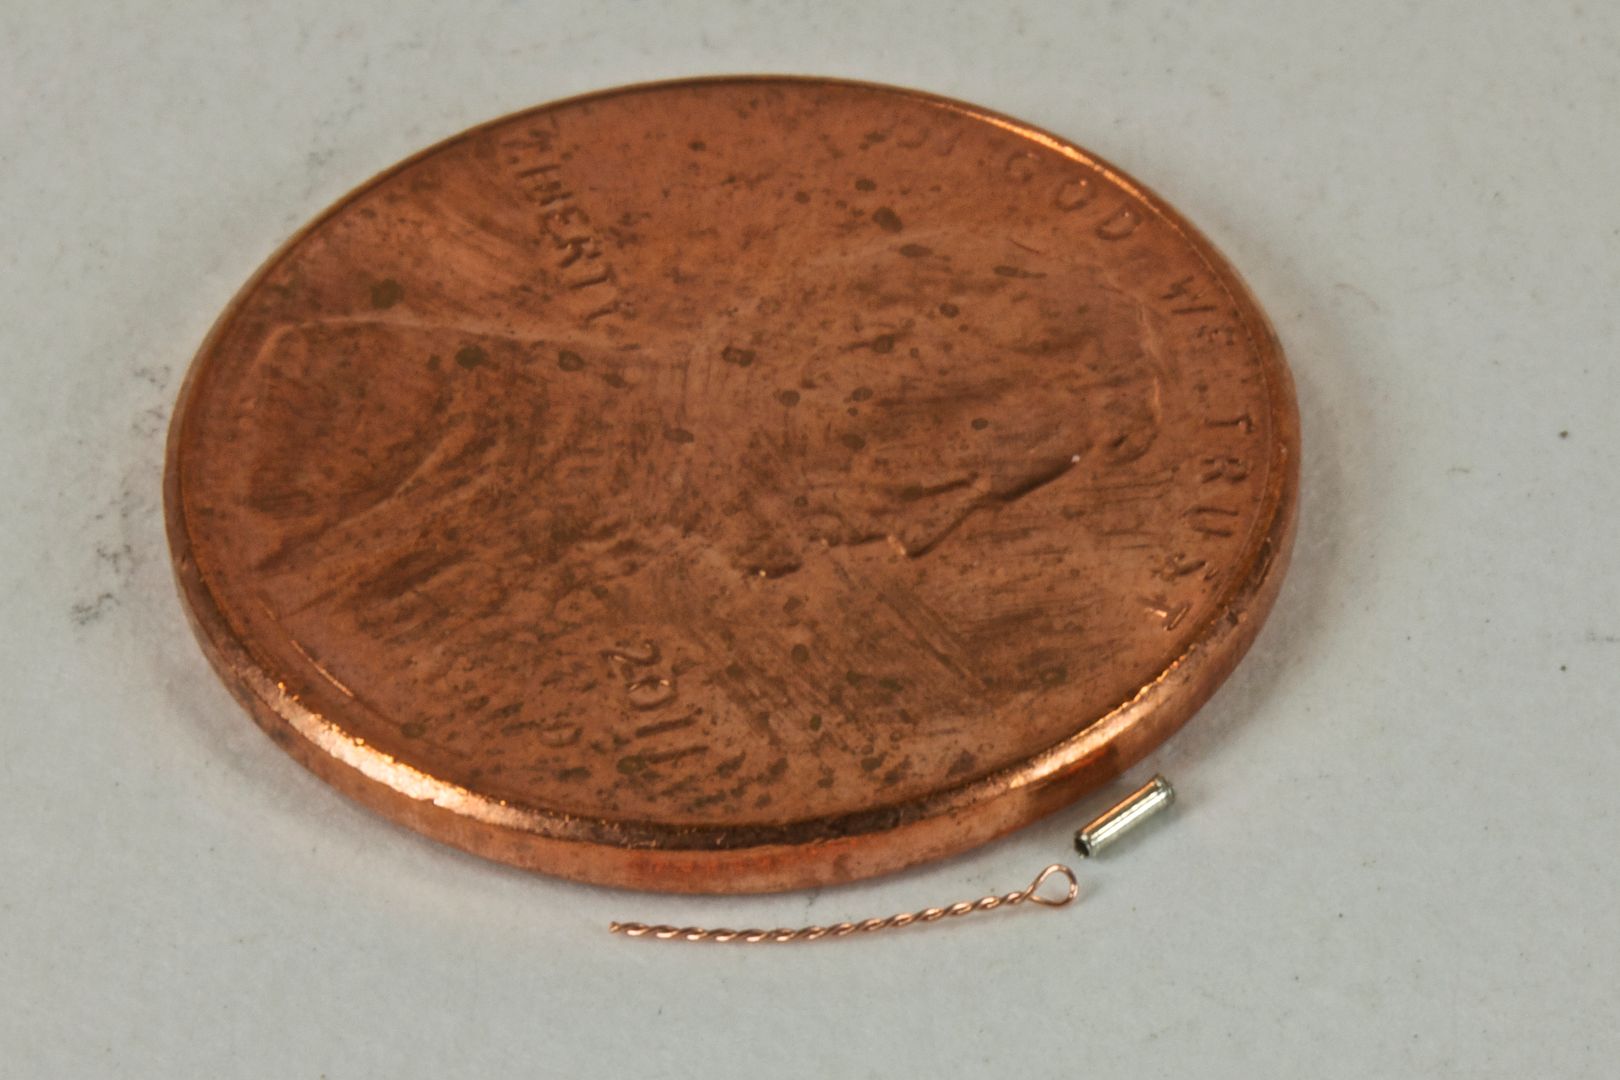
Make turnbuckles. Very fine (we're talking like .5mm diameter) tubing. Cut into short lengths by rolling an xacto over the tubing sort of like a rolling pin. 

Rig. I prefer a monofilament line called Uni-Mono (it has a bit more elasticity than usual mono line). Thread through a tubing "turnbuckle", then through the eyebolt, then back through the tubing. Slide tubing down close to the eyebolt, then get a few drops of thin CA into the far side of the tubing. Once it cures, carefully trim the excess line. 

Sounds intimidating, but once you do the first one or two, it's more an exercise in patience than anything else. The actual process is more or less foolproof.

To give a sense of the sizes involved:
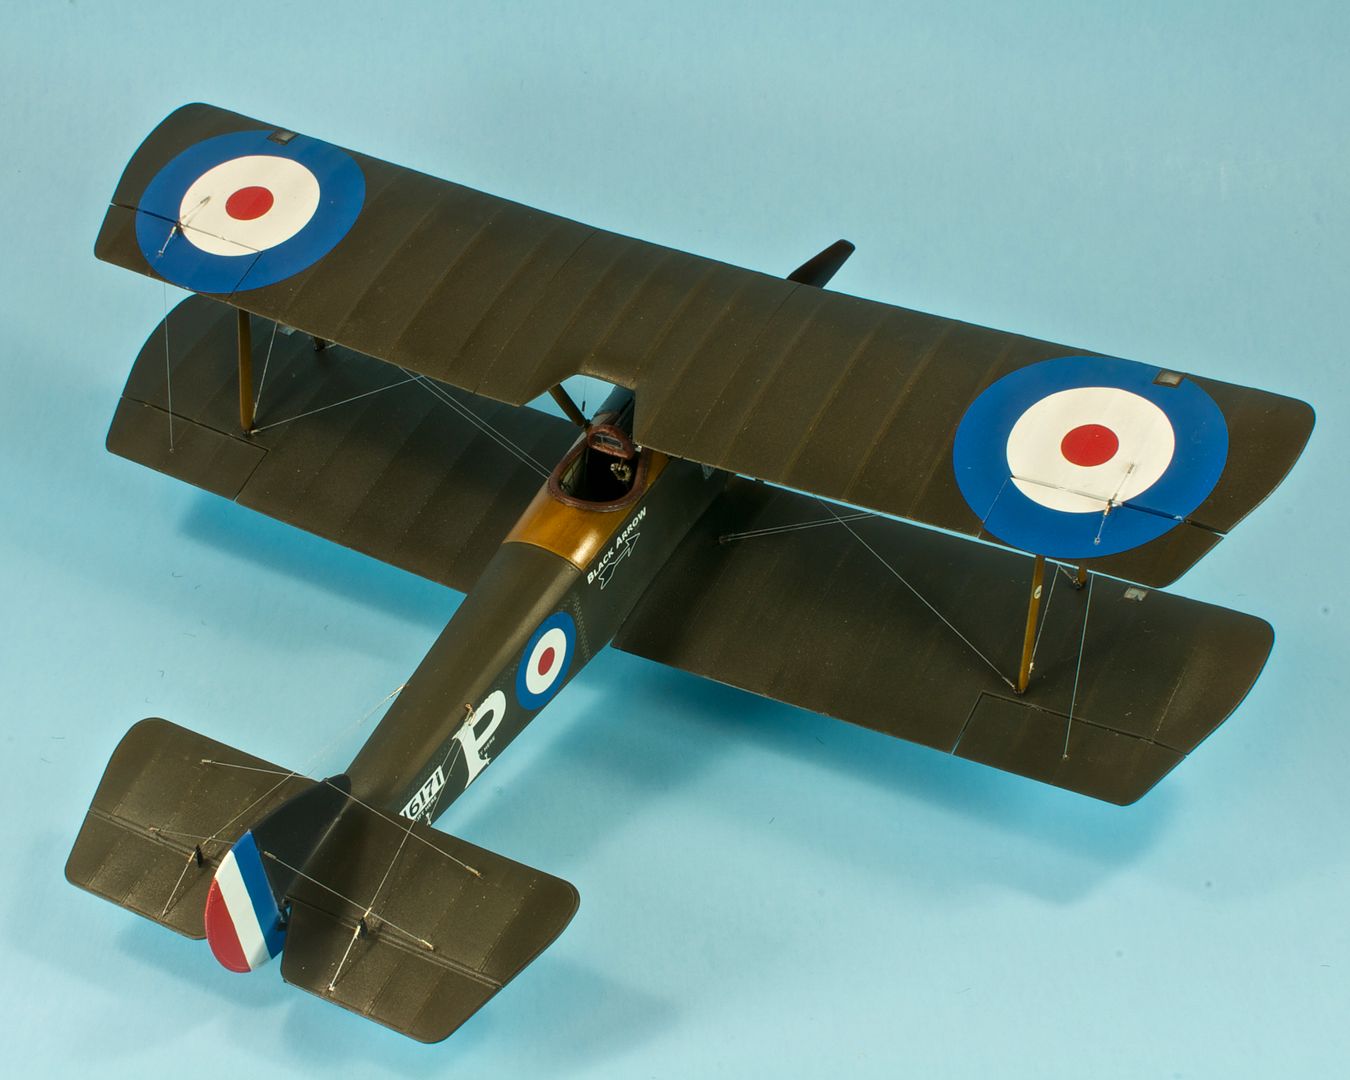
Rigging underway:

Done:

On the Bench: 1/32 Trumpeter P-47 | 1/32 Hasegawa Bf 109G | 1/144 Eduard MiG-21MF x2

On Deck:  1/350 HMS Dreadnought

Blog/Completed Builds: doogsmodels.com


  • Member since
    December 2003
  • From: Indiana
Posted by hkshooter on Sunday, April 1, 2012 2:03 PM

No. There is no easy way.

What I do is locate all the attachment points for the flying wires and rigging cables and drill a #80 hole all the way through the wing, both top and bottom. I do this after the wings are attached.
Once the holes are in place I start with the top wing and insert a length of rigging wire (I use invisible thread colored with a marker) into a hole leaving a small portion sticking through the top then CA it in place. I do the entire top wing first. Once all wires are in place I trim the excess and sand the wing smooth.
Next, I pull each wire through it's corresponding hole in the bottom wing, paying attention to references. When I pull a wire through I hold it tight while applying CA to the hole. Accelerator helps set the glue. I do this for all wires then trim the excess and sand the lower wing smooth.

The job is tedious but what helps is to look at each wire as an individual job. Tend to each wire, one at a time as if it is a single job and it's easier. If you look at all the wires at once it'll seem overwhelming.

Some guys (I envy their talent) add turnbuckles to the wires. They look fantastic but I havent been brave enough to try it yet. If so I'll have to change how I rig my planes.

Edit: Personally, I'd ditch the thread. IMHO it never looks right.


  • Member since
    March 2005
  • From: West Virginia, USA
Posted by mfsob on Sunday, April 1, 2012 1:56 PM

*laughs* Kind of an oxymoron there, mate, the "quick and easy" part, that is.

However, in that scale, many of the biplane builders on this forum use a product called EZ-Line, an elastic-type cord that you can cut to length, superglue into tiny holes (a no. 80 pin vice bit works about the best) and it will stay taut. It is available in the railroad section of model shops and on-line stores in a variety of thicknesses. I agree, the thread that comes with those kits is 1) Way too overscale size-wise, 2) impossible to do anything with, and 3) Bound to sag because it's, well, thread.

The only two biplanes I've ever built, I rigged with stretched sprue, but mine were a tad smaller, 1/72. You could always go that route because it's abundant, cheap, and tightens up nicely. But it is brittle.


  • Member since
    December 2011
WW I Biplane wing rigging
Posted by old timer on Sunday, April 1, 2012 1:34 PM

Anyone know quick & easy way to rig biplane wings that looks decent?  Kit  (1:32 Sopwith Camel) came with black string, but don't know how to get string in the right  places and get it tight.  (Slacks when tied, if I can tie it at all.)  

JOIN OUR COMMUNITY!

Our community is FREE to join. To participate you must either login or register for an account.

SEARCH FORUMS
FREE NEWSLETTER
By signing up you may also receive reader surveys and occasional special offers. We do not sell, rent or trade our email lists. View our Privacy Policy.