UPDATE 1
How cool is that Daniel? Thanks for the pix.
Earlier, I had found the 3 pix below on the Internet.
My dad is front and center on this one…

He is on the far right in this one…

He isn’t in this picture, but I think it was taken at about the same time.

Does your dad have one of the plaques dad made? Does he remember my dad? I will ask dad if he remembers your dad the next time I see him.
Thanks for the kind words and advice guys.
Pawel, you are right, it would be cool to build bigger models of the aircraft. But you are also right that it couldn’t be done as fast or as easy. Who knows though, perhaps someday?
The way the 1/350 scale project came to being is kind of a long story. By chance I got into modeling submarines in AutoCad for 3D printing. Somebody following my CAD submarine posts asked me to make some 1/700 scale planes for him. I made several but life happened to him and he hasn’t progressed with them or even printed them so I could see how they looked. I paid to print them myself, although I had not done any detailing yet. They were cool but tiny at 1/700 scale. I had goofed on the scale of one of the planes (a Skyraider AD-5W) and printed it at 1/350 scale, and I really liked it.
I really enjoyed the process of making the planes in AutoCad using decent, but not great plans, and wanted to make more. Looking at the virtual models together in formation and seeing the 1/350 scale Skyraider made me think that it would be cool to do something like that. So I asked dad what planes he flew. I knew he had flown the AC-47 in Vietnam and that when he met mom he was a flight instructor, but I did not know what planes he had flown. I looked up the wingspans and lengths of the planes and laid out rectangles “in-formation” and decided that 1/350 scale would make for a nice size display. So here we are.
Well Guys, the consensus seems to be that the cold was the cause of the wrinkling. Pawel, Glenn and Salmon (Tom?) all kindly offered it as a potential culprit. I haven’t painted many models, but I have painted many things in my life. Almost every paint that I have used over the years warns about painting below a certain temperature. Now I know why.
I sensed that it was too cold, but dang it, I got impatient and thought that if I rushed out, painted them, and took them back inside to dry, I would be OK. And I might have been. Things were going good until the last pass with the spray can, which probably wasn’t needed. As soon as it hit the surface it was like I was watching those time elapsed shots of somebody getting old. DOH!
Salmon’s explanation makes perfect sense. I didn’t think that it could be a reaction with the plastic, because the plastic primer went on fine and covered the plastic. The first passes of paint went on OK because even though the garage was cold, the models and paint can were still at room temperature. I sprayed the tops and then the bottoms with no problem. When I went back and sprayed the top, the thin layer I had applied before was probably much colder than the new paint, which was still at room temperature, physics took over and the thermal gradient skewed the surface tension of the paint. Perhaps?
Anyway, I sanded the T-29 with some super fine sand paper from an old Testor’s paint kit (no clue what grade), and I think I got it pretty smooth, but I won’t know how good of job I did until after I paint it again. The question is, do I paint it inside and get my butt chewed out for the smell or wait a few days for it to warm up? I guess I could brush on some aluminum. It doesn’t smell as bad, but I like the way spray looks better.

Even though the paint job didn’t go quite as planned, I am still encouraged by the results. When I did the detailing of the canopy, ailerons, flaps, elevators and rudders, I really had no idea how they would turn out. In areas where the blasted paint didn’t wrinkle, the detailing I did had just the effect that I was hoping it would. I can only hope that they don’t disappear with another coat of paint.
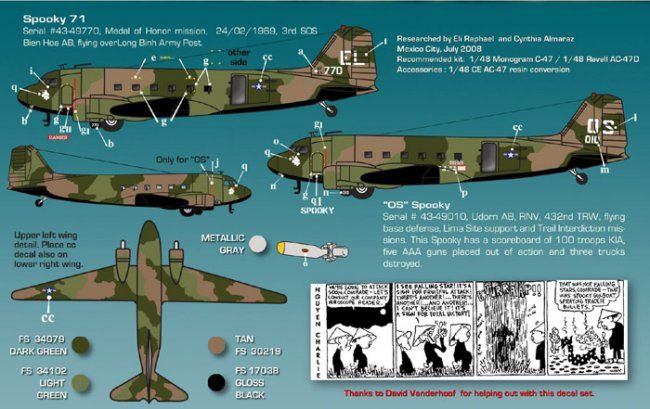
Since discretion is the better part of valor, I decided to paint the AC-47 next, using the paint scheme shown in the image below, which specifies Dark Green (FS 34079), Light Green (FS 34102), Tan (FS 30219) and Gloss Black (FS 17038). Opting to use the paints that I have, I plan on using Testor’s Flat Olive Enamel for the Dark Green. For the light green I will use Testor’s Flat Green Enamel lightened with about an equal amount of Testor’s White Enamel and a smidge of the Flat Olive. For the Tan I will use Testor’s Light Tan Enamel made even lighter with probably about a third as much white. For the Gloss Black I will use Model Master’s Flat Black Acrylic. I will paint the tires gloss black so they stand out.

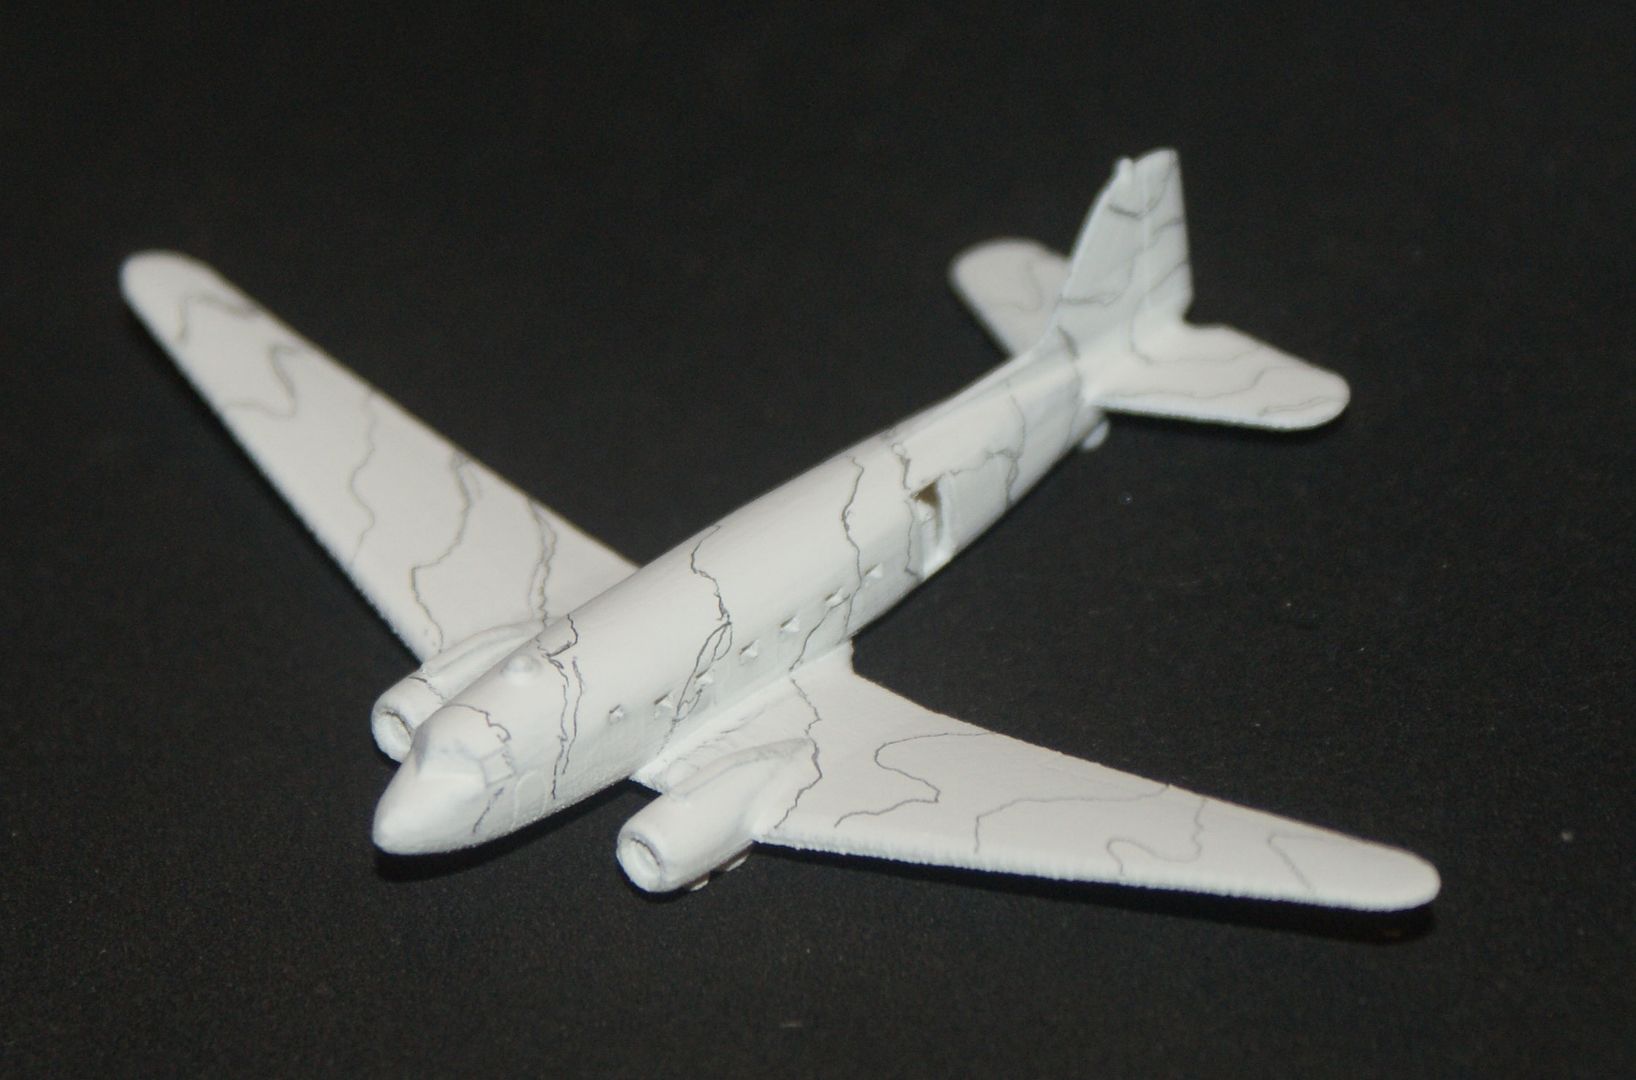
I started by drawing the pattern on the model using a mechanical pencil.

Now it’s time to paint.
CHEERS!!!