SEARCH FINESCALE.COM

Enter keywords or a search phrase below:

1/32 RF 4C "kitbash" *Completed*

7804 views
31 replies
1 rating 2 rating 3 rating 4 rating 5 rating
  • Member since
    July 2011
  • From: minnesota
1/32 RF 4C "kitbash" *Completed*
Posted by handiabled on Tuesday, November 25, 2014 2:39 PM


Hello All, it has been quite a while since I posted a thread here, but here I am,, This is going to be a Revell RF 4C front fuselage, being combined to a Tamiya F 4C. Why? The Revell offering is very mis-shaped and lacking decent detail the Tamiya has. I will be attempting to create  RF 4C Tail # 65-0866 of the 12th TRS 460TRW at Tan Son Nhut,  Vietnam in 1969. I am doing this to honor my friend retired USAF Pilot L Clark , and his Crew Chief D Dixon whom are technical advisors on this build. Clark flew this tail# and Dixon was CC. My bird will be "drawers down" so the camera bay will be detailed quite a bit.....


Starting with the cuts made to both fuselages to be mated together, and to fit "seamless" intakes as well as the camera bay doors..


Viewfinder window cut out and clear styrene added


My best attempt at scratching together a KA-55 camera for the #3 station, dry fitted into place with a scratched "gyro"  mount..


I made and opening for the right side photoflash compartment and may open the left as well as I found out after doing so that the left banks were used first, so it's open up or scribe them on the other side. I made racks with 123 cartridges that were used  in that era,, everything is dry fitted the length of the carts needs to be made as well as additional detail


The Cutting Edge seamless suckers I have were a very big disappointment to say the least. Full of pinholes and wrong /missing panel lines ,, so rather than dealing with the large ledge the kit parts have , I ground them down paper thin and added the kit skins to them keeping the seamless look. Now I will need to rescribe and sand down all the raised panels on them.


Starting to get the camera bay internal detail going, added scratched door latches, viewfinder tube, rear bulkhead and there is a never ending amount of detail in this compartment


As always thanks for lookin!!  More to come 


  • Member since
    March 2010
  • From: MN
Posted by Nathan T on Tuesday, November 25, 2014 3:32 PM

Holy cow Handi! Phreaking Phabulous! Just what we need in here. More Eph- phours. Nice detail and kitbashing! Tell me why Tamiya always stops short of kitting a whole line of a certain subject?? I'm building my own phrankenstein F-4D in 1/48 because I want one with recessed detail and don't feel like scribing a whole kit yet. Great honor to your friends as well. Keep it up!


  • Member since
    November 2003
  • From: State of Mississippi. State motto: Virtute et armis (By valor and arms)
Posted by mississippivol on Tuesday, November 25, 2014 8:58 PM

Sweet tea and cookies!

  • Member since
    March 2005
  • From: near Nashville, TN
Posted by TarnShip on Tuesday, November 25, 2014 9:43 PM

Great work going on here.

Is it just me, or do the rest of you think of Bernie whenever you see an AC coded RF-4C?

He would have loved this thread.

Rex

almost gone

  • Member since
    July 2011
  • From: minnesota
Posted by handiabled on Wednesday, August 12, 2015 4:07 PM

Thanks for the kind words All. I fell out of sight for a bit taking care of a parent with health issues. A sibling in town gives me the chance to do a quick update on my kitbash. Progress has been glacial at best, working in the middle of the night mostly..  


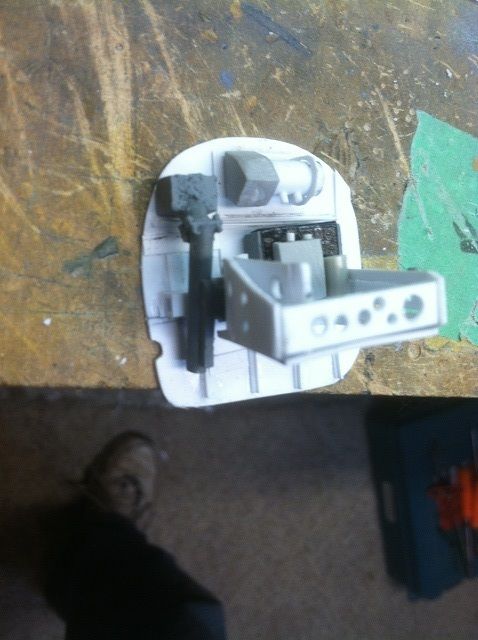
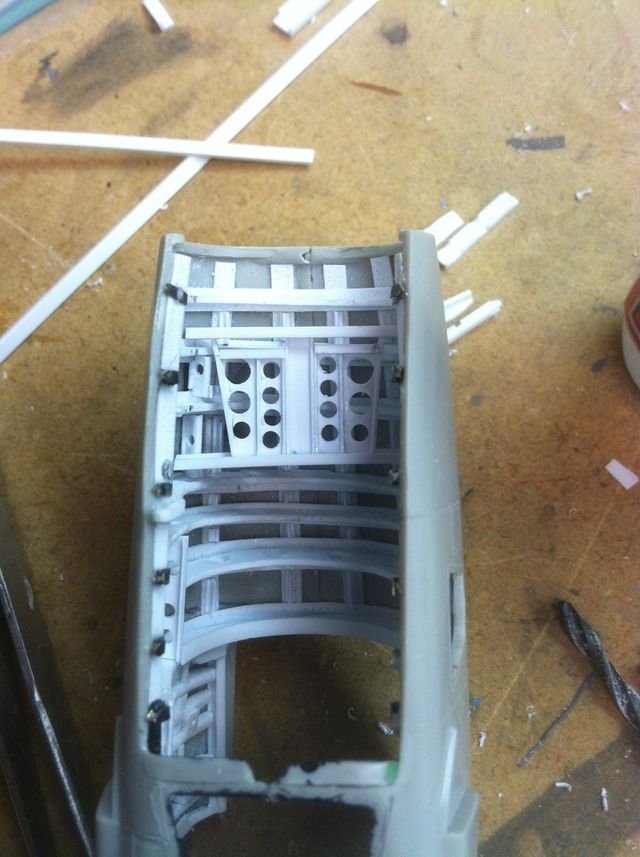
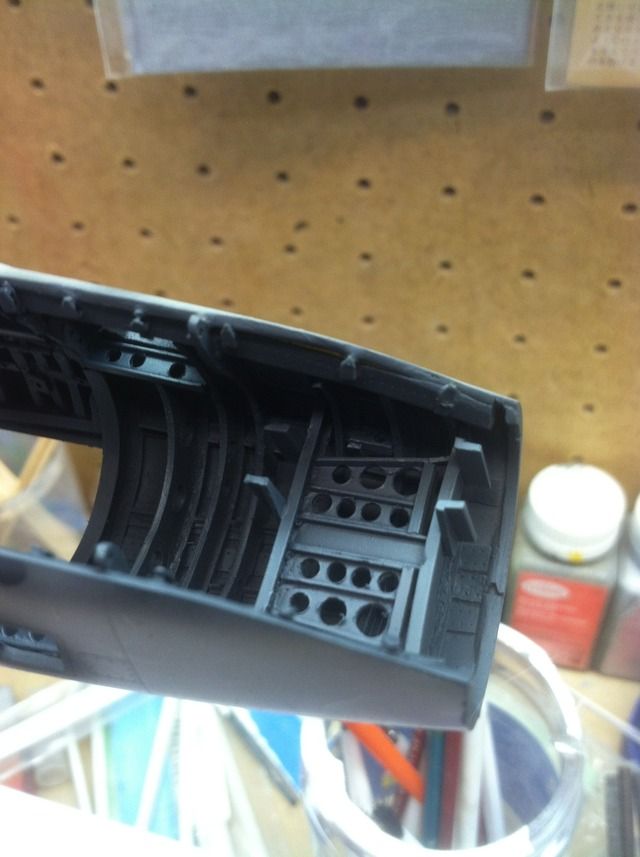
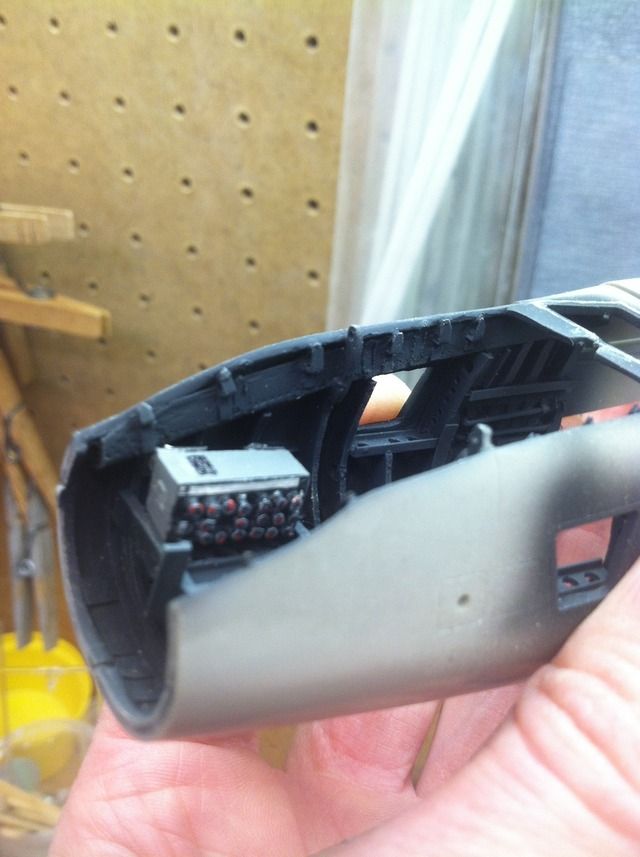
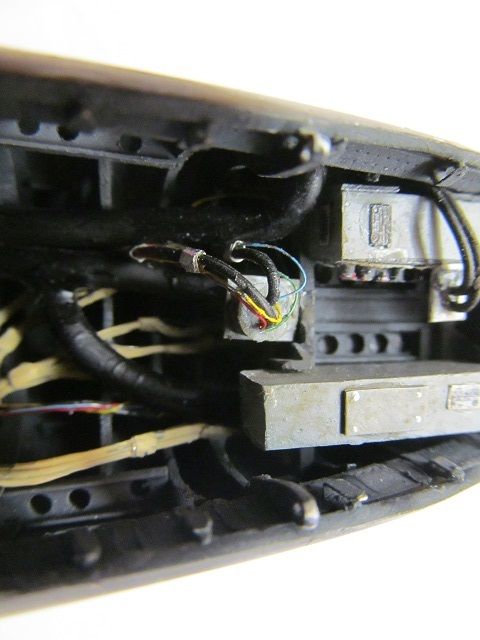
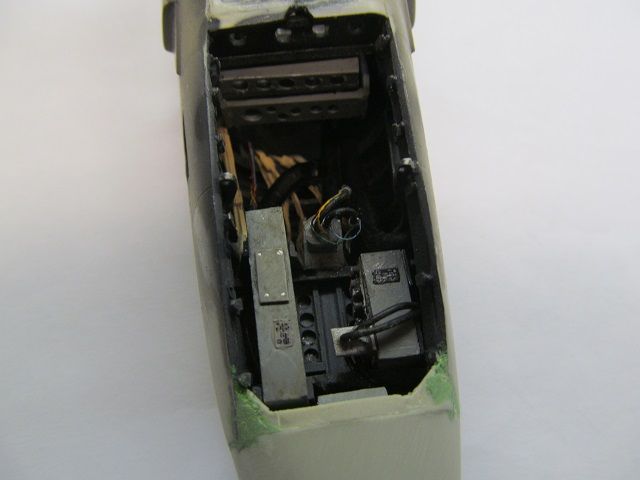
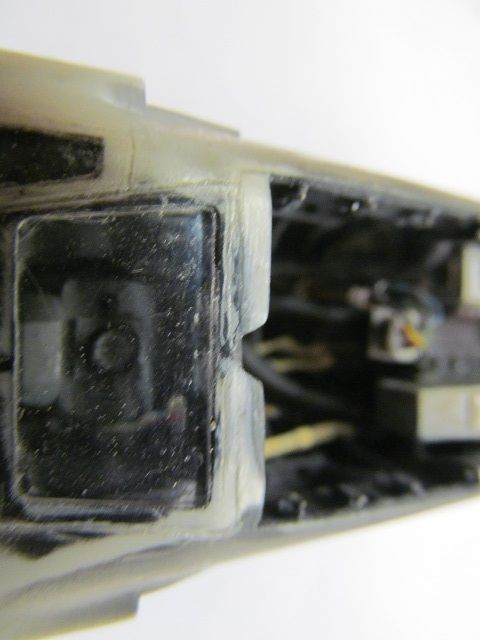
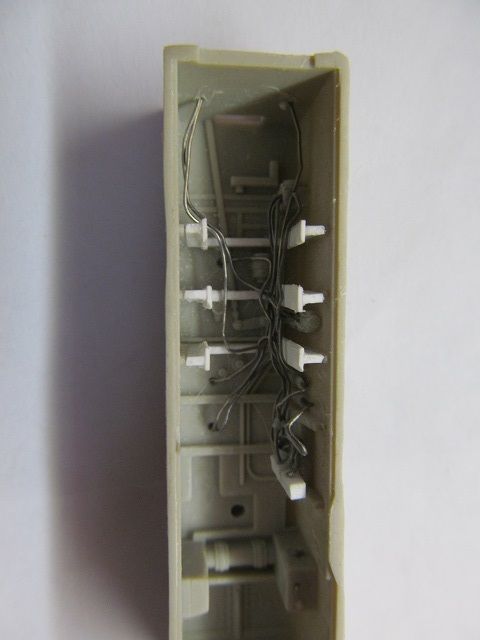
So far my camera bay has come together, with ten pounds stuffed in a five pound bag,,,, bulkheads, station 3 with KA 55 camera and gyro mount, viewfinder tube , ducting , wire bundles and forward control rack with various boxes are all stuffed inside. All of the inner works had to be scratch built.


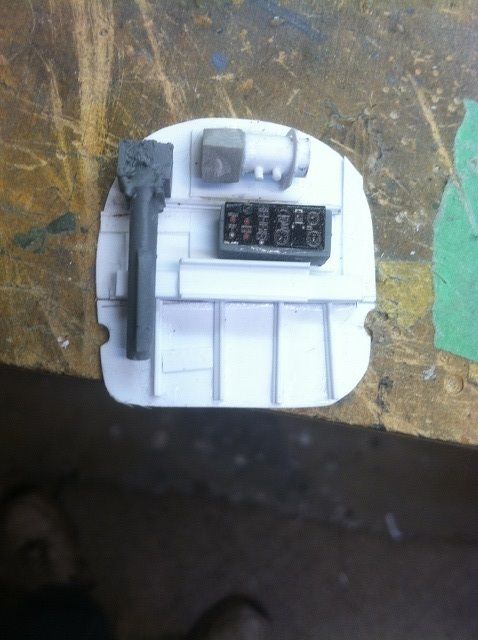
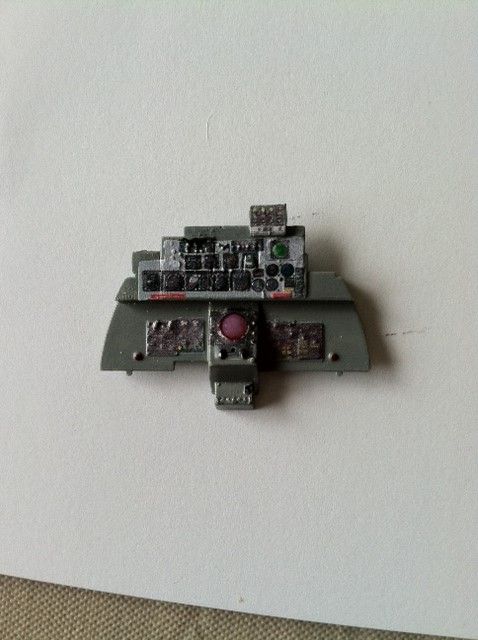
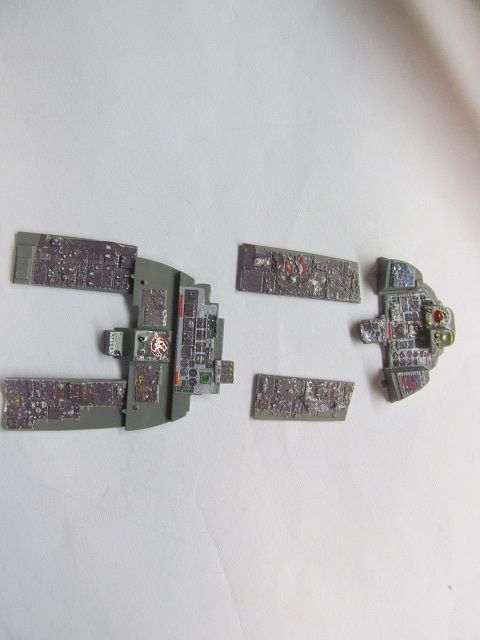
Here is the rear main IP..... scope with a dull foggy "turned off" look. I made the rest of the ip's and panels with decals made from both the dash-one and graphics sent too me by the crew chief.................


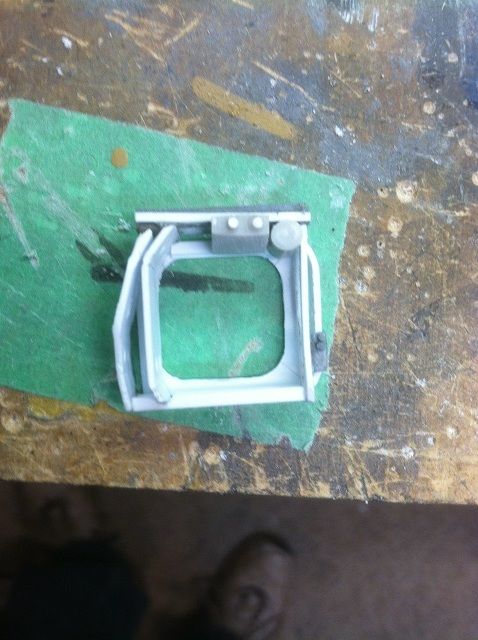
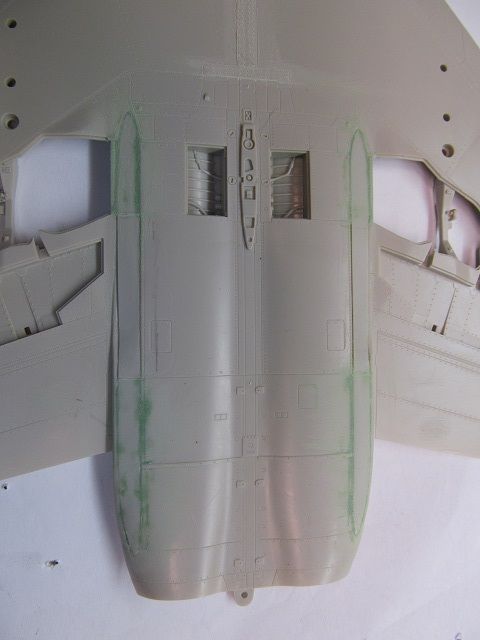
Here the front gear bay is taking shape...............


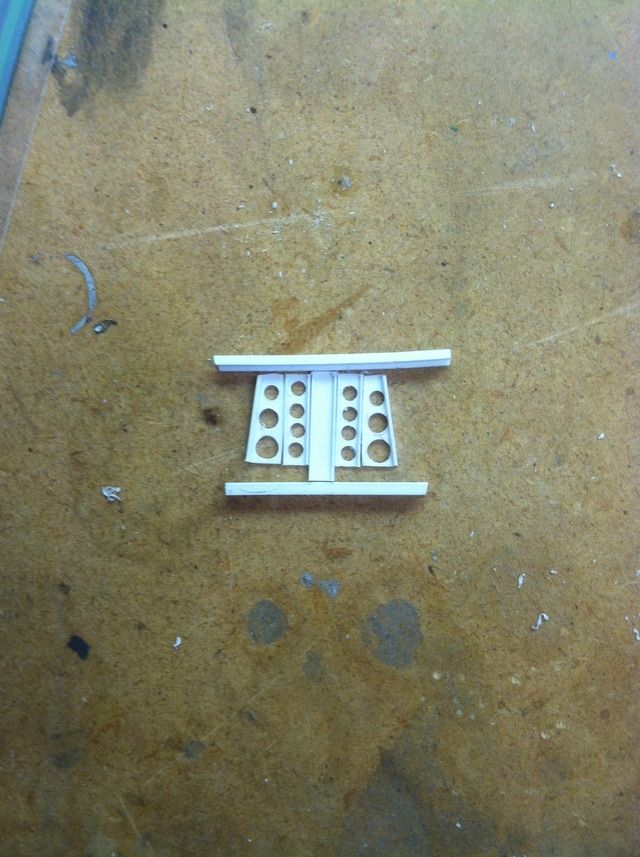
And the missle rails are filled and doors added.... a bit more work to do on this.......


Well that's all I have for now,,,, hopefully soon I will be able to pick up the pace with this and on the rest of the Forum as well.

                               As always , Thanks for lookin!!Smile

  • Member since
    May 2013
  • From: Indiana, USA
Posted by Greg on Wednesday, August 12, 2015 4:19 PM

Wow!!!

(and good to hear from you, Handi. You are missed around here)

  • Member since
    February 2013
Posted by tomwatkins45 on Wednesday, August 12, 2015 7:06 PM
Wow ! This is going to be awesome ! It looks great so far. Tom
  • Member since
    March 2015
  • From: Streetsboro, Ohio
Posted by Toshi on Thursday, August 13, 2015 5:54 AM

Your skill set is fantastic!  Great job on the F-4 Phantom

On The Bench: Revell 1/48 B-25 Mitchell


Married to the most caring, loving, understanding, and beautiful wife in the world.  Mrs. Toshi


  • Member since
    July 2011
  • From: minnesota
Posted by handiabled on Sunday, October 18, 2015 8:45 AM

Thanks Everyone for the kind words...   I finally finished the two MK 7 seats for the most part. I thought going the way of Brassin seats would be the way to go as the rail and "horses head" are the only ones with the correct dimensions of how they overhang the upper chute container, mistake.......They are too tall and the seat bucket is too wide.

Here is the height difference between the Brassin and Avionix seats as I am using the Avionix resin set for the Cockpit tubs....


Rather than lower the floor and mess up the side panel height, I cut the rail and head off of the Brassin set and shortened them, then routered out the Avionix seats. The result looks good I guess. I suck painting belts, so off they went as well, the end result was achieved with a combo of tape and pe belts, and added wire and solder to the seat.


   As always thanks for lookin!!  Smile

  • Member since
    January 2010
  • From: Nebraska, USA
Posted by CallSignOWL on Sunday, October 18, 2015 2:01 PM

wow. that detailing is amazing!!

------------------------

Now that I'm here, where am I??

  • Member since
    May 2009
  • From: Poland
Posted by Pawel on Sunday, October 18, 2015 4:03 PM

Hello!

Great work here! Like, what would be the use of 1/32 scale if not for builds like this one? The ejection seats are looking beautiful! Good luck with your build and have a nice day

Paweł

All comments and critique welcomed. Thanks for your honest opinions!

www.vietnam.net.pl

  • Member since
    December 2002
Posted by 7474 on Sunday, October 18, 2015 5:42 PM

Yeah looks good. 

  • Member since
    June 2003
  • From: Cavite, Philippines
Posted by allan on Sunday, October 18, 2015 9:54 PM

Big fan of extreme detailing, and its great to see your work on this Phantom. Looking forward to more WIP shots.

No bucks, no Buck Rogers

  • Member since
    November 2009
  • From: SW Virginia
Posted by Gamera on Monday, October 19, 2015 7:43 AM

I hope things have straightened out for your some, it's good to see you back. 

Amazing job there, that's one of the reasons I don't do 1/32nd is that I almost feel like I have to superdetail things out like you're doing- beautiful work! 

"I dream in fire but work in clay." -Arthur Machen


  • Member since
    June 2014
Posted by BrandonK on Monday, October 19, 2015 9:06 AM

WOW!!! That is some super work happening there. Definately watching this one.

BK

On the bench:

A lot !! And I mean A LOT!!

2024 Kits on deck / in process / completed   

                         14 / 5 / 2  

                              Tongue Tied

  • Member since
    July 2011
  • From: minnesota
Posted by handiabled on Monday, November 30, 2015 12:41 PM

Thanks everyone!   It has been a while since I updated this build but progress has been made. New panel lines scribed in the vertical stabilizer, both kits fuselage parts fused together, intakes in, office finally figured out (1969 SEA configuration)and fitted into the fuselage, canopy rails and more correct looking glare shield scratched together,, parts dry fitted.... now just a matter of detailing wheel bays, aux air intakes, landing gears, canopies and so on.......


                               As always Thanks for lookin!!Smile

  • Member since
    June 2003
  • From: Cavite, Philippines
Posted by allan on Tuesday, December 1, 2015 1:27 AM

Looking real good there.

No bucks, no Buck Rogers

  • Member since
    July 2011
  • From: minnesota
Posted by handiabled on Saturday, February 20, 2016 9:32 AM

Well it took a while but this one is finally done.  some more of the mods made to the kit included, cutting the oversized aft vents on the Tamiya fuselage and replacing with graft piece from the Revell, added detail to the aux air intakes, added hydro lines-ect to the wheel bays, scratched together all the photo flash compartment detail and doors, all the detail inside the camera doors including the cameras and mounts, I also opened the latches on the doors for a more realistic open look. I added a set of Isradecals after painting and then put another layer of paint over the stencils to give a more true look of a camoed bird in SEA 1969. The burner cans and nozzles and inner pylons were made out of resin and given to me by the CC D Dixon. They are fantastic! I added adjustment screws to the pylons as well as stabilizing adjustment screws for the cl tank. The braces for the fins of the cl tank were scratched as well as the mount and fins. All of this was finished off with some RBF ribbons in places specified by the CC Handbook of the RF 4C.....


This bird would not have turned out close to this without the help, encouragment and tech advice from D Dixon and L Clark, the two men this build is about.  For their years of dedicated service ,,, and friendship.   Thanks again Guys.


                           And as always , Thanks for lookin!Smile


  • Member since
    March 2010
  • From: MN
Posted by Nathan T on Saturday, February 20, 2016 9:48 AM

Excellent work all around Handi! Every part and detail I see is well detailed and painted up perfectly. the pylons and fuel tanks look right on. I love the SEA camo recce Rhinos! This has been a great and professional build to follow!


  • Member since
    February 2014
  • From: Michigan
Posted by silentbob33 on Saturday, February 20, 2016 9:49 AM
Now that looks awesome! The detail is amazing, I especially like the camera bay and the landing gear bays. Thanks for sharing.

On my bench: Academy 1/35 UH-60L Black Hawk

  • Member since
    July 2011
  • From: minnesota
Posted by handiabled on Saturday, February 20, 2016 9:59 AM

Thanks Guys!  This was by far the most difficult build I have done. Mostly because of trying to stay true to the RF (in SEA 1969) there were many many things that needed to be changed, from panel lines to the panels in the pit.


  • Member since
    May 2013
  • From: Indiana, USA
Posted by Greg on Saturday, February 20, 2016 9:59 AM

Wowza, what a beaut, Handi. Really fine work, and thanks for taking the time to show some of the detail stuff.

What a neat thing that the crew of the real bird advised, and are your freinds. Really neat.

PS, thank you for taking so long to complete this. Makes me feel a little less guilty about my own building habits.

  • Member since
    November 2003
  • From: Naples, FL
Posted by tempestjohnny on Saturday, February 20, 2016 10:40 AM
Phreakin awesome. And big


  • Member since
    August 2014
  • From: Willamette Valley, Oregon
Posted by goldhammer on Saturday, February 20, 2016 11:11 AM

Phantastic build.  As someone who spent about 3 years digging in the camera bays and upside down in the front office after the seat was out fixing wiring on RF's as an ECM tech in the ealry/mid 70's, I absolutely love that bird of yours.  You did the guys proud.

Not going to go as deep in the one I have, but wish I was able to.

  • Member since
    June 2004
  • From: 29° 58' N 95° 21' W
Posted by seasick on Saturday, February 20, 2016 7:04 PM

Bring out the blue ribbon!

Chasing the ultimate build.

  • Member since
    November 2003
  • From: State of Mississippi. State motto: Virtute et armis (By valor and arms)
Posted by mississippivol on Saturday, February 20, 2016 8:40 PM
Sweet tea and cookies!
  • Member since
    July 2011
  • From: minnesota
Posted by handiabled on Sunday, February 21, 2016 8:07 AM

Thanks Everyone!   This one pushed me over the edge a couple times but the result was worth it.

fox
  • Member since
    January 2007
  • From: Narvon, Pa.
Posted by fox on Sunday, February 21, 2016 12:20 PM

Just sat here and went through the whole build 2X with my mouth hanging open all the time.  FANTASTIC build.  My wife came over to see what I was looking at and said "That has to be a bigger kit, no way he got all that detail in there". 

So, from both of us Bow Down Bow Down Bow Down Toast Toast Toast.

Jim  Captain

 Main WIP: 

   On the Bench: Artesania Latina  (aka) Artists in the Latrine 1/75 Bluenose II

I keep hitting "escape", but I'm still here.

  • Member since
    March 2015
  • From: Streetsboro, Ohio
Posted by Toshi on Sunday, February 21, 2016 2:27 PM

Mrs. Toshi and I are amazed by the attention to detail as well as the build it's self.  You did a fantastic job on that!

Toshi

On The Bench: Revell 1/48 B-25 Mitchell


Married to the most caring, loving, understanding, and beautiful wife in the world.  Mrs. Toshi


  • Member since
    November 2009
  • From: SW Virginia
Posted by Gamera on Sunday, February 21, 2016 2:33 PM

Yeah, what else can I say but...

PHANTASTIC!!! 

"I dream in fire but work in clay." -Arthur Machen


JOIN OUR COMMUNITY!

Our community is FREE to join. To participate you must either login or register for an account.

SEARCH FORUMS
FREE NEWSLETTER
By signing up you may also receive reader surveys and occasional special offers. We do not sell, rent or trade our email lists. View our Privacy Policy.