SEARCH FINESCALE.COM

Enter keywords or a search phrase below:

My Monogram C-47 Build!

11262 views
34 replies
1 rating 2 rating 3 rating 4 rating 5 rating
  • Member since
    February 2015
  • From: Wisconsin
My Monogram C-47 Build!
Posted by Airborne_Trooper11B on Monday, February 16, 2015 1:15 AM

Hey guys. I'm a vet that served with the 101st Airborne so obviously the history of the Screamin' Eagles is something I hold pretty near and dear.  Anyway, after seeing some jaw dropping diorams on here, I decided to give this a whirl myself. So here's my C-47 I'm working on. Not nearly as talented as some of you guys. But believe me I've come a loooooong way from the F-16 Thunderbird I built back in middle school that eventually collapsed because I REFUSED to let the glue dry properly lol. Anyway, constructive criticism and suggestions always welcome. I have a 6 month old little guy, so I'll try and post as soon as I can, but as you other fathers know, we work on their schedule! Toast

So, obviously starting with the interior. Normally I tend to just "flat black" every little piece in this part and even leave stuff out, as I never see it once it's complete, but I decided to put a some more effort into it this time. The glue got a little outta hand in some spots, but, I'm ok with the turn out, being my first go around. More to come soon! 

Tags: aircraft , Build , C-47 , Monogram

  • Member since
    February 2011
  • From: Mobile, AL
Posted by RotorHead10 on Monday, February 16, 2015 7:40 AM
I like it! This is a kit I've always wanted to build. Poor radio operator....at least give hime a couch cushion to sit on!

http://i301.photobucket.com/albums/nn48/MikeTheModeller/GB_Badges/Phantom2011_1.jpg

  • Member since
    February 2003
  • From: Green Bay, WI USA
Posted by echolmberg on Monday, February 16, 2015 9:46 AM

Ooo!  I'll be watching this one!  I love Revell/Monogram kits and this is one that I'm so tempted to get.  Were it not for the fact that I already have about 25 kits in my stash, I'd have snapped up the C-47 by now.

As a dad of two young daughters, I TOTALLY understand what you mean when you say you work on your kids' schedules.  I remember those days when my little ones were 6 months old.  Oh, and congratulations on your little guy, too!  :o)

Eric

  • Member since
    March 2003
Posted by rangerj on Monday, February 16, 2015 12:21 PM

Currahee. I'm also a "Screaming Eagle". I requested the 101st because I had an uncle that was in the "Battle of the Bulge" with the 101st. If you ever get the chance to go to Belgium go during the week that they celebrate the liberation from the Germans by the 101st and the 82nd airborne. That said, keep going on the C -47. It is a good kit and needs very little filling. I filled the wing to fuselage joint with sheet stock and stretched sprue. That was the largest gap to fill if I remember correctly. I'll throw out two pieces of advice, as a 60 year modeler, and that is make up your mind to finish ant model you start no matter what happens, and secondly if you ever build the perfect model it is time to quit. No surrender, no retreat, and never say die!!!  Rangers lead the  way.

  • Member since
    February 2015
  • From: Wisconsin
Posted by Airborne_Trooper11B on Monday, February 16, 2015 2:54 PM

@Rotohead: Haha the black on the stool was supposed to be a cushion. Eric thanks for the well wishes on my son! He keeps me busy that's for sure, but the last 6 months have been AMAZING! Anyway, if you can, I say definitely get this model! It's a lot of fun so far, and I loofa working with the 1/48 scale. It's kinda beasty, but being a C-47, this is the only way to go! RangerJ! HOOAH!!!

  • Member since
    February 2015
  • From: Wisconsin
Posted by Airborne_Trooper11B on Monday, February 16, 2015 3:16 PM

Ok, so I got a lot of painting done and even a little bit of detailing as well! 

Here, I just finished putting in the fuselage windows. I won't mention how much thought I put into when to install these windows so as to find the easiest way to avoid painting over them lol Sleep

Here I have the top and underside of the wings, I went with the "gull grey" version for the belly


I'm just about done with the interior. I was gonna go all out on the seat belts but decided against it because  it meant another store run. With all that stuff being only on the inside, it just wasn't worth it to me considering how incredibly tedious it would of been!

Here's some work on the engines, propellers and landing gear.


Well so far so good. More to come!! Toast

  • Member since
    December 2002
  • From: Bury St Edmunds, Suffolk, England
Posted by Bish on Monday, February 16, 2015 4:00 PM

Nice work so far. What are you planning for the dio. For the D-day GB last year, one of the guys built a 48th C-47, I think it was the same kit. He depicted an aircraft about to board its load of Screaming eagles. His completed pics are this page, hope you find them interesting and useful.

cs.finescale.com/.../154026.aspx

I am a Norfolk man and i glory in being so


On the bench: Airfix 1/72nd Harrier GR.3/Fujimi 1/72nd Ju 87D-3

  • Member since
    February 2015
  • From: Wisconsin
Posted by Airborne_Trooper11B on Monday, February 16, 2015 4:25 PM

Thanks Bish. Yeah that's a pretty sweet model there and definitely helpful! I think I finally decided to go ahead and tackle the invasion stripes myself, to get the "haphazard look". I also found a really cool chipping effect called "worn effects" acrylic. It's supposed to work better than hairspray so I'm gonna give that a go tonight.

  • Member since
    December 2002
  • From: Bury St Edmunds, Suffolk, England
Posted by Bish on Monday, February 16, 2015 4:29 PM

Look forward to seeing that. What brand is the worn effects.

There was a lot of discussion through that Gb about the invasion stripes, and the general consensus was that those applied for the 6th June were done at the last minute and were rather rough looking.

I am a Norfolk man and i glory in being so


On the bench: Airfix 1/72nd Harrier GR.3/Fujimi 1/72nd Ju 87D-3

  • Member since
    February 2015
  • From: Wisconsin
Posted by Airborne_Trooper11B on Monday, February 16, 2015 4:57 PM

It's made by AK interactive. A guy on another forum did a whole tutorial on how it worked, and after seeing the results, I was blown away. Check out the link! privateerpressforums.com/showthread.php

  • Member since
    June 2013
Posted by RobGroot4 on Monday, February 16, 2015 8:35 PM

If you are still interested in doing seatbelts, just use some masking tape.  Stick it flat to something you can cut on (a piece of glass or plexi works great.  Then just use an exacto to cut it into thin strips, paint it, and stick it on the benches.  The other thing you can do (if you can't get the tape to fold up right) is use wine bottle foil.  Just cut it and ball it up, straighten it out and fold to shape before painting.

Looks good so far!

Groot

"Firing flares while dumping fuel may ruin your day" SH-60B NATOPS

  • Member since
    July 2004
  • From: Sonora Desert
Posted by stikpusher on Monday, February 16, 2015 9:12 PM

Looking good there airborne. I might suggest some drybrushing of aluminum in the troop compartment on the floorboards and seats to suggest some wear. This build is right up my alley.


F is for FIRE, That burns down the whole town!

U is for URANIUM... BOMBS!

N is for NO SURVIVORS...

       - Plankton

LSM


  • Member since
    December 2002
  • From: Bury St Edmunds, Suffolk, England
Posted by Bish on Monday, February 16, 2015 11:28 PM

Right, thanks. I use a lot of their enamel products but have not tried their Acrylic line.

I am a Norfolk man and i glory in being so


On the bench: Airfix 1/72nd Harrier GR.3/Fujimi 1/72nd Ju 87D-3

  • Member since
    December 2009
Posted by ww2psycho on Tuesday, February 17, 2015 5:17 AM

Great work so far!  I picked one of these up last year. When you get to it can you take a picture of the wing to fuselage fit on the belly? I dry fitted mine just for something to do one day and it seemed like a pretty good gap there. Maybe I wasn't holding it right either. Just curious to find out from someone else.

  • Member since
    February 2015
  • From: Wisconsin
Posted by Airborne_Trooper11B on Tuesday, February 17, 2015 9:47 AM

Thanks Rob! I'd already sealed the fuselage  by the time I read your comment. I'm not too familiar with dry brushing anyhow, but I'll be looking into it soon with my next model. But thanks for the advice! Yes

Psycho. Thanks bud, I'll get that pic for you when I get to that part. It looks like it should be ok, but I'll tell you right now the gap you need to be worried about is the one between the two fuselage halves! A few people have mentioned this already, but once the interior is installed and the two halves are connected, it's like gap city all around. I dry fitted mine like 10 times, I was able to close most of them prior to gluing, but it's still gonna take some manipulation. I should of gone with my first thought-- initially I was gonna leave the entire interior outside of the plane, to give the inside it's due presentation, but decided not to at the last minute. When you build yours, I say leave the entire interior out, dress it up REALLY nice and make it a separate piece from the plane. It'll pay off big time with connecting the plane and all the hard work you did on the inside won't have to only be seen by way of pictures. Toast

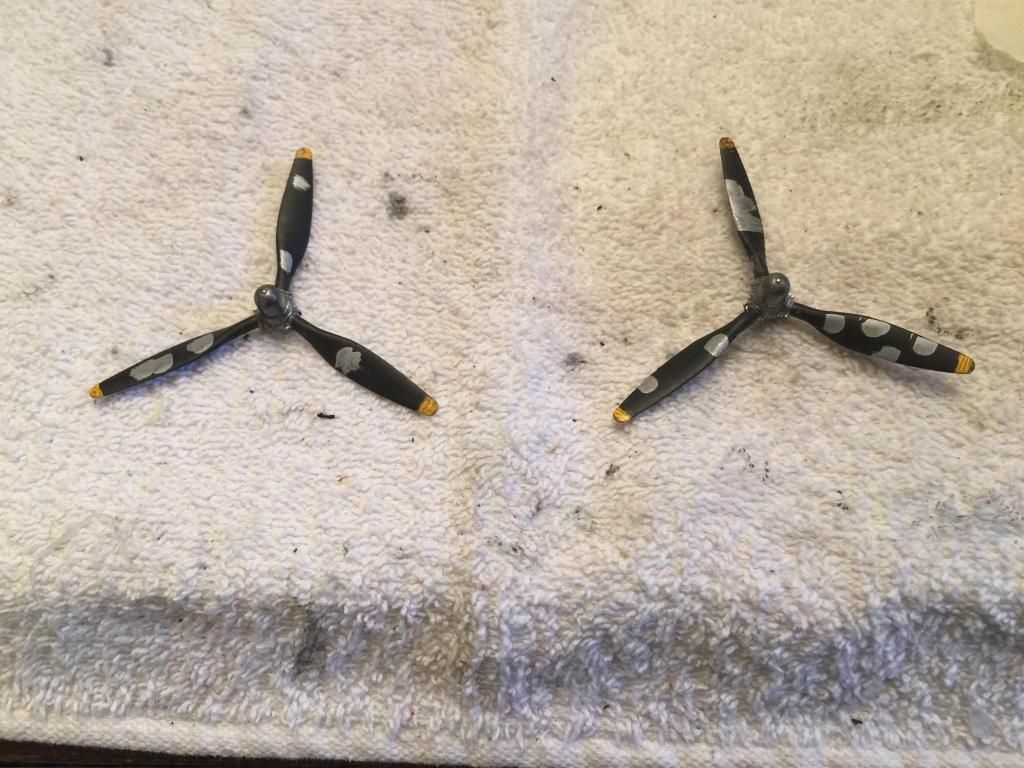
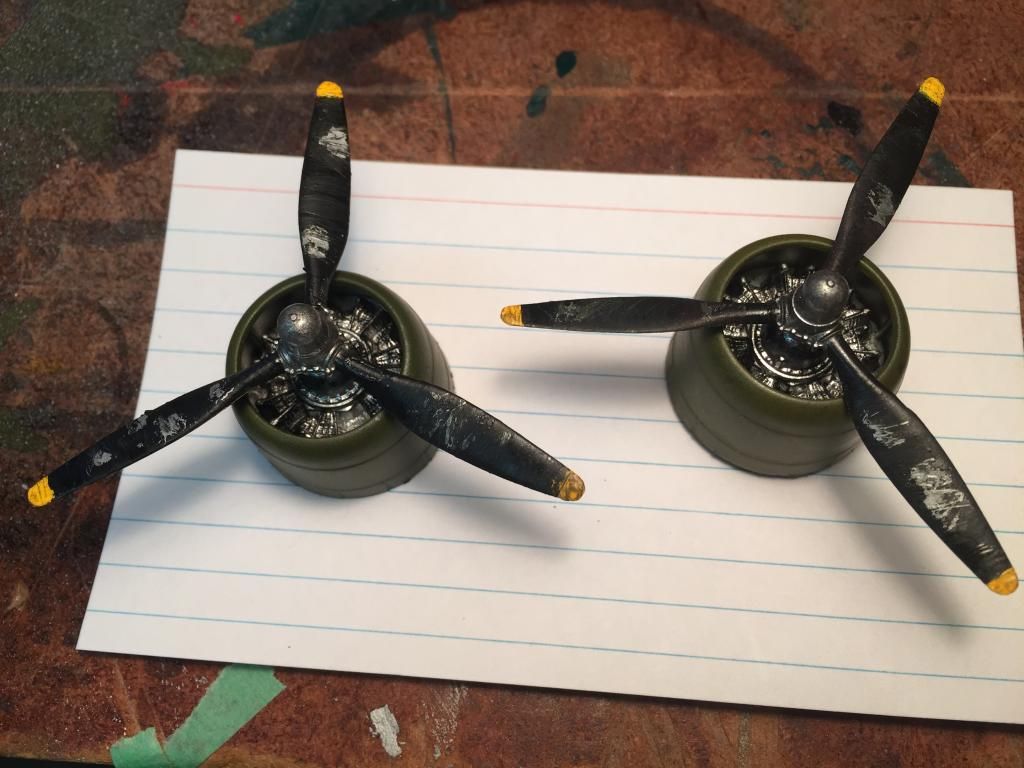
Bish. Yeah my hobby store here was sold out of all of the acrylic because they're going out of business, so I went with the ol' hair spray method. Crazy me totally forgot to seal the chipped parts with the flat finish, before applying the hair spray, but thankfully, I was only working on the propeller blades at the time. It actually didn't turn out too bad! I had to touch it up a little bit because it stripped down to the plastic color in a couple parts, but it was a super easy fix. Sleep

Starting out..

Here, I was beginning to realize I forgot the flat finish, but as you can see, it wasn't terrible. 

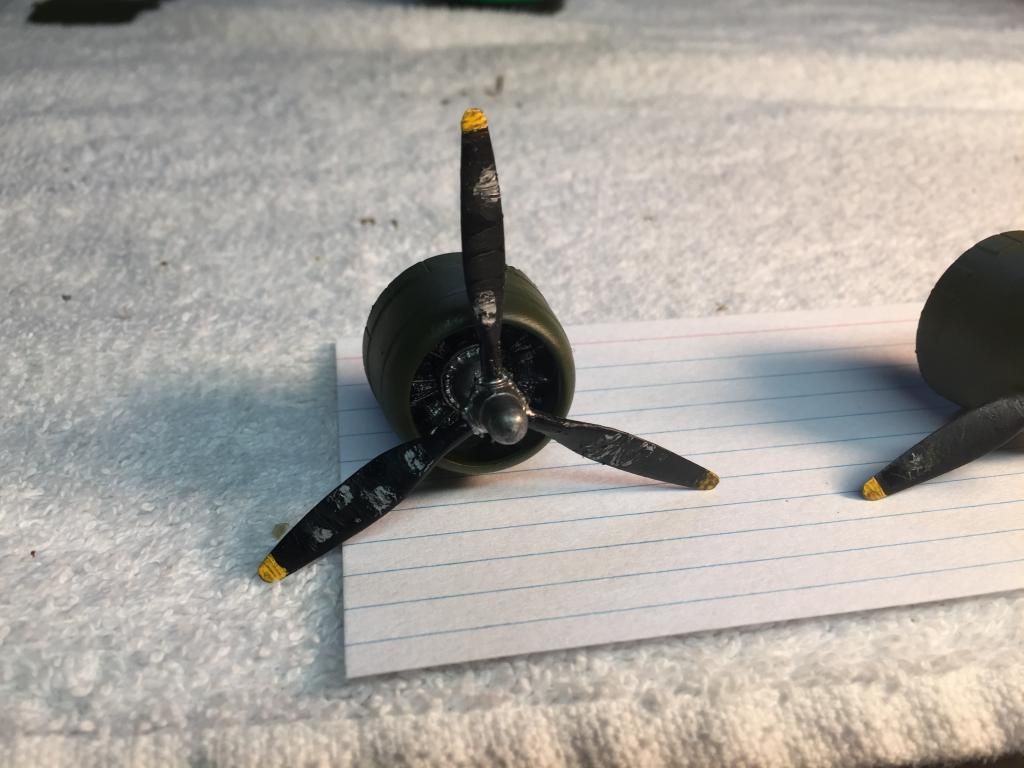
Still, I wanted to touch it up, but then called it quits so as not to over-correct. Could of been a lot worse, but thankfully I have bunch of propeller blades from old "I give up" models laying around from way back when lol. 

And then super random, but I thought you guys would like this. I put this in my little guy's nursery since he has an aviator themed bedroom-- A Tuskegee Airmen version of the P-51D (I did the red tail markings myself), chasing a Messerschmitt 109. The aerodynamic bank the 109 is taking is a little ridiculous but working with fishing line with my arms in the air was painful and annoying as the 109 kept twisting about. 

  • Member since
    December 2002
  • From: Bury St Edmunds, Suffolk, England
Posted by Bish on Tuesday, February 17, 2015 12:13 PM

Nice work. I have never tried hairspray and not often seen it on aircraft. Nice chase scene there as well, though of course it should have the 109 on the tail of the Stang  Wink

I am a Norfolk man and i glory in being so


On the bench: Airfix 1/72nd Harrier GR.3/Fujimi 1/72nd Ju 87D-3

  • Member since
    February 2015
  • From: Wisconsin
Posted by Airborne_Trooper11B on Tuesday, February 17, 2015 2:31 PM
Hahaha I won't abide superior flying from a Nazi plane in my house! Anyway, yeah the hairspray deal worked well for the propellers but no dice for other parts. I have to repaint a couple things and do it again. It doesn't look bad, but for whatever reason the chipping skipped over the aluminum base I put on and went all the way down to the initial gray primer. That was even with a flat seal and two coats of hair spray.

  • Member since
    March 2003
Posted by rangerj on Tuesday, February 17, 2015 3:37 PM

Note: The story of "Kilroy was here" is an interesting story. When he inspected a section of a ship that was being constructed he wrote "Kilroy was here". GIs left that and the cartoon character all over the world. The press, especially Bill Mauldin the Army cartoonist for the "Stars and Stripes", used it in many cartoons involving GIs, especially "Willie and Joe" cartoons. The U.S. Post Office very recently dedicated a stamp to Bill Mauldin. This is long over due. Note Bill Mauldin was a GI in the ARMY before the war started and all during the war. The GIs loved his cartoons, that is except Gen Geo. Patton, but Gen Eisenhower told Patton to leave him alone in no uncertain terms. This is also a great WWII story. Gen. Eisenhower was also a pilot, another little known fact. Paul Tibbets, the Enola Gay pilot, flew Eisenhower to a meeting in Malta and Eisenhower thought Tibbets was the best pilot he had ever flown with. From that flight Tibbets got the recommendation to lead the B-29 mission that would drop the first Atomic bomb. The flight to Malta was in a B-17 and was done at wave top level at night for security reasons. When they arrived the planes props were covered with salt from the sea water. Eisenhower was impressed with Tibbets flying skills.

  • Member since
    February 2015
  • From: Wisconsin
Posted by Airborne_Trooper11B on Tuesday, February 17, 2015 3:41 PM

Oh yeah, I know all about Kilroy. If you ever make it to Fort Benning or Campbell, you'll find this guy drawn in almost any bathroom haha.

  • Member since
    February 2015
  • From: Wisconsin
Posted by Airborne_Trooper11B on Wednesday, February 18, 2015 1:16 PM

Tiny update nearing the end but all the "interesting" stuff is well under construction. 

Anyway, I worked on the tires a little more, painted them rubber, then took a charcoal vine stick, grounded it up and rolled the tires in them to give them a more gritty look. 

  • Member since
    February 2015
  • From: Wisconsin
Posted by Airborne_Trooper11B on Thursday, February 19, 2015 8:05 AM

Ok so, I don't own a stencil and finding one in my area is like finding a four leaf clover! So I had to draw the letter/numbers by hand. Painting around the middle for the "4" will be interesting as it's small and yields VERY little protection from paint. I imagine I'll have to touch it up, but we'll see!

  • Member since
    February 2015
  • From: Wisconsin
Posted by Airborne_Trooper11B on Thursday, February 19, 2015 12:38 PM

Alrighty, so the first halves of the "L" and "4" came out ok, got some more touching up to do to even out the green, but not too shabby. 

Here, I finished up the invasion stripes on the wings. I was all excited to do this, because here I thought was a part where I didn't need to hold my breath to do it. But sure enough, it takes even MORE precision to paint "haphazard" lines than straight ones! Either way, happy with the results! 

  • Member since
    December 2003
  • From: Charleston, SC
Posted by sanderson_91 on Thursday, February 19, 2015 7:20 PM

Very nice!! You're doing a great job on a cool kit!  I like your stencils!

Steve


  • Member since
    February 2015
  • From: Wisconsin
Posted by Airborne_Trooper11B on Friday, February 20, 2015 9:56 AM

Thanks Steve! Got most of the wing work done and nearly complete with that. Just waiting on some microsol to show up at my shop then I can put the decals on and get ready to attach it to the fuselage. 

I also touched up the invasion stripes just a bit, and added it a little chipping effect to the wing edges.

  • Member since
    February 2014
  • From: Michigan
Posted by silentbob33 on Friday, February 20, 2015 10:10 AM

Looking great so far. I love the roughness of the invasion stripes, looks like the real deal.  And by the way, Kilroy also made it onto the WWII Memorial in DC.

On my bench: Academy 1/35 UH-60L Black Hawk

  • Member since
    May 2014
Posted by SubarooMike on Friday, February 20, 2015 10:34 AM

Hello Airborne_Trooper!       I want to pass on a little advice.   You might want to think about repainting the black the leading edge of the wing.   You added the chipping and worn paint there; however, this would have never occurred there.  The black on the leading edge represents the deicing boots.  These boots were rubber so they could be inflated.    The build looks good!

  • Member since
    February 2015
  • From: Wisconsin
Posted by Airborne_Trooper11B on Friday, February 20, 2015 10:47 AM

Mike thanks for the info! I looked that up and you're 100% correct. I'll repaint that for sure. Thanks for the tip Yes

GAF
  • Member since
    June 2012
  • From: Anniston, AL
Posted by GAF on Saturday, February 21, 2015 1:47 PM

Nice start on the Monogram C-47 model.  I did a 1/72nd scale version of a C-47 from the 301st last year, so ran across quite a bit of info.  You may already know of this site, but thought you might enjoy this article written by a glider pilot attached to the 91st squadron.  The TCS not only dropped paratroopers, but hauled gliders in as well on separate missions.

http://airbornetroopcarrier.com/gpskidmore439thtcg.html

A nice site to just explore, and some good information.

Gary

  • Member since
    February 2015
  • From: Wisconsin
Posted by Airborne_Trooper11B on Monday, February 23, 2015 8:17 AM

Thanks for the website Gary! I'll be sure to check that out sometime.

Anyway, kind of at a standstill for the moment. Waiting for some Microsol to show up at my local hobby store before I can move on. I'm not gonna assemble the plane until I get these decals on, just so I can have the ease of manipulating the plane when I set them. I also re-painted the wing edges a rubber-black to show the deicing boots Mike so kindly informed me about. The edges look a little glossy due to the paint, but that'll "gloss down" a bit once I add the final flat finish. I'm really trying to resist the urge to repaintthe "L4" but I should just leave well enough alone. 

  • Member since
    June 2014
Posted by BrandonK on Monday, February 23, 2015 10:01 AM

I've been eye balling one of these at the LHS, but I just can't handle the price yet. I will be watching the completion of this build and I am interested in you overall thoughts to the kit.

On the bench:

A lot !! And I mean A LOT!!

2024 Kits on deck / in process / completed   

                         14 / 5 / 2  

                              Tongue Tied

JOIN OUR COMMUNITY!

Our community is FREE to join. To participate you must either login or register for an account.

SEARCH FORUMS
FREE NEWSLETTER
By signing up you may also receive reader surveys and occasional special offers. We do not sell, rent or trade our email lists. View our Privacy Policy.