SEARCH FINESCALE.COM

Enter keywords or a search phrase below:

Glencoe Oeffag Albatross D.III Finished- More new pics added on page 3

8178 views
88 replies
1 rating 2 rating 3 rating 4 rating 5 rating
  • Member since
    July 2004
  • From: Sonora Desert
Glencoe Oeffag Albatross D.III Finished- More new pics added on page 3
Posted by stikpusher on Saturday, November 7, 2015 2:24 PM

Well a month or two ago my modeling moejoe went real low. So I decided to get back in the game I would go do something that I had not done in a LONG time... a biplane. I have a lot in my stash, from nice Eduards & Rodens, to original Auroras and their clones/re-pops. After looking at all the ones in my stash I decided to start here, as I have not built a biplane kit since I was in Jr. High School way back when. My basic rule to self here was to use just what is in the box, although I would modify kit parts as needed along the way...
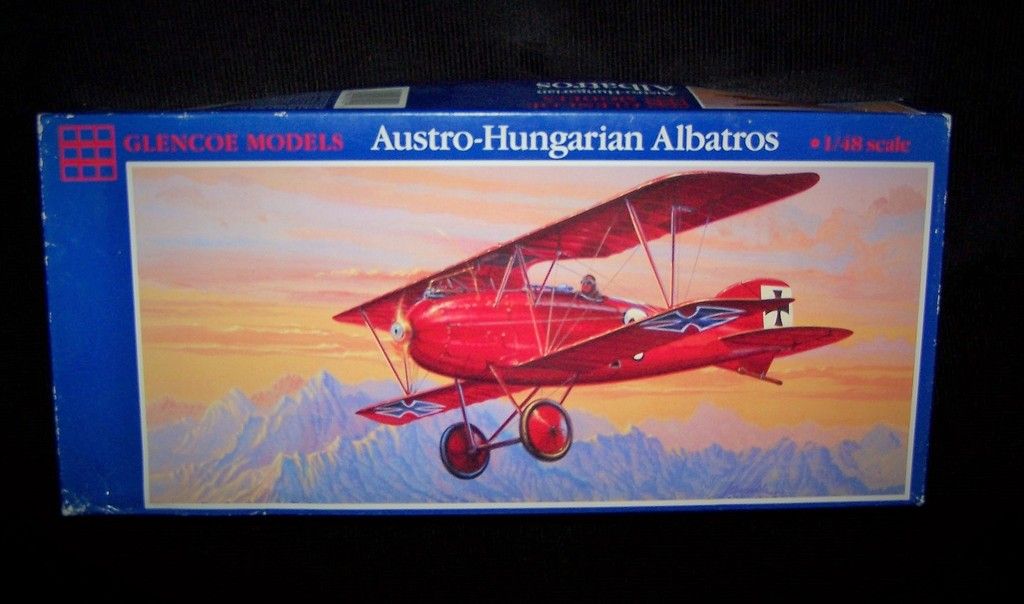
 

So here is the boxtop. For those of you who have never seen or handled a Glencoe kit, they are usually reboxings of very old kits from other companies, sometimes cleaned up or modified, with basic instructions, a very nice Scale Master decal sheet, and sold for a very inexpensive price. They are not for the fainthearted.  As far as I can find, Aurora never issued an Oeffag Albatross D.III (Austrian built for those who are wondering), and they only issued the German built Albatross D.III. So I am presuming that Glencoe took the orginal Aurora molds here and added the parts needed to make the Oeffag version, as well as having the standard D.III part. To call this kit basic is an understatement. Although in all fairness, the original molds probably date from the late '50s or early 60s. Most parts beyond the fuselage halves needed filing, sanding, or shims to fit properly. Not to mention a good amount of flash on many parts. On the plus side the kit does come with a beautiful Scalemaster decal sheet with three marking options, which is probably worth the $5 or so that I paid for this challenging kit.


Of course, as usual for a build the first step once that I decided to build this crate was research. I did happen upon a walk around of a beautiful exact flying reproduction Oeffag D.III, so armed with this source I went to work.


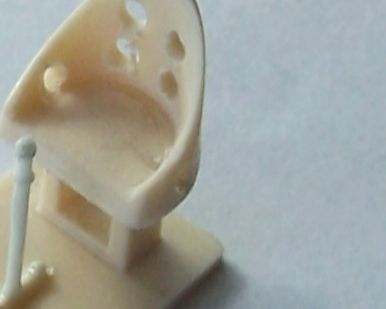
Now in the cockpit I did deviate slightly from my no additions/kit parts only self imposed guidance. I did add a control stick, and I was not going to use the pilot figure, and teh kit did not include one. So from my spares bin I found something suitable. And I also drilled out some lightening holes in the seat based upon what I could find in online photos.


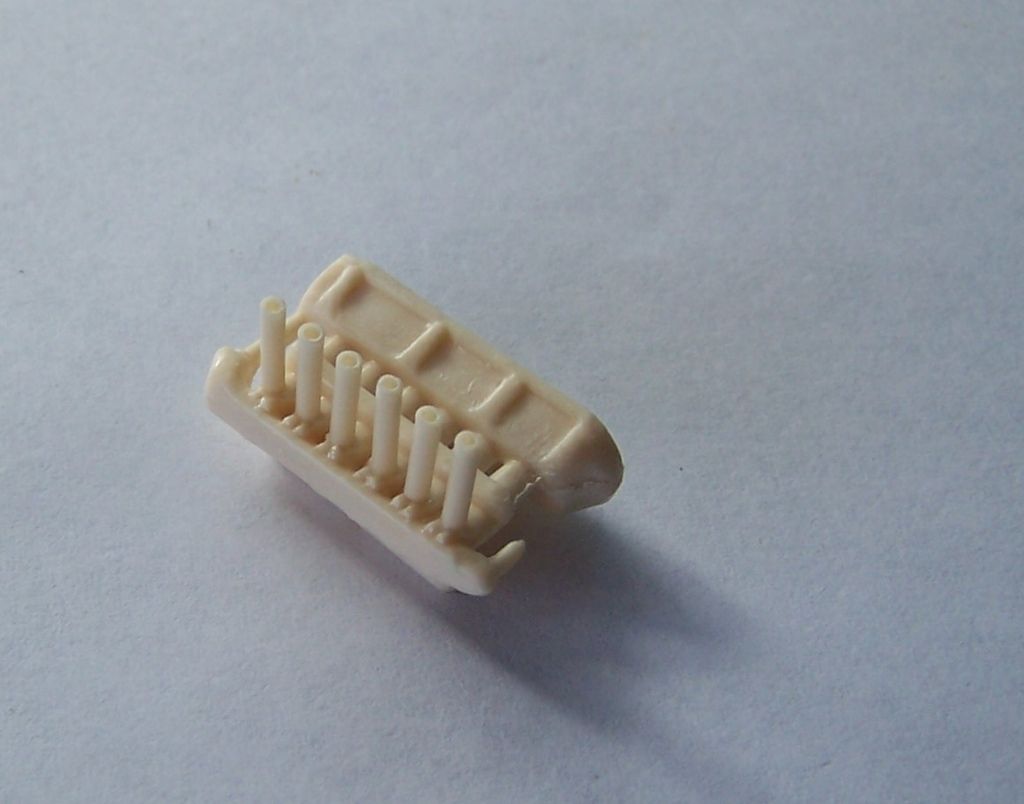
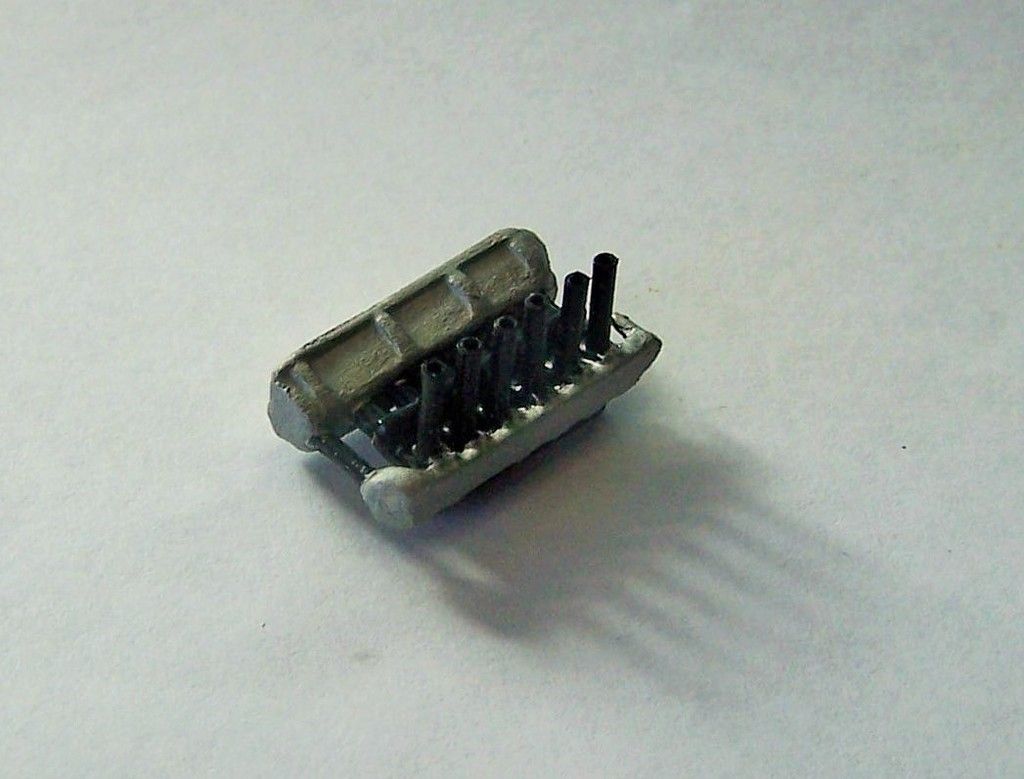
and I built the motor, probably the best molded and detailed part of the kit. I did drill out each of the exhaust stacks and filed the intake manifold to rounded profile rather than the as molded squared off edges.
Then these items and areas were painted
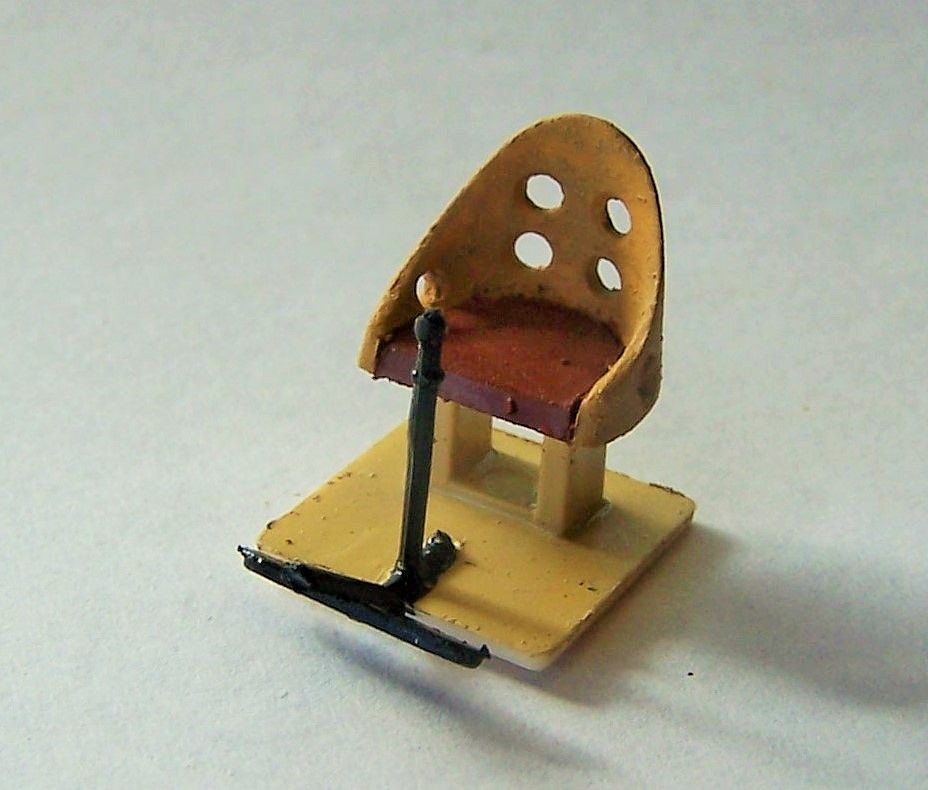


Next up was the cockpit & fuselage interior painting- varnished plywood, as well as some instrument decals (minimal) for the panel.
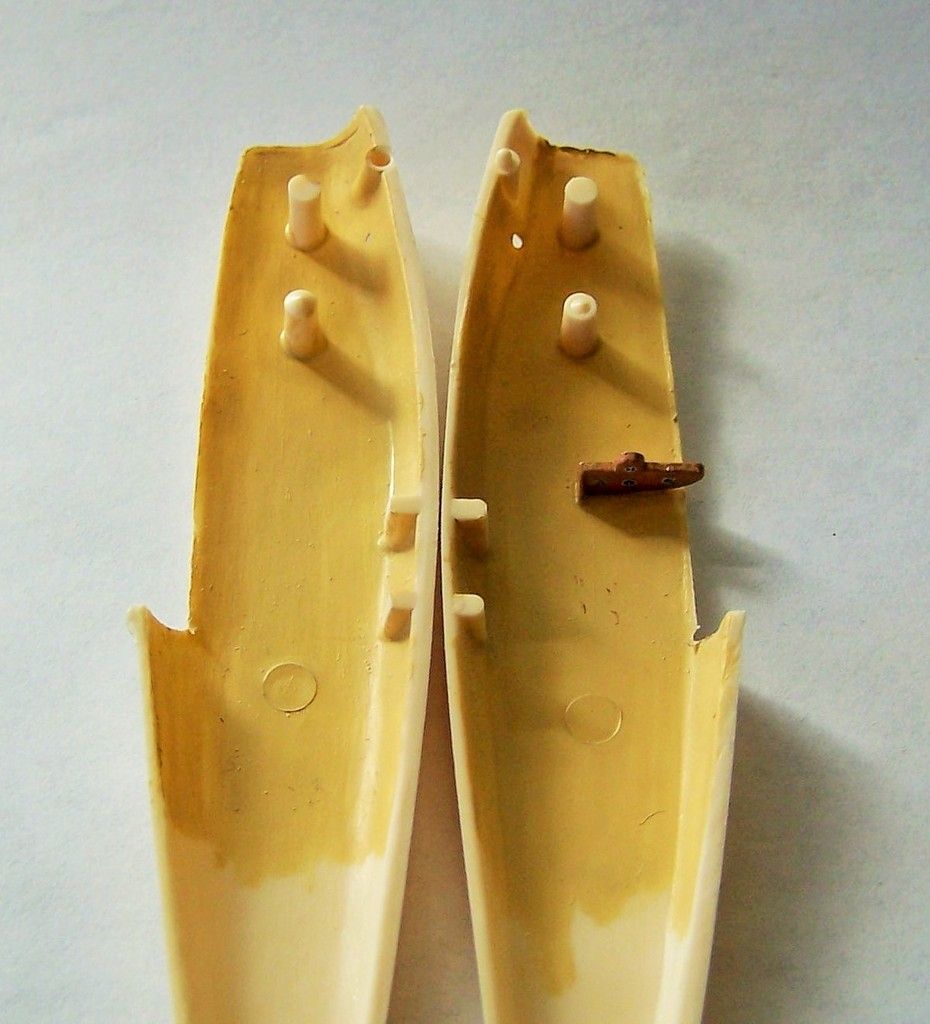
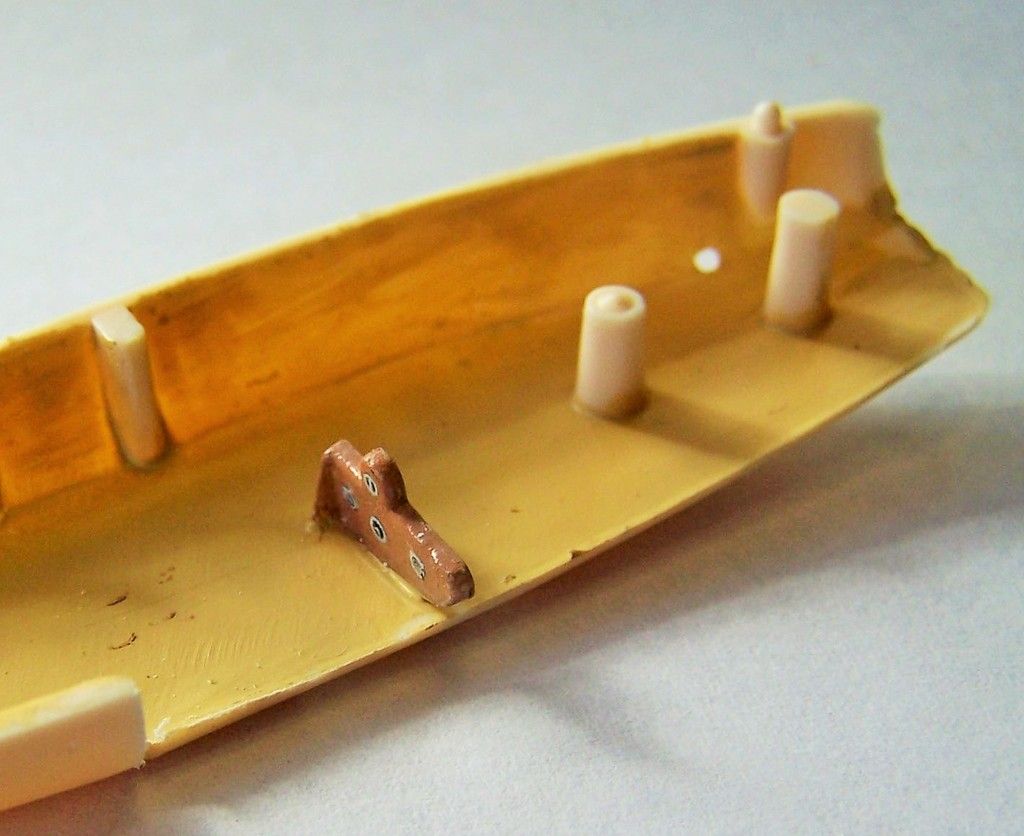


then painting of the interior and exterior engine areas that I knew would be best done before assembly, as well as the guns.
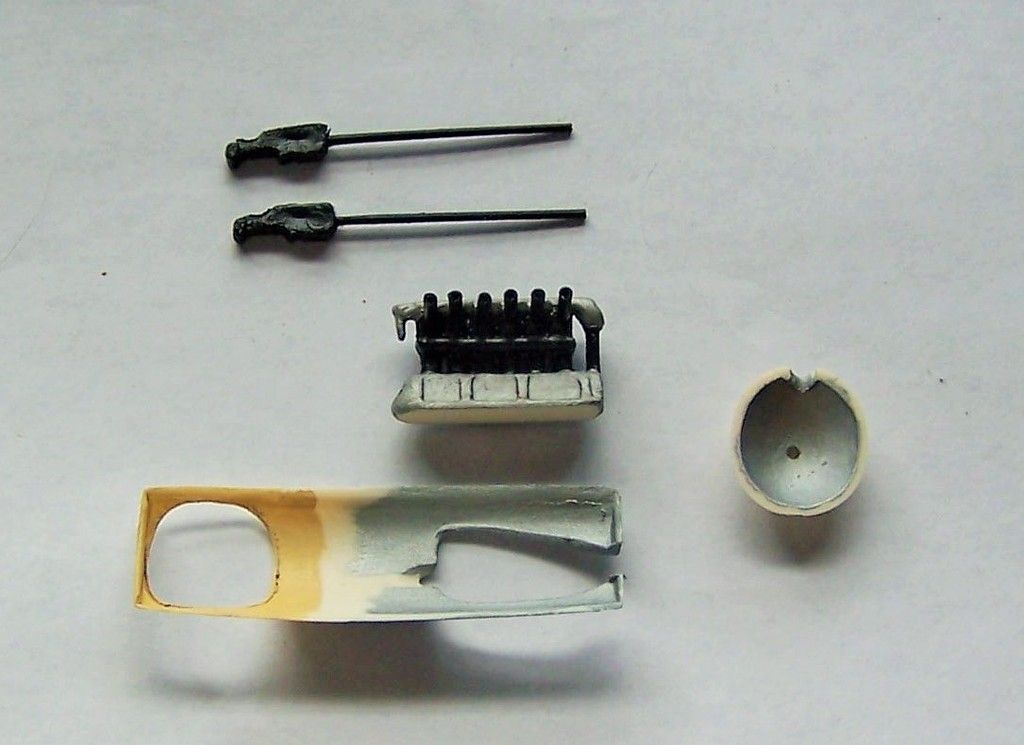
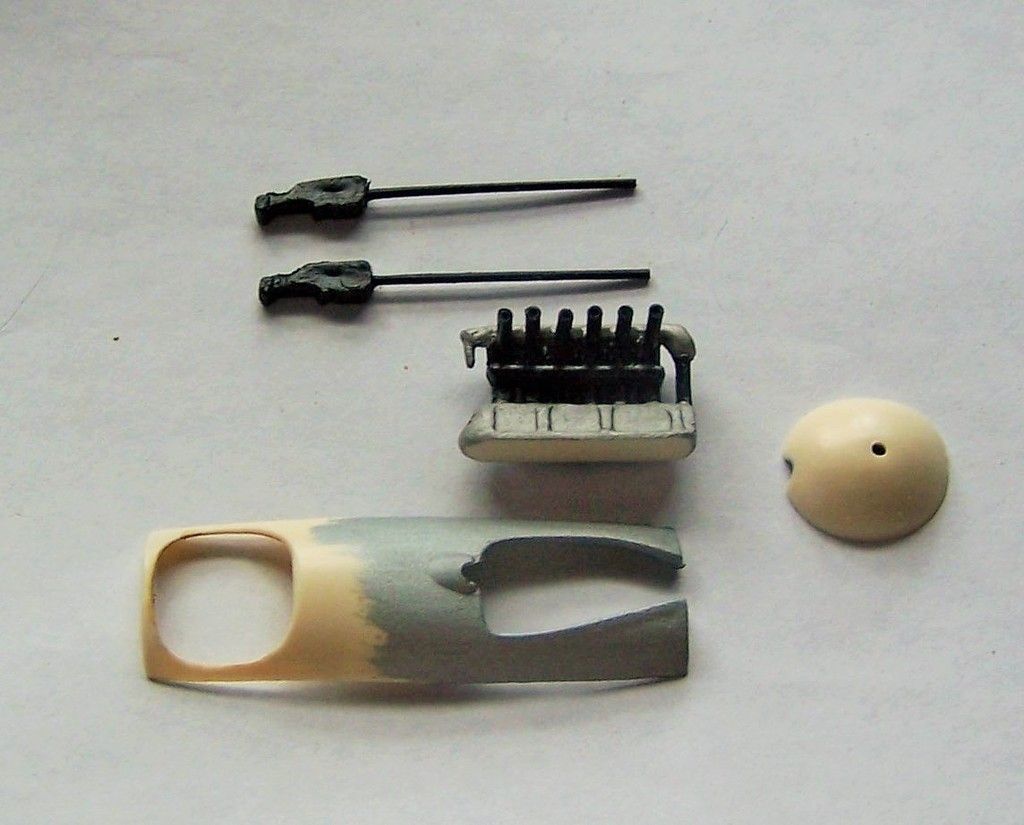


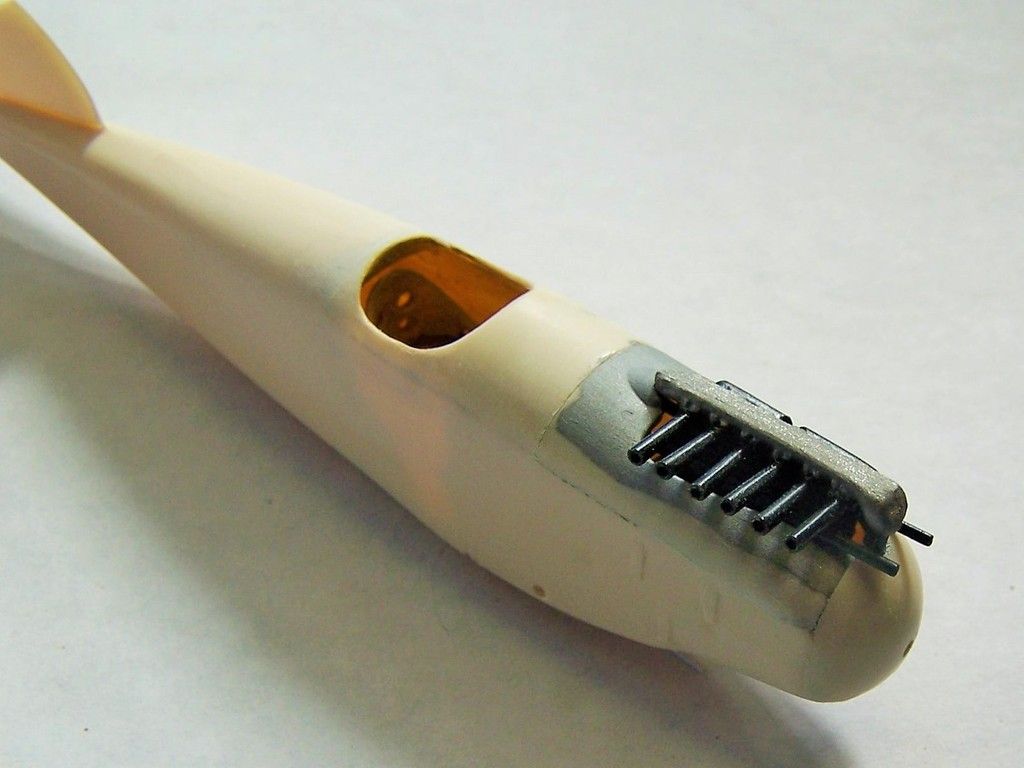
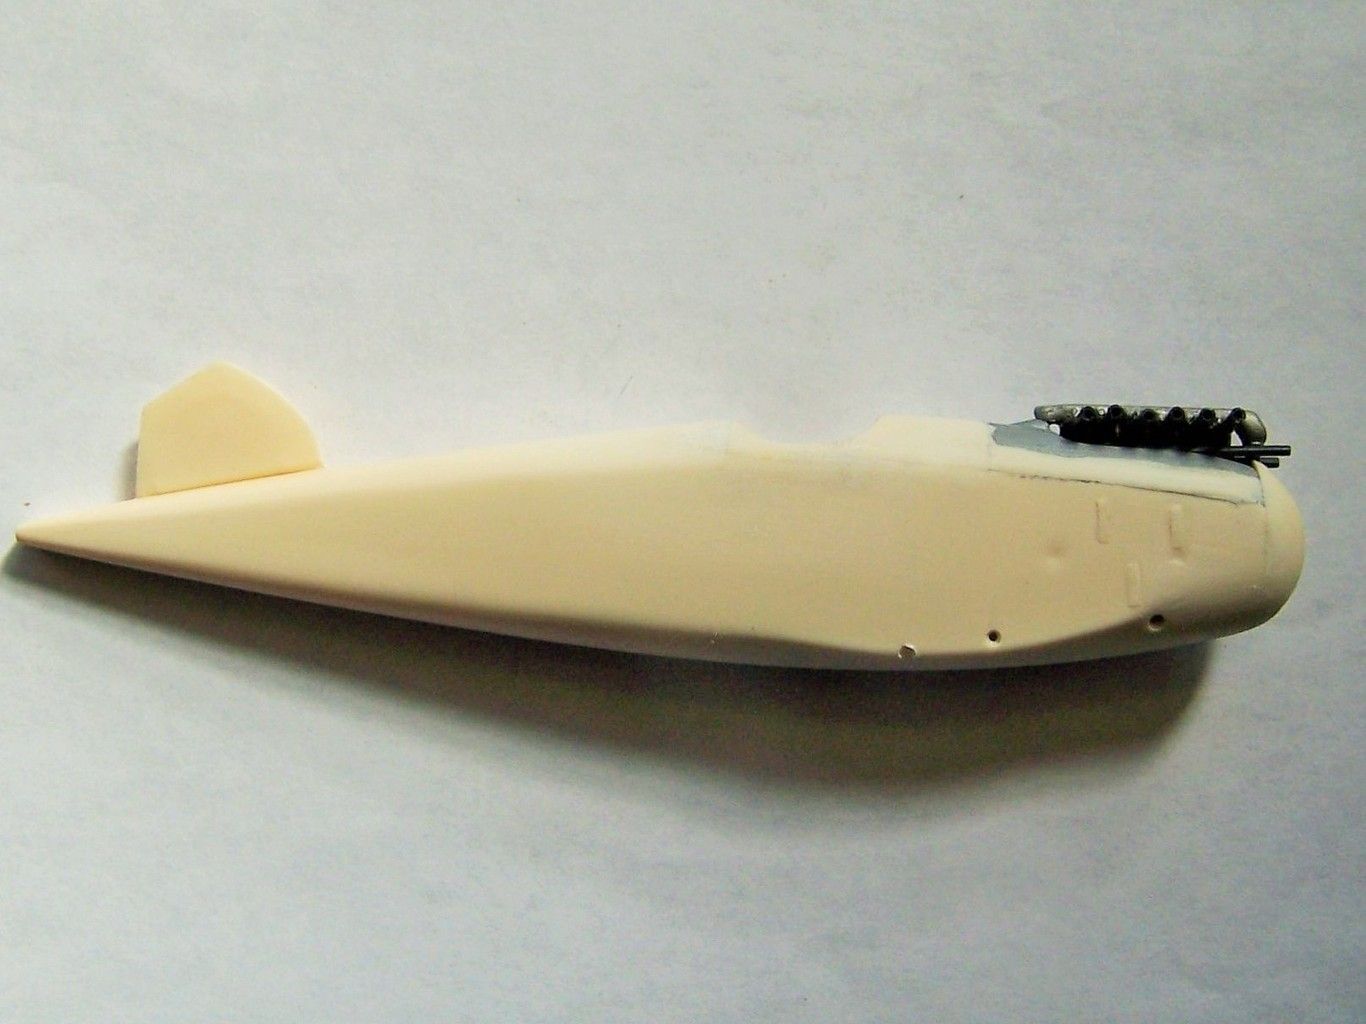
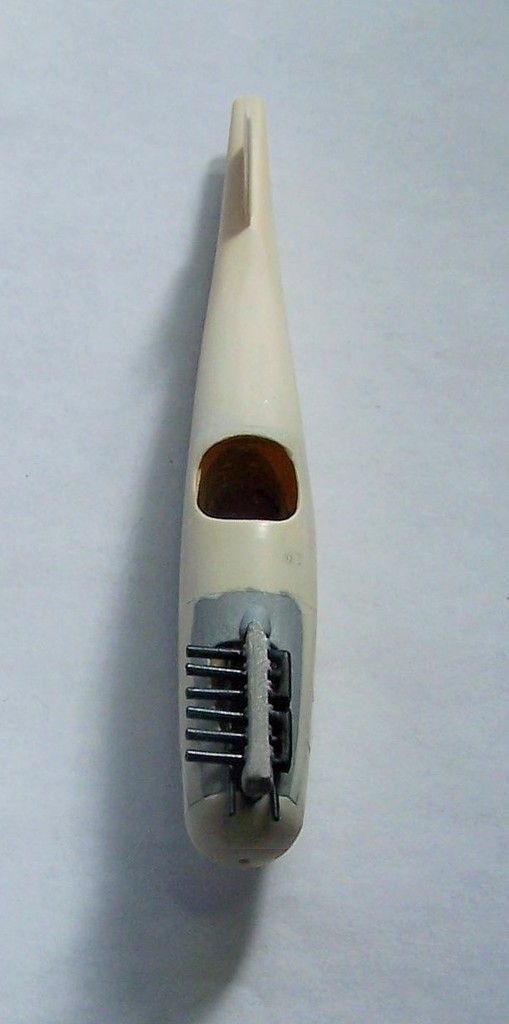
afterwards I glued the fuselage halves together with the cockpit in place, then added the engine, guns, and cowl/decking. The fit was very rough and required quite a bit of sanding before it finally began to look right. I almost felt like I was shaping a wooden model during this point.


more to come shortly...


F is for FIRE, That burns down the whole town!

U is for URANIUM... BOMBS!

N is for NO SURVIVORS...

       - Plankton

LSM


  • Member since
    March 2003
  • From: Towson MD
Posted by gregbale on Saturday, November 7, 2015 2:38 PM

One of my favorite old models, and you're doing a cracking job with it. Look forward to seeing the build as it develops.

Greg

George Lewis:

"Every time you correct me on my grammar I love you a little fewer."
 
  • Member since
    January 2015
  • From: Tumwater, WA.
Posted by M. Brindos on Saturday, November 7, 2015 2:46 PM

Off to an excellent start! I too, have not built one of these since I was in Jr. High. I'm looking forward to this.  :)

- Mike Brindos "Lost Boy"

  • Member since
    July 2004
  • From: Sonora Desert
Posted by stikpusher on Saturday, November 7, 2015 2:48 PM

Next up was the tail. The fit of the horizontal stabilizer was horrid! Basically the only part that made contact was the leading edge area and where the elevator met the fuselage rear. So I had to do some serious shim work and sanding to build it up to make for a proper fit.


But I was successful there and then with some putty, not bad at all.


Then I added the rudder and ventral fin/skid. Again it was a major case of test fit, sand, test fit again, file some more, repeat as needed.


Next up was adding the radiator to the upper wing. The bottom of those parts was dead flat and needed some serious file work to match the airfoils shape of the wing. I also thinned down the wing trailing edges and added some scallop shape to the trailing edges of the ailerons, based upon the walkaround photos. I also added some locator holes for the radiator lines to the lower portion of the radiator. 


Now the attachment points for the lower wings are some of the weakest I can imagine. So I cut the pins on the wings off, drilled a locator hole in their place on each lower wing, drilled thru the fuselage locator holes, and added a length of .20 gauge steel wire to reinforce the wings. I then super glued the wire to the locator holes in the wing and used Plastruct cement (Very hot stuff, like Tenax) to attach the lower wings and set them aside to dry overnite. I also drilled locator holes for the radiator lines in the fuselage and engine


and finally, I added the interplane and cabane struts to the upper wing, aligned them as best I could, and set them aside to dry


So that is where this project stands at this point. I am just about ready to begin painting, after I mark and drill some attachment holes for the cabane struts in the forward fuselage.


Like I said, this is not a project for the faint hearted....


F is for FIRE, That burns down the whole town!

U is for URANIUM... BOMBS!

N is for NO SURVIVORS...

       - Plankton

LSM


  • Member since
    July 2004
  • From: Sonora Desert
Posted by stikpusher on Saturday, November 7, 2015 2:53 PM

Greg and Mike, thanks for looking in and the encouragement. This is actually pretty fun to overcome each challenge that this kit presents.  I just cant imagine building one of these old kits as a kid back when it was state of the art with tube glue... scary... Surprise Wink


F is for FIRE, That burns down the whole town!

U is for URANIUM... BOMBS!

N is for NO SURVIVORS...

       - Plankton

LSM


  • Member since
    August 2013
Posted by Jay Jay on Saturday, November 7, 2015 5:47 PM

It's very nice to see one of these crummy Glencoe kits in the hands of an expert.  the last Glencoe I built, I sworn not to build another, but they have some really cool subjects so I just had to buy 2 more which are currently in my stash.  you've inspired me to get a start on another one dang it.


 I'm finally retired. Now time I got, money I don't.

  • Member since
    July 2004
  • From: Sonora Desert
Posted by stikpusher on Saturday, November 7, 2015 7:22 PM

I dont know about expert... Hmm Experienced yes... Wink I still have 3 more Glencoe biplanes in my stash to tackle one day. 


F is for FIRE, That burns down the whole town!

U is for URANIUM... BOMBS!

N is for NO SURVIVORS...

       - Plankton

LSM


  • Member since
    March 2015
  • From: Streetsboro, Ohio
Posted by Toshi on Saturday, November 7, 2015 7:50 PM

Very nicely done, I'll be following to see how this will turn out.

Toshi

On The Bench: Revell 1/48 B-25 Mitchell


Married to the most caring, loving, understanding, and beautiful wife in the world.  Mrs. Toshi


  • Member since
    July 2004
  • From: Sonora Desert
Posted by stikpusher on Saturday, November 7, 2015 8:33 PM

Thanks Toshi. I started painting earlier this evening and have most of the base colors on now. I'll get some more photos posted tomorrow.


F is for FIRE, That burns down the whole town!

U is for URANIUM... BOMBS!

N is for NO SURVIVORS...

       - Plankton

LSM


  • Member since
    May 2014
Posted by SubarooMike on Saturday, November 7, 2015 9:06 PM

I'm a bit nerdy, so I have to point out that the Albatros would be referred to as a sesquiplane rather than a biplane.  Please, just ignore me LOL


  • Member since
    July 2004
  • From: Sonora Desert
Posted by stikpusher on Sunday, November 8, 2015 12:41 AM

SubarooMike

I'm a bit nerdy, so I have to point out that the Albatros would be referred to as a sesquiplane rather than a biplane.  Please, just ignore me LOL


You are absolutely correct. GeekedJust like certain Nieuports. But it is far easier to say and spell biplane. Wink


F is for FIRE, That burns down the whole town!

U is for URANIUM... BOMBS!

N is for NO SURVIVORS...

       - Plankton

LSM


  • Member since
    October 2015
Posted by GazzaS on Sunday, November 8, 2015 2:55 AM

Thanks for staring this thread, I'm enjoying your build.  I haven't built a biplane since I was a kid, and rigging was something I never considered then. So, I'll be glad to see you rig yours.


Best wishes,


Gary

  • Member since
    June 2014
Posted by BrandonK on Sunday, November 8, 2015 11:33 AM

I adore the Albitros. It's by far my favorite early airplane. Looking forward to seeing this one come togehter.

BK

On the bench:

A lot !! And I mean A LOT!!

2024 Kits on deck / in process / completed   

                         14 / 5 / 2  

                              Tongue Tied

  • Member since
    July 2004
  • From: Sonora Desert
Posted by stikpusher on Sunday, November 8, 2015 5:47 PM

Gary & Brandon, thanks for looking in and commenting. I am so happy to be at a point where I see serious progress. I actually have the base colors on the exterior now, but can't post photos from my phone. Later hopefully when I can access a real computer. As far as rigging goes, that is something I am still assessing as to how best attempt...


F is for FIRE, That burns down the whole town!

U is for URANIUM... BOMBS!

N is for NO SURVIVORS...

       - Plankton

LSM


  • Member since
    June 2003
  • From: Cavite, Philippines
Posted by allan on Sunday, November 8, 2015 7:38 PM

Ill definitely be following this.  Ive built only 1 Glencoe kit (back in the 90s) and I know how "basic" the kit can be.

No bucks, no Buck Rogers

  • Member since
    December 2010
  • From: Salem, Oregon
Posted by 1943Mike on Sunday, November 8, 2015 11:16 PM

I have Glencoe's 1/48 Albatros DIII in my stash - not the Oeffag version - the Oeffag version I have in an Eduard box in one of my closets full of kits Big Smile. I'm sure your WIP will inspire me to get to one of my 1/48 Albatros kits. Maybe right after my Hobby Boss F4U-4 early version or my Accurate Miniatures SBD-5, or....... Maybe I should just finish my Liberty Ship before thinking too much about another Biplane Embarrassed.

Anyway I'm following your build with great interest.

Mike

Mike

"Le temps est un grand maître, mais malheureusement, il tue tous ses élèves."

Hector Berlioz

  • Member since
    July 2004
  • From: Sonora Desert
Posted by stikpusher on Monday, November 9, 2015 12:21 AM

Alan, these kits are basic indeed. But they can be worked into something with a little creative effort.

Mike, I have the Glencoe D.III in my stash as well. This project is giving me ideas on how to improve that one when I do tackle it. 


F is for FIRE, That burns down the whole town!

U is for URANIUM... BOMBS!

N is for NO SURVIVORS...

       - Plankton

LSM


  • Member since
    July 2004
  • From: Sonora Desert
Posted by stikpusher on Monday, November 9, 2015 5:23 AM

Well here are the basic paint colors on so far. All Humbrol- Oak for the wood areas of the Fuselage, Linen for the fabric areas of the wings, rudder, and horizontal stabilizers, and Aluminum for the engine deck & cowl


and a rest fit of the upper wing onto the rest


next up over the coming days, applying a camo pattern


F is for FIRE, That burns down the whole town!

U is for URANIUM... BOMBS!

N is for NO SURVIVORS...

       - Plankton

LSM


  • Member since
    March 2015
  • From: Streetsboro, Ohio
Posted by Toshi on Monday, November 9, 2015 5:29 AM

OH yes, it's coming together very nicely!

Toshi

On The Bench: Revell 1/48 B-25 Mitchell


Married to the most caring, loving, understanding, and beautiful wife in the world.  Mrs. Toshi


  • Member since
    July 2010
  • From: Tempe AZ
Posted by docidle on Monday, November 9, 2015 10:45 PM

Stik,

Looking good so far. Mind if I tag along? And by the way, what scale is this?

Steve


  • Member since
    July 2004
  • From: Sonora Desert
Posted by stikpusher on Monday, November 9, 2015 11:19 PM

Toshi and Steve, thanks for the kind words. Steve, this kit is 1/48. And by all means, do tag along...


F is for FIRE, That burns down the whole town!

U is for URANIUM... BOMBS!

N is for NO SURVIVORS...

       - Plankton

LSM


  • Member since
    January 2015
Posted by BrandonD on Tuesday, November 10, 2015 1:16 AM

Man, you're doing a great job on an old kit. Makes me want to get out my GLencoe Pfalz D.III, but I don't know if I'm up to it. I will happily follow this one and hope it brings your *** back.

-BD-

  • Member since
    July 2004
  • From: Sonora Desert
Posted by stikpusher on Tuesday, November 10, 2015 3:14 AM

Thank you BD. Oh the Pfalz appears to be a FAR better kit. I have that one as well. And yes, this is actually motivating me to get back to the bench.


F is for FIRE, That burns down the whole town!

U is for URANIUM... BOMBS!

N is for NO SURVIVORS...

       - Plankton

LSM


  • Member since
    July 2004
  • From: Sonora Desert
Posted by stikpusher on Wednesday, November 11, 2015 2:31 PM

Well here is my latest update. I am building this as the Oeffag D.III as flown by Fiedrich Navratil an Austro Hungarian of Croatian blood, from Sarajevo. His aircraft was camouflaged with dark olive green applied by sponge over the wood and linen. To replicate this, I used a tiny bit of make up sponge superglued to a toothpick and applied Xtra Color enamel Matt Olive Green paint. It actually looks pretty good for concealment purposes. I suspect that whoever thought this up must have had some kind of painter/artist background.


Anyways, here is my attempt at it, photos via my cell phone.


and with the upper wing test fitted


I need to go back and do some touch up on the lower horizontal stabilizers doped linen, but otherwise I am happy with how it turned out.


F is for FIRE, That burns down the whole town!

U is for URANIUM... BOMBS!

N is for NO SURVIVORS...

       - Plankton

LSM


  • Member since
    August 2013
Posted by Jay Jay on Wednesday, November 11, 2015 4:30 PM

Oh my !   that camo looks teriffic ! You have the eye of an artist, mate. TY for sharing your technique, that I gotta try.


 I'm finally retired. Now time I got, money I don't.

  • Member since
    July 2004
  • From: Sonora Desert
Posted by stikpusher on Wednesday, November 11, 2015 5:37 PM

Thanks JayJay. I really like the look, but I honestly do not know of this camo style being widely used. I have read that JG-2 used sponges to apply the  fuselage side mottling on their Bf-109s during the Battle of Britain. I will use this same technique whenever I get around to that build.


F is for FIRE, That burns down the whole town!

U is for URANIUM... BOMBS!

N is for NO SURVIVORS...

       - Plankton

LSM


  • Member since
    June 2003
  • From: Cavite, Philippines
Posted by allan on Wednesday, November 11, 2015 7:12 PM

Thats a really neat camo indeed!  Reminds me of the German Army's flecktarn.  Well ahead of its time.

No bucks, no Buck Rogers

  • Member since
    July 2004
  • From: Sonora Desert
Posted by stikpusher on Wednesday, November 11, 2015 9:03 PM

Yes the dapple effect is very effective looking to me. So simple to apply as well. But like I said, it reminds me of a look often seen in landscape type oil paintings for plants/trees. I truly think that whoever came up with this camo scheme had a artists background. Very contemporary for that era.


F is for FIRE, That burns down the whole town!

U is for URANIUM... BOMBS!

N is for NO SURVIVORS...

       - Plankton

LSM


  • Member since
    June 2014
Posted by BrandonK on Thursday, November 12, 2015 9:14 AM

What a cool looking camo pattern, and quite clever how you pulled it off. It looks superb, and really brings that kit to life.

BK

On the bench:

A lot !! And I mean A LOT!!

2024 Kits on deck / in process / completed   

                         14 / 5 / 2  

                              Tongue Tied

  • Member since
    April 2006
  • From: ON, Canada
Posted by jgeratic on Thursday, November 12, 2015 11:46 AM

Hi  Stik, spot on with the camou application, it really does look extremely good.

Best source  on this particular Austrian colouring could be found in articles written by Dr. Martin O'Conner.  Pheon produced 3 decal sets just for the Oeffag Albatros, with instructions including brief write ups based on the above.   Flik 3J in particular would carry the splotch like scheme, believed to have been applied with rags. 

regards,

Jack

JOIN OUR COMMUNITY!

Our community is FREE to join. To participate you must either login or register for an account.

SEARCH FORUMS
FREE NEWSLETTER
By signing up you may also receive reader surveys and occasional special offers. We do not sell, rent or trade our email lists. View our Privacy Policy.