SEARCH FINESCALE.COM

Enter keywords or a search phrase below:

1/72 Eduard FW-190's (Finished)

4057 views
63 replies
1 rating 2 rating 3 rating 4 rating 5 rating
  • Member since
    April 2015
  • From: New Hampshire, USA
Posted by UKguyInUSA on Sunday, January 31, 2016 8:32 PM

Three gorgeous looking "Butcher Birds"....the engine detail for that scale is insane....too small for my aging poor eye-sight!

Cheers Smile Yes

  • Member since
    January 2009
  • From: hamburg michigan
Posted by fermis on Sunday, January 31, 2016 12:48 PM

Thanks again guys!Toast

Mike...the exhausts are first painted flat black, then drybrushed with "rubber" and then again with "rust" (Testors). At the end, after dull coating everything, I'll brush on a bit of black, then brown pastels. The exhaust shmootz down the side of the plane is just pastels.

  • Member since
    May 2014
Posted by SubarooMike on Sunday, January 31, 2016 11:43 AM

Excellent finish on the exhuast stacks.  What method did you use?

  • Member since
    September 2013
Posted by blackdog62 on Sunday, January 31, 2016 11:00 AM

Sorry to here about photo bucket mine is so bad I quit joining builds its the first and only one I learnd to use. I nead to find another.

Your build are verynice. I'm not sure about trying that smaller scale. Your details is amazing.

  • Member since
    May 2013
  • From: Indiana, USA
Posted by Greg on Saturday, January 30, 2016 8:18 PM

Ah ....that my 1/48th's might look so good.

Really fine workmanship.

  • Member since
    January 2009
  • From: hamburg michigan
Posted by fermis on Saturday, January 30, 2016 2:34 PM

hanks again guys!

Much appreciated!Toast

  • Member since
    December 2010
  • From: Salem, Oregon
Posted by 1943Mike on Friday, January 29, 2016 7:16 PM

These are real gems! Your builds are truly inspirational and I've learned a bit from this WIP - thank you!

I'm currently trying to help someone in the ships forum post pictures but PB has been down all day for "maintenance". I sure hope they get their act together soon. I mention this because you seem to have had some problems with them in the last day or two as well but you were able to get the URL's for these magnificent models eventually. Thank goodness - yours is just flat out gorgeous work!!

Mike

Mike

"Le temps est un grand maître, mais malheureusement, il tue tous ses élèves."

Hector Berlioz

  • Member since
    June 2003
  • From: Cavite, Philippines
Posted by allan on Thursday, January 28, 2016 11:58 PM

Excellent work! Id have a hard time simultaneously building 3 models as great looking as yours. You pulled it off!

No bucks, no Buck Rogers

  • Member since
    October 2011
  • From: Lake Villa, Illinois
Posted by Chuck Davis on Thursday, January 28, 2016 11:16 PM

Oustanding, Fermis!  I saw the beginning - missed out on seeing the middle - and then "poof."  Out pop three gorgeous '190's.  Beautiful work!

Chuck Davis

  • Member since
    November 2003
  • From: Naples, FL
Posted by tempestjohnny on Thursday, January 28, 2016 5:49 PM
Oh wow. Those are absolutely incredible. Front and center in the display cabinet


  • Member since
    February 2011
Posted by knox on Thursday, January 28, 2016 5:39 PM

Good grief!! I feel like I should have to pay something to view this awesomeness.   Magazine worthy and then some.                             gk

  • Member since
    January 2009
  • From: hamburg michigan
Posted by fermis on Thursday, January 28, 2016 3:35 PM

...and...


  • Member since
    January 2009
  • From: hamburg michigan
Posted by fermis on Thursday, January 28, 2016 3:32 PM

P/B finally got around to doin what it's supposed to do!


Finally!!!


White 10...


Black 8...


  • Member since
    January 2009
  • From: hamburg michigan
Posted by fermis on Thursday, January 28, 2016 3:29 PM

Jester75

Nice finish fermis! The detail under the hood is amazing for that scale. I think I am a bit partial to white 10 personally. Something about the white cowl ring and the two tone theatre bands.


That does set it apart, and I love it for the same reasons. I really dig Black 8 as well, for the red outline and yellow spinner stripe....and then there's the opened up one!


  • Member since
    December 2006
  • From: N. Georgia
Posted by Jester75 on Thursday, January 28, 2016 11:34 AM

Nice finish fermis! The detail under the hood is amazing for that scale. I think I am a bit partial to white 10 personally. Something about the white cowl ring and the two tone theatre bands.

Eric


  • Member since
    January 2009
  • From: hamburg michigan
Posted by fermis on Thursday, January 28, 2016 3:52 AM

Got this batch all wrapped up.

I'll get the rest of the pics posted, if and when photobucket decides to quit being a total B!T@#...nothing but problems there lately.Bang Head

Anyway...until then...


  • Member since
    January 2009
  • From: hamburg michigan
Posted by fermis on Monday, January 25, 2016 10:29 PM

Thanks again dudes!


All decals are done, as well as a wash. They're all on their feet and getting the rest of their fiddly bits.


  • Member since
    April 2005
  • From: Piscataway, NJ!
Posted by wing_nut on Monday, January 25, 2016 4:07 PM

A yupper, that's a trio of nice looking 190's

Marc  

  • Member since
    September 2015
Posted by TempusFugit on Saturday, January 23, 2016 11:41 AM

Beautiful work, fermis. Wow. Can't wait to see them finished!

TF

  • Member since
    November 2003
  • From: Naples, FL
Posted by tempestjohnny on Friday, January 22, 2016 8:30 PM
That is unbelievable. Truly a great build x3


  • Member since
    January 2009
  • From: hamburg michigan
Posted by fermis on Friday, January 22, 2016 5:51 PM

Thanks again dudes!Toast


I did the specific to airframe decals last night. When I sat down to the bench this afternoon, I was not happy with what I had...finish wise. The white was weak, the black was way off from the black decals, and the shades of grey showed very little demarcation between them.

 So, I masked off what needed to be masked and sprayed a lighter shade of grey(RLM75).


"White 10" has been done and unmasked, "Black 8" is done...a much closer match to "Blue 13". I peeled the masking off the wingtip of the one above the rest, just to show the "before".


After that, I masked and sprayed a bit more white on the tail bands and nose of White 10. Then masked the borders of the (whatever they be) black decals, behind the exhausts, cowls and wing roots and sprayed them all the same. Another coat of gloss. Much happier now! (aside from the delay of getting the decals all done)


  • Member since
    August 2013
Posted by Jay Jay on Friday, January 22, 2016 9:14 AM

Thanks a ton for the engine pic and info Fermis. it's a real help.


 I'm finally retired. Now time I got, money I don't.

  • Member since
    December 2006
  • From: N. Georgia
Posted by Jester75 on Friday, January 22, 2016 8:22 AM

Damned nice work fermis. The mottling on those looks super sharp and in 72nd to boot! Surprise

Eric


  • Member since
    December 2010
  • From: Salem, Oregon
Posted by 1943Mike on Thursday, January 21, 2016 10:43 PM

I very much appreciate the tutorial on your painting methods. I'm working on masking my Tamiya 1/48 Fw 190 F-8 now and your WIP details are quite helpful.

I still don't understand how you can get the styrene parts of a 1/72 kit to look like the real thing! You have extraordinary skill in this hobby!

Mike

Mike

"Le temps est un grand maître, mais malheureusement, il tue tous ses élèves."

Hector Berlioz

  • Member since
    June 2003
  • From: Cavite, Philippines
Posted by allan on Thursday, January 21, 2016 8:22 PM

Wow, its impressive that you can line 3 kits up and get fantastic results from each. Niice!

No bucks, no Buck Rogers

  • Member since
    March 2015
  • From: Streetsboro, Ohio
Posted by Toshi on Thursday, January 21, 2016 4:02 PM

I still am in awe that you're building these aircraft with this much detail in 1:72!  Fantastic!

Toshi

On The Bench: Revell 1/48 B-25 Mitchell


Married to the most caring, loving, understanding, and beautiful wife in the world.  Mrs. Toshi


  • Member since
    May 2013
  • From: From the Mit, but live in Mason, O high ho
Posted by hogfanfs on Thursday, January 21, 2016 1:41 PM

I like the effect, I'm going to try this with the Spitfire I'm building.

 Bruce


 On the bench:  1/48 Eduard MiG-21MF

                        1/35 Takom Merkava Mk.I


  • Member since
    January 2009
  • From: hamburg michigan
Posted by fermis on Thursday, January 21, 2016 1:15 PM

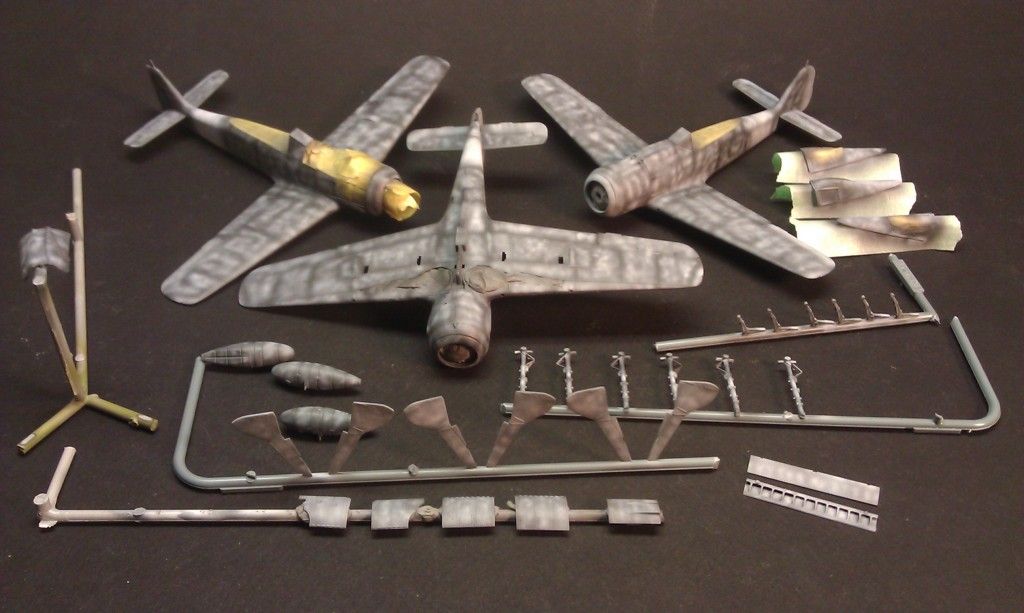
Alright, alright....painting time!!!

Gonna go through the whole process here, step by step.

I'm sure it's not the "be all end all" to painting, but it's what I do and I like it!


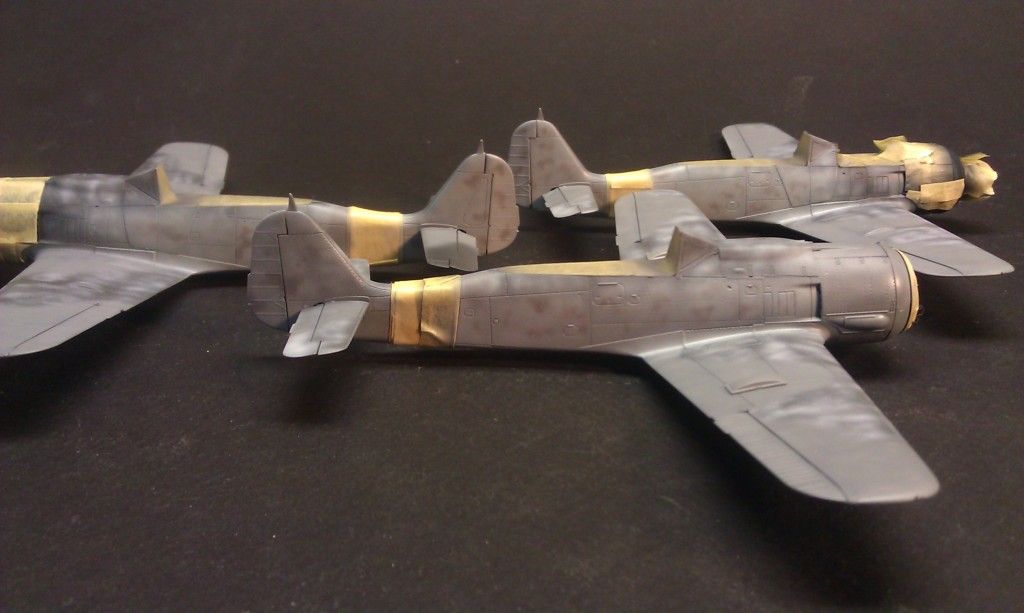
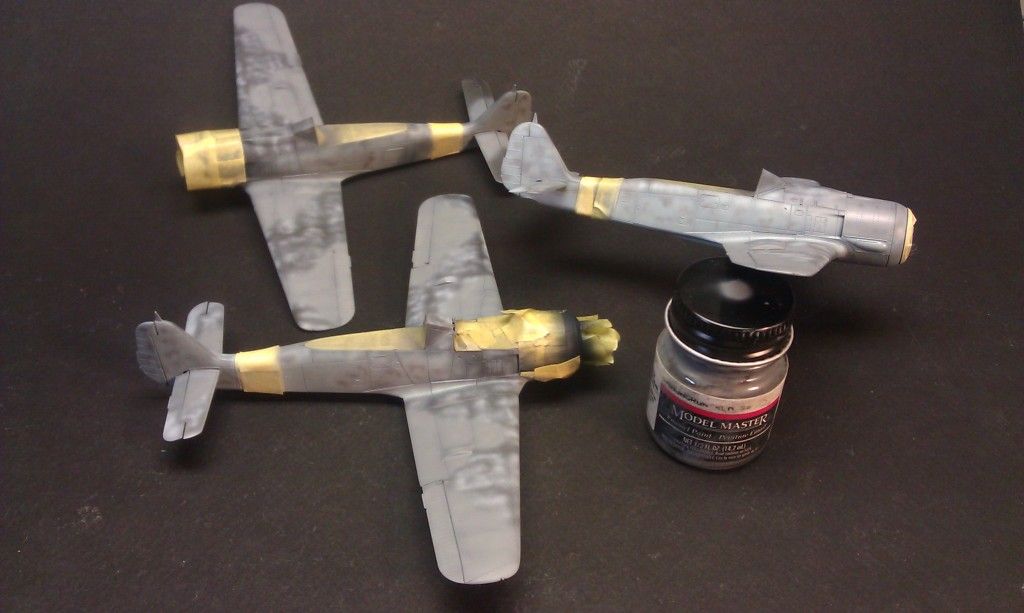
Step 1. Ducks in a row! Everything not to be painted is masked...fiddley bits CAed to some scrap sprue...ready to sling paint!
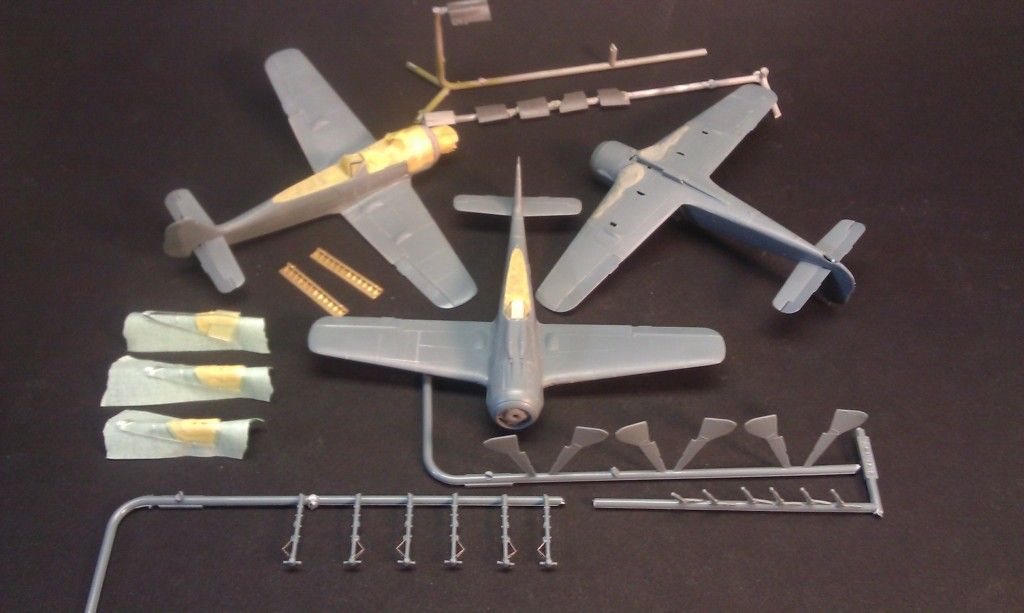


2. Hit the canopies with the interior color.
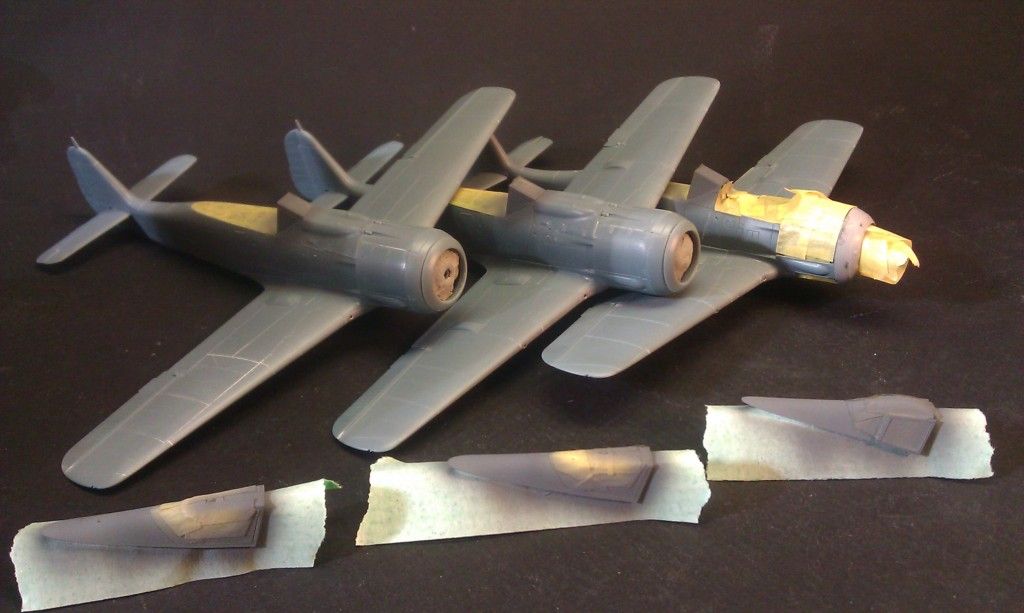


3. All black...or in this case, a very dark grey.
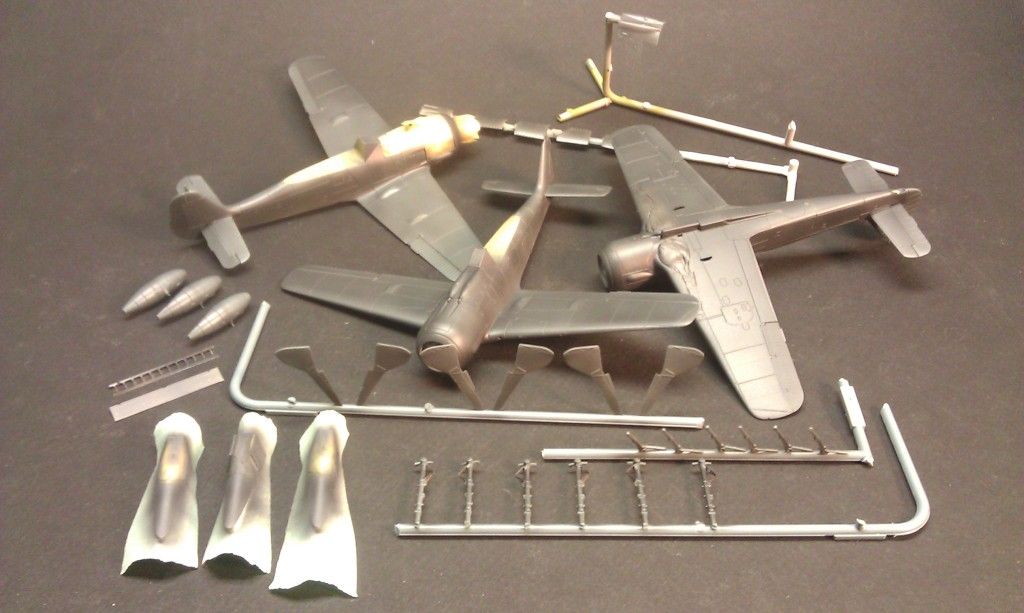


4. Marbling/mottling in white...this is when I also do tail bands and "prime" for other splashes of color (such as rudders or yellow chins...not in this case though).


5. Tail Band and cowls painted.
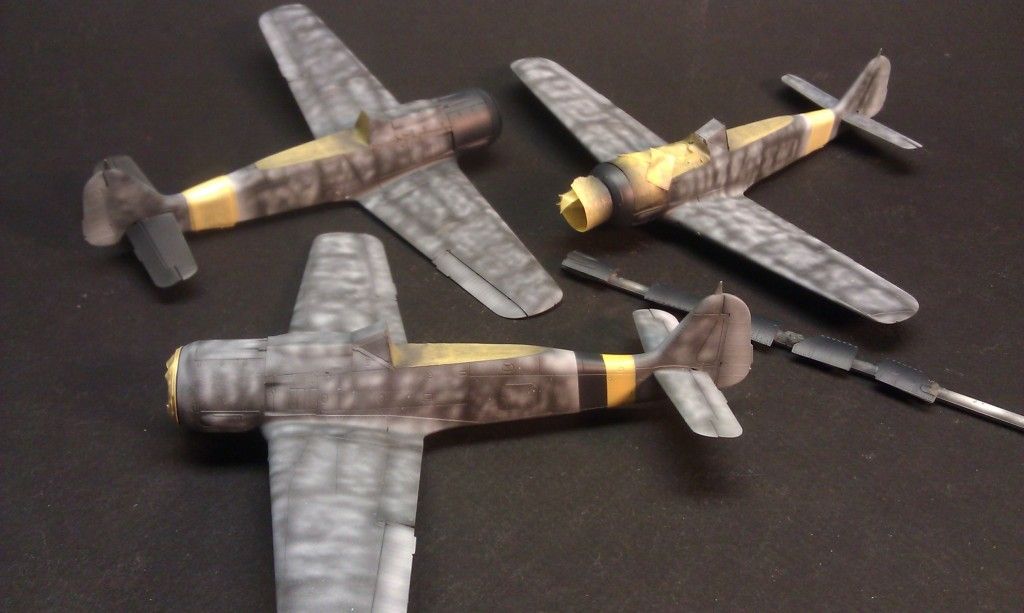


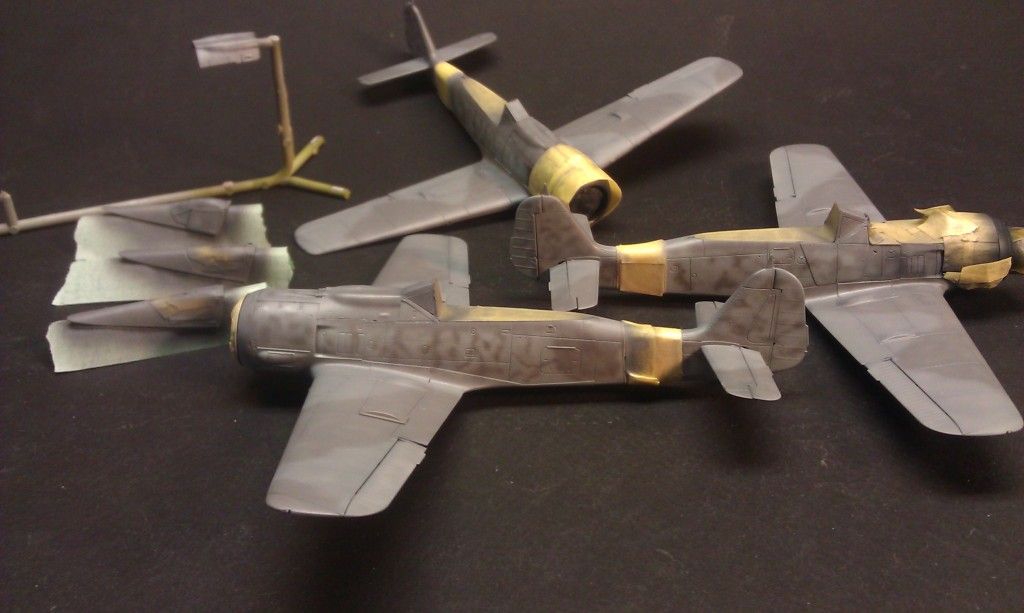
6. Bands and cowls masked off...time for color. RLM76 first. I thin the color coats way down, beyond 50/50...to a point where you really can't see any color with one pass. Build it up slowly! When you think you've almost gone too far, it's time to stop!
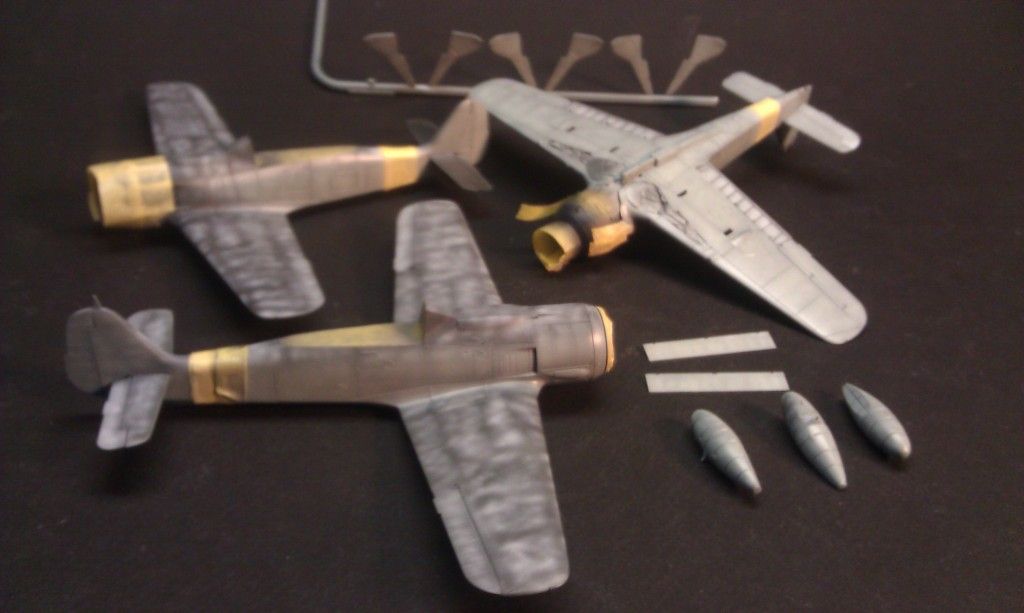
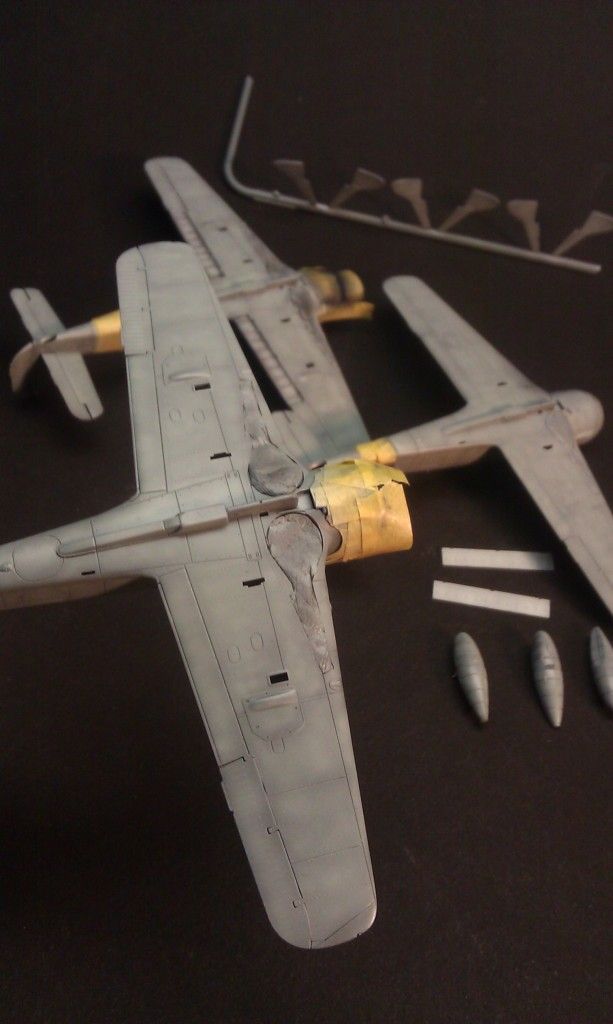


7. Lightest top camo color...RLM75. Along with a little bit of mottling.


8. Final color, RLM74.


9. Any other color that needs to be painted. In this case, the black wing roots were easier to mask and paint after the other stuff.
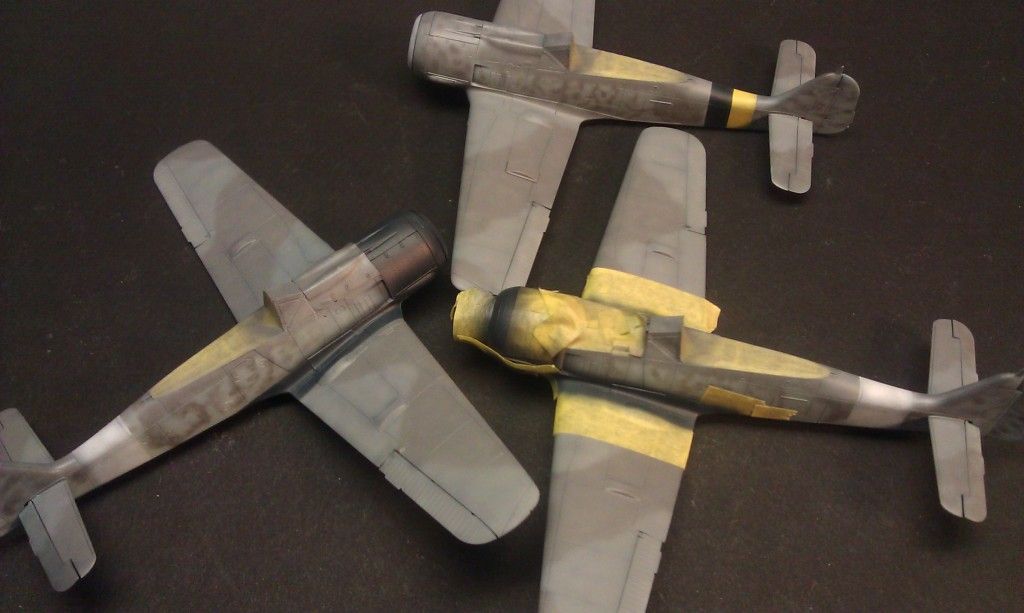


Same is true for the flap area. Since I had the RLM02 out and loaded, I hit the landing gear parts as well.
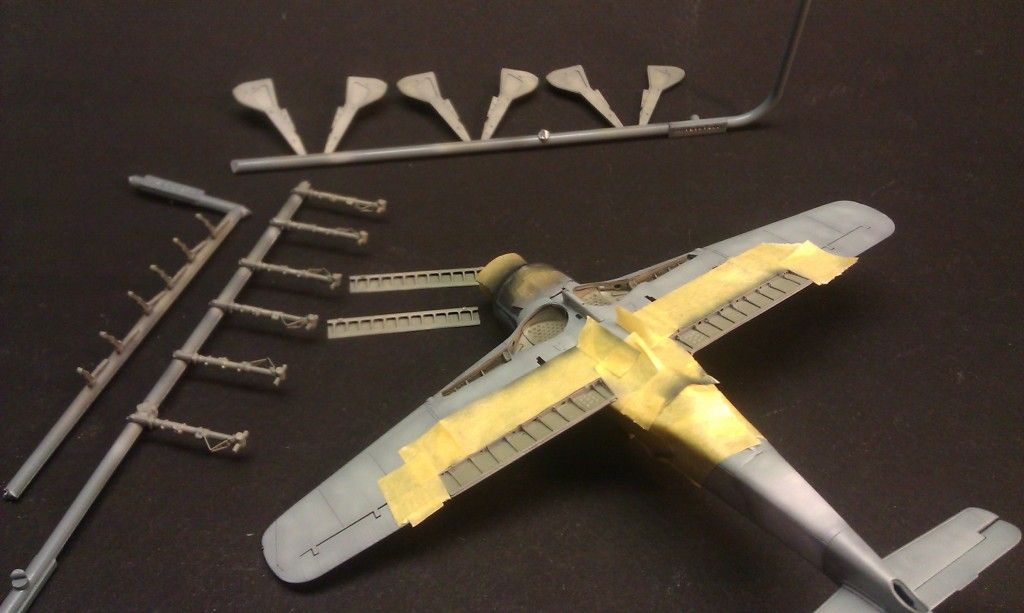


All are nice and shiney right now, waiting on decals!

  • Member since
    January 2009
  • From: hamburg michigan
Posted by fermis on Tuesday, January 19, 2016 10:06 AM

Thanks everybody, much appreciated!


Jay Jay

Man that engine is fantastic.

I am just starting an Accurate Miniatures 1/48 TBF-1C Avenger I bought at an IPMS show.  Included in the box was a Verlinden resin engine Marked for the Avenger but it looks VERY similar to your 190.  I am going to attempt to build it similar to yours in appearence with of course American colors.  I just hafta find some referance pics somewhere but I don't know exactly what the engine brand/number would be.

Any suggestions ?


I believe you'd want to look for a Wright R2600 Cyclone.

I LOVE that kit. It was a game changer for me! Prior to building that kit, all I knew was the old Revellogram stuff. I called a shop, listed in the back of FSM looking for a TBF to build for my Grampa (he was a radio op/gunner on the TBF). WOW!!!! What a kit! I have since built another, and have another pair in the stash.

JOIN OUR COMMUNITY!

Our community is FREE to join. To participate you must either login or register for an account.

SEARCH FORUMS
FREE NEWSLETTER
By signing up you may also receive reader surveys and occasional special offers. We do not sell, rent or trade our email lists. View our Privacy Policy.