SEARCH FINESCALE.COM

Enter keywords or a search phrase below:

Trumpeter 1/48 RA-5C Vigilante - Bird of Doom

11269 views
20 replies
1 rating 2 rating 3 rating 4 rating 5 rating
  • Member since
    May 2011
  • From: Honolulu, Hawaii
Trumpeter 1/48 RA-5C Vigilante - Bird of Doom
Posted by Real G on Monday, March 14, 2016 4:52 PM

I seem to suffer from A.D.D. as I was suddenly motivated to drag out this kit to address the floppy fuselage.  For those unfamiliar with the kit, Trumpeter decided to mold the fuselage halves in left/right pieces, but failed to provide any bulkheads to keep the centerline from sagging.  An aftermarket plywood brace is available, but I thought that making a simple spine from plastic would solve the problem.

https://flic.kr/p/EL2w85] 
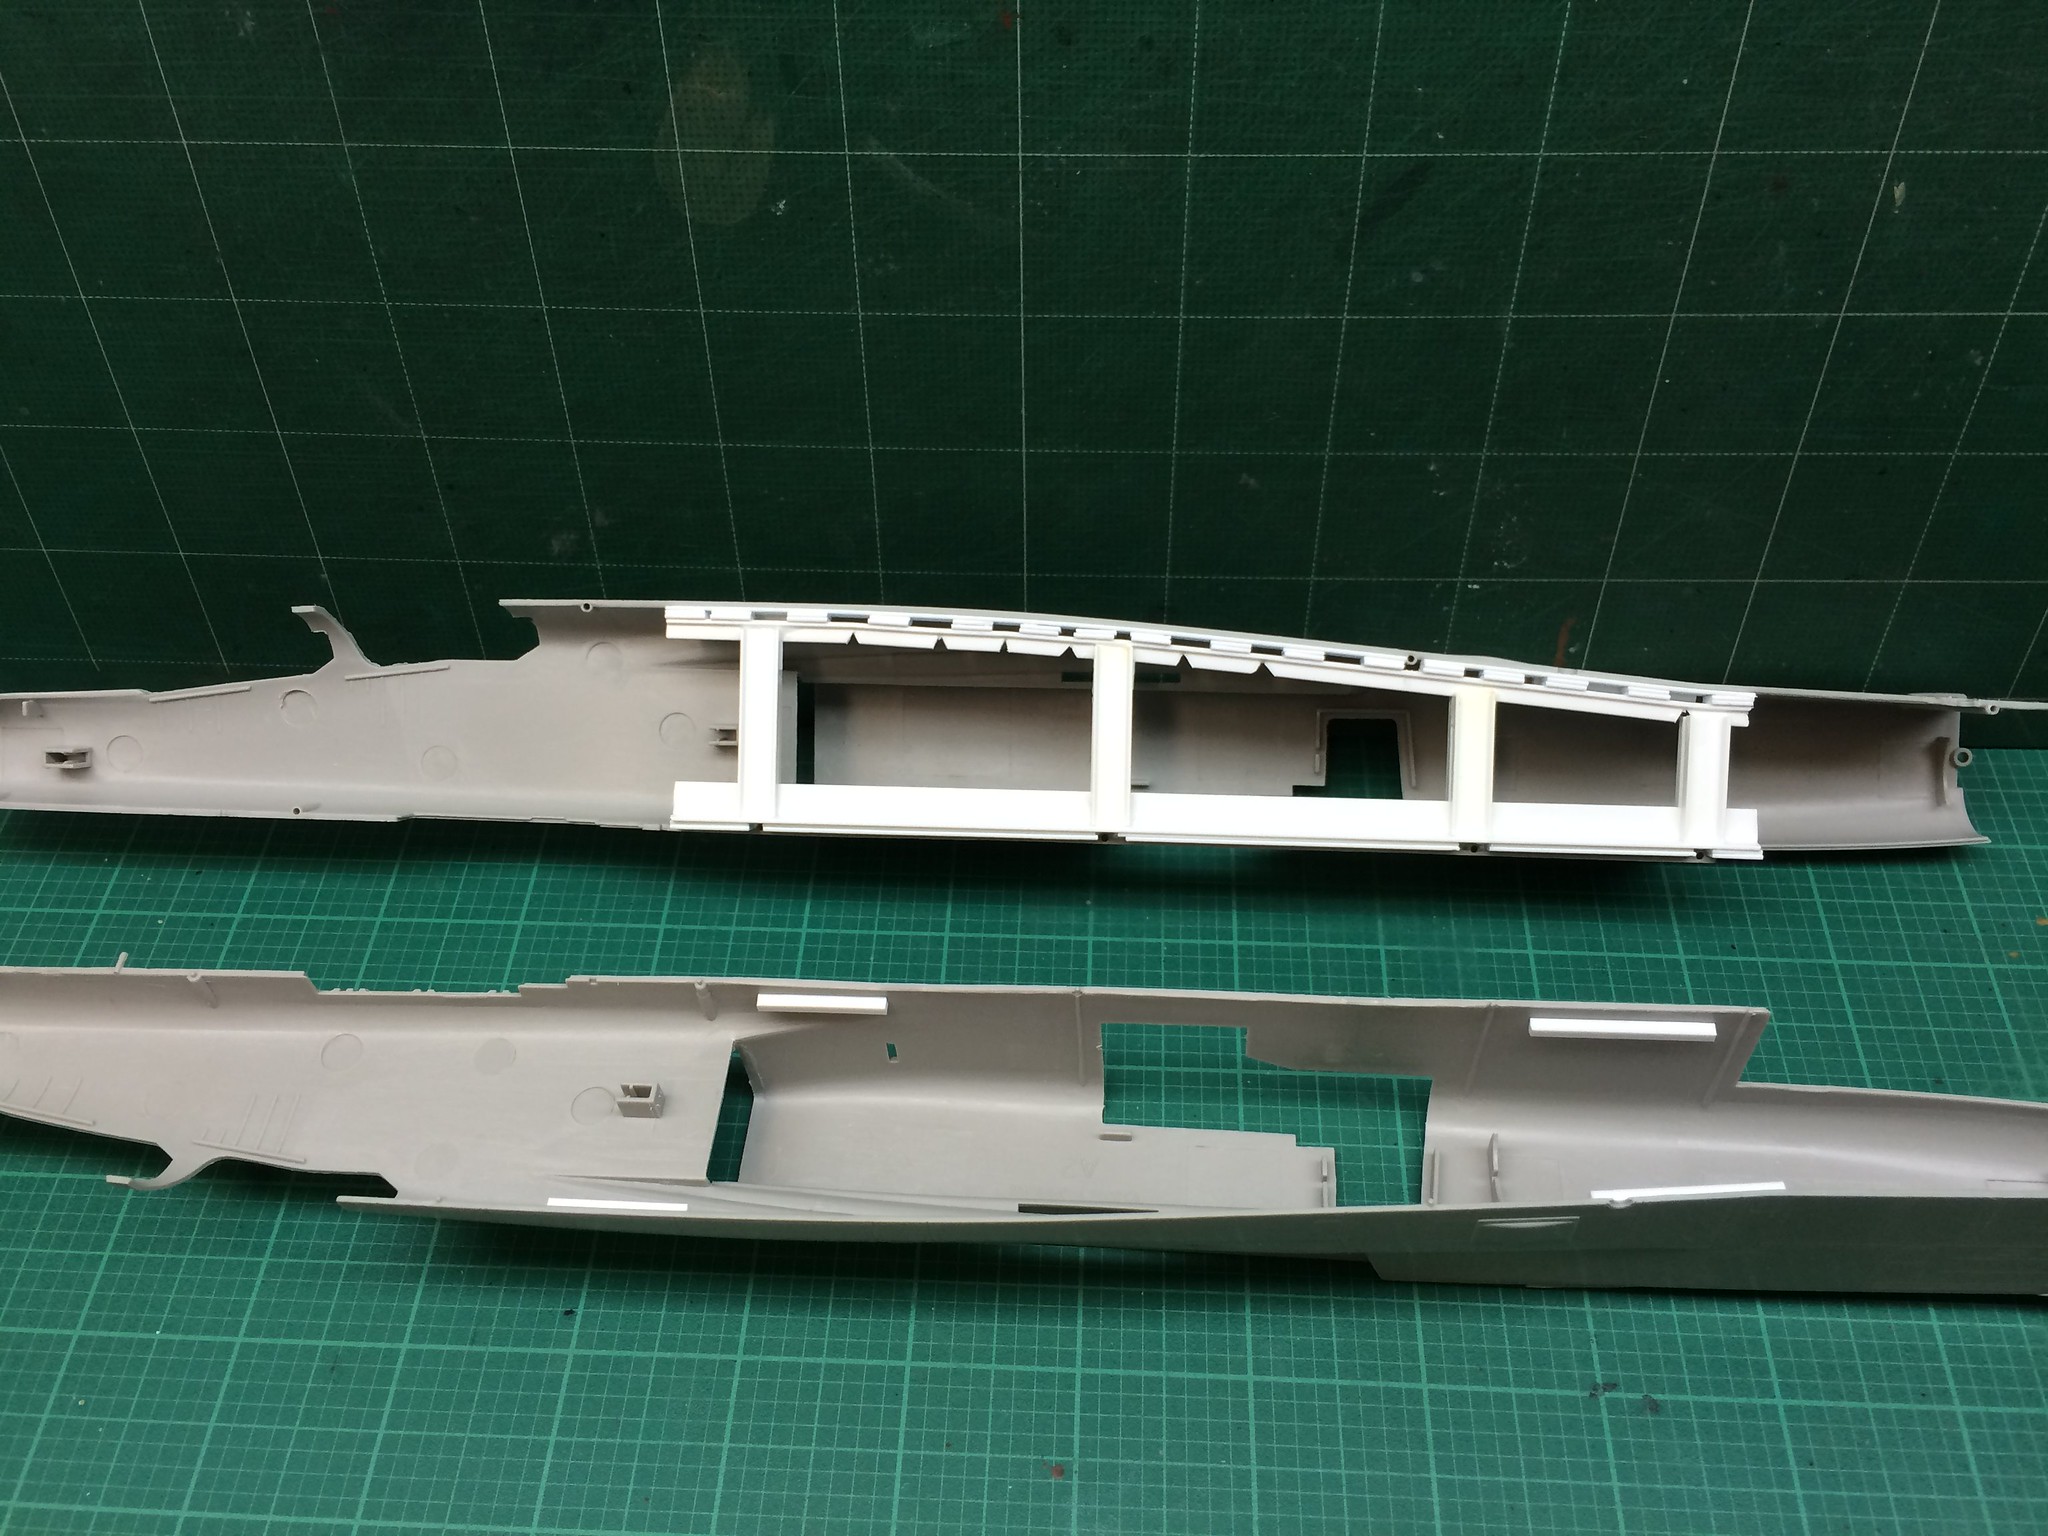
[/url]Vigilante-05 by N.T. Izumi, on Flickr

Rather than spend time making precise measurements, I made it so that pieces of "T" and "C" channel strips could just be cut and fit as needed to get the desired result.

https://flic.kr/p/EfSEa3] 
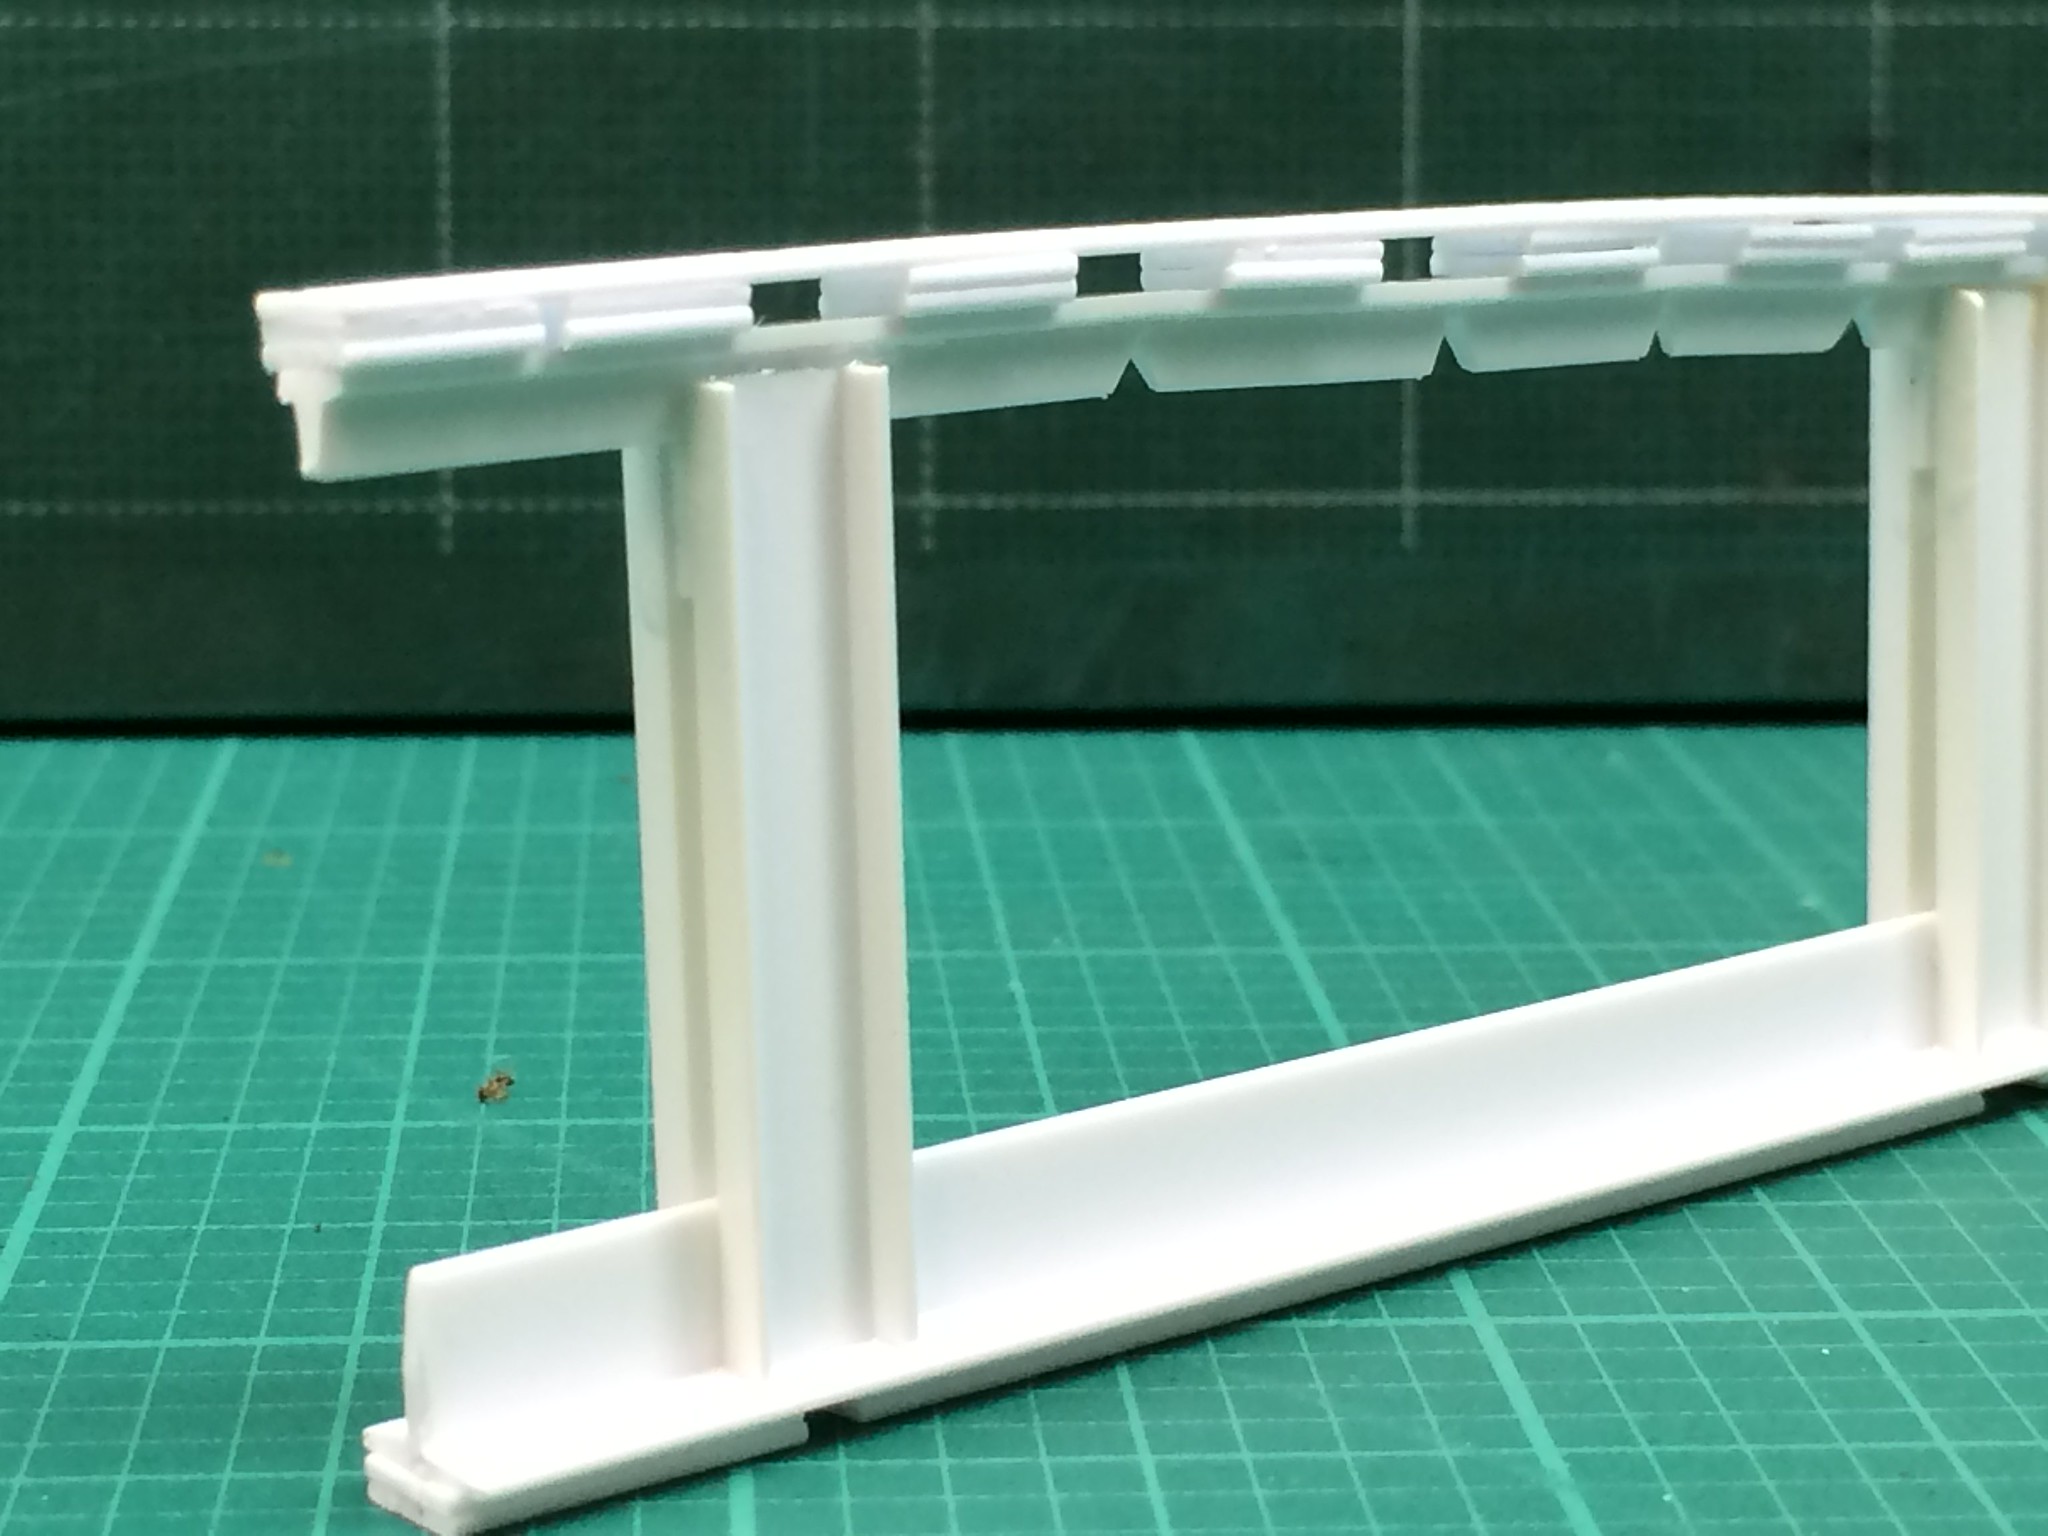
[/url]Vigilante-02 by N.T. Izumi, on Flickr

https://flic.kr/p/F5caFM] 
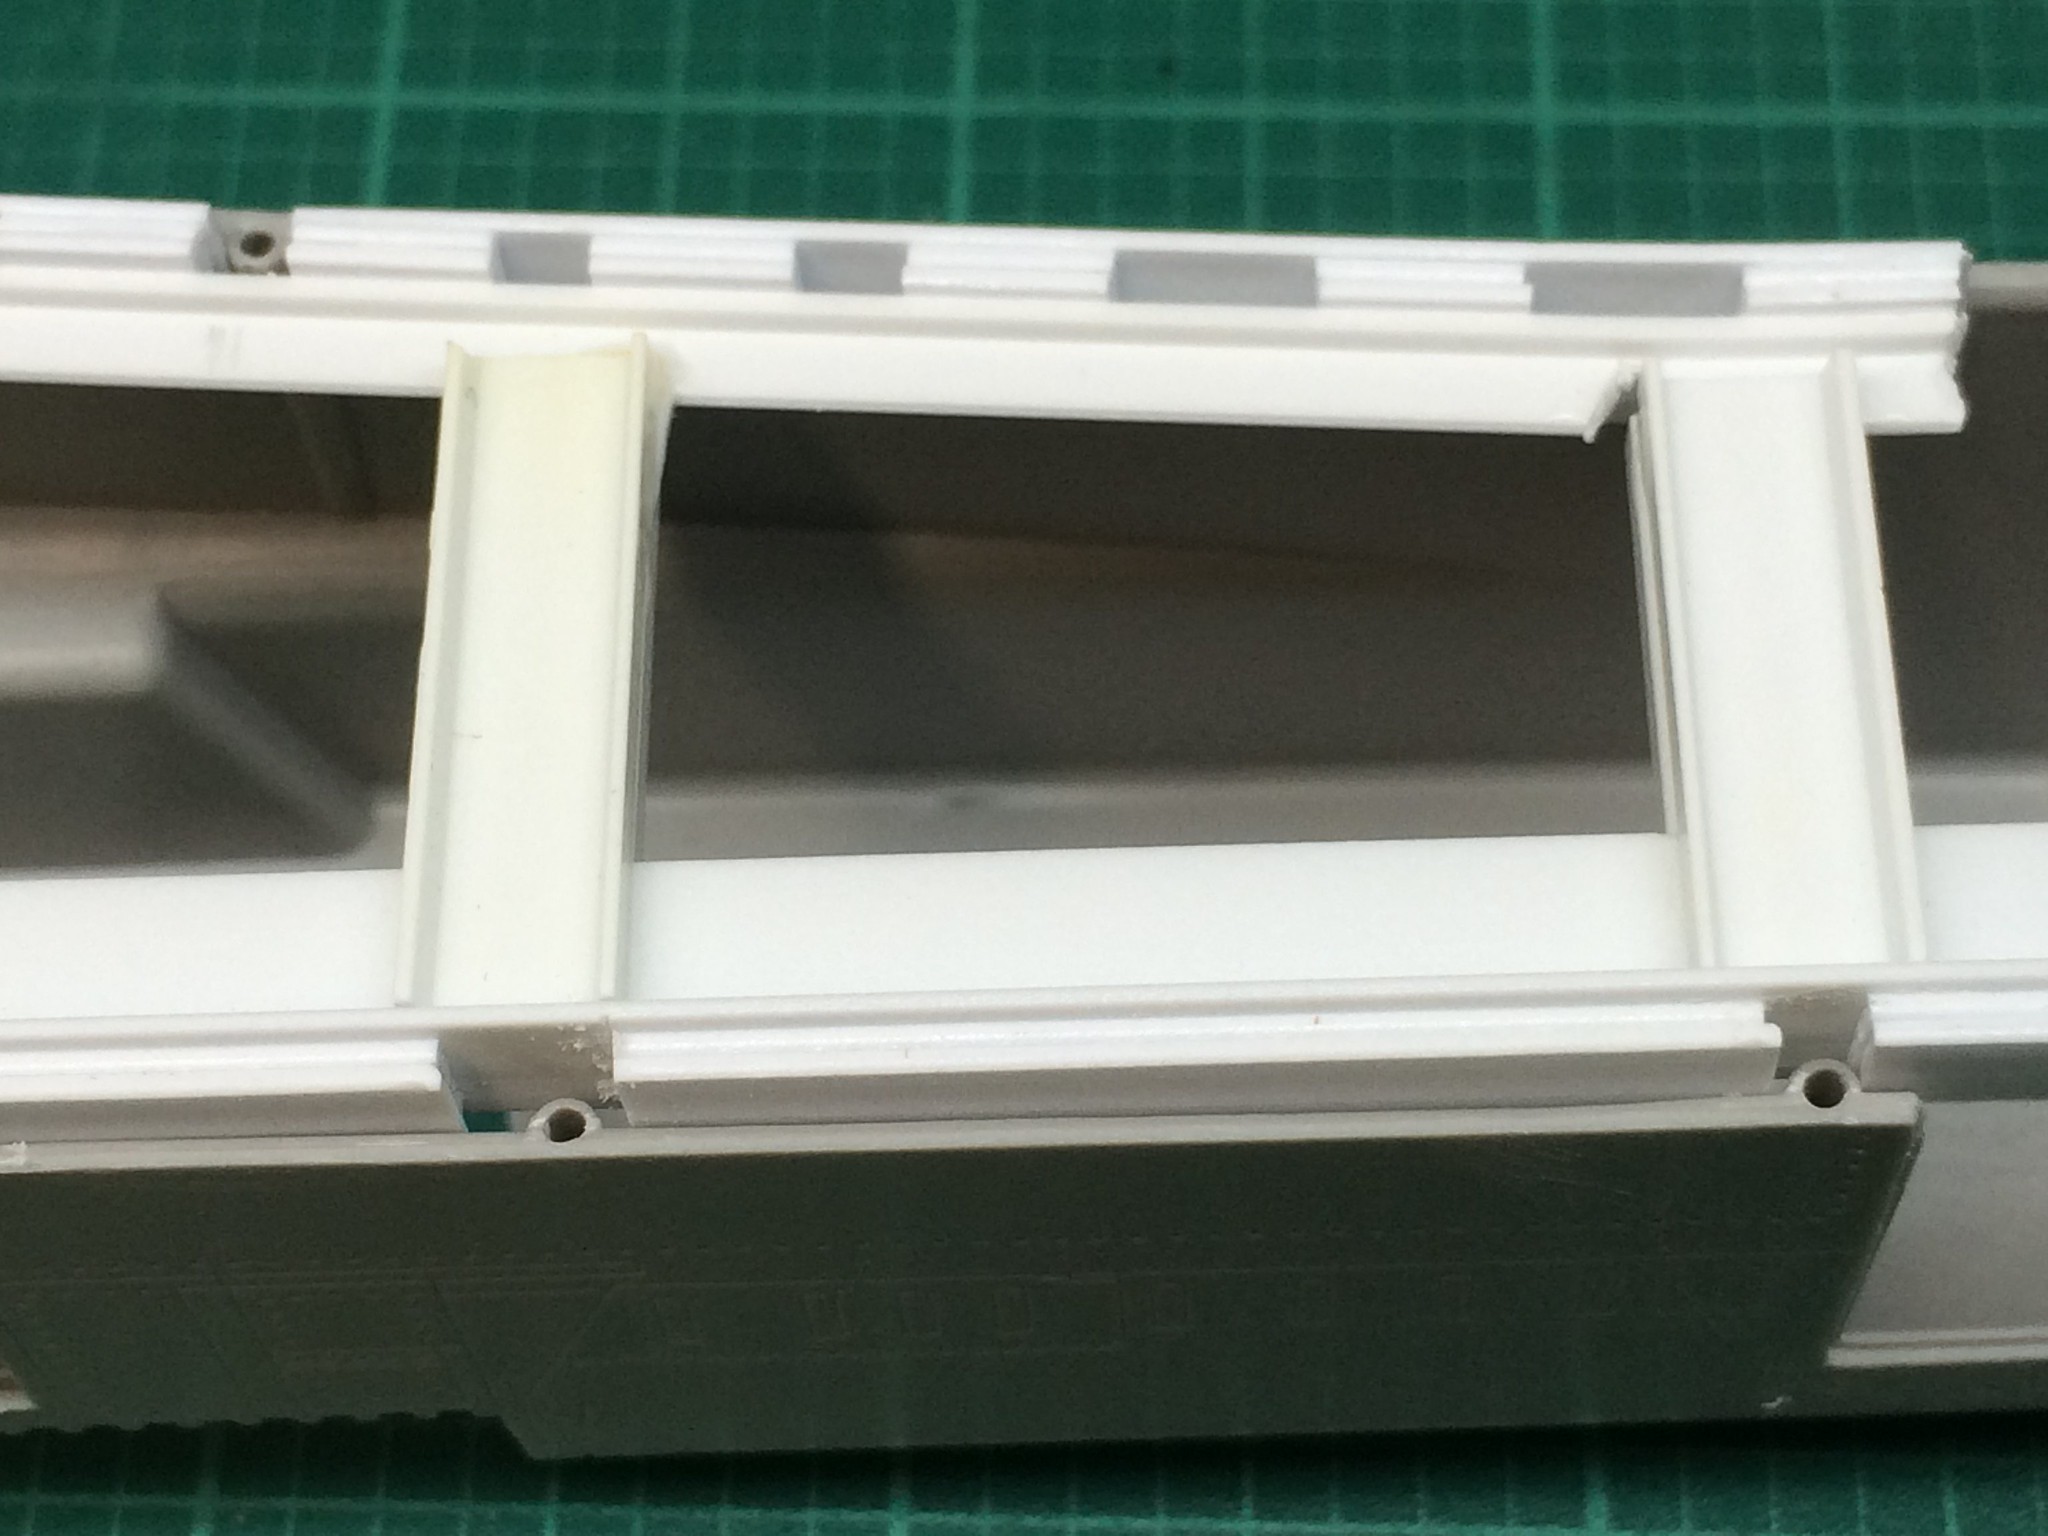
[/url]Vigilante-03 by N.T. Izumi, on Flickr

https://flic.kr/p/Ege2UV] 
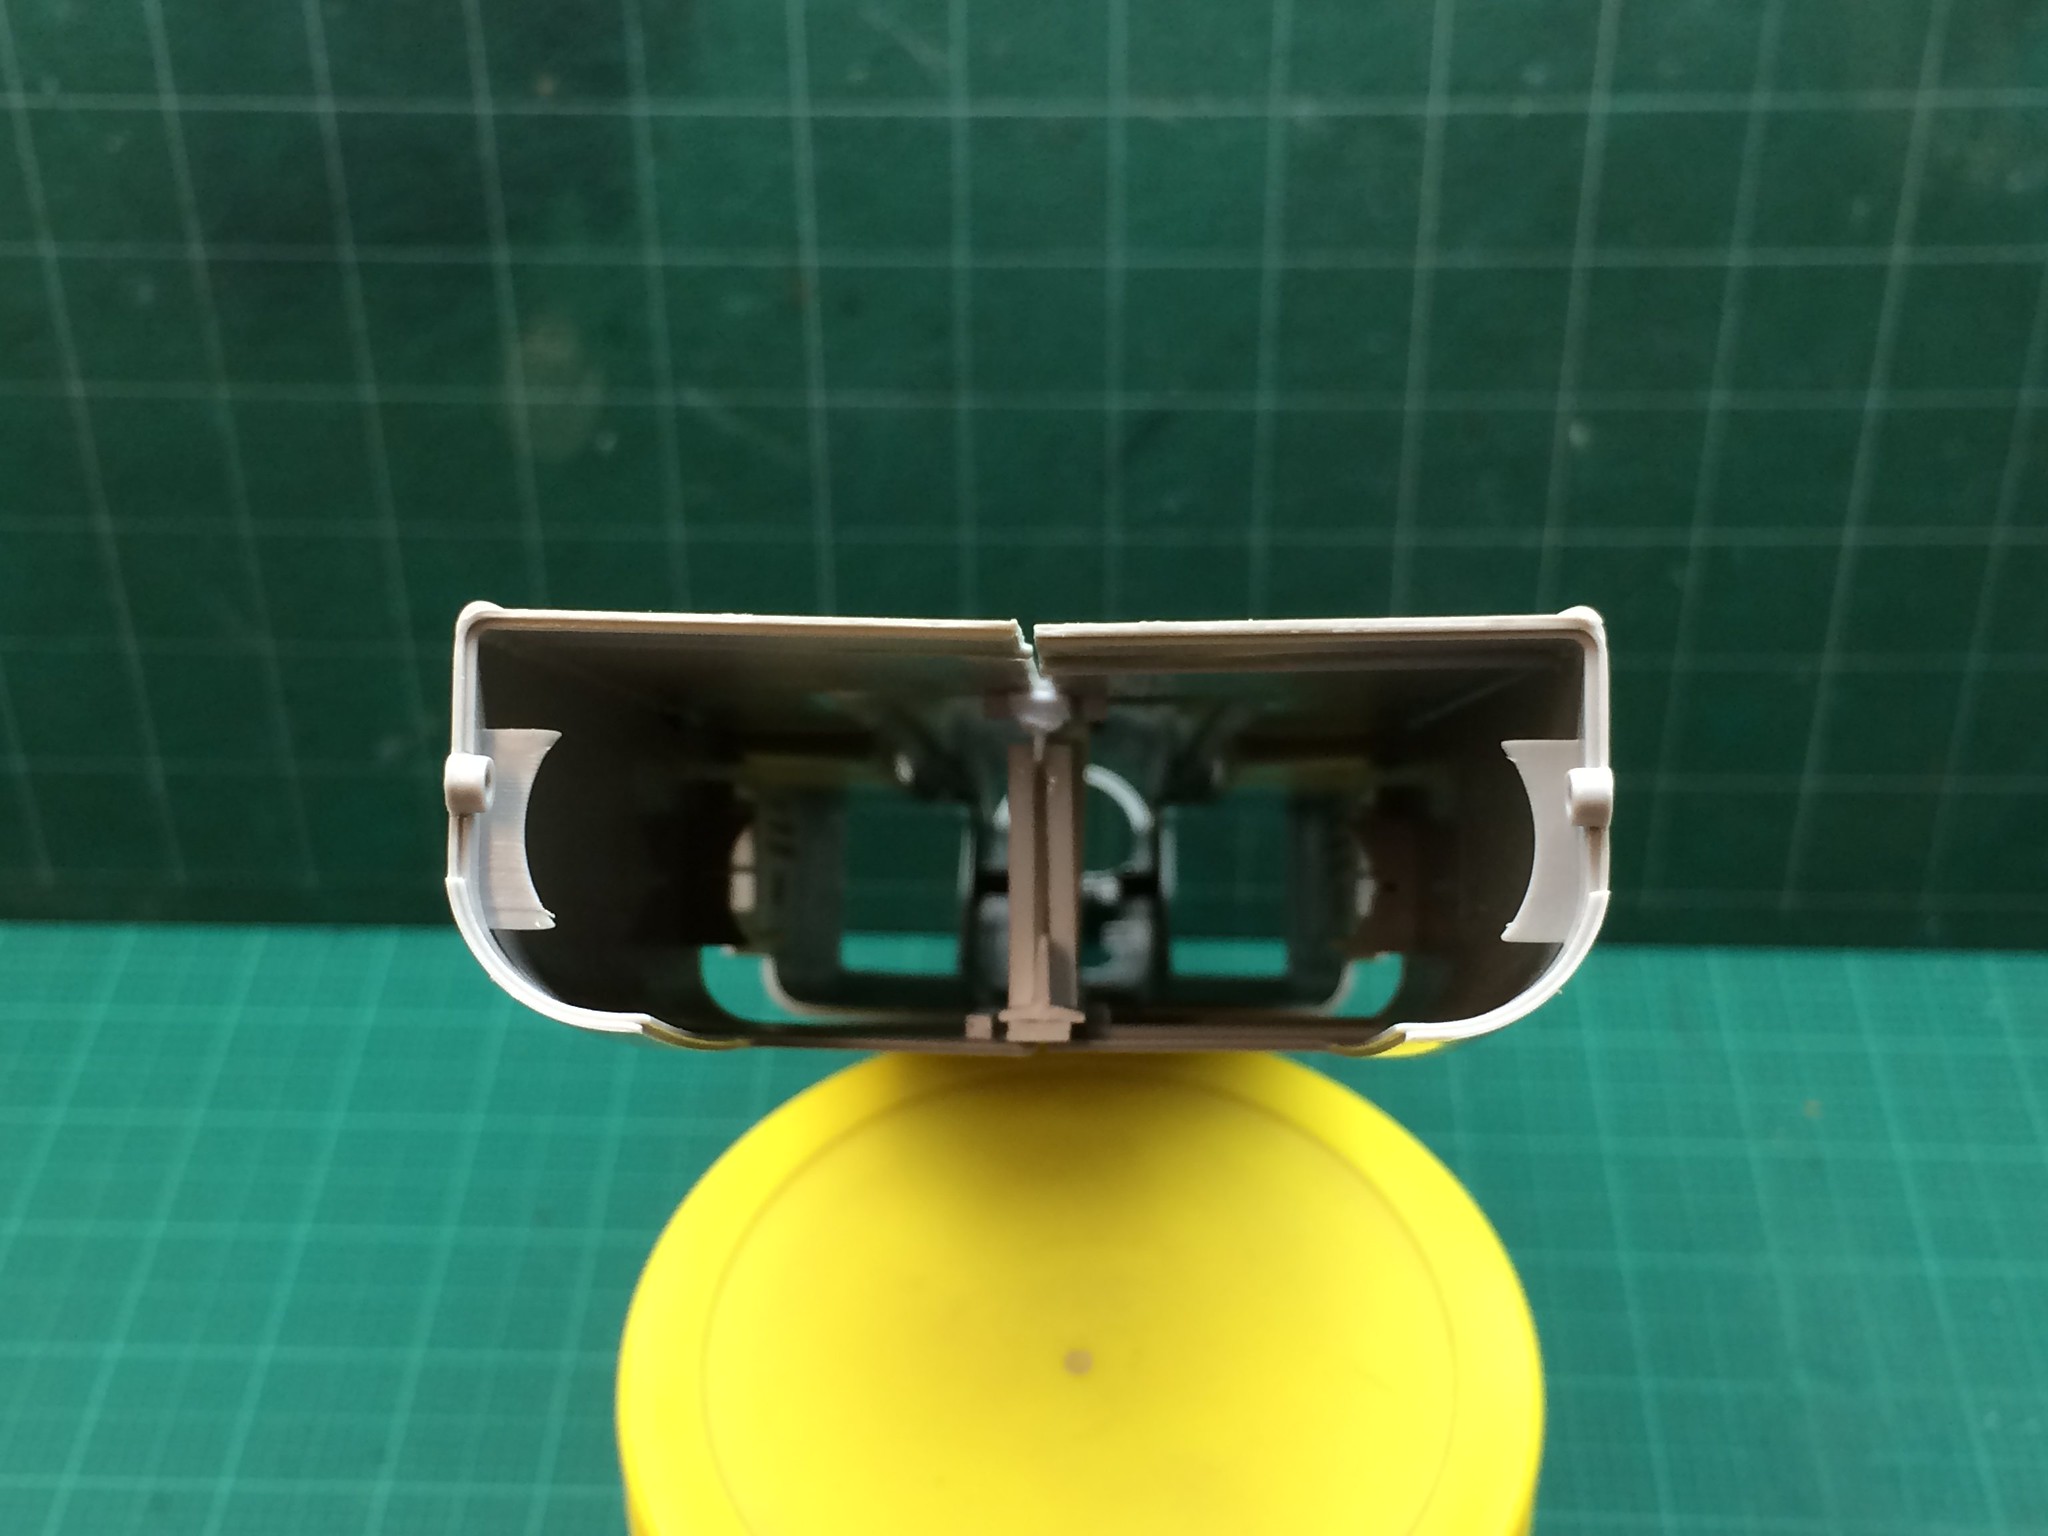
[/url]Vigilante-04 by N.T. Izumi, on Flickr

Seems to work!  Of course, the saggy fuselage joint is only one of the many serious shortcomings of this much maligned kit, so I have some questions for those that know:

- For the intakes (or more correctly the lack thereof), what do the FOD covers look like?  I am not too inclined to vac form the super-long intake tunnels, as they would be really hard to filll, sand, and paint white.  I know Cutting Edge made a resin set, but it it OOP and I want to keep this build simple and cheap.

- I had read that the inboard leading edges of the intakes had a different profile on certain production blocks.  Can someone shed light on this?  Also, was the LERX on the kit also something associated with certain blocks?

- The kit comes with two kinds of nukes (!) to hang under the wings, but what was the typical misison loadout during Vietnam?  (Yes I know they didn't carry nukes.)  Were drop tanks common?  Or did the aircraft fly combat missions clean, without tanks or pylons?

- The RA-5C's primary mission was recon, but I guess the "A" in its designation meant that it retained (but did not use) its strike capability.  So is the HUD still appropriate?  Or was it used for general flight information as well?

Inquiring minds want to know.  (A.D.D. ones too!)  TIA.


“Ya ya ya, unicorn papoi!”

  • Member since
    May 2011
  • From: Honolulu, Hawaii
Posted by Real G on Tuesday, March 15, 2016 1:30 PM

OK I sort of answered one of my own questions by looking at the box, where there are a few photos of a real RA-5C, one of which shows a red FOD cover in the intake with white lettering that reads "REMOVE BEFORE FLIGHT".  Were there handles to allow ground crew to pull the things out?


“Ya ya ya, unicorn papoi!”

  • Member since
    May 2009
  • From: Poland
Posted by Pawel on Tuesday, March 15, 2016 3:44 PM

Hello!

Your build is looking good!

My friend have built a scaled-down kit of the RA-5C - 1/72 Vigilante by Trumpeter and I have posted the photos of his model on my web page. Here's the link to the development history of the Vigilante:

http://www.vietnam.net.pl/RA5en.htm

and here's the link to the build report:

http://www.vietnam.net.pl/RA5moden.htm

There were two separate production runs of the RA-5C. The first started in 1962. 43 Aircraft were built, then 18+43 were converted from other A-5 variants. The second production run started in 1968 and then 36 "late" aircraft were built. Those "late" aircraft can be distinguished from the earlier machines in that they  have the leading edge extensions and the outer edges of the air intakes were straight (the inner edges were still S-shaped). The engines were also slightly different in the "early" and the "late" aircraft.

The bomb bay was used for fuel tanks even if the aircraft carried the nuclear weapon. In the recon version the whole bomb bay was used to carry fuel. This way nothing had to be carried under the wings (that is apart of the photo flash pods), and the aerodynamics of the aircraft were very clean. Using almost the same engines as the Phantom, the Vigilante was much faster and if it was escorted, the escorts had problems to keep up.

I hope this helps you - good luck with your build, keep those pics comin' and have a nice day

Paweł

All comments and critique welcomed. Thanks for your honest opinions!

www.vietnam.net.pl

  • Member since
    May 2011
  • From: Honolulu, Hawaii
Posted by Real G on Tuesday, March 15, 2016 6:18 PM

Thanks Pawel, and your model looks great!  How did you make your intake tunnels?  I also noticed the nose gear on your model appears to be extended for launch - was this also a modification you did?

“Ya ya ya, unicorn papoi!”

  • Member since
    January 2003
Posted by Darren Roberts on Tuesday, March 15, 2016 6:21 PM
Nice looking brace. Steel Beach has a set of resin intake plugs. They are available at Sprue Brothers. They need to be put in place before you attach the intake parts, however, due to the weird shape of the intakes. I tried to make them so you fit them in after, but I couldn't come up with a workable design.
  • Member since
    May 2011
  • From: Honolulu, Hawaii
Posted by Real G on Tuesday, March 15, 2016 8:51 PM

Darren,

If I go the intake plug route, I will add some locator strips to keep the plugs from falling in.  That way they can be added afterwards.  I'll check out the Steel Beach website.  Thanks for the heads-up!

“Ya ya ya, unicorn papoi!”

  • Member since
    March 2015
  • From: Streetsboro, Ohio
Posted by Toshi on Wednesday, March 16, 2016 4:36 AM

What a very nice way to scratch build, not only does it look cool, it's functional as well!  Keep up the great work.  I'll be watching!

Toshi

On The Bench: Revell 1/48 B-25 Mitchell


Married to the most caring, loving, understanding, and beautiful wife in the world.  Mrs. Toshi


  • Member since
    October 2007
  • From: Scotland
Posted by Milairjunkie on Wednesday, March 16, 2016 6:56 AM

Nice work on the brace!

I attempted this kit many moons ago with tube glue, a hairy stick & little patience, the sag in the fuselage was dissapointing to say the least & my limited skills didn't allow a reasonable fix. It was so dissapointing that the Vigi got a rocket stuck up it's rear & was launched out of my bedroom window.....

The Vigilante is one gorgeous, hot & cool aircraft. 

  • Member since
    May 2011
  • From: Honolulu, Hawaii
Posted by Real G on Wednesday, March 16, 2016 2:50 PM

Toshi - The frame is just a collection of structural strip that was piled on until it fit the fuselage profile.  The "vertebrae" looking top chord was because I figued using segments of plastic strip would allow better control to follow the upper fuselage contour.  I also notched the upper "T" section for the same reason.  And then I had to increase the height of the frame so the continuous top strip was added.  Notice how the upright "C" channels are not all perpendicular to the bottom chord?  Surprise

Milairjunkie - a rocket launch out the bedroom window?  Holy moley, the 1/48 Vigilante is a pretty good size for a model-turned-projectile!  (We went outside to do those kinds of things - our parents would have had fits with kids playing with pyrotechnics inside the house!)

I'm taking a closer look at the kit now, and there are a lot of shortcomings in engineering.  The heavy slab tailplanes and all-moving fin have really dinky mounting pins which fit loosely, which I am certain will prove to be weak.  The fold options for the wings and fin should have had insert tabs to allow a strong joint if built in the extended position.  Most of the molded in strip locator tabs cause the joints to form steps.  I think the starboard wing is a hair too thick where it meets the intake, as there is a step at the joint.

BUT - in the end it is a Vigilante.  It will be worht the trouble.  Smile

“Ya ya ya, unicorn papoi!”

  • Member since
    October 2007
  • From: Scotland
Posted by Milairjunkie on Wednesday, March 16, 2016 3:29 PM

Real G

Milairjunkie - a rocket launch out the bedroom window?  Holy moley, the 1/48 Vigilante is a pretty good size for a model-turned-projectile!  (We went outside to do those kinds of things - our parents would have had fits with kids playing with pyrotechnics inside the house!)

Technically it was outside when launched...

I used to do the garden thing, but despite being bearing a scaled down aerodynamic resemblance to the full sized items, none of the junked, solid booster converted models ever performed very well in flight. The launch strategy was studied & revised & the launch site relocated to my 1st floor bedroom window.

Despite the obvious height advantage, there was little improvement in flight time / distance & uncontrolled flight into terrain before bingo fuel was the normal outcome.

The ultimate project goal of targeting & destroying the boosted aircraft by air rifle was never achieved & the project was abandoned (like all abandoned projects, probably due to a lack of funds...)

Happy days!  

  • Member since
    May 2011
  • From: Honolulu, Hawaii
Posted by Real G on Tuesday, March 22, 2016 11:03 PM

I have finally tweaked the fuselage reinforcement frame to satisfaction:

https://flic.kr/p/Fqz4uW] [/url]Vigilante-06 by N.T. Izumi, on Flickr

https://flic.kr/p/FBf6JR] [/url]Vigilante-07 by N.T. Izumi, on Flickr

It passes the steel ruler test, top and bottom.

But more fit issues remain.  The long legdes that Trumpeter provide for some of the parts' mating surfaces cause slight steps.  To address this, the ledges are cut away and strip plastic is glued to the inside of one surface and sanded until the fit is flush.  Pretty easy stuff:

https://flic.kr/p/FBf5op] [/url]Vigilante-08 by N.T. Izumi, on Flickr

The kit provides separate leading and trailing edge flaps, with molded in actuator arms.  The wings have little notches in them to allow these arms to fit close to the wing surfaces, but my model will represent a parked aircraft with everything up.  So I filled the notches with plastic strip and sanded them flush:

https://flic.kr/p/EDFzTv] [/url]Vigilante-09 by N.T. Izumi, on Flickr

I have read that the leading edge flaps are thicker than the wing, so I will test fit and thin them as needed.

“Ya ya ya, unicorn papoi!”

  • Member since
    May 2011
  • From: Honolulu, Hawaii
Posted by Real G on Monday, March 28, 2016 2:59 PM

A little more tinkering, this time to deal with the ridiculously short mounting pin for the all-moving fin.  I don't know how Trumpeter intended the fin to be securely attached to the fuselage, but as it is the connection is weak and allows a lot of side to side play.

https://flic.kr/p/EP6vp8] [/url]Vigilante-10 by N.T. Izumi, on Flickr

https://flic.kr/p/FCufTp] [/url]Vigilante-11 by N.T. Izumi, on Flickr

A kingpost was attached to the lower fuselage insert for the arrester hook and a new longer pin was attached to the fin.  Now the fin is more secure and sits vertically with no trouble.  I am not planning on making the fin movable, but might consider leaving it loose to ease storage and transport.

The all-moving stabilizers also suffer from the short pin problem, so I'll treat them similarly.


“Ya ya ya, unicorn papoi!”

  • Member since
    May 2009
  • From: Poland
Posted by Pawel on Monday, March 28, 2016 3:11 PM

Hello!

Now that's some solid construction work! Just a little bit more in that direction and you'll have servos there moving the control surfaces! Good luck with your build and have a nice day!

Paweł

All comments and critique welcomed. Thanks for your honest opinions!

www.vietnam.net.pl

  • Member since
    May 2011
  • From: Honolulu, Hawaii
Posted by Real G on Tuesday, May 10, 2016 8:48 PM

I keep going back to this stinker of a kit.  Don't know why.  I guess I just like bad kits.  Fit continues to be not-very-good, but is moving forward.

https://flic.kr/p/GZQQQo] [/url]Vigilante-12 by N.T. Izumi, on Flickr

The folding fin is not provided with any way to securely hold it in the extended position, so sheet plastic strip was shaped and inserted to provide some gluing surface.  The fit is so-so, but I am happy to have gotten the fin straight.

https://flic.kr/p/G8icad] [/url]Vigilante-13 by N.T. Izumi, on Flickr

The wings have no support on the outboard edges of the fuselage, so they tend to adopt an anhedral (the wings are supposed to be level).  Strip plastic was laid along the fuselage edges and shaped to conform to the inside contours of the upper wing halves.

https://flic.kr/p/H3PjW8] [/url]Vigilante-14 by N.T. Izumi, on Flickr

https://flic.kr/p/GWMSxR] [/url]Vigilante-15 by N.T. Izumi, on Flickr

The wing tips are another barrel of fun.  They are gappy and like the fin, have precious little gluing surface.  The separate leading edge pieces are supposed to close up tight as there is a high pressure air duct that feeds the BLC system that runs through it.  Sheet plastic will be used to close up the gaps.  I'm considering inserting some wires and wads of epoxy putty into the wing fold to get them to stay together.

The leading edge pieces were thicker than the wing, but being a lazy bum, I just shimmed the wing instead of thinning the leading edge.  Hee hee.

https://flic.kr/p/GZQMAs] [/url]Vigilante-16 by N.T. Izumi, on Flickr

I know I said I wasn't going to spend money on this already expensive kit, but I lied.  If the Cutting edge resin intakes weren't OOP I probably would have bought them as well.  Too bad no one makes resin wheels, as the tread detail on the kit tires are kind of blah.  The Eduard color PE consoles have already been cut from the fret, as I wanted to see how well they fit.

Anyway, that is the state of play for this joy killer of a kit.  I'm getting a perverse sense of enjoyment diddling around with it though.  Stick out tongue


“Ya ya ya, unicorn papoi!”

  • Member since
    May 2009
  • From: Poland
Posted by Pawel on Wednesday, May 11, 2016 1:54 AM

Hello!

Perverse joy - I kinda think I know what you're talking about... Good to see you posting updates again, the model is looking good! So good luck with this build and have a nice day

Paweł

All comments and critique welcomed. Thanks for your honest opinions!

www.vietnam.net.pl

  • Member since
    May 2011
  • From: Honolulu, Hawaii
Posted by Real G on Wednesday, May 11, 2016 1:25 PM

Thanks Pawel!  I hope my kit turns out at least half as well as yours!

“Ya ya ya, unicorn papoi!”

  • Member since
    February 2003
Posted by Jim Barton on Thursday, May 19, 2016 5:12 PM

Milairjunkie


Real G

Milairjunkie - a rocket launch out the bedroom window?  Holy moley, the 1/48 Vigilante is a pretty good size for a model-turned-projectile!  (We went outside to do those kinds of things - our parents would have had fits with kids playing with pyrotechnics inside the house!)


Technically it was outside when launched...

I used to do the garden thing, but despite being bearing a scaled down aerodynamic resemblance to the full sized items, none of the junked, solid booster converted models ever performed very well in flight. The launch strategy was studied & revised & the launch site relocated to my 1st floor bedroom window.

Despite the obvious height advantage, there was little improvement in flight time / distance & uncontrolled flight into terrain before bingo fuel was the normal outcome.

The ultimate project goal of targeting & destroying the boosted aircraft by air rifle was never achieved & the project was abandoned (like all abandoned projects, probably due to a lack of funds...)

Happy days!  


Toast

"Whaddya mean 'Who's flying the plane?!' Nobody's flying the plane!"

  • Member since
    May 2011
  • From: Honolulu, Hawaii
Posted by Real G on Friday, May 20, 2016 9:11 PM

A simple method to help the wing tips stay attached to the main wings:  By gluing plastic blocks to the thin "teeth", there is now actual gluing surface area for the heavier teeth to bond to.

https://flic.kr/p/Hiiify] [/url]Vigilante-15a by N.T. Izumi, on Flickr

Looking over the extensively slide molded parts, it seems that Trumpeter at one time planned on releasing variants like an early block RA-5C and an A-5A.  Mold mismatches betray a potential for molding the fuselage without the A-5B/RA-5C dorsal hump and an insert to eliminate the leading edge wing extensions at the wing root/intake junction.

https://flic.kr/p/HfcXCk] [/url]Vigilante-18 by N.T. Izumi, on Flickr

https://flic.kr/p/HiihN1] [/url]Vigilante-17 by N.T. Izumi, on Flickr

The slide mold lines are particularly bad on this kit, with lots of shallow steps.  Some stretched sprue was laid down on the lower fuselage where the steps are the worst.  They will be sanded flush once the glue dries.

https://flic.kr/p/Hiigh5] [/url]Vigilante-19 by N.T. Izumi, on Flickr

My spirits still have not been dashed, so onwards with the more fun stuff like the cockpit.  I plan on cheating here, using Quickboost resin bang seats in combination with Eduard's pre-colored PE IPs and consoles.  I'll probably substitute plastic blocks for the really 3-D stuff, as I can't seem to make precise accordion folds like Eduard would have you do on some of their parts.  The PE ejection grab handles look terrific, so hopefully their flat cross section will not be too noticeable.


“Ya ya ya, unicorn papoi!”

  • Member since
    August 2013
Posted by Jay Jay on Saturday, May 21, 2016 8:24 AM

Very interesting "engineering " you're doing on this kit. I am building a 1/48 Kitech F-111 E

that has similar sagging and fit issues . I'm learning much from this thread and thank you much for posting.


 I'm finally retired. Now time I got, money I don't.

  • Member since
    May 2011
  • From: Honolulu, Hawaii
Posted by Real G on Monday, May 23, 2016 1:41 PM

Jay Jay,

You are most welcome!  Is the Kitech F-111 from the Academy molds?  I have the Hobby Boo-Boo F-111A in the stash, and that one has a lot of similar issues as the Vigilante.

“Ya ya ya, unicorn papoi!”

  • Member since
    August 2013
Posted by Jay Jay on Tuesday, May 24, 2016 9:16 AM

I have no idea and don't know how to tell.   Amazingliy, the fits are pretty good on this Kitech model. The biggest pain is all the flash and mold seems and injector pin marks. I have been sanding and scraping for days. No

My concern now is the very shallow panel lines. I hate the thought of having to rescribe every one of them so the wash will stick in them. I'm building this kit to practice painting tri color camo but that point in the build seems far away.


 I'm finally retired. Now time I got, money I don't.

JOIN OUR COMMUNITY!

Our community is FREE to join. To participate you must either login or register for an account.

SEARCH FORUMS
FREE NEWSLETTER
By signing up you may also receive reader surveys and occasional special offers. We do not sell, rent or trade our email lists. View our Privacy Policy.