SEARCH FINESCALE.COM

Enter keywords or a search phrase below:

My First in 20 Years - AMT 1/48 Hawker Tempest

1584 views
10 replies
1 rating 2 rating 3 rating 4 rating 5 rating
  • Member since
    November 2016
Posted by Wiggus on Tuesday, December 6, 2016 10:02 AM

Thanks. I'm having a blast.

I've dry fit the wings and fuselage together. THAT looks like its going to be a challege. Sad

  • Member since
    December 2002
  • From: Bury St Edmunds, Suffolk, England
Posted by Bish on Tuesday, December 6, 2016 8:19 AM

Talk about a challenge after 20 years away. You seem to be dealing with it nicley though.

I am a Norfolk man and i glory in being so


On the bench: Airfix 1/72nd Harrier GR.3/Fujimi 1/72nd Ju 87D-3

  • Member since
    November 2016
Posted by Wiggus on Tuesday, December 6, 2016 8:16 AM

So what have I done in the mean time? I’ve continued to add some doo-dads and hicky-ma-jigs to the cockpit area. I glued some spars to the inside fuselage to suggest the airframe that should be visible. I added a little ribbing to the floor boards, even though NO ONE is going to see them. I wanted to add a little depth to the instrument cluster so I shaved down a recessed panel in the center and drilled out some divots to suggest the gauges. I added a small panel attached to the left side airframe where the throttle would go…if I had a throttle. And lastly I tried to scratch build a small frame in front of the instruments that would hold the artificial horizon.
 TEMPEST 11 by Wiggus, on Flickr

I put the smallest tip I had into my soldering iron, and suspended the iron within the metal loops of the soldering stand. I was able to hold the tubing just above the point. It was just hot enough to facilitate bending without even feeling it on my fingers. I’ll get a picture up of all this good stuff later.

So now I have all the wings and elevators glued up. Time to fill the recesses where the halves meet and start etching some panel lines.
 Tempest 10 by Wiggus, on Flickr

The raised panel line were pretty close to accurate, for the most part. I’m learning to use the UMM panel line tool, and I think in general I’ve gone deeper than I wanted to. I think next time I will prime before I cut to make it easier to see what I’m doing. You can see the cuts here because they are filled with sanding dust. I found a cheap eraser shield that works well as a flexible straight edge. I have the underside of both wings done, all the stabilizers and one side of the fuselage.

And I have to do something about this:
 Tempest 12 by Wiggus, on Flickr

This is the air intake / oil cooler / what does this do? that sits inside the nose. I want to add some more interest to it…and I have an idea.

  • Member since
    November 2016
Posted by Wiggus on Tuesday, December 6, 2016 8:15 AM

I also got going on glueing the wings together. The design is odd compared to any other kits I’ve built in the past. The bottom wing half nestles inside the top wing. There is a recessed ledge in the top wing for the bottom wing to glue to. I highlighted the bottom half for clarity.
 Tempest 06 Hilited by Wiggus, on Flickr

The wheel wells are really shallow; there would be no way to fit a wheel in there. And you can see that wall nearest the fuselage cuts right across the wheel bay. Since I’ve already glued it up, there isn’t much I can do about it now, unless I want to go at it with a Dremel. Probably not.

I had to do considerable scraping of the recessed ledge out near the wing tips to get them to sit flush with each other. I also went kind of crazy with the glue. I need a better applicator than the brush in the bottle of Tamiya Extra Thin. That’s OK since there are lots of gaps to fill anyway. More sanding in my future.
 Tempest 08 by Wiggus, on Flickr

The rear stabilizers are made the same way.
 Tempest 09 by Wiggus, on Flickr

  • Member since
    November 2016
Posted by Wiggus on Tuesday, December 6, 2016 6:26 AM

While I was shopping on UMM for a scribing tool (that I’m learning to use on this kit) I happened upon some $5 resin Tempest exhaust that are nicer looking than the bumps molded into the fuselage.
 Tempest 04 by Wiggus, on Flickr

Well now I've done it; I just doubled the cost of this kit.

They cut apart fairly easily with a saw blade. I’m going to have to research resin. I’ve never used it before. I know that you need CA to glue it, but I just saw mention of needing to remove manufacturing residue before painting; so much to learn.

So now I had to cut out the old molded exhaust. Fortunately there were already raised panel lines for me to follow. I scribed lightly with a #11 blade and a strait-edge to start the furrow. Once there was a cut to follow, I found that plowing with the outside edge of a standard razor blade worked much faster than trying to cut down through with the razor edge. I did this step a while ago and just came back last night to clean up the edges. I’ll put up a photo of that later.
 Tempest 05 by Wiggus, on Flickr

Notice that the whole plane has raised panel lines. I don’t intend to let them stay. The only exception is these DEEP recessed lines on the top of both wings. Does anyone know the significance? It may be where the ordinance is loaded? I find it strange that they chose to emphasize these panels SO LOUDLY. THEY MUST BE SUPER IMPORTANT. Since they are accurate to drawing I’ve found, I can’t decide whether to fill them and re-scribe them or just let them go as is.
 Tempest 07 by Wiggus, on Flickr

  • Member since
    November 2016
Posted by Wiggus on Tuesday, December 6, 2016 6:24 AM

Hello all, to be honest...I was not planning on posting again. It took three days for my first post to show, and many features of this forum do not work correctly in Apple's Safari browser, i.e. not all the reply buttons show up and the preview post button does not work. I didn't think it would be worth the hassle. But since you were all so kind to reply I will try to keep up with it. I can live with using Firefox once and a while I suppose. :-)

Last night I finally fired up the airbrush for the first time, so I'll try to catch you up.

The cockpit is about as bare bones as you can imagine. The instrument cluster has hardly any detail and the seat was more like a mausoleum slab. I decided to cut away the “seat” in the front to make it a little closer to the seat in the Eduard and Airfix models. When I cut that away, the middle of the floorboard is now open, which is actually more like the real plane.
 Tempest 03 by Wiggus, on Flickr

I did some really basic scratch building to add sides to the seat, cut from .040 styrene sheets; edges rounded. I also trimmed down the enormous armor plate behind the pilots head. I’m not going too deep because I doubt much will be visible through the thick canopy.

I thought about at least adding a yoke, but the demure little pilot has his legs tightly together. I thought about cutting them apart, but what a hassle. I checked the pilot that came in the Gloster Meteor kit, and it has a lot more detail. Maybe a swap?
 Untitled by Wiggus, on Flickr

No, the Meteor pilot is much bigger and his head wouldn’t fit in the canopy! I began to wonder which figure was more to scale. After some quick measurements the Meteor piot is revealed to be 7’ tall at the 1/48 scale. This guy should be in the RAF basketball team…not a pilot.

  • Member since
    November 2010
  • From: Florida-West Central
Posted by Eagle90 on Tuesday, December 6, 2016 5:47 AM

Welcome Wiggus!  And what a great score you have there!  And you have the right idea.  Cheap and they can be used to get back into the swing of things.  I think you will be surprised at how quick you bounce back.  Lots of great folks here to help out if you need any help.  So jump on in and have fun!  Oh, be sure to post pics of your builds!

Eagle90


  • Member since
    November 2003
  • From: Naples, FL
Posted by tempestjohnny on Tuesday, December 6, 2016 5:00 AM
Good luck. Sounds like you are getting a stash already


  • Member since
    March 2015
  • From: Streetsboro, Ohio
Posted by Toshi on Monday, December 5, 2016 10:18 PM

Welcome back! I too have been away, my haitus resulted in a 40 year absence.  The best part is forum members here have helped me grow.  One thing I learned is to just have fun!

Toshi

On The Bench: Revell 1/48 B-25 Mitchell


Married to the most caring, loving, understanding, and beautiful wife in the world.  Mrs. Toshi


  • Member since
    January 2015
Posted by BrandonD on Monday, December 5, 2016 3:16 PM

Welcome back to it!

I came back after 15ish years in 2014 and have really been enjoying it. Looking forward to getting the progress reports as you go back through it. It's been fun for me to see how much the modeling experience has changed with the Internet. Much more social now, and I learn new techniques with each thread I read.

-BD-

  • Member since
    November 2016
My First in 20 Years - AMT 1/48 Hawker Tempest
Posted by Wiggus on Wednesday, November 30, 2016 1:04 PM

Hello all. I have just re-entered the modeling world after a 20 year hiatus. And before that  it had probably been another 20 years to back when I first started as a kid. A guy I work with had also returned and is building armor again. That started me thinking. I recently found a stash of cheap AMT and Lindberg re-issued kits at a local discount store, so I dove back in.

I decided on the AMT 1/48 scale Hawker Tempest for my return kit. I was trepidacious to even buy the kit, because I can remember that as a kid, AMT kits gave me the hardest time...aside from one Lindberg kit that I doubt I even finished!

 Tempest 01 by Wiggus, on Flickr

So you might be wondering, why I would pick a kit that I strongly suspect is going to be a pain in the butt to start with? 

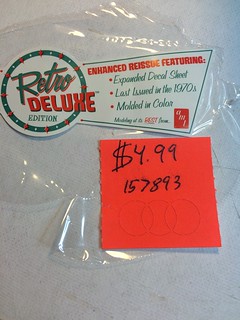
I'll give you five reasons...$$$ that is. :-)
 Tempest 02 by Wiggus, on Flickr

I got six kits for $40;

AMT: Tempest MkV, Gloster Meteor MkI, and JU88A-4.

Lindberg: Gloster Gladiator MkII, Curtiss Jenny, and F100D Super Sabre.

What better way to test all the new techniques I've read about? If I screw up really bady, I'm ony out a couple bucks. Plus I expect to be a putty-master by the time this is finished. The Sabre was the real wallet buster at $10.

I'll try to keep a diary so to speak of the build as it goes. I'm not looking for praise nor criticism, just wanted to pass on the problems and joys as it progresses.

JOIN OUR COMMUNITY!

Our community is FREE to join. To participate you must either login or register for an account.

SEARCH FORUMS
FREE NEWSLETTER
By signing up you may also receive reader surveys and occasional special offers. We do not sell, rent or trade our email lists. View our Privacy Policy.