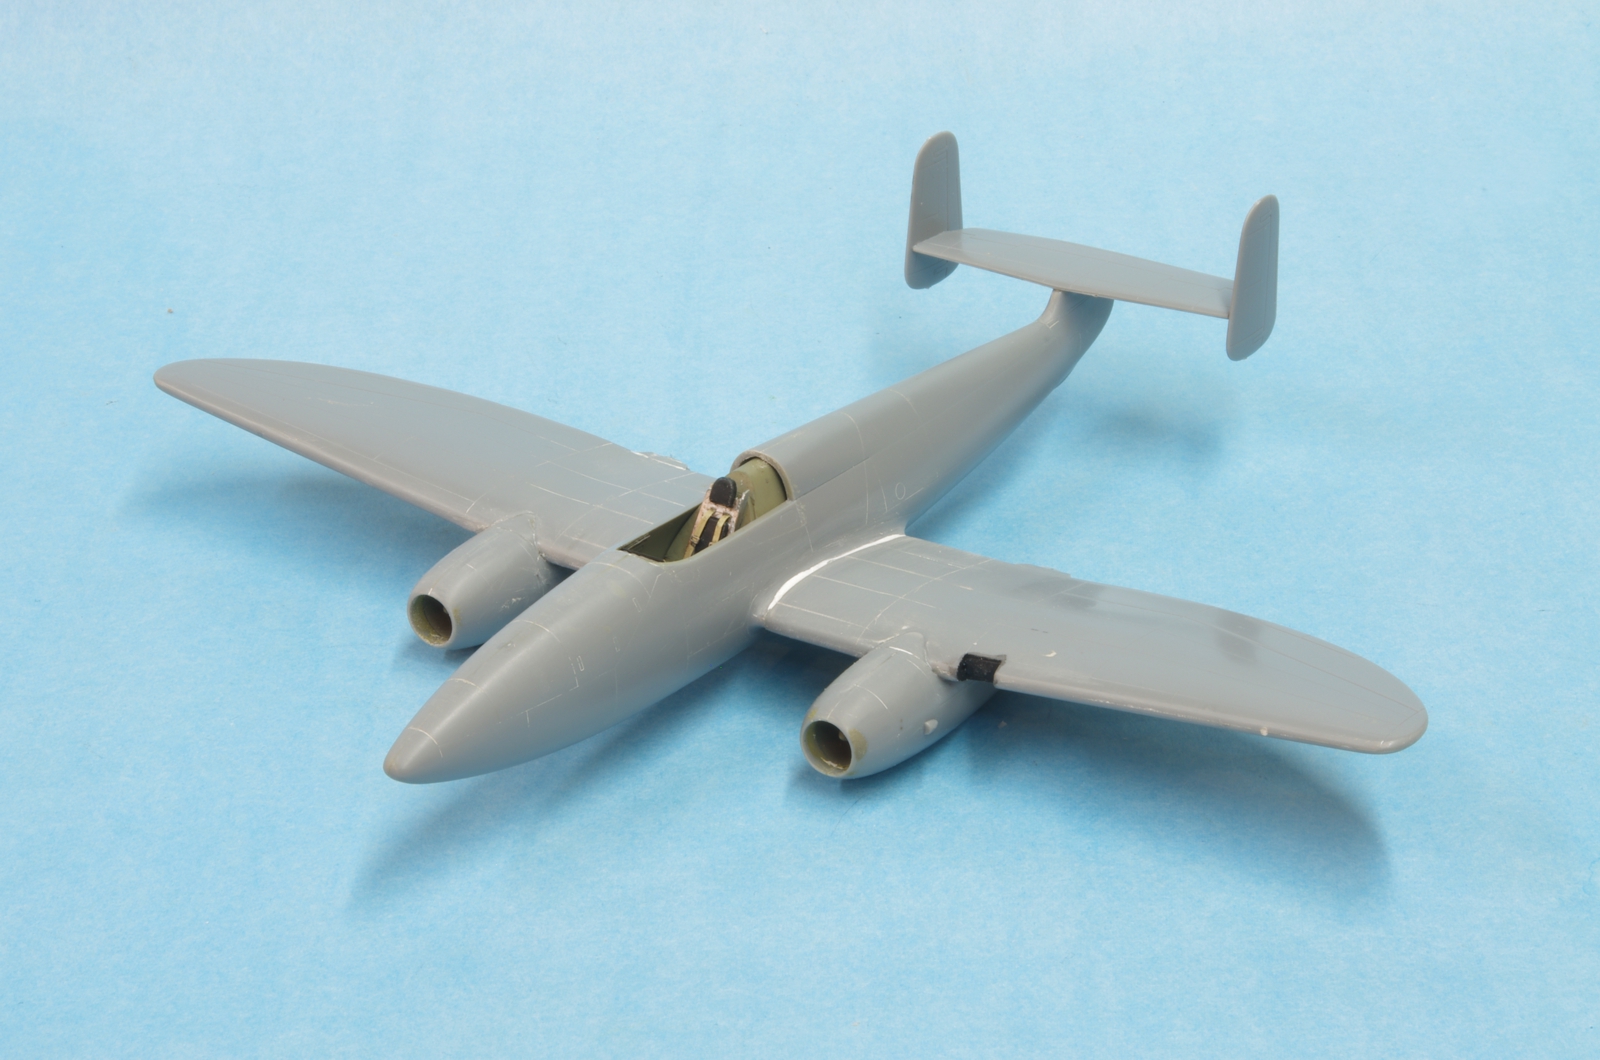
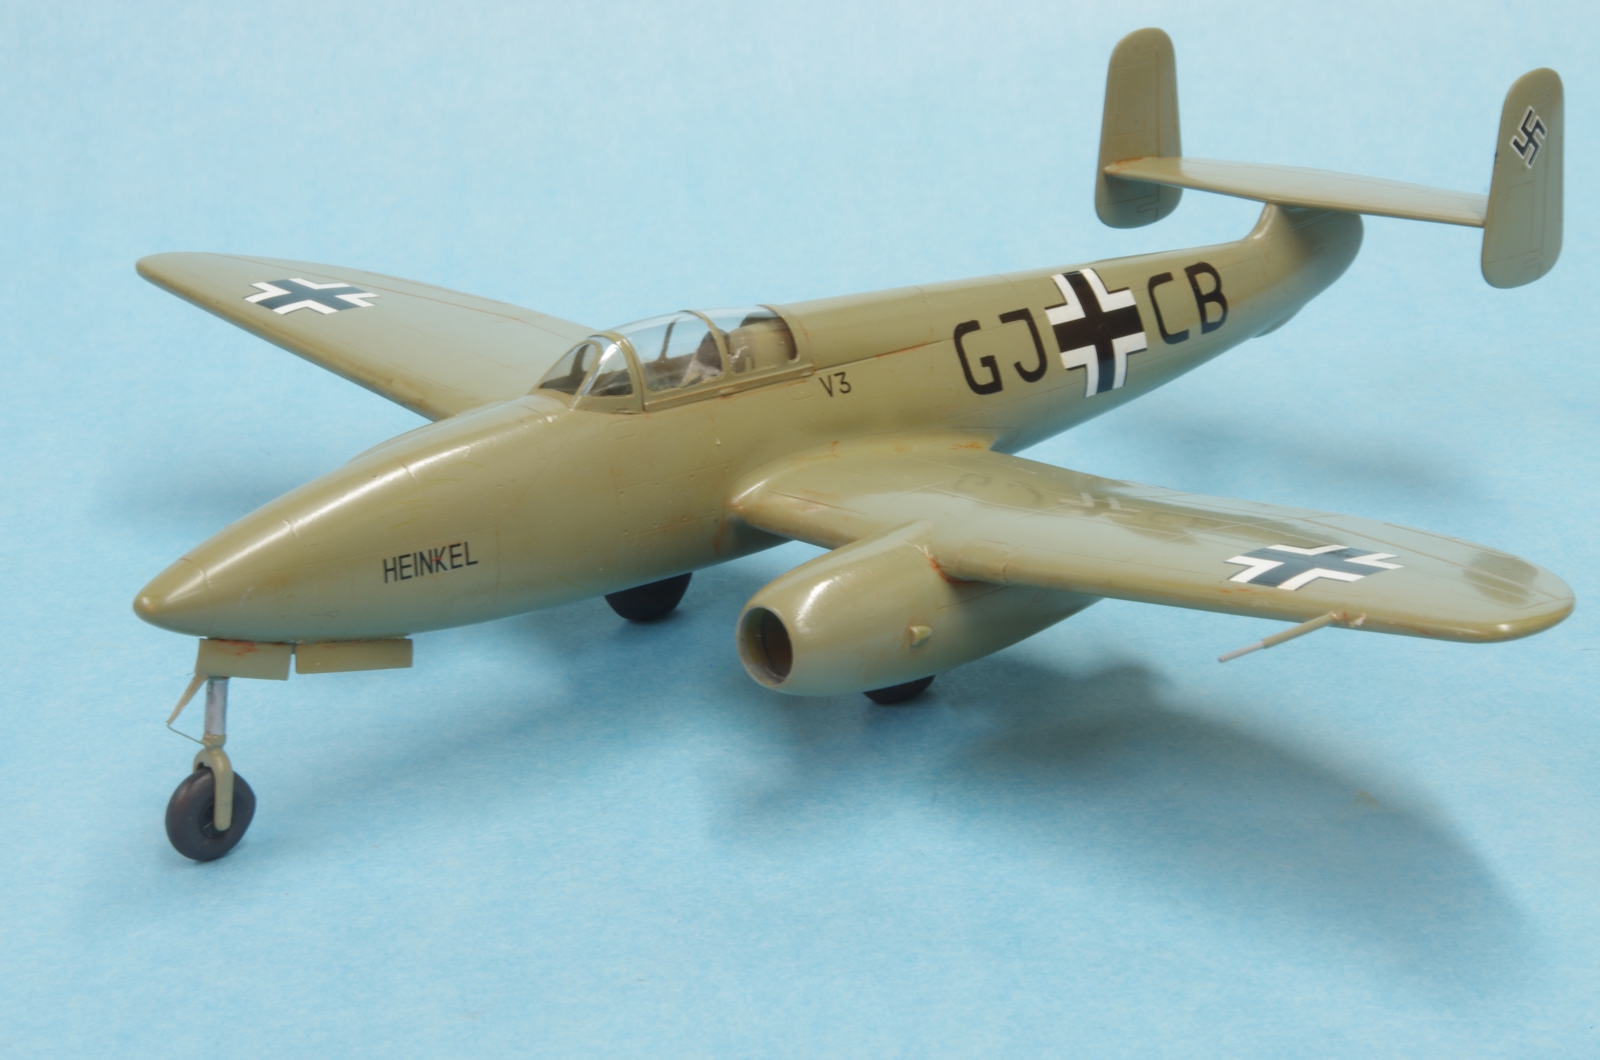
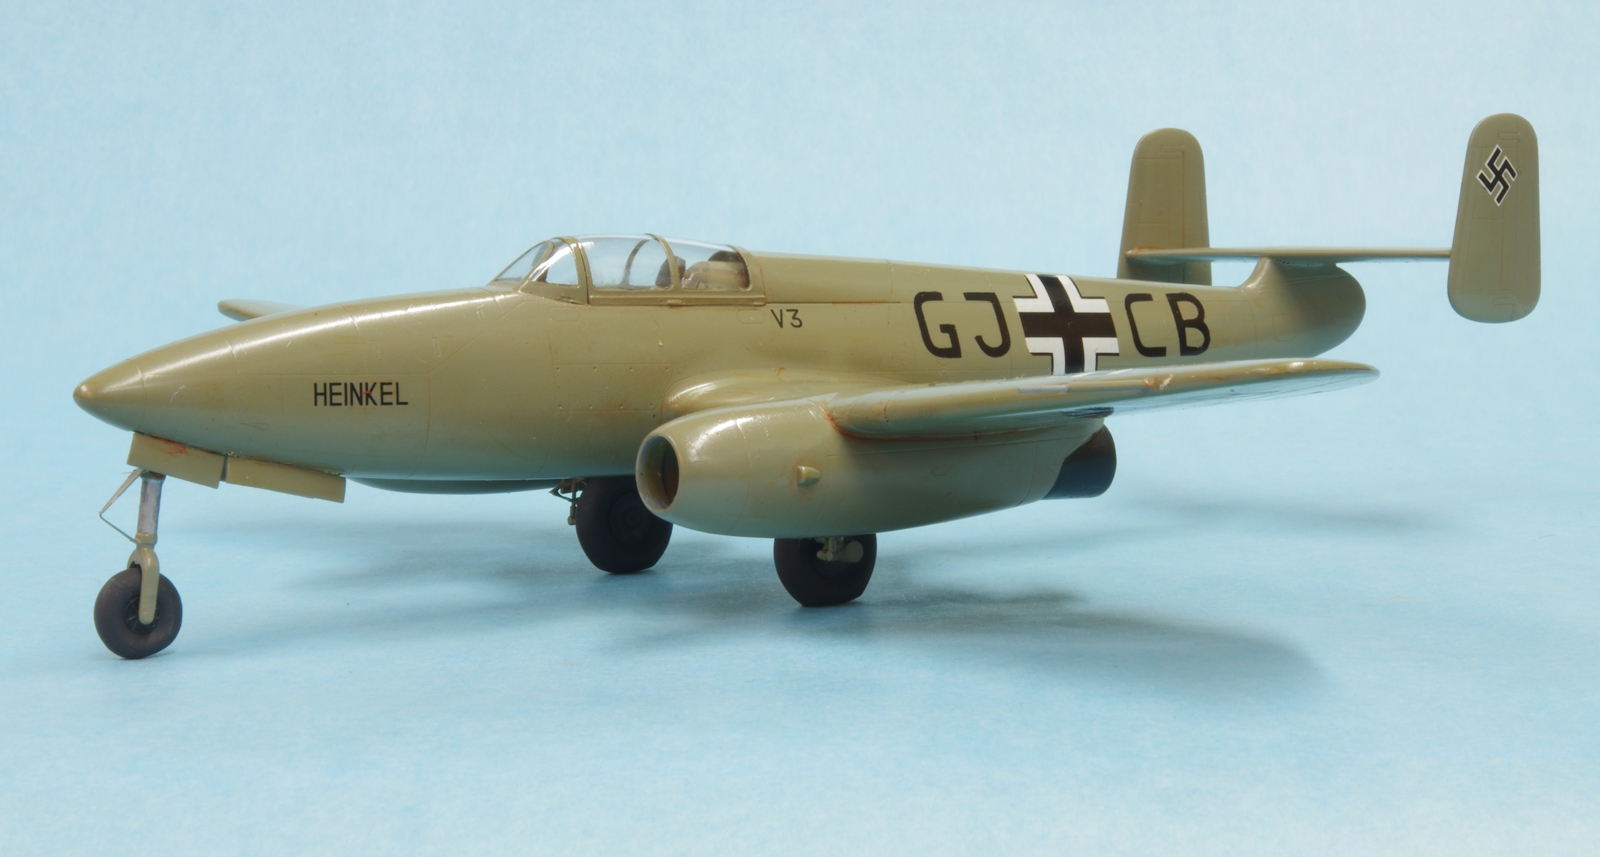
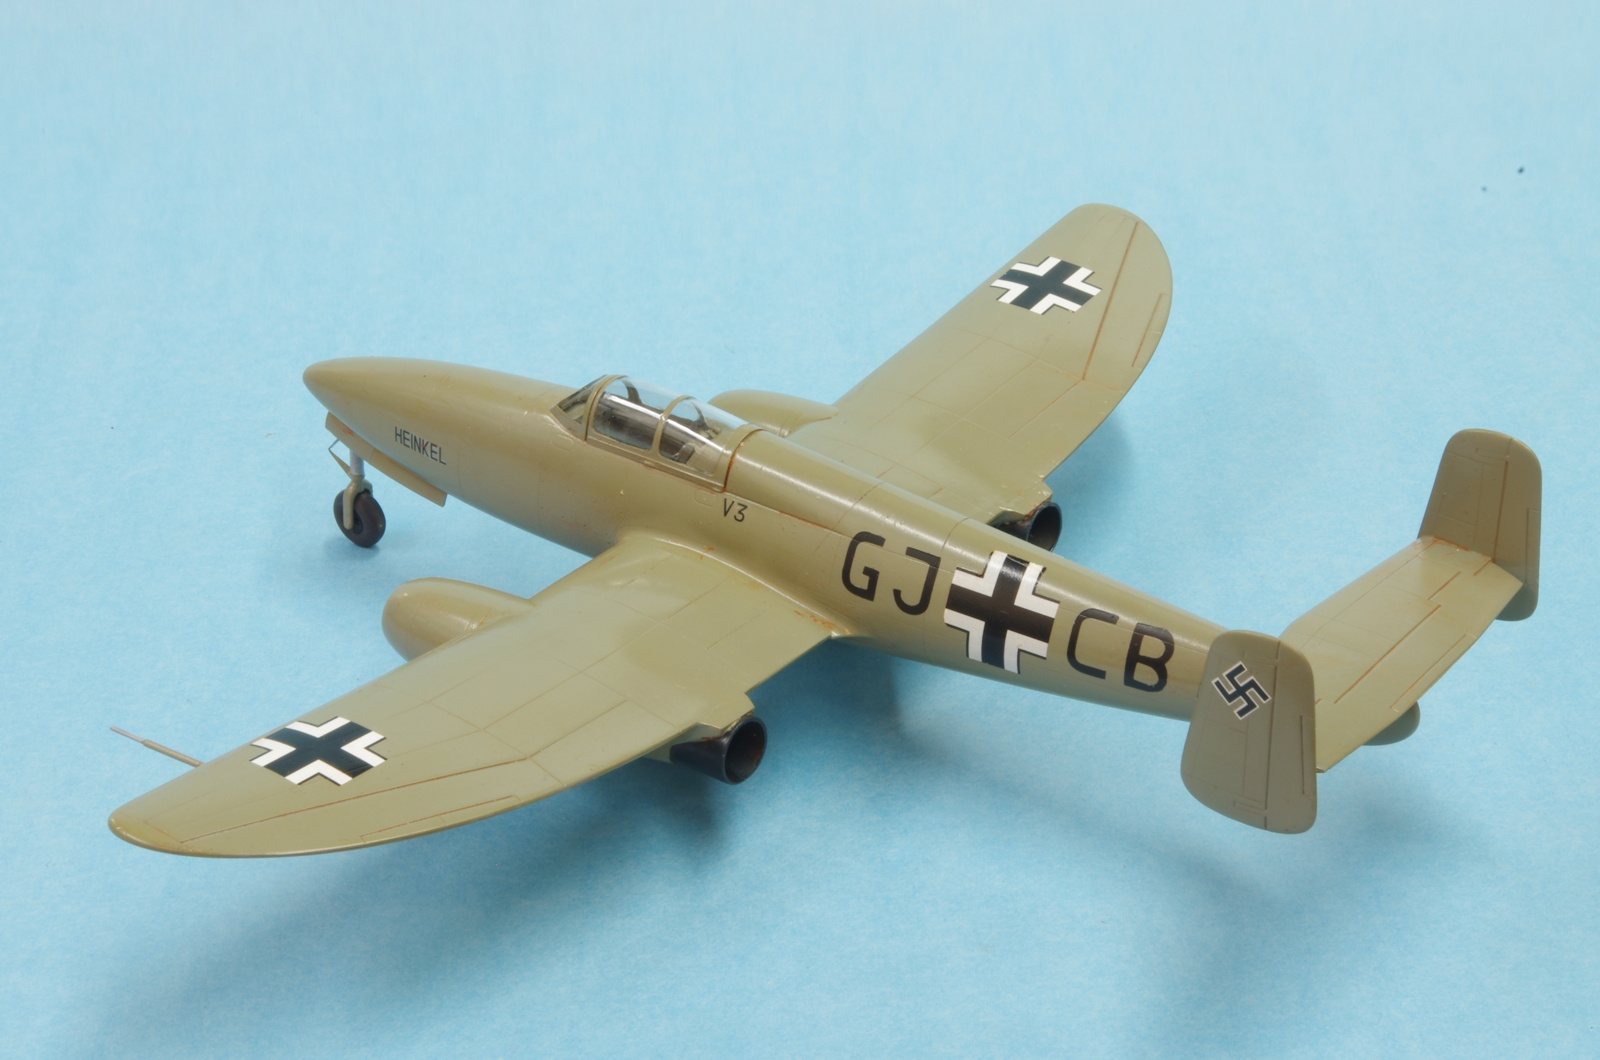
This is an early Eduard kit, not nearly as early as the Siemens Schuckert D.IIIIa which was the first Eduard kit I built, and later found out it was also Eduard's first kit. Some parts in that kit were hiding inside plastic blobs. The He-280 kits are far along from that standard, but still clearly not near the fine kits they are currently producing. Two versions were built, one as a Profipack with alternate Jumo or He-S8 engine nacelles, a comprehensive decal sheet (unusable due to age), and a photoech fret. The clear parts are very nice injection molded parts, with options for both open and closed, but the hood is not sized properly to fit in the open position. Resin wheels and canopy masks are included. The other kit you might call a weekend edition but this was before Eduard had started that. It has the He-S8 nacelles only, decals for the V3 version only, no PE fret, and no resin wheels. It does have canopy masks and a molded nose weight like the Profipack. The plastic parts are identical and of good quality and generally nice fit.
The kit number for the simpler kit is 8048, the Profipack is 8049.
The box art and parts:
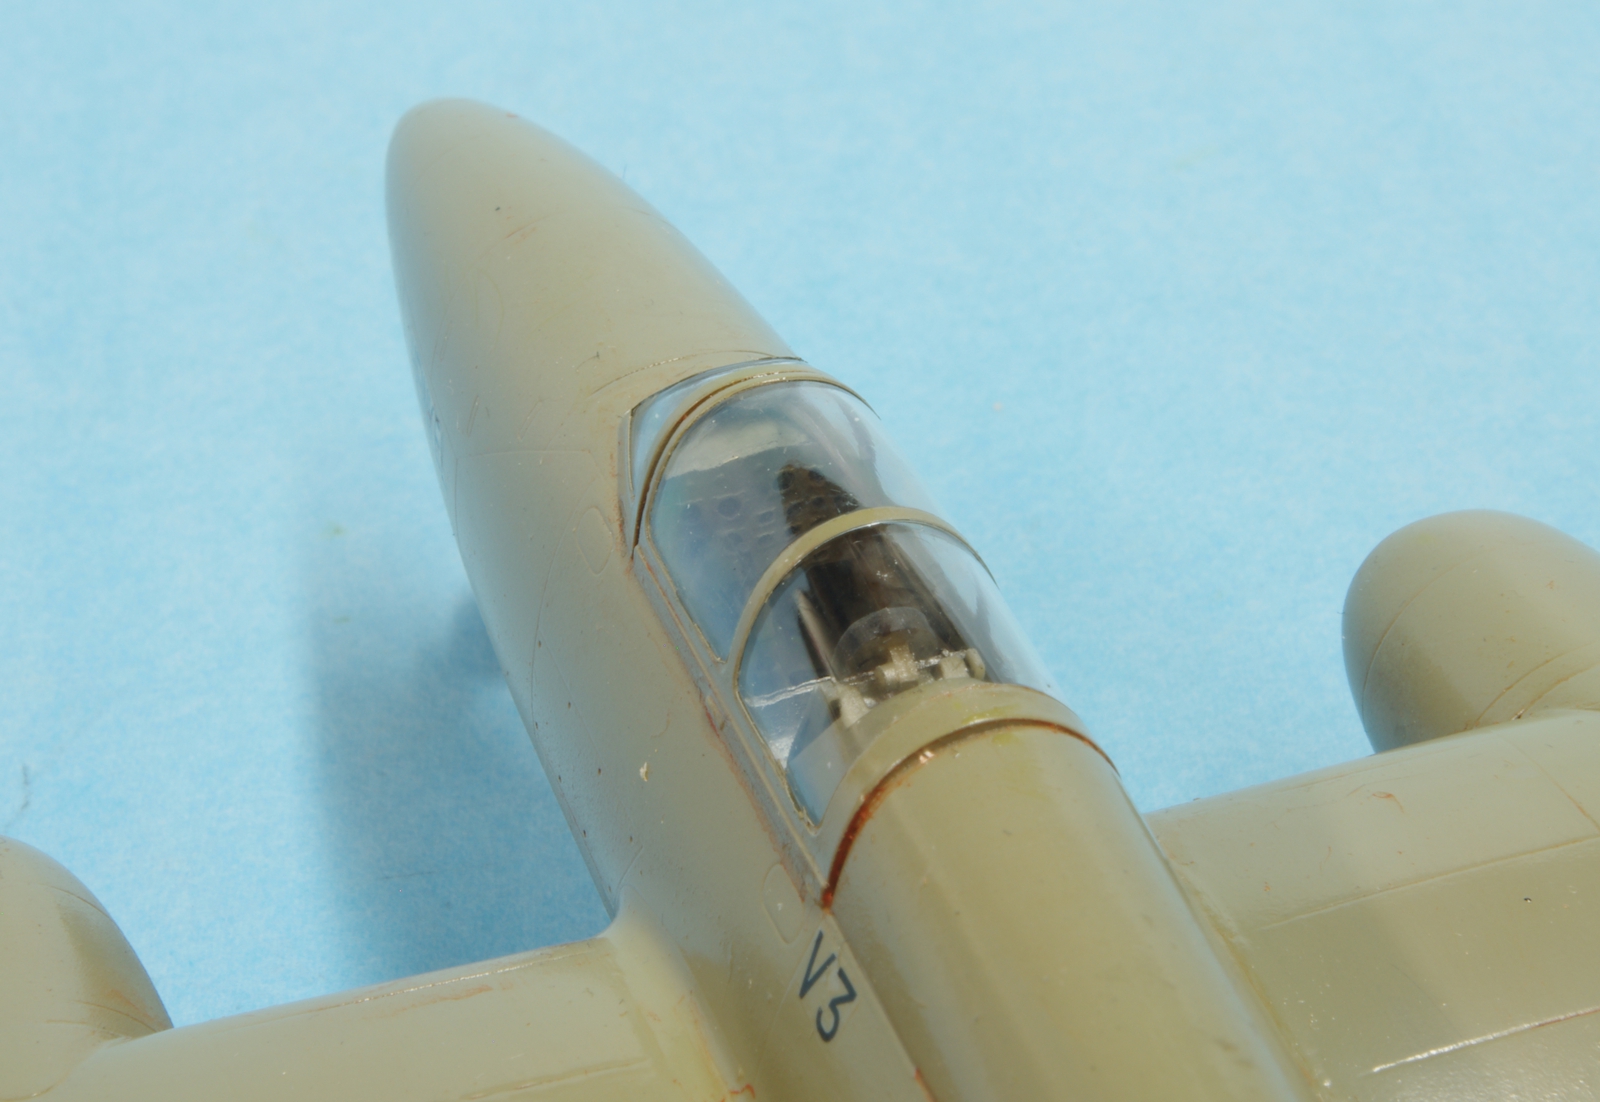
The completed cockpit. The resin seat is a detailed casting but has roughness in some areas. It was the first ejection seat used in emergency conditions when one of the He-280's iced up, left controlled flight, and the pilot ejected. The seat was powered by compressed air. The instrument panel is a sandwich of PE and instrument faces on acetate sheet. I followed the instructions and painted the panel RLM 02 but wonder if it should be actually be RLM 66. I used some newer Eduard pre-painted seat belts.
The fuselage shells fit pretty well, but not quite. They were a little thick and stiff so some persuasion was applied to get the best effect.
The basic components assembled. There were adapting fairings at the leading and trailing edges of the wing for the nacelles, to accommodate the different nacelle shapes for the He-S8 and Jumo engines. They fit amazingly well on the front and took some work at the back. There was a little work to do at the upper roots, just some minor putty.
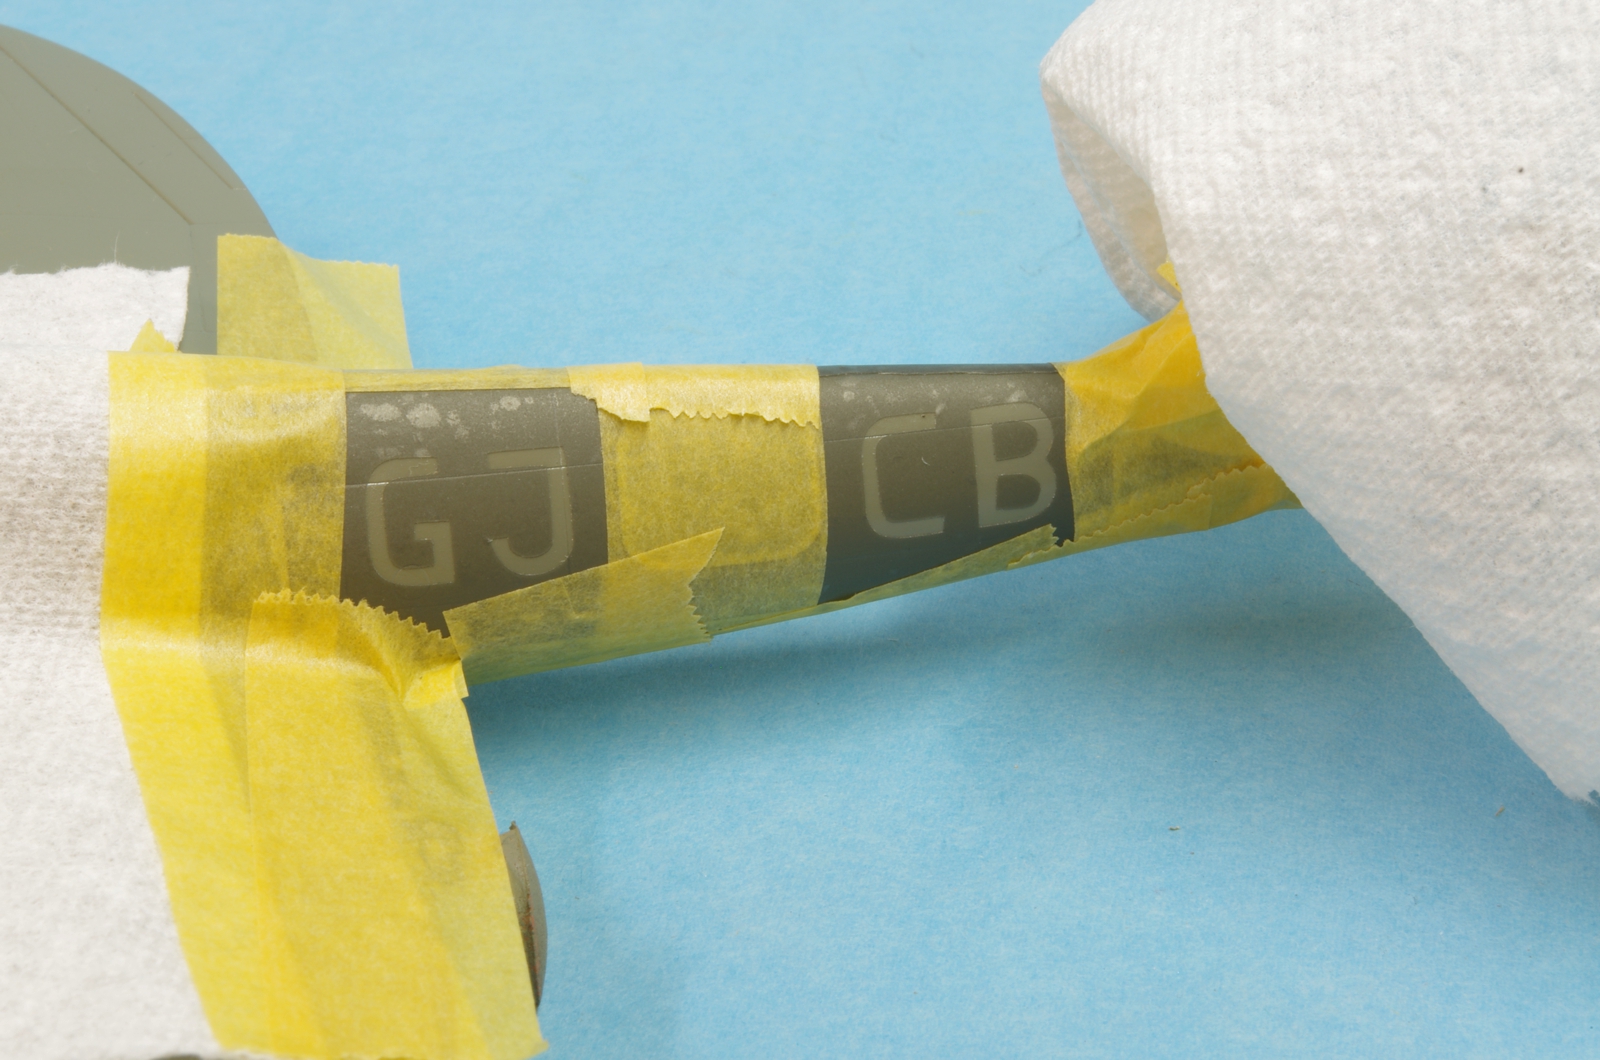
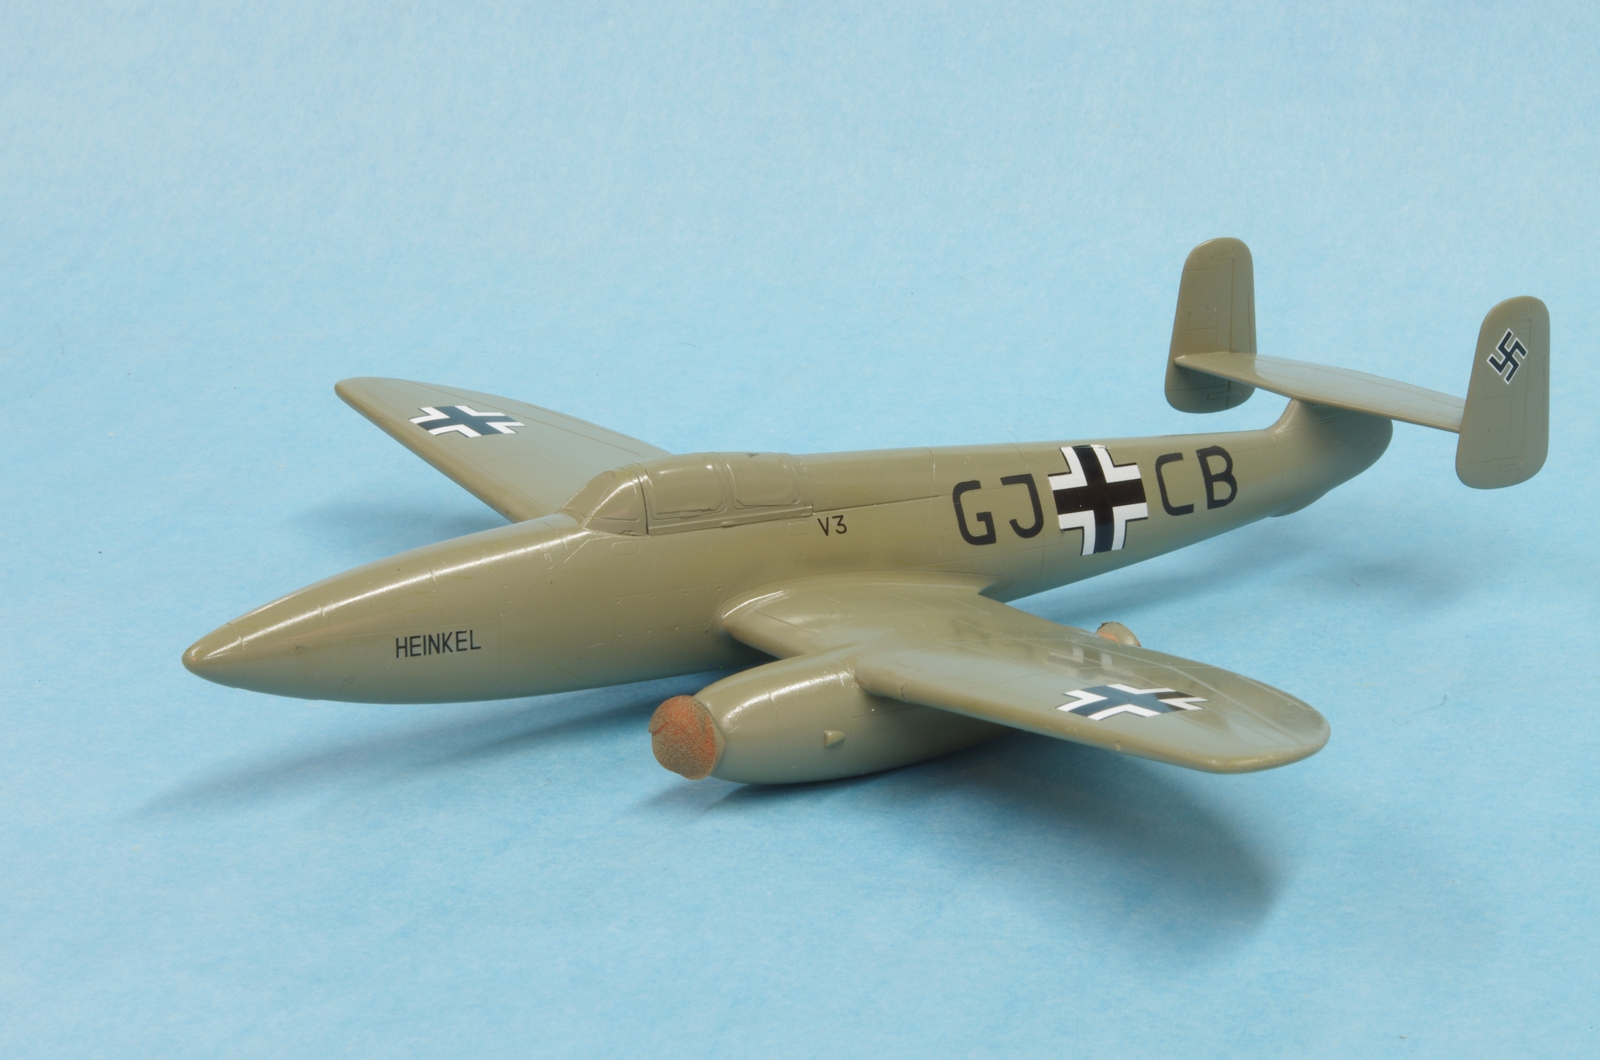
I usually am left with silvering to some extent, or else just a different sheen, when I apply decals that have large areas of clear, such as code letters. I bought a Silhouette Cameo vinyl cutter and am learning to use it. The drawing is no problem as I can import dxf files from Autocad. The difficulty for me has been learning what the cutter can do and what it can't, particularly in fine details. I am also finding out I still have more to learn about spraying white paint in very thin layers. I did the code letters on this one, and also tried to do the balkenkreuz insignia on the lower wings. The wheels definitely came off! I had used an Alclad gloss clear coat, I really like the stuff. I put down the stencils, sprayed the white (too thick, used my medium tip airbrush and just generally made a mess), put down the masks over the white and sprayed the black areas. Okay, I might save this. I started pulling up the mask and the adhesive had reacted with the Alclad clear coat. A gooey mess! I tried a couple of my adhesive removers and found one that would remove the adhesive, and it also did a fine job of removing the Alclad, leaving an undisturbed layer of Model Master enamel RLM 02 behind, with good transition to the undisturbed areas. Turns out the Alclad is an acrylic, and so is the adhesive on the Oramask 810 material I am using. They are apparently solvents for each other. I coated the model with Future and made masks only for the code letters. Smooth sailing. Used spare decals for the insignia, swastika, and the kit decal for the Heinkel logo.
![]()