SEARCH FINESCALE.COM

Enter keywords or a search phrase below:

Complete - Monogram 1/121 B-58 Hustler

5137 views
22 replies
1 rating 2 rating 3 rating 4 rating 5 rating
  • Member since
    December 2015
  • From: providence ,r.i.
Posted by templar1099 on Thursday, April 27, 2017 4:28 AM

A silk purse from a sow's ear.

"le plaisir delicieux et toujours nouveau d'une occupation inutile"

  • Member since
    December 2002
  • From: Northern California
Posted by jeaton01 on Wednesday, April 26, 2017 10:34 PM

Very nice, Stephen.  The old kits have a special charm.

John

To see build logs for my models:  http://goldeneramodel.com/mymodels/mymodels.html


  • Member since
    December 2003
  • From: 37deg 40.13' N 95deg 29.10'W
Posted by scottrc on Tuesday, April 25, 2017 4:37 PM

Turned out great.  I'm glad you did this build log.  

  • Member since
    March 2015
  • From: Streetsboro, Ohio
Posted by Toshi on Tuesday, April 25, 2017 11:44 AM

It looks great to me.  You've resurrected a beautiful build.

Toshi

On The Bench: Revell 1/48 B-25 Mitchell


Married to the most caring, loving, understanding, and beautiful wife in the world.  Mrs. Toshi


  • Member since
    June 2014
  • From: New Braunfels , Texas
Posted by Tanker - Builder on Tuesday, April 25, 2017 9:59 AM

Nice Plane ;

 Now you know why I will NOT use Alclad on Natural Metal birds . Old stick in the mud , that's me !  T.B. 

  • Member since
    July 2016
  • From: Ohio
Posted by David2080 on Tuesday, April 25, 2017 9:50 AM

I've never used alclad but since I have the italeri version of this plane, I may try. 

Heres my question: I've seen many folks recommend gloss black as a base. I am wondering if you were to do different panels in other dark shades would that show through the alclad. Such as using dark gloss blue or very dark grey. Would that show through as a realistic variation in the surface?  Just something I have been wondering. 

  • Member since
    August 2013
Posted by Jay Jay on Tuesday, April 25, 2017 8:38 AM

Nice job saving this little kit. Your putty /seam work paid off well.

  A tip from your Uncle Jay ; I have found that Alclad performs best over a gloss black undercoat, not flat.


 I'm finally retired. Now time I got, money I don't.

  • Member since
    August 2016
Posted by Keyda81 on Monday, April 24, 2017 4:25 PM

Nice!  I didn't even realize how small it was at first! 

  • Member since
    January 2015
  • From: Katy, TX
Posted by Aggieman on Monday, April 24, 2017 10:53 AM

Well just like that, it's done.  It's remarkable what a guy can get done when his girls are away for the weekend at Girl Scouts camp.

This is a very simplistic and easy-to-build kit.  Never really encountered any build issues other than the gaps and chasms.  The tires are tiny, resulting in a difficult paint job.  I ended up just using a black Sharpie to fill in the surface area of all those tiny little tires.

Ok, so the paint is mostly Alclads.  The nose is Model Master flat black, and the interior of the gear doors are Model Master yellow zinc chromate.  The gear bays are Model Master Metalizer aluminum, although I did not photograph the underside of this tiny little aircraft.

I used airframe aluminum as the primary Alclad shade, with highlights from dark aluminum, dull aluminum and magnesium rounding things out.  This is the second build that I have completed with a majority of the paint coming from Alclad airframe aluminum. I must say that I'm not completely happy with it.  I did a P-38 a few years back with this same shading, and both share this same almost dark gray look in the supposed metal.  Both were applied over a black primer.  Perhaps it's an error on my part, perhaps I didn't apply enough paint, but I'm thinking I did get enough on there to not result in such a non-metallic look.  I'm not even sure if the photos will bear this out, but to my naked eyes it really does not look like metal except under the best of lighting conditions, ie, the sun.

Maybe this is the way that particular shade of Alclad is supposed to perform.  I don't know.  I've done plenty of NMF builds where I did not note any issue with the Alclad fully covering the underlying black primer.  So I'm left kinda scratching my head on this one.

Any way, on the photographs.

All in all, this is a fun little kit of one of my favorite aircraft.  It has given me an urge to build another one, a bigger one, but man, I already have done that one in 1/48 and cannot justify the expense or the space.

So on to my next build, which I expect to return me to WWII and 1/48 in the form on Revell's PV-1 Ventura.

  • Member since
    December 2002
  • From: Northern California
Posted by jeaton01 on Saturday, April 22, 2017 4:01 PM

Looking good, Stephen.

I sent Model Maniac a link to the TB-58A instructions via PM, here they are if you or any others are interested:

http://goldeneramodel.com/kitinstructions/italeritb58a/italeritb58a.html

John

To see build logs for my models:  http://goldeneramodel.com/mymodels/mymodels.html


  • Member since
    January 2015
  • From: Tumwater, WA.
Posted by M. Brindos on Saturday, April 22, 2017 3:34 PM

Oh, that is lookin really good now.  :)

- Mike Brindos "Lost Boy"

  • Member since
    January 2015
  • From: Katy, TX
Posted by Aggieman on Saturday, April 22, 2017 3:00 PM

I am making good progress on this build.  I expected that it would fight me tooth and nail but it has actually been a fairly easy job thus far.  And I would say the hard part is now behind me, dealing with all the seams, gaps and chasms on this old bird.

Here are a couple of pictures showing the gaps and chasms that I have been presented with on this build.

The opening just astern of the pilot's hatch is there because the part was broken.  The hinging portion of the part was not in the box with the rest of the parts, so I would not have been able to implement the "working" features on this kit even if I had wanted to. Well, not without engineering some kind of work-around for that hatch.

In this next picture the gap along the starboard wing and fuselage is perhaps hidden in shadow, but it was there and it was sizable.

This next set of shots is varying stages of seam/gap/chasm clean-up.  I am using sheet styrene and Perfect Plastic Putty to handle these gaps.  I used the styrene to fill in the openings that surrounded the crew hatches before filling what was left with putty.  All the other seams disappeared (I think, but I have not yet had a chance to really inspect them) under the putty alone.

Finally, I was able to put down a good coat of black Stynlrez primer in preparation for the Alclad paint scheme that I hope to apply tomorrow or early next week.

  • Member since
    December 2002
  • From: Northern California
Posted by jeaton01 on Saturday, April 22, 2017 2:55 PM

I have the TB-58 kit, I will scan the instructions for you, MM.

John

To see build logs for my models:  http://goldeneramodel.com/mymodels/mymodels.html


  • Member since
    January 2015
  • From: Katy, TX
Posted by Aggieman on Saturday, April 22, 2017 2:37 PM

Model Maniac

You remind me of my first batch of kits bought. And as I've been keeping purchase records, I can tell that it was B-58 Hustler 1:93 by Revell some 40 years ago. I just assembled it and put on decals without painting (except the wheels) because it already had silver color. It's still with me today. I also have Italeri's TB-58 1:72 unbuilt and may not be able to build because the box, instruction sheets and decals were destroyed by termites. I can't find its instruction anywhere now.


I built Italeri's B-58 several years ago and I believe I still have the instructions. I will check and if so I can scan them for you if you'd like.  I doubt there is a tremendous amount of difference between a B-58 and a TB-58.

  • Member since
    February 2003
  • From: Thailand
Posted by Model Maniac on Saturday, April 22, 2017 12:04 AM

You remind me of my first batch of kits bought. And as I've been keeping purchase records, I can tell that it was B-58 Hustler 1:93 by Revell some 40 years ago. I just assembled it and put on decals without painting (except the wheels) because it already had silver color. It's still with me today. I also have Italeri's TB-58 1:72 unbuilt and may not be able to build because the box, instruction sheets and decals were destroyed by termites. I can't find its instruction anywhere now.

Impressive Songs:

All 10 Playlists that I created on Youtube:

http://www.youtube.com/user/ModelManiacThailand/playlists

Pan Flute Music (300 songs) (Most Popular, over 100K views):

https://www.youtube.com/playlist?list=PLUNb2zPxGTZO7alagEPsEMzgBkWt4-vKV

El Condor Pasa (Top 50) (World's most famous and my most favorite song):

http://www.youtube.com/playlist?list=PLUNb2zPxGTZOLKHbju350mLle4HkMhsb8

  • Member since
    December 2003
  • From: 37deg 40.13' N 95deg 29.10'W
Posted by scottrc on Friday, April 21, 2017 3:26 PM

As a fan of old kits, I will be watching this build.

  • Member since
    March 2015
  • From: Streetsboro, Ohio
Posted by Toshi on Friday, April 21, 2017 2:00 PM

Oh, you brought back fond memories for me with this build!  This was my first attempt at masking.  I actually used masking tape (Of which worked surprisingly) then took a can of silver and gloss red and just went for it.

I had an uncle of whom built kits.  When I showed him my B-58, he said; "You did a good job Jr.".  I was so proud of my build, I'll never forget the experience building the B-58 Hustler!  

You'll do an awesome job building this kit.  Your technique and skills are amazing.  I'll definitely be following this build!  By the way, my B-58 had the same button up to on the fueselage just right behind the cockpit.  I used to play with dropping that bomb all the time.  Thank you sir for the memories!

Toshi

On The Bench: Revell 1/48 B-25 Mitchell


Married to the most caring, loving, understanding, and beautiful wife in the world.  Mrs. Toshi


  • Member since
    January 2010
Posted by CrashTestDummy on Friday, April 21, 2017 12:44 PM

I don't remember seeing this one when I was growing up.  IIRC, I built the Lindberg version, which I currently have a copy of in my stash.  :-)

I can imagine the same challenges when I start that one.  Back then, though, I really didnt' care much about seams, or paint, for that matter. 

Gene Beaird,
Pearland, Texas

G. Beaird,

Pearland, Texas

  • Member since
    December 2002
  • From: Northern California
Posted by jeaton01 on Thursday, April 20, 2017 4:49 PM

My favorite kit from my mispent youth is the F-102A with all the ground equipment.  I remember no problems whatsoever building it as a 10 year old but some years back I tried fitting one together and it was truly awful. I know it's not mold wear, those molds were only used for two releases and then lost.  Ah, well, I still have a soft spot for it.

John

To see build logs for my models:  http://goldeneramodel.com/mymodels/mymodels.html


  • Member since
    January 2015
  • From: Tumwater, WA.
Posted by M. Brindos on Thursday, April 20, 2017 1:44 PM

Sounds like a challenging kit. Break out the plasticard and the putty, and let the fun begin. Just let it flow.  :)

- Mike Brindos "Lost Boy"

  • Member since
    January 2015
  • From: Katy, TX
Posted by Aggieman on Thursday, April 20, 2017 10:29 AM

M. Brindos

In your hands, this will be gold.  :)


It may be more like fool's gold. 

Just returned from a morning at the bench cleaning up the parts, doing some very basic interior painting, and beginning to close up the fuselage.  Fit is not great.  I have a very noticable seam running along the underside of the bomb pod that has so far resisted my efforts at making it disappear.  Then the crew pod hatches are, in a word, atrocious. There are huge gaps in front and behind each.  None of this surprises me, given this kit's age, plus the toy-like feature that this one includes, a droppable bomb pod with the push of a "hidden" button along the upper fuselage which is also going to be a PITA to flush into the fuselage.

Well, it's not called kit assembly.  It's called modeling.  I may need more putty and a whole lot more patience for this one.

  • Member since
    January 2015
  • From: Tumwater, WA.
Posted by M. Brindos on Tuesday, April 18, 2017 9:09 PM

In your hands, this will be gold.  :)

- Mike Brindos "Lost Boy"

  • Member since
    January 2015
  • From: Katy, TX
Complete - Monogram 1/121 B-58 Hustler
Posted by Aggieman on Tuesday, April 18, 2017 7:24 PM

Howdy!

I spent a lot of the beginning of the year wearing myself out on a 5-kit build, and decided I needed to recharge my batteries.  In the last week I noticed I was perusing pictures of various aircraft, of which I had all in my stash, even though I knew that my next build is going to be a Hustler.

This is one of my all-time favorite aircraft.  It just looks fast sitting perfectly still.

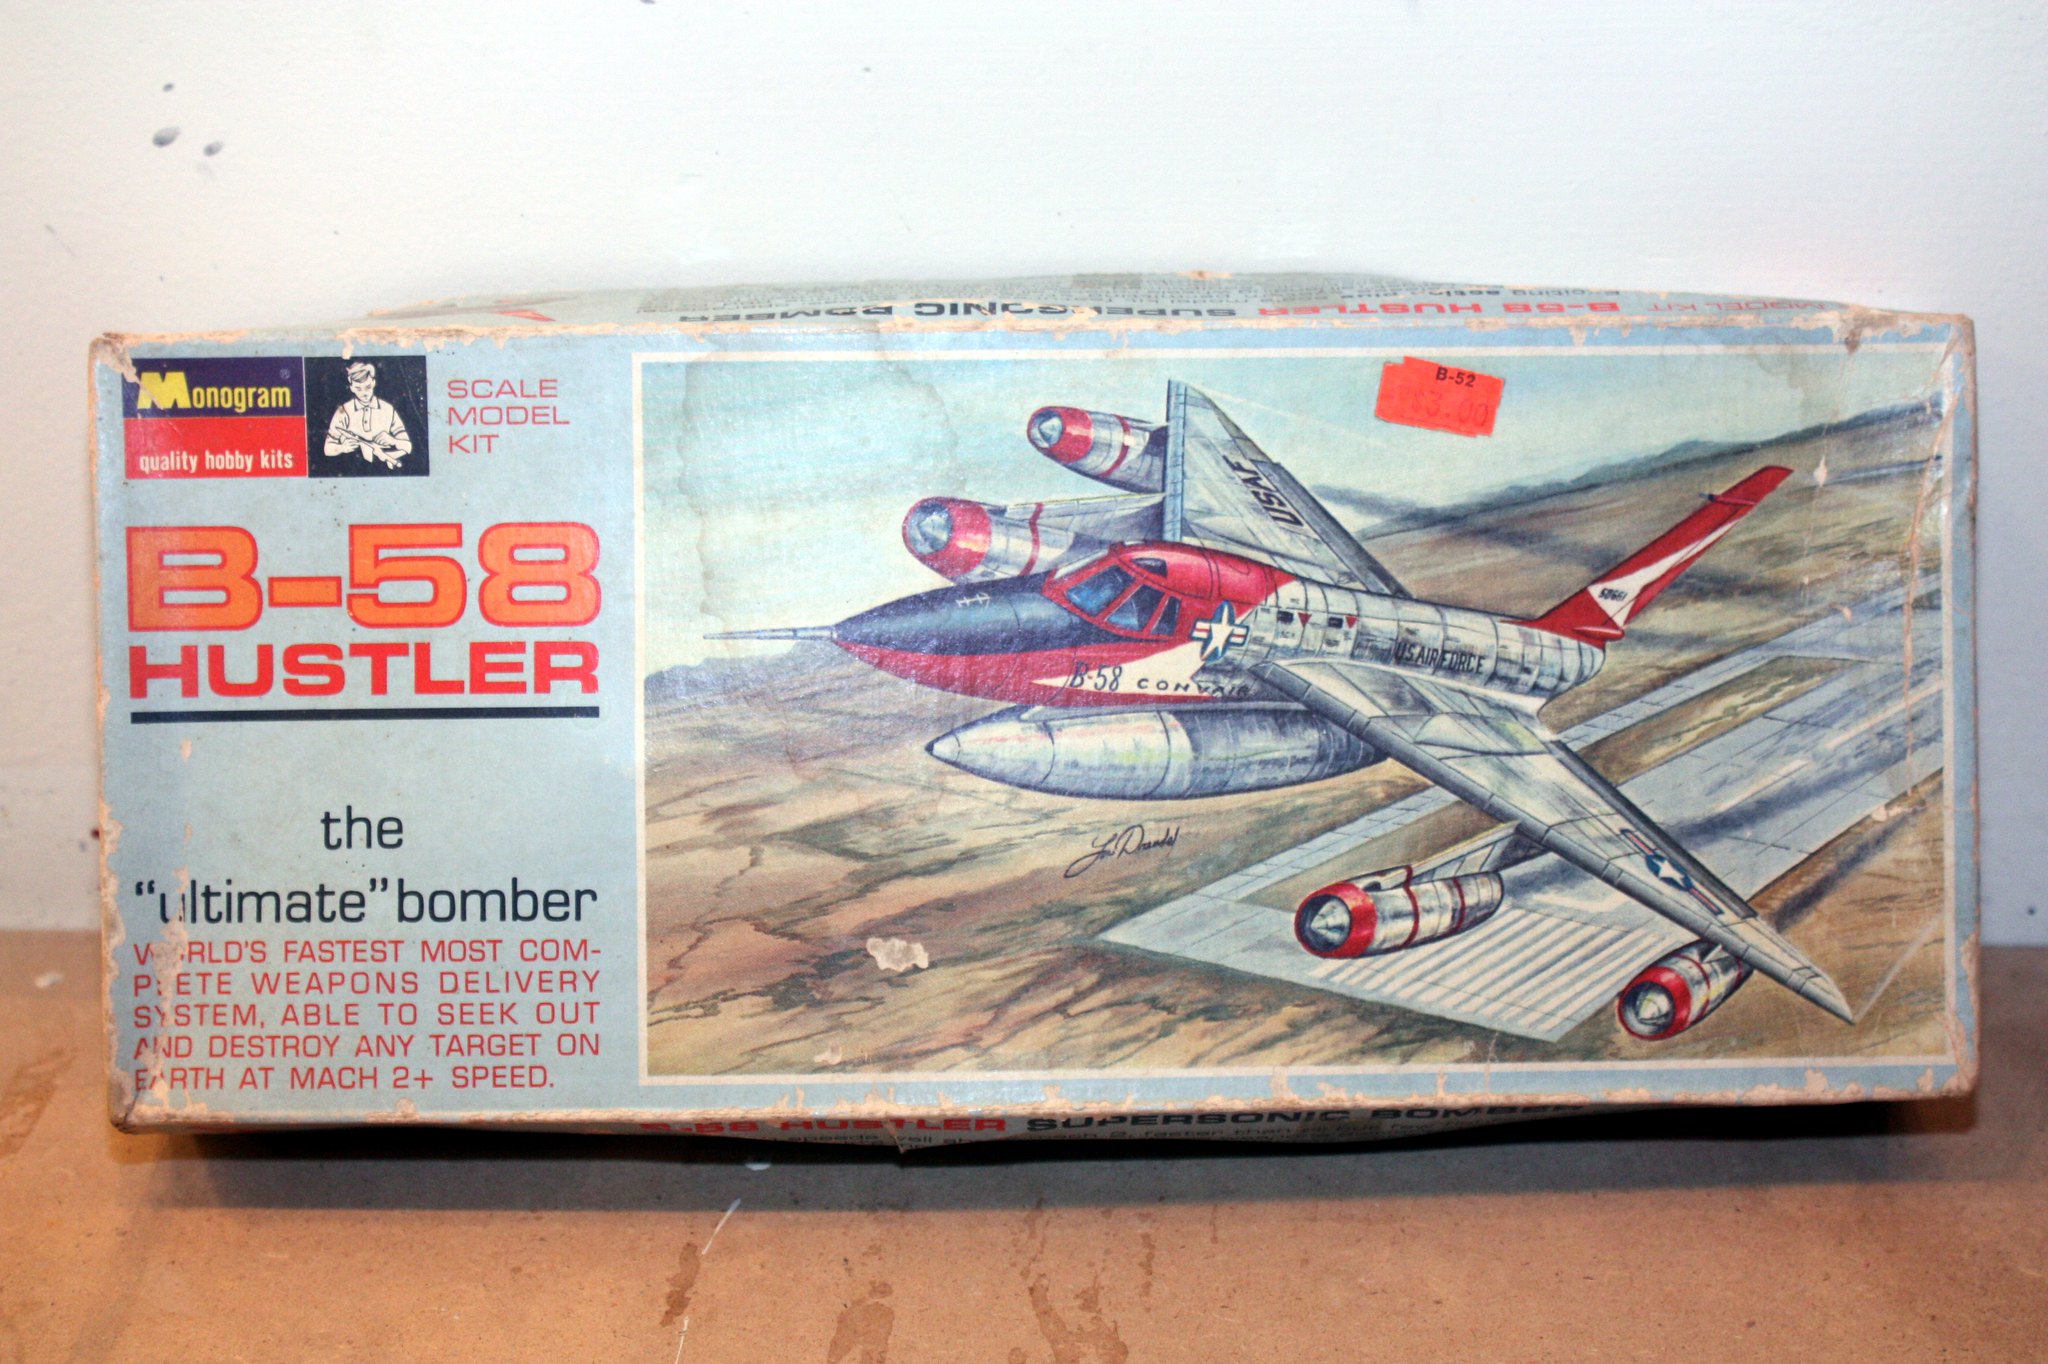
The kit I have chosen is an old one - Monogram's box-scale B-58 first kitted in roughly 1957, although the particular kit I have dates to the year of my birth, 1967, and is from their "blue box" line.  Of note, this will be the second time in my life that I have built this kit, having done so once before many, many years ago when I was probably about 5 years old.  I have since build the Italeri 1/72 Hustler, covering that one with household foil, and Monogram's 1/48 Hustler.

A few years ago I found myself waxing nostalgic over those blue box kits, and so a few trips to eBay and voila! I have an entire stash of these kits.  Some came still wrapped in their original celophane wrapping, others came in far worse condition.  Unfortunately, this Hustler is of the latter variety.  The box is in bad shape.  The kit has been started.  And the kit is missing the fuel truck that came with it.  I can live with out that as it was really more like a box with crude wheels.

So here is the box in all its shelf-worn glory.

The instructions are classic Monogram style, with photographs of someone assembling the parts and the exploded diagram of all the parts.

Finally, the decal sheet.  It is in terrible condition.  Many of the individual decals are split in multiple places, although I don't think it is as yellowed as I might otherwise have expected it to be.  I will not be using this thing, as I imagine that I could spray it with decal solution or whatever that stuff is and the decals would still disintegrate if I even approached them with a cup of water.  I found some decals that, while not to scale, are close enough for government work and will suffice.

The parts are in good shape.  Some are still attached to the trees.  The fuselage has two spots harkening back to the real early days of plastic models - ridge lines indicating where to apply decals.  That used to be a standard feature - there would be an unmistakable area where you were to apply the national insignia, for instance.  Thankfully most of that is not present here, but there are two triangular areas, on the nose and on the rudder, where the Hustler typically had some painted area.  I cannot use the kit decals for this, and could not locate any to scale that I could purchase.  So I will likely just scrape those ridges off and clean it up as best I can.

I will be painting this to match a Stan Stokes print I have of this bird in my display room. In fact, that area of my room has three such Stokes prints (Mosquito and F-117 in addition to the Hustler), and I already have Tamiya's F-117 and Airfix's 1/24 Mosquito hanging alongside those prints, so that was the motivation for pulling this ancient kit out of the stash, to fill in that open area in my display room.

I don't have any idea how long I will take to complete this.  It should not be a challenging build in any form or fashion.  Parts count is extremely small, and the paint scheme is NM with some variation on metallic shades and a black anti-glare panel.

JOIN OUR COMMUNITY!

Our community is FREE to join. To participate you must either login or register for an account.

SEARCH FORUMS
FREE NEWSLETTER
By signing up you may also receive reader surveys and occasional special offers. We do not sell, rent or trade our email lists. View our Privacy Policy.