SEARCH FINESCALE.COM

Enter keywords or a search phrase below:

WIP: Part 2, UPDATE 7-18-17 (Nose Weights) Building the Revell 1/48 scale B-29

6128 views
33 replies
1 rating 2 rating 3 rating 4 rating 5 rating
  • Member since
    August 2016
Posted by Keyda81 on Wednesday, May 24, 2017 6:44 PM

Beautiful job!  That is going to be one big bird when finished! 

  • Member since
    March 2015
  • From: Close to Chicago
Posted by JohnnyK on Wednesday, May 24, 2017 2:01 PM

I finished both horizontal stabilizers before I started on the main wings.


Above is a photo of the 1:1 plane and a photo of the wing of the Enola Gay.  Note that a portion of the main wing is painted an aluminum color. I contacted Brad Pilgram of the Commerative Air Force regarding the painting of the B-29 wings. He was nice enough to reply with the fillowing, "The part you are talking about was a different alloy with aluminum lacquer on it. Pretty much the rest of the airplane is bare metal. "    I will try to duplicate the look of the actural airplane's wing.

First I added rivets to the wing.


Then I masked the portions of the wing that will not be painted.

I painted the wing with Testors Metallic ALuminum paint and then sealed the paint with Testors Metallic Sealer.


Then the real work began. Bare Metal Foil was added to the wing. Most of the foil is Matt Aluminum, but I also used Bright Chrome on a few panels for visual contrast. The top of this wing is almost finised. Note the contrast with the unfinished wing. The quarter was added to the photo so that you can have some idea of the size of the wings. Time to start on the underside of the wing.


Your comments and questions are always welcome.

  • Member since
    January 2015
Posted by PFJN on Friday, May 12, 2017 6:59 PM

Wow,

That looks great.

Pat


1st Group BuildSP

  • Member since
    January 2015
  • From: Tumwater, WA.
Posted by M. Brindos on Friday, May 12, 2017 4:38 PM

WOW!

- Mike Brindos "Lost Boy"

  • Member since
    March 2015
  • From: Close to Chicago
WIP: Part 2, UPDATE 7-18-17 (Nose Weights) Building the Revell 1/48 scale B-29
Posted by JohnnyK on Friday, May 12, 2017 10:16 AM

My original post was getting too long, so I decided to start a new Post. Part One can be found here http://cs.finescale.com/fsm/modeling_subjects/f/2/t/174977.aspx


Okay, on with the build starting with the tail stabilizer wings Smile

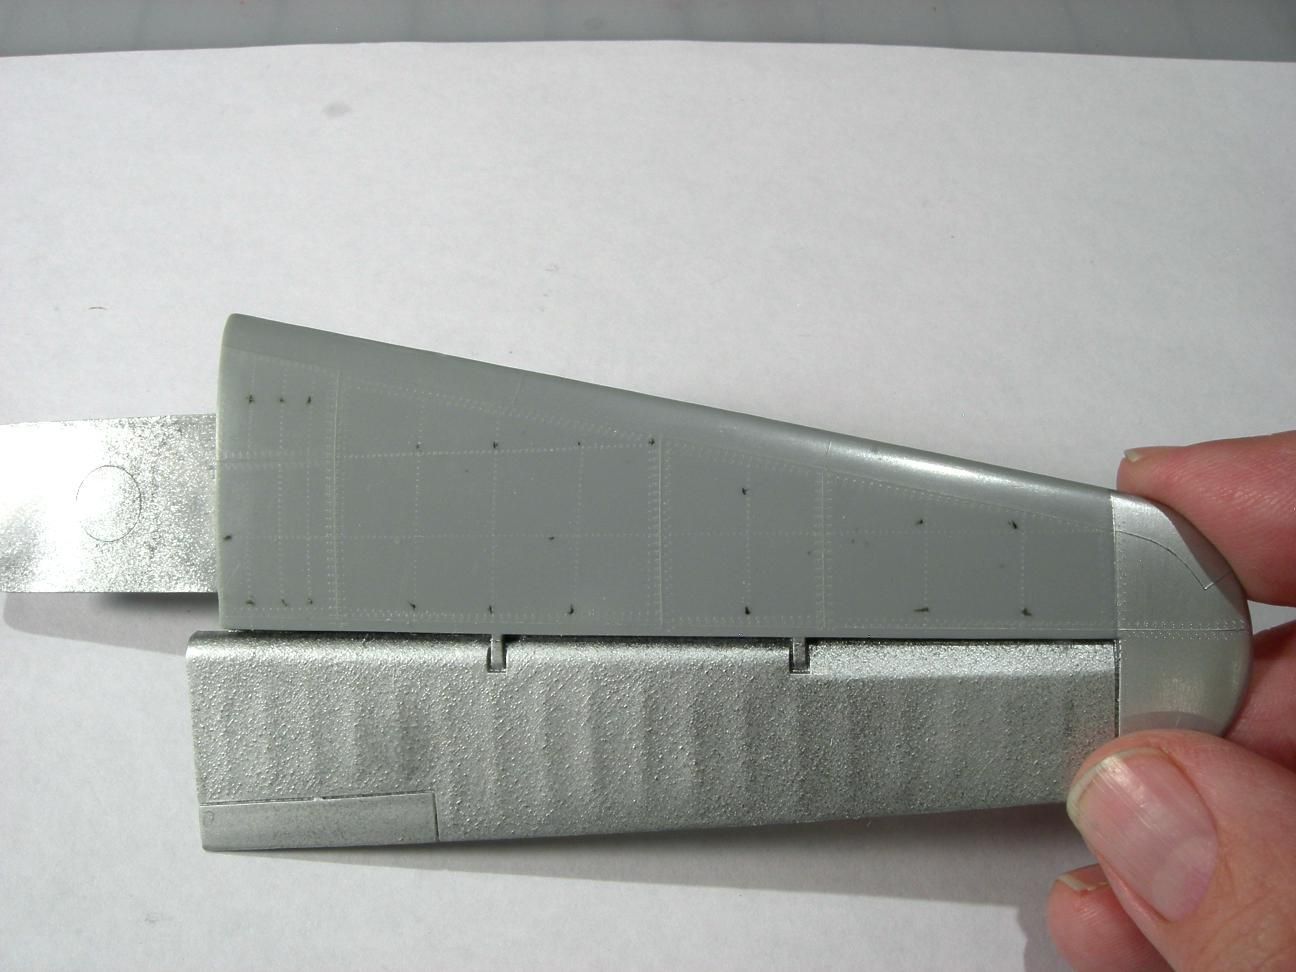
On the real aircraft the elevator of the rear stabilizer wing was covered in fabric. The elevator on the Revell kit has a textured finish. I painted the elevator with Testors' Metallic Aluminum and Testors' Metallic Sealer. The tip of the wing was also painted with Testors' Metallic Aluminum. After the paint dried I burnisihed it with a paper blending stick then painted it with Testors' Metallic Sealer. The kit's wings and body do not have rivets so I decided to add rivets. Usually I add rivets after I apply the Bare Metal Foil, but this time I tried something different. I added the rivets before I applied the foil. That way if I screwed up with the rivets I could correct the mistake without having to remove the foil. The black tick marks help me keep the rivets straight.

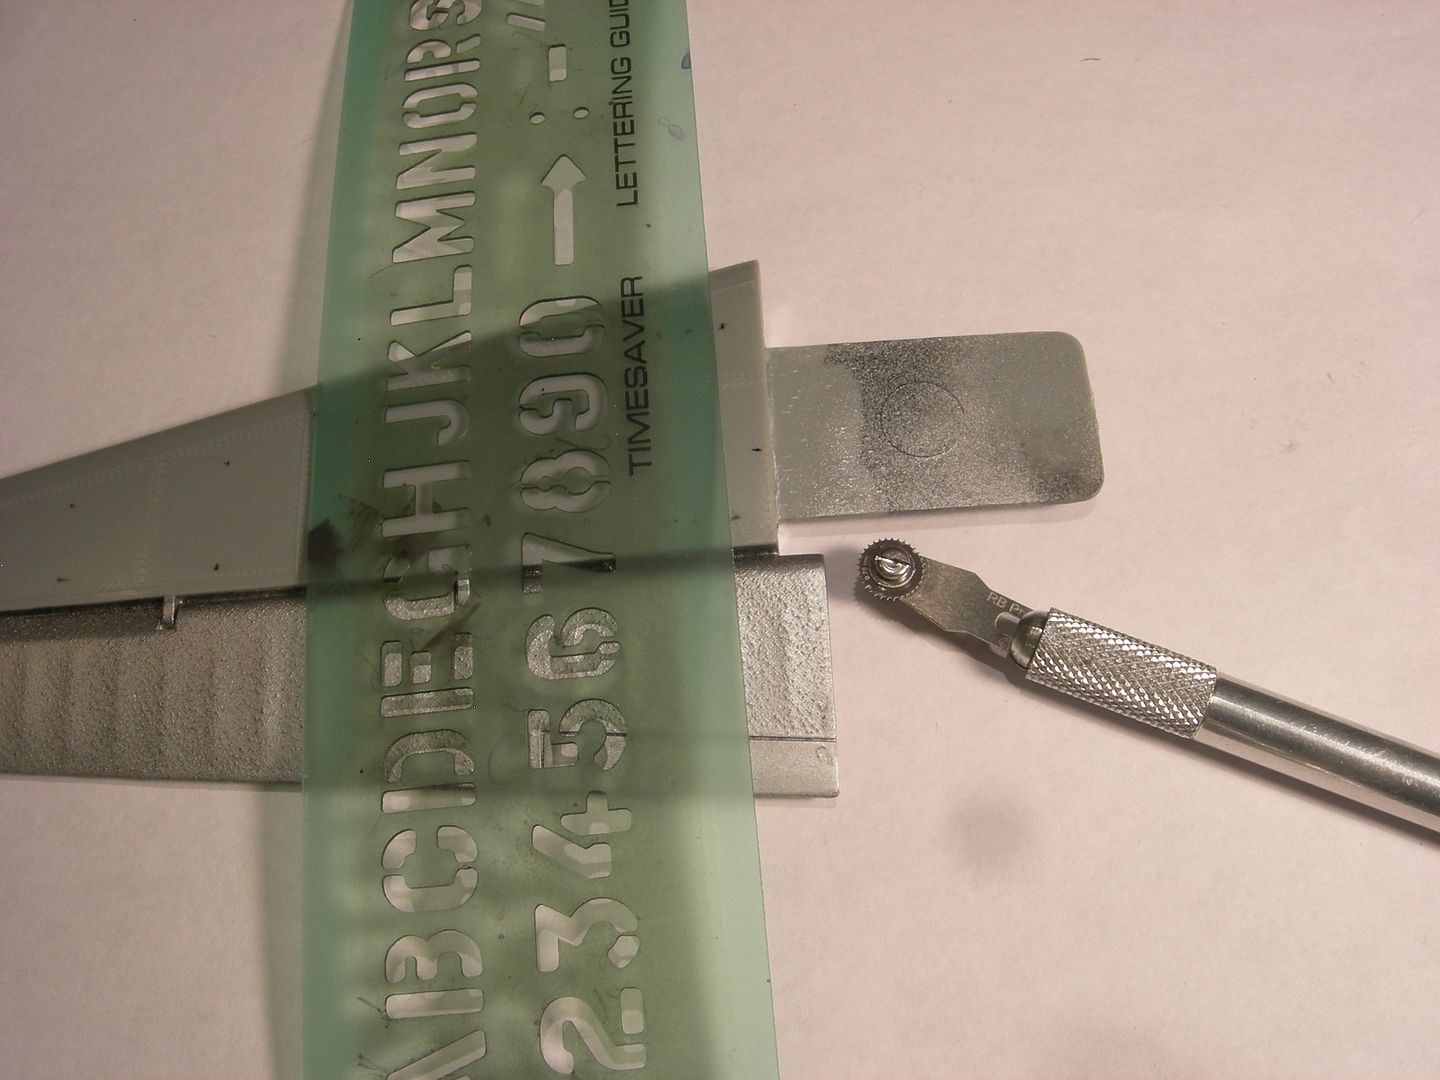
I ran my rivet tool along my high school lettering guide to make sure that the rivets stay in a straight line.

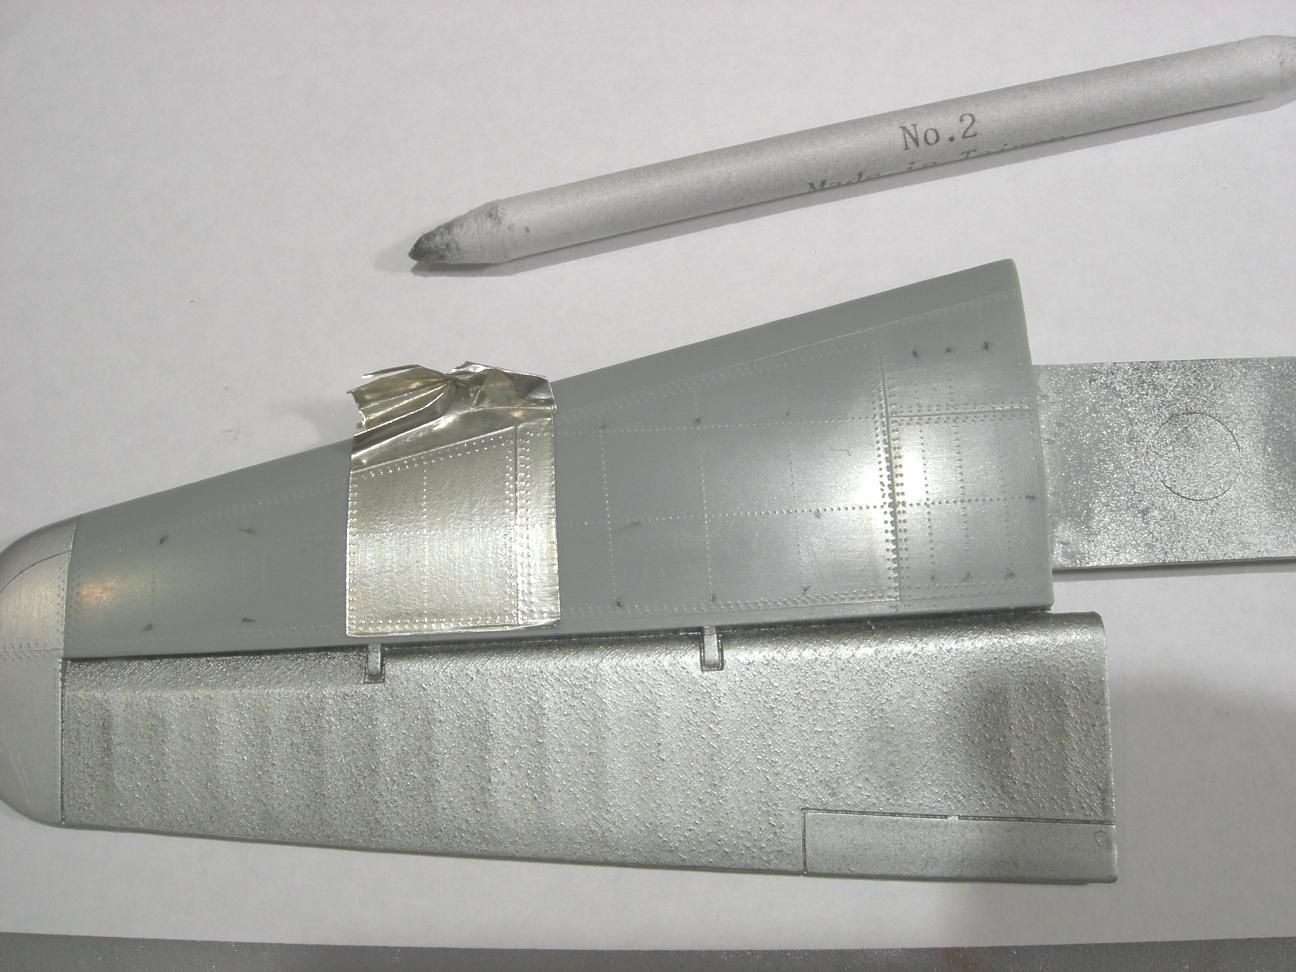
After the rivets were finished I started applying the Bare Metal Foil panel by panel. After the foil is applied it is burnished with a paper blending stick to remove wrinkles. The paper blending stick is very soft so no matter how hard it is pressed against the foil it will not tear the foil. Notice how the rivets telegraph through the foil. The Bare Metal Foil is way to shiny so I sprayed the entire sheet with "Simple Green" which knocks down the shine.

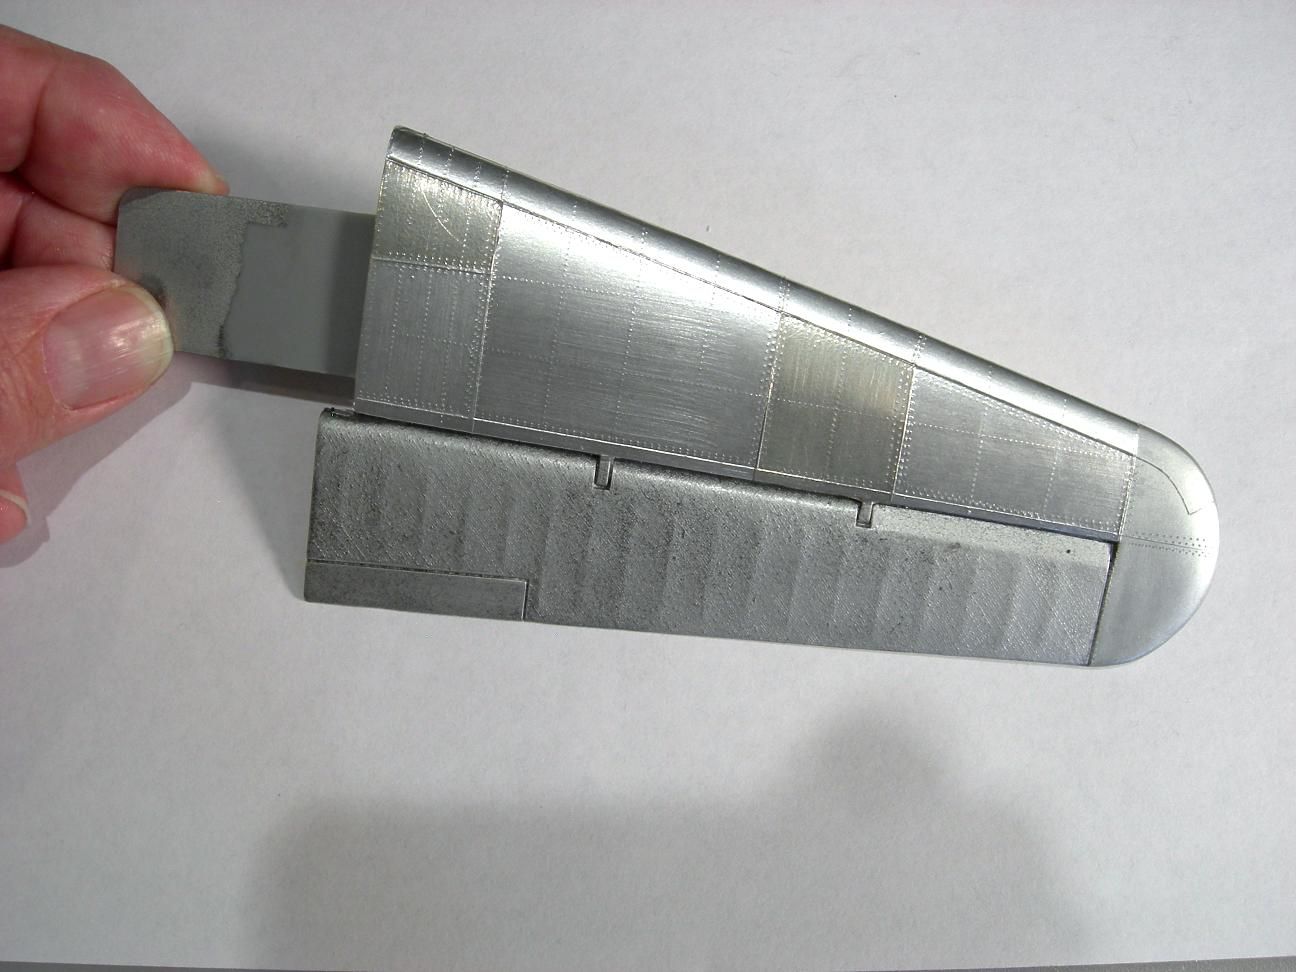
This is the final result. I used two types of metal foil, Matt Aluminum Plate and Bright Chrome. I used the Bright Chrome on two panels to add visual interest. I also ran 0000 steel wool across each panel to replicate the natural grain of aluminum plates. The finished wing is not as shiny and bright as indicated in the photo. I used a bright light to enhance the grain in the metal foil.


Your comments and questions are always welcome.

JOIN OUR COMMUNITY!

Our community is FREE to join. To participate you must either login or register for an account.

SEARCH FORUMS
FREE NEWSLETTER
By signing up you may also receive reader surveys and occasional special offers. We do not sell, rent or trade our email lists. View our Privacy Policy.