SEARCH FINESCALE.COM

Enter keywords or a search phrase below:

Second model: 1/48 Revellogram B-25J

3828 views
50 replies
1 rating 2 rating 3 rating 4 rating 5 rating
  • Member since
    August 2016
Posted by Keyda81 on Tuesday, June 13, 2017 8:31 PM

Nice job!  Take any oppurtunity you can get to take pics of actual aircraft any chance you get!  You'd be surprised the more models you do, you might find yourself getting interested in something you didn't think you would.  I know I have!  Some planes can be so ugly they are beautiful, lol.  I'm not a fan of the B-2 at all though, lol. 

  • Member since
    November 2013
Posted by bstarr3 on Tuesday, June 13, 2017 3:40 PM

Thanks for the kind words.  The "Wings of Freedom Tour" is in my town today so I went by and took about 100 up close detail pics of a B17F, B24J and B25J.  After I got home, I dirtied up the undersides more.  That plane was filthy after flying yesterday.  You know what they say: when it stops leaking oil, you're out of oil!


I want to do a super detailed 1/48 or 1/32 B17 at some point, so I took a ton of pics of the B17 especially.  Was able to walk through the whole ship except tail turret so got lots of detail shots of cockpit, bombardier's office, radios, as well as exterior details.  Will be happy to share if anybody needs them.  Fewer pics, though still a lot, of the 24.  That's such an ugly boat!  I know they were important planes but I can't get interested in modelling that one. 

  • Member since
    August 2013
Posted by Jay Jay on Tuesday, June 13, 2017 9:04 AM

I am extreemly impressed with this beiing only your second model. You Sir have some mad skills and I'm looking forward to your next W.I.P.


 I'm finally retired. Now time I got, money I don't.

  • Member since
    November 2003
  • From: State of Mississippi. State motto: Virtute et armis (By valor and arms)
Posted by mississippivol on Monday, June 12, 2017 6:35 PM
Hey! That turned out great! You'll like that Tbolt kit you're getting.
  • Member since
    November 2013
Posted by bstarr3 on Monday, June 12, 2017 5:56 PM

Chemteacher
Great job. I have this kit in the ready locker. Due to limited display area, most of my models get hung from the ceiling of my work area. Any insight on how much of an issue it would be to build this kit with the gear up?
 

Not sure since I never dry-fit it that way, but it seems that you could button it up pretty easily. 

  • Member since
    June 2017
Posted by Chemteacher on Monday, June 12, 2017 5:23 PM
Great job. I have this kit in the ready locker. Due to limited display area, most of my models get hung from the ceiling of my work area. Any insight on how much of an issue it would be to build this kit with the gear up?

On the bench: Revell-USS Arizona; Airfix P-51D in 1/72

  • Member since
    November 2013
Posted by bstarr3 on Monday, June 12, 2017 3:24 PM

And finally, finished photos:

Nose art

Topside detailing.  Used a pin wash of raw umber oils, followed by dullcoat and chalk pastels for more tonal variation, exhaust staining, and dusty footprints on the wings.  Finally a little drybrushing with silver

Underside.  Wasn't thrilled with how light the exhaust staining came out on the grey.

A little gunsmoke:

Signal lights:


As for the nose weights, I applied 5 or 6 split lead fishing sinkers in the bombardiers tunnel and between the cockpit bulkhead and instrument panel.  Still, though: 

This has been  a really fun kit to get me back into the hobby and practice some new techniques.  Thanks everyone for your encouragement and tips along the way.  I've got a Tamiya 1/48 Razorback kit arriving tomorrow, so expect another thread soon!  

  • Member since
    March 2015
  • From: Close to Chicago
Posted by JohnnyK on Monday, June 12, 2017 10:59 AM

This is the first time that I have looked at this post. You are doing a great job. That will be a nice looking aircraft.

I hate to ask this question, but did you add any weight to the front of the plane to keep it from sitting on its tail. Maybe you did and I missed it. I have not built this model, maybe it does not need nose weights?

Your comments and questions are always welcome.

  • Member since
    November 2013
Posted by bstarr3 on Saturday, June 10, 2017 9:59 PM

getting there! Assembled except for fiddly bits, final paint down and gloss coat on for decals

  • Member since
    June 2014
Posted by BrandonK on Wednesday, June 7, 2017 9:14 AM

I had the same issue with the nose glass on mine and I too moved the guns to make the glass line up. Your work and paint looks very good. I may have to do another one of these.

BK

On the bench:

A lot !! And I mean A LOT!!

2024 Kits on deck / in process / completed   

                         14 / 5 / 2  

                              Tongue Tied

  • Member since
    January 2015
  • From: Tumwater, WA.
Posted by M. Brindos on Tuesday, June 6, 2017 3:34 PM

Well that explains that.

Sorry to hear about the broken MG barrels though. That's never fun. I once cut one in half when not paying attention to where my clipper blades were. I fixed it, but it was a big swear moment regardless. Lol

- Mike Brindos "Lost Boy"

  • Member since
    November 2013
Posted by bstarr3 on Tuesday, June 6, 2017 3:30 PM

it wasn't that bad. I removed all the guns (easy because I used CA), taped on the glass and shimmied the guns through the holes. Then reapplied CA.

Funny story, though... Trying to take the glass back off to mask for painting, I completely shattered all four barrels. I switched out the other nose with the two gun barrels and moved on with my life. 

  • Member since
    January 2015
  • From: Tumwater, WA.
Posted by M. Brindos on Monday, June 5, 2017 10:28 PM

I think it's looking good!  How much rearranging did you have to do with those guns to get the nose to line up? I haven't heard that mentioned before.

- Mike Brindos "Lost Boy"

  • Member since
    November 2013
Posted by bstarr3 on Monday, June 5, 2017 2:50 PM

Fixed the glass nose issue in the expected fashion - redoing the placement of all the guns. Overall, the nose of the plane is the only major fit problem I've come into with this kit, but it's been kind of a PITA. Got on to some painting. Trying my hand at black basing. Definitely can improve my technique on this. The wing is finished with the initial color - going to add some highlights. Don't know why it's showing up so light on this picture. It's Olive drab. Fuselage is pictured after the "marbling" layer. Im going to put a couple things blending coats of base Olive drab over this before adding highlights.

  • Member since
    November 2013
Posted by bstarr3 on Wednesday, May 31, 2017 12:52 PM

I read elsewhere about using Liquitex flow enhancer to make MM acrylics easier to work with and reduce tip dry.  I went to Michael's (my only local source for hobby and art supplies) and they were out of that, but I bought some Golden retarder and added 2 drops to a half-full cup on my Patriot.  This did improve the tip dry issue significantly.  I still had to brush it clean, but not as frequently.  

Goodies from my good friends the Sprue Brothers:

Had been waiting on the touch n flow before assembling the fuselage halves.  My first time using this tool and my first time using this welding technique.  Decent results on top.  A little sloppy on the belly. 

That largest seam by the bomb bay is filled with some stretched sprue:

Did some more work on the wings.  I think the tonal variation shows up better now.  I have to remember not to make it too subtle because weathering and dullcoat will reduce the effect:

Detailing ammo belts for the nose guns:

Big problem with the glass nose.  With the guns fitted through the holes, it doesn't come anywhere close to matching up at the bottom.  Any advice on dealing with this?  

  • Member since
    September 2016
  • From: Albany, New York
Posted by ManCityFan on Wednesday, May 31, 2017 10:04 AM
I am far from an expert in airbrushing, but I recently purchased a Badger Patriot, and used some MM acrylic just this past weekend. I did get some dry tip, but not enough to keep me from being able to keep painting. I use Golden Airbrush Medium (GAM) as a thinner, and there is some (not much) retardant effect when using it. I have used other methods for thinning MM acrylics, including MM acrylic thinner, and have had better results with the GAM. Read about GAM online somewhere, and it is essentially a clear acrylic that doesn't stress the paint molecules the way some other thinners can. This made sense to me, so I tried it, and have been pretty pleased with the results. I am still a newbie with an airbrush, but am loving the Patriot. If others have tried GAM, I would love to hear your results.

Dwayne or Dman or just D.  All comments are welcome on my builds. 

  • Member since
    November 2013
Posted by bstarr3 on Tuesday, May 30, 2017 6:11 PM

Model Masters was the best I was aware of the last time I was modeling, oh, about 25 years ago, so when I bought my first kit off scalehobbyist, I got some of those.  I've since realized that they are widely disliked (the acrylic version at least).  I've read some great reviews of the Mission Models paint line.  I've been in touch with their CEO, who says a pretty full line of WWII and modern aircraft colors are coming out this week, with about thirty more to follow in July.  Once those are available from Mega Hobby (the only one of the big online retailers who carries those paints, that I've seen), I'm going to get some USN colors and do a navy bird for my next project.  Dauntless or Helldiver maybe. Or a Hellcat.  Or Corsair.  Or I could do another of these kits as a PBJ-1....

  • Member since
    January 2017
Posted by damouav on Tuesday, May 30, 2017 6:06 PM

Very nice work your doing here.

Cant help with the dry tip issue, but as a general check pherhaps try these.

1. Air Pressure - As I found over time, no one pressure fits all sprayed media

2. Cleaning - After every session I shoot laquer thinners through my AB. I strip and oil/clean all parts every 1-2 weeks depending on use.

3. Paint - I manily use Tamiya (coming from my childhood days) which I only thin with laquer thinners and shoots great. Mr Hobby is the same regement as Tamiya, MRP straight out of the Jar.

Keep up the good work.

In Progress
1/48 Tamiya P47-D Bubbletop
1/48 Hobby Boss TBF-1C Avenger (on hold)
Pending
1/48 Roden S.E.5a
1/48 Airfix Walrus
  • Member since
    December 2010
  • From: Salem, Oregon
Posted by 1943Mike on Tuesday, May 30, 2017 5:55 PM

I think your progress is fine and I commend you for experimenting. I'll have to start trying to do some weathering in the near future.

As far as MM acrylics are concerned, I gave up on them with my Badger 105 Patriot. Not necessarily because I couldn't have found the magic combination of thinner to paint along with, perhaps better techniques while airbrushing - I just tried Tamiya and have not looked back. That, of course, is exactly what you were NOT looking for in your query so I hope someone on FineScale can help. Any suggestions you get I'll also be reading.

Mike

"Le temps est un grand maître, mais malheureusement, il tue tous ses élèves."

Hector Berlioz

  • Member since
    November 2013
Posted by bstarr3 on Tuesday, May 30, 2017 5:22 PM

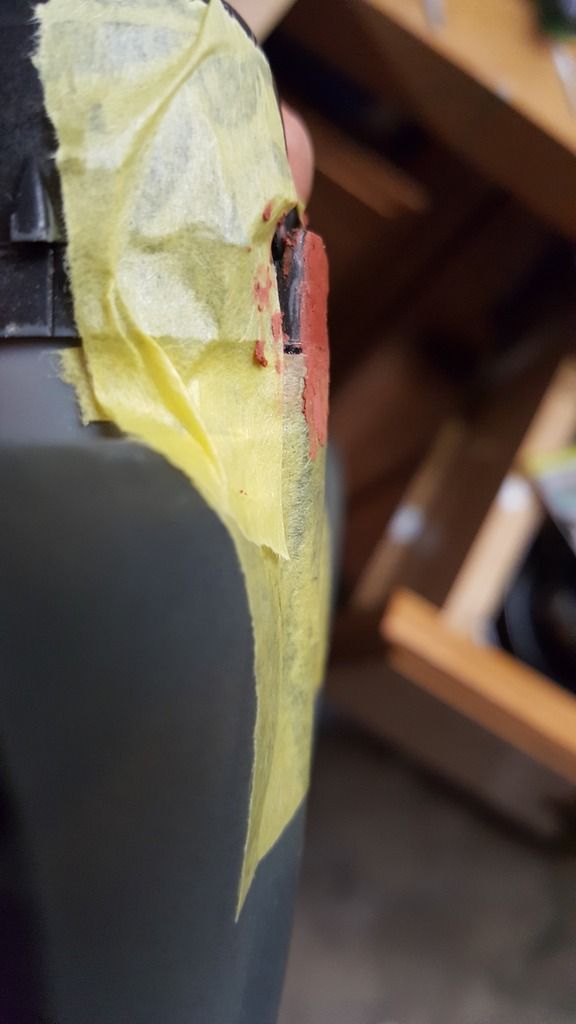
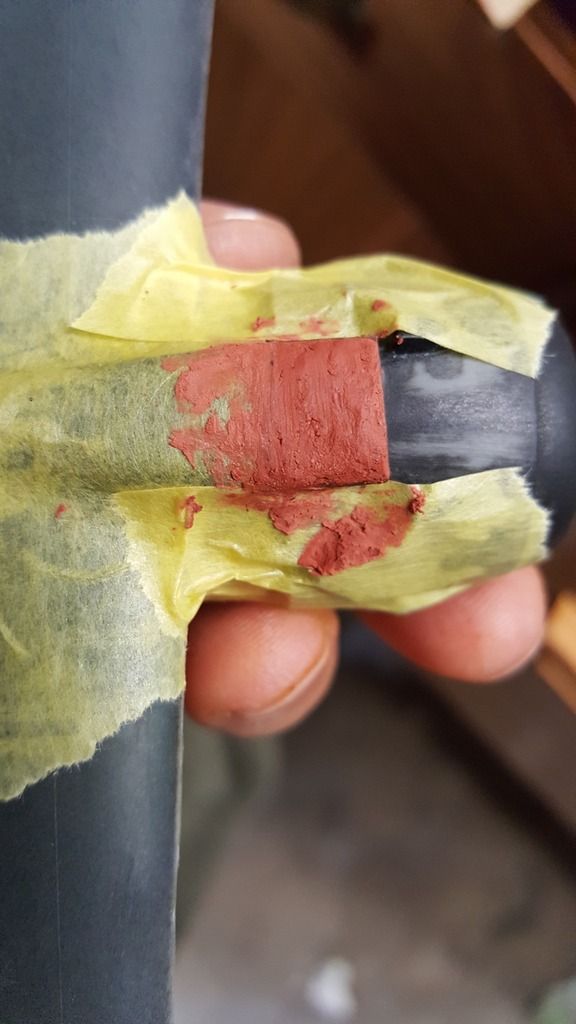
A little more progress.  In spite of my best efforts, I ended up with a pretty big step on the air intake on my port wing.  I built it up with Bondo applied with a popsicle stick, then smoothed out after a few minutes of drying with a q-tip dipped in lacquer thinner.  This was then sanded smooth after drying for 24hrs.
 

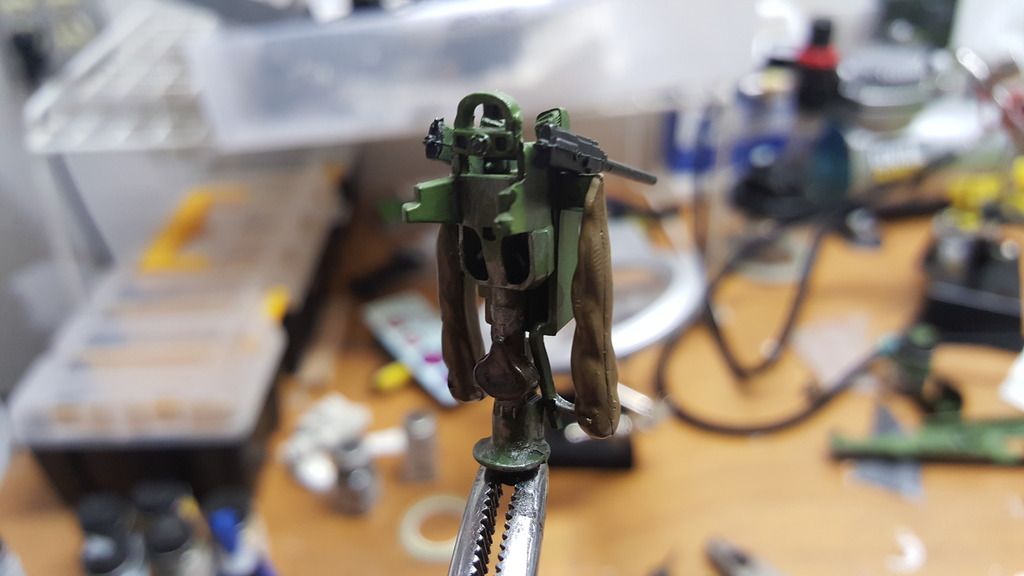
Detailed up the dorsal turret:
And last night, finally got grey on the underside of the wings.  I made a large batch of neutral grey with 2:1 flat white:flat black, and then made two highlight shades in 5:2 and 3:1 ratios.  I convinced myself that the tonal variation showed up in person, although it doesn't look like much in this photo.
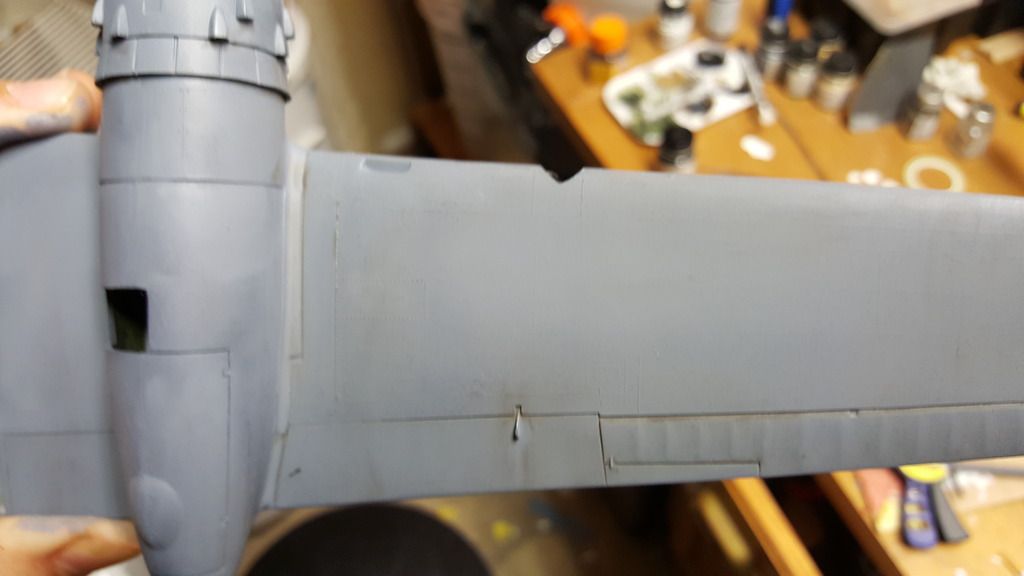
As you can sort of see in the above photo, I tried some basic weathering.  I used acrylic washes, dry pastels, and wet pastels.  I wasn't thrilled with any of the results and washed most of it off.  There's a little shadow left around the aileron.  You may also notice that I achieved a very nice seam free join somewhere that there is not supposed to be one: the gear bay door! After notice that mistake, I tried rescribing it a little.  It's not great but no one will see it on the undersurface of the wing. 


As a side note, I'm having a huge problem with tip dry on my Badger 105 using model master acrylics thinned with windex.  I've tried brushes and qtips with a variety of solvents (windex, water, alcohol, lacquer thinner) but it seems to take a good thirty seconds of cleanign for every thirty seconds of spraying.  Other than trying another paint, which I plan to do with my next model, any tips?

  • Member since
    January 2017
  • From: Colorado Springs
Posted by mawright20 on Sunday, May 28, 2017 5:45 PM
be careful with the gear! the front is especially fragile.
  • Member since
    January 2017
  • From: Colorado Springs
Posted by mawright20 on Sunday, May 28, 2017 5:43 PM
I have built three of these kits. For some reason as you can see from your pics, the bombs don't seem to fit well into the bay. I've made the move to paint a yellow base on the bombs, thin tape around the front end and overpaint with OD to finish the colors.
  • Member since
    November 2013
Posted by bstarr3 on Sunday, May 28, 2017 11:52 AM

Update: the caulk has shrunk down a little more after a couple days, so I would recommend two applications for any use, knowing that it's going to receed somewhat.  

Bomb racks and sloppily-painted bombs installed:

Engines painted and detailed, installed with cowlings onto engine nacelles:

With the wings completed, I think I'm going to try spraying the OD/NG on these. My only pause is that I'm going to have to mix the grey, since I don't have any, and I'm not sure I can make it an exact match when I mix the rest for the fuselage.  

This little post was broken out of the box. Replaced it with stretched sprue.  Hopefully it'll be strong:

Bought quick boost barrells.  Unfortunately, the set I got's for the B-25B, which means there are only seven barrels instead of the 19 on this bird.  I'm going to use them on the nose mounted guns and the waist guns.  

Also sadly found the mask set I ordered was for the -B model, meaning it's not very useful for the canopies on my J.  I'm going to experiment with a couple of things, since fortunately this kit comes with two complete sets of clear.  Has anybody ever tried painting over the whole canopy and picking the paint off of the clear glass with a toothpick?  As tedious as applying a pre-cut masking set seems, using tape and cutting each window out individually seems even more so.  

  • Member since
    August 2016
Posted by Keyda81 on Thursday, May 25, 2017 8:19 PM

I may have to give the caulk thing a try myself!  I've been using perfect plastic putty, and I really love it.  But if I run out I know what to try!

Nice looking build so far!  I'll be watching.

  • Member since
    January 2015
  • From: Tumwater, WA.
Posted by M. Brindos on Thursday, May 25, 2017 8:06 PM

The gap filling latex painter's caulk? I can't imagine machines guns are all that troublesome. Lol!

- Mike Brindos "Lost Boy"

  • Member since
    January 2017
  • From: Colorado Springs
Posted by mawright20 on Thursday, May 25, 2017 7:36 PM
You are the Man! You just saved some of my biggest headaches...
  • Member since
    January 2015
  • From: Tumwater, WA.
Posted by M. Brindos on Thursday, May 25, 2017 6:44 PM

Just a standard pencil works fine. The softer art ones are easier to grind down if you want to brush it on though. Hit the highlights or, as I do, rub down the entire thing. You won't be able to get all of the crevices, but you don't needs to. "Try it, you'll like it" lol. I do this on all gun barrels. Its just the most realistic finish for them IMHO.

You can even black wash over it for filling in the deep areas!

- Mike Brindos "Lost Boy"

  • Member since
    November 2013
Posted by bstarr3 on Thursday, May 25, 2017 6:36 PM
Cool. So just a regular pencil? Or one of those fancy ones from the art store? Am I hitting just the high points, like drybrushing, or giving it an all-over coat of graphite?
  • Member since
    January 2015
  • From: Tumwater, WA.
Posted by M. Brindos on Thursday, May 25, 2017 6:17 PM

Yeah! Paint them flat black and rub them down with a graphite pencil. If you can find an old lead pencil theeffect is not as stark, but wil look the same after a clear coat.

Easy, effective, and looks perfectly like the real finish.

- Mike Brindos "Lost Boy"

JOIN OUR COMMUNITY!

Our community is FREE to join. To participate you must either login or register for an account.

SEARCH FORUMS
FREE NEWSLETTER
By signing up you may also receive reader surveys and occasional special offers. We do not sell, rent or trade our email lists. View our Privacy Policy.