SEARCH FINESCALE.COM

Enter keywords or a search phrase below:

Tamiya 1:48 Mustang F-6D Conversion

5190 views
17 replies
1 rating 2 rating 3 rating 4 rating 5 rating
  • Member since
    June 2013
Tamiya 1:48 Mustang F-6D Conversion
Posted by bvallot on Wednesday, October 4, 2017 11:07 PM

I started this build and another P-51A just over a year ago for a Mustang GB and never quite got to finish. I didn't want to rush them and set them aside. Having just finished my redo of O'Hare's Wildcat, I pulled them back out to put the final touches on them. I'm waiting to cut another block for the other Mustang before posting. This particular Mustang was an F-6D reconnaissance variant that I thought would be fun to try and craft. There isn't any AM gear for this out there in the 1:48 scale, but with a little effort it isn't too hard to pull off.

 Untitled by Britt Vallot, on Flickr

Naturally, I'm building William Shomo's F-6D from his MOH flight with his wingman Paul Lipscomb. Shomo was flying with the 71st Tactical Reconnaissance Group and more specifically the 82nd Tactical Reconnaissance Squadron which had just replaced its P-39s with the much more nimble Mustangs. On January 11, Shomo and Lipscomb were out patrolling along Atarri and Laoag airstrips when they encountered a lone Betty bomber, 11 Ki-61 Tonys and a single Ki-44 Tojo. Shomo immediately jumped into an 11-2 outnumbered fight and after a very short tussle had completely decimated the lot of them with the help of his wingman as well. For these efforts he was awarded the Medal of Honor. The F-6D was the plane he flew during this flight. Later photo ops show him in a brand new P-51D that was allocated to Shomo and given a nice fancy paint scheme for the press coverage. I'll be building this one also some time later. Thanks goes out to Stik for sending me the decals! =] 

 Untitled by Britt Vallot, on Flickr

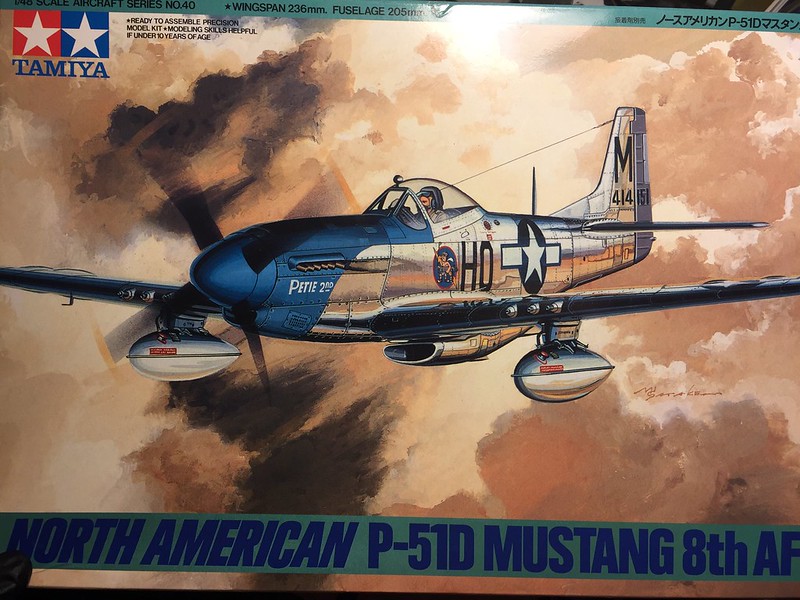
So here's Snook's 5th. I'll include a few WIP pics just to show what's going on here. I did build up the camera bay which took a fair amount of scratch building. There's a lot of AM here this time as well since I wanted to see how some of these parts would look next to the Tamiya kit parts. Normally I just upgrade the exhaust and canopy. So here we go. =]
 Untitled by Britt Vallot, on Flickr

 Untitled by Britt Vallot, on Flickr
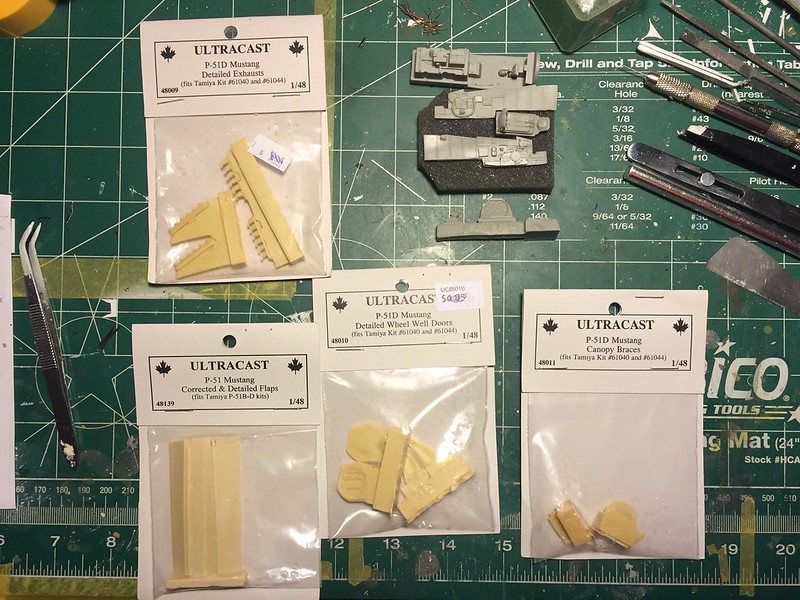
The canopy braces came with some of this set which I got a pretty good deal on ebay. Tamiya does a decent enough job though. A little sanding and drill some holes...easy peasy. 

Cockpit
 Untitled by Britt Vallot, on Flickr

 Untitled by Britt Vallot, on Flickr
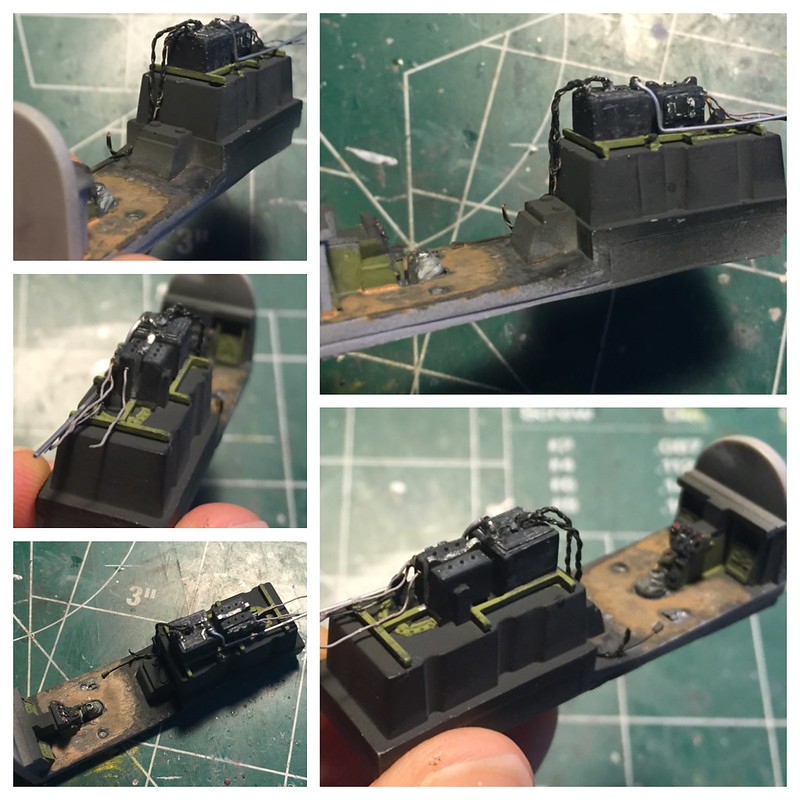
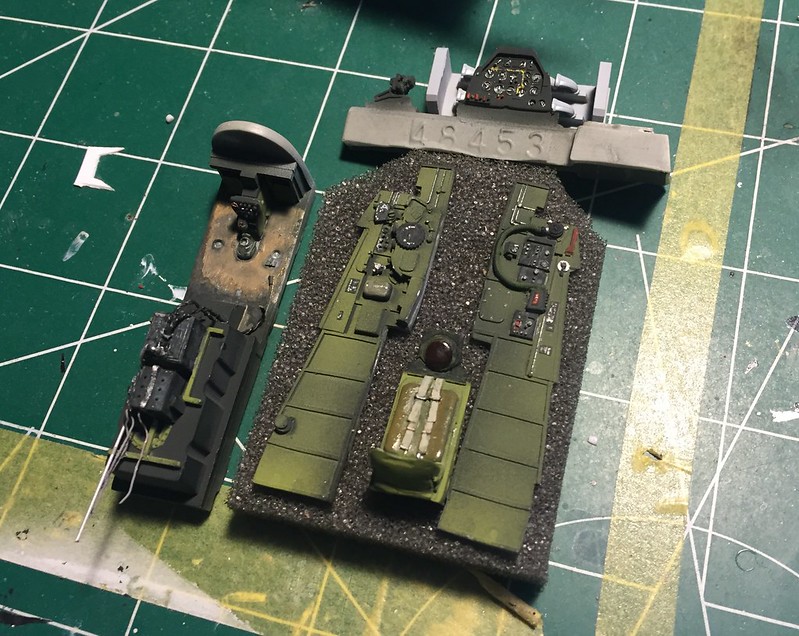
Here you'll note an extra device on the floor. The Intervalometer was an added piece of equipment for recon aircraft to trigger and time exposures.

 Untitled by Britt Vallot, on Flickr

Tail gear got some love.

 Untitled by Britt Vallot, on Flickr

Fashioning the camera bay.

 Untitled by Britt Vallot, on Flickr

 Untitled by Britt Vallot, on Flickr

 Untitled by Britt Vallot, on Flickr

 Untitled by Britt Vallot, on Flickr

K-24 Aerial Surveillance Camera

 Untitled by Britt Vallot, on Flickr

 Untitled by Britt Vallot, on Flickr

 Untitled by Britt Vallot, on Flickr

 Untitled by Britt Vallot, on Flickr

A couple of NMF pics before all the extra weathering.

 Untitled by Britt Vallot, on Flickr

 Untitled by Britt Vallot, on Flickr

 Untitled by Britt Vallot, on Flickr

 Untitled by Britt Vallot, on Flickr

There's a little more going on here than just Alclad over their grey primer. I put down a bit of preshading with Alclad's Magnesium over the panel lines along the cowling and in a few other appropriate places. It goes a long way to add some depth to the metal when putting down whatever color you choose. The wings are in Duraluminum which I find does a great job of replicating the silver lacquer paint. Cowling is done in Aluminum or White Aluminum as per photo reference. The fuselage is done in varying coats of thickness in Aluminum and Polished Aluminum towards the rear. The vertical stab was pick out in Aircraft Aluminum for something shinier as seen in photos.

 Untitled by Britt Vallot, on Flickr

 Untitled by Britt Vallot, on Flickr

You'll note the crosshairs painted on the wing. These corresponded to whichever port the camera was installed based on mission parameters and the photos needed and whatever altitude required to get them. They lined up with smaller crosshairs etched onto the canopy glass for the pilot to use as a reference. Pretty nifty huh! On Shomo's mustang this was apparently not present...nor were the stars and bars on the left wing.

I'll end this part of the post here and will continue with the finished pics on the following post.

On the bench:  

Tamiya F4U-1  Kenneth Walsh


  • Member since
    June 2013
Posted by bvallot on Wednesday, October 4, 2017 11:19 PM

Here's the finished pics with a little walkaround. =]

 Untitled by Britt Vallot, on Flickr

 Untitled by Britt Vallot, on Flickr

 Untitled by Britt Vallot, on Flickr

 Untitled by Britt Vallot, on Flickr

 Untitled by Britt Vallot, on Flickr

 Untitled by Britt Vallot, on Flickr

 Untitled by Britt Vallot, on Flickr

 Untitled by Britt Vallot, on Flickr

 Untitled by Britt Vallot, on Flickr

 Untitled by Britt Vallot, on Flickr

 Untitled by Britt Vallot, on Flickr

 Untitled by Britt Vallot, on Flickr

 Untitled by Britt Vallot, on Flickr

 Untitled by Britt Vallot, on Flickr

 Untitled by Britt Vallot, on Flickr

 Untitled by Britt Vallot, on Flickr

 Untitled by Britt Vallot, on Flickr

 Untitled by Britt Vallot, on Flickr

 Untitled by Britt Vallot, on Flickr

 Untitled by Britt Vallot, on Flickr

 Untitled by Britt Vallot, on Flickr

 Untitled by Britt Vallot, on Flickr

 Untitled by Britt Vallot, on Flickr

 Untitled by Britt Vallot, on Flickr

 Untitled by Britt Vallot, on Flickr

That's a wrap. =] Thanks for stopping by. Any questions, comments, critiques...please feel free to drop 'em here. 


On the bench:  

Tamiya F4U-1  Kenneth Walsh


  • Member since
    July 2004
  • From: Sonora Desert
Posted by stikpusher on Wednesday, October 4, 2017 11:49 PM

Excellent work! I really love the conversion work in the camera bay. Great stuff there!!!

And you’re quite welcome for the decals. I was never going to use them, and you put them to superb use. Exactly what they were intended for!


F is for FIRE, That burns down the whole town!

U is for URANIUM... BOMBS!

N is for NO SURVIVORS...

       - Plankton

LSM


  • Member since
    June 2014
Posted by BrandonK on Thursday, October 5, 2017 9:11 AM

That is a super cool build. What a neat idea. I love it. Great details and work. Awesome.

BK

On the bench:

A lot !! And I mean A LOT!!

2024 Kits on deck / in process / completed   

                         14 / 5 / 2  

                              Tongue Tied

  • Member since
    September 2014
Posted by rooster513 on Thursday, October 5, 2017 9:41 AM

Turned out great! Really love the NMF you pulled off!

-Andy

  • Member since
    February 2014
  • From: Michigan
Posted by silentbob33 on Thursday, October 5, 2017 6:26 PM
The only word that comes to mind when looking at that is "wow!" Great job, especially all that weathering

On my bench: Academy 1/35 UH-60L Black Hawk

  • Member since
    June 2013
Posted by bvallot on Thursday, October 5, 2017 9:32 PM

Thanks gang! This was actually a lot of fun to figure out and piece together.

Stik, those decals were for The Flying Undertaker which was Shomo's P-51D he got after this mission. I plan to build that one too since you were kind enough to send those. I'll be happy to keep a NMF mustang a little cleaner looking for a change. The only decals on this plane are the tail codes, prop, and the standard info on the fuselage and the victory flags too. Everything else was masked and painted. I did actually get clever and used some water color pencils to put the names on the sides of the fuselage. Shomo's was on the left and the crew chief Ralph Winkle and the armorer T.O. Davis were on the right. A brush just doesn't seem to allow for enough control at 1:48. I did my best with painting Snook's 5th by hand. Mostly happy with it. The decals for Snook's 6th are absolutely going to come in handy! Can't thank you enough. 


On the bench:  

Tamiya F4U-1  Kenneth Walsh


  • Member since
    January 2016
  • From: A Galaxy Far, Far Away
Posted by Hunter on Thursday, October 5, 2017 9:50 PM

bvallot,

Sir that is one great looking build, and the base is really cool....wonderful job buddy. And to top it off with a great snack... cashews and tabasco sauce LOL Big Smile

Hunter 


  • Member since
    June 2013
Posted by bvallot on Thursday, October 5, 2017 10:07 PM

Ha! Yeah. During the build, we moved into our new home and my work bench became the kitchen table for a while. I tried to be resourceful and make the most of it. =] It's always tricky trying to find lighting that helps show what the eye sees in a NMF. This seemed to work at the time. Lol. 

On the bench:  

Tamiya F4U-1  Kenneth Walsh


fox
  • Member since
    January 2007
  • From: Narvon, Pa.
Posted by fox on Thursday, October 5, 2017 10:13 PM

O -U -T -S -T -A -N -D -I -N -G!!! Bow Down

Jim Captain

 Main WIP: 

   On the Bench: Artesania Latina  (aka) Artists in the Latrine 1/75 Bluenose II

I keep hitting "escape", but I'm still here.

  • Member since
    December 2010
  • From: Salem, Oregon
Posted by 1943Mike on Thursday, October 5, 2017 11:10 PM

Wow cubed!

Mike

"Le temps est un grand maître, mais malheureusement, il tue tous ses élèves."

Hector Berlioz

  • Member since
    November 2003
  • From: Naples, FL
Posted by tempestjohnny on Friday, October 6, 2017 7:59 AM
You really outdid yourself on this one. The weathering and metal variation is what shows your skills


  • Member since
    June 2017
Posted by Chemteacher on Friday, October 6, 2017 8:26 AM
Wow! Your NMF looks awesome. I love all the variations and hues and it's dirtied up just right. Excellent job

On the bench: Revell-USS Arizona; Airfix P-51D in 1/72

  • Member since
    November 2013
Posted by bstarr3 on Friday, October 6, 2017 11:14 AM

Wow, this is really remarkable.  Every time I think I've got what it takes to try a NMF, I see results like this and completely lose hope!  Fantastic work

  • Member since
    January 2015
  • From: Tumwater, WA.
Posted by M. Brindos on Friday, October 6, 2017 9:46 PM

Wow Britt!!

That is stunning! I'm with Starr , that makes me think I'm not entirely ready for such a finish.

I am thoroughly impressed! Magnificent!!

- Mike Brindos "Lost Boy"

  • Member since
    June 2013
Posted by bvallot on Saturday, October 7, 2017 12:00 PM

Thanks everyone. =] 

bstarr3, while I appreciate the sentiment, I would hate to hear if you felt a NMF like this was actually out of reach. None of this is really that difficult. It just takes a little extra time and a few extra steps. I haven't really elaborated much on what's going on here as I'm finding it hard to make time for WIPs, but I'll take a moment here to discuss some of what's present and how I got here. The concept is easy...the only trick is in it's application. You have to be comfortable with your airbrush.

About a year ago, me and Theuns started the Metal Masters GB and in it we were discussing some ways of attaining different tones of the same color metal by just adjusting the thickness and amount of paint that's going down on a particular panel. At least with the Alclad line up of paints this was working out really well. For this part, you can put down whatever color metal you're looking to paint with and mask off the rest of your surface that will not recieve it. For example, painting the fuselage in Aluminum and the back part behind the cockpit in Polished Aluminum. When painting the Aluminum, I'll mask off just the Polished Aluminum sections leaving the Aluminum section to work on. With a single light coat down, you can start to mask off certain panels and continue with another pass of your airbrush over the rest. This helps the appearance of different tones within the same color and their proximity will show the contrast between panels without having to paint an entirely different color. Put as many coats down as you like to emphasize this difference until you get what you're looking for. It usually won't take much though. The other step that's helping out with variation of metal within the same panel is a light coat of preshading with Alclad's Magnesium. The plane is first primed in Alclad's Grey Primer for the regular metals. Magnesium is sprayed in light coats across panel lines and areas across where I've riveted the plane to help portray the warping of metal across the ribbing of the plane. This is a very light coat. Keep in mind it's not just about hitting the actual panel lines, but encroaching a fair amount into the panel itself. When you're done, the process of putting down all the actual metal colors begins. I like to start in the middle of panels and work my way outward. Certain long panels might require some long, broad strokes though. I also try to put more paint down over areas that would be between ribs or stringers. This also helps to reveal the underlying structure of the plane without having to try so hard. This is all done in light coats. The only other part to mention really is to mask and paint each panel separate. I'll keep handy some strips of Tamiya tape that I'll lay down across my shirt or pants just to take off some of the tack from the tape. This way I can move quickly from panel to panel. This also helps with the knowing how much paint you're putting down at once which helps you paint more or less depending on how you're moving about the surface of the plane. =] That's really the gist of it. I'd encourage you to practice on something first just to get the hang of things. All of this is very simple to set out and do. Just takes a bit of practice is all and being familar with your airbrush. I hope that helps. Some times a road map is all you need to get moving. =]

On the bench:  

Tamiya F4U-1  Kenneth Walsh


  • Member since
    November 2013
Posted by bstarr3 on Saturday, October 7, 2017 2:02 PM

wow, thanks ballot! This is an incredible resource of information for trying out this technique. I'm definitely interested in giving one a try sometime

  • Member since
    March 2015
  • From: Streetsboro, Ohio
Posted by Toshi on Saturday, October 7, 2017 4:01 PM

Just the plethora of information in this WIP is priceless.  That sir has to be one of the best Mustangs I’ve ever seen.  Just amazing.

Toshi

On The Bench: Revell 1/48 B-25 Mitchell


Married to the most caring, loving, understanding, and beautiful wife in the world.  Mrs. Toshi


JOIN OUR COMMUNITY!

Our community is FREE to join. To participate you must either login or register for an account.

SEARCH FORUMS
FREE NEWSLETTER
By signing up you may also receive reader surveys and occasional special offers. We do not sell, rent or trade our email lists. View our Privacy Policy.