- Member since
January 2004
- From: Brisbane Australia
|
Posted by ChrisJH666
on Saturday, November 11, 2017 10:49 PM
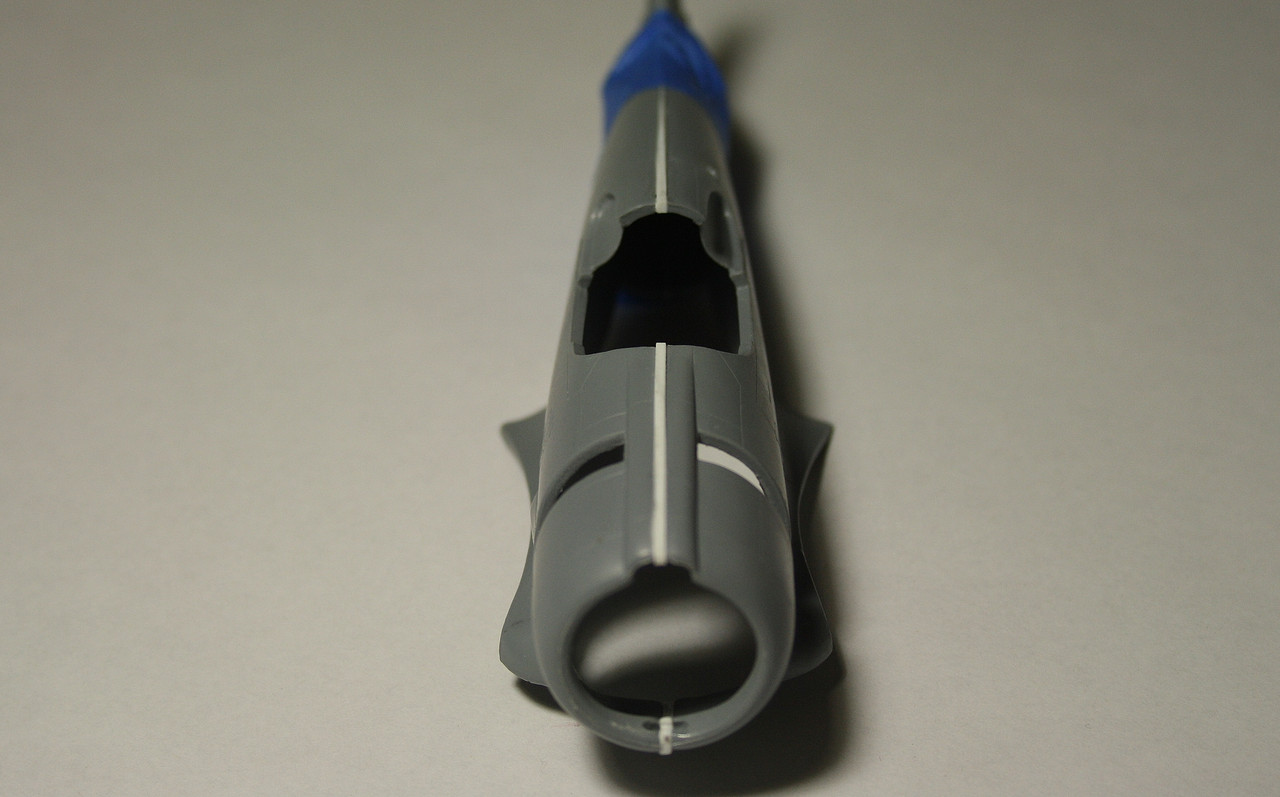
The fuselage needed a few modifications. The fuel filler cover was drilled out, and a fuel filler cap inserted from behind. Photo's show this particular aircraft was missing its fuel filler covers, and also its electrical socket cover, which has also been drilled out. The blue formation lights either side of the cockpit were filled and then redrilled. The lenses in the kit are clear, so once they had been fitted, a piece of aluminium foil was glued, shiny side towards the back of the lens, and once the aircraft has been painted, the lenses will be painted Tamiya clear blue. The curved plate at the rear of the cockpit either side has been thinned right down as far as I dare as it is supposed to be a sheet of aluminium, not a great big thick casting! The forward and bottom edges of the space for the cowl flaps got the same treatment. The most obvious change though is the 40 thou insert between the two fuselage halves. Now, not only is the cowl front circular rather than eliptical, but also the internal bulkheads fit. The more eagle eyed might spot I haven't attached anything to the inside of the cockpit sidewalls. That is because the instructions are wrong, and almost everything is attached to the fuselage frame, not the outer skin
 
In the queue: 1/48 Beech Staggerwing (RAAF), P38 (RAAF), Vultee Vengeance (RAAF), Spitfire Vb (Malta), Spitfire VIII x2 (RAAF), P39 x2 (RAAF), Martin Baltimore (Malta?), Martin Maryland (Malta), Typhoon NF1b, Hellcat x2 (FAA)
Chris 
|