SEARCH FINESCALE.COM

Enter keywords or a search phrase below:

1/72 GW's F-102 Finished

4489 views
37 replies
1 rating 2 rating 3 rating 4 rating 5 rating
  • Member since
    June 2008
1/72 GW's F-102 Finished
Posted by lewbud on Monday, June 11, 2018 8:20 PM

Started building Meng's 1/72 F-102 Case X in future President George H.W. Bush's markings. Started with the wings.

Since the wingtips on the Case X are different from the Case XX, they are molded as separate pieces, as are the ailerons.

Fit so far is good, but I hear there are pitfalls ahead.

Buddy- Those who say there are no stupid questions have never worked in customer service.

  • Member since
    January 2015
Posted by PFJN on Tuesday, June 12, 2018 10:30 AM

lewbud

Started building Meng's 1/72 F-102 Case X in future President George H.W. Bush's markings.

Hi,

I thought George H.W. was the father who flew Avengers in WWII, and George W. was the son that flew F-102s in the Air National Guard. Huh?


1st Group BuildSP

  • Member since
    July 2004
  • From: Sonora Desert
Posted by stikpusher on Tuesday, June 12, 2018 1:02 PM

Yup, HW was a USN TBF Naval Aviator. W was a ANG Deuce driver.


F is for FIRE, That burns down the whole town!

U is for URANIUM... BOMBS!

N is for NO SURVIVORS...

       - Plankton

LSM


  • Member since
    June 2008
Posted by lewbud on Tuesday, June 12, 2018 1:05 PM

Yup. Had a brainfart at work.

Buddy- Those who say there are no stupid questions have never worked in customer service.

  • Member since
    September 2012
Posted by GMorrison on Tuesday, June 12, 2018 2:16 PM

Shoot. I was looking forward to blue over blue over white.

 Modeling is an excuse to buy books.


  • Member since
    June 2008
Posted by lewbud on Friday, June 15, 2018 5:32 AM

Did some work on the pit yesterday. Got the tub painted (still need to do some touch up) and installed Eduard's PE. Need to go back and paint the foot pads with some Aircraft Interior Black. Crappy phone pics follow.

The instrument panel. Unfortunately, Meng got the color of the cockpit wrong. The instructions call for Aircraft Gray (ADC Gray) like the exterior, rather than Dark Gull Gray. Not going to sweat it because once the canopy is closed, it won't be noticeable.

Also painted the interior of the fuselage, but that's boring and not pic worthy.  More soon.

Buddy- Those who say there are no stupid questions have never worked in customer service.

  • Member since
    March 2005
  • From: Lancaster, South Carolina
Posted by Devil Dawg on Sunday, June 24, 2018 10:31 PM

GMorrison

Shoot. I was looking forward to blue over blue over white.


That wuz a good one!!

Devil Dawg

On The Bench: Tamiya 1/32nd Mitsubishi A6M5 Model 52 Zeke For Japanese Group Build

Build one at a time? Hah! That'll be the day!!

  • Member since
    June 2008
Posted by lewbud on Friday, June 29, 2018 1:43 AM

Okay, since my self impose deadline for finishing this is 8 July, I figured I better get cracking. The pit is pretty much done. I think there is a PE piece to go behind the ejection seat, but I think it is for when the canopy is displayed open as it provides canopy rail detail. Will check on that when I get home. Here's some pics.

The bang seat box stock.

The bang seat with PE enhancements. Its a crappy pic, sorry.

The complete pit.

I haven't played with PE belts in awhile, and I'm not real happy with the right armrest cushion, it'll look appropriately busy through the canopy. I still need to paint the radar scope hood black, but that'll have to wait until I hit the LHS Saturday. The plan is to have the everything closed up and ready for paint on Monday. More to come.


Buddy- Those who say there are no stupid questions have never worked in customer service.

  • Member since
    April 2003
  • From: USA
Posted by keavdog on Friday, June 29, 2018 3:07 AM

Looking good - and in 1/72... wow!  Nice

Thanks,

John

  • Member since
    June 2008
Posted by lewbud on Saturday, June 30, 2018 6:51 AM

Thanks Keav!

Buddy- Those who say there are no stupid questions have never worked in customer service.

  • Member since
    June 2008
Posted by lewbud on Wednesday, July 4, 2018 10:00 PM

I didn't accomplish my goal of getting her ready for paint by Monday, but progress has been made.

The exhaust. Consists of 4 parts, painted with Mr. Color Steel, burnt metal and silver. First time I've used Mr. Color paints and I like them so far.
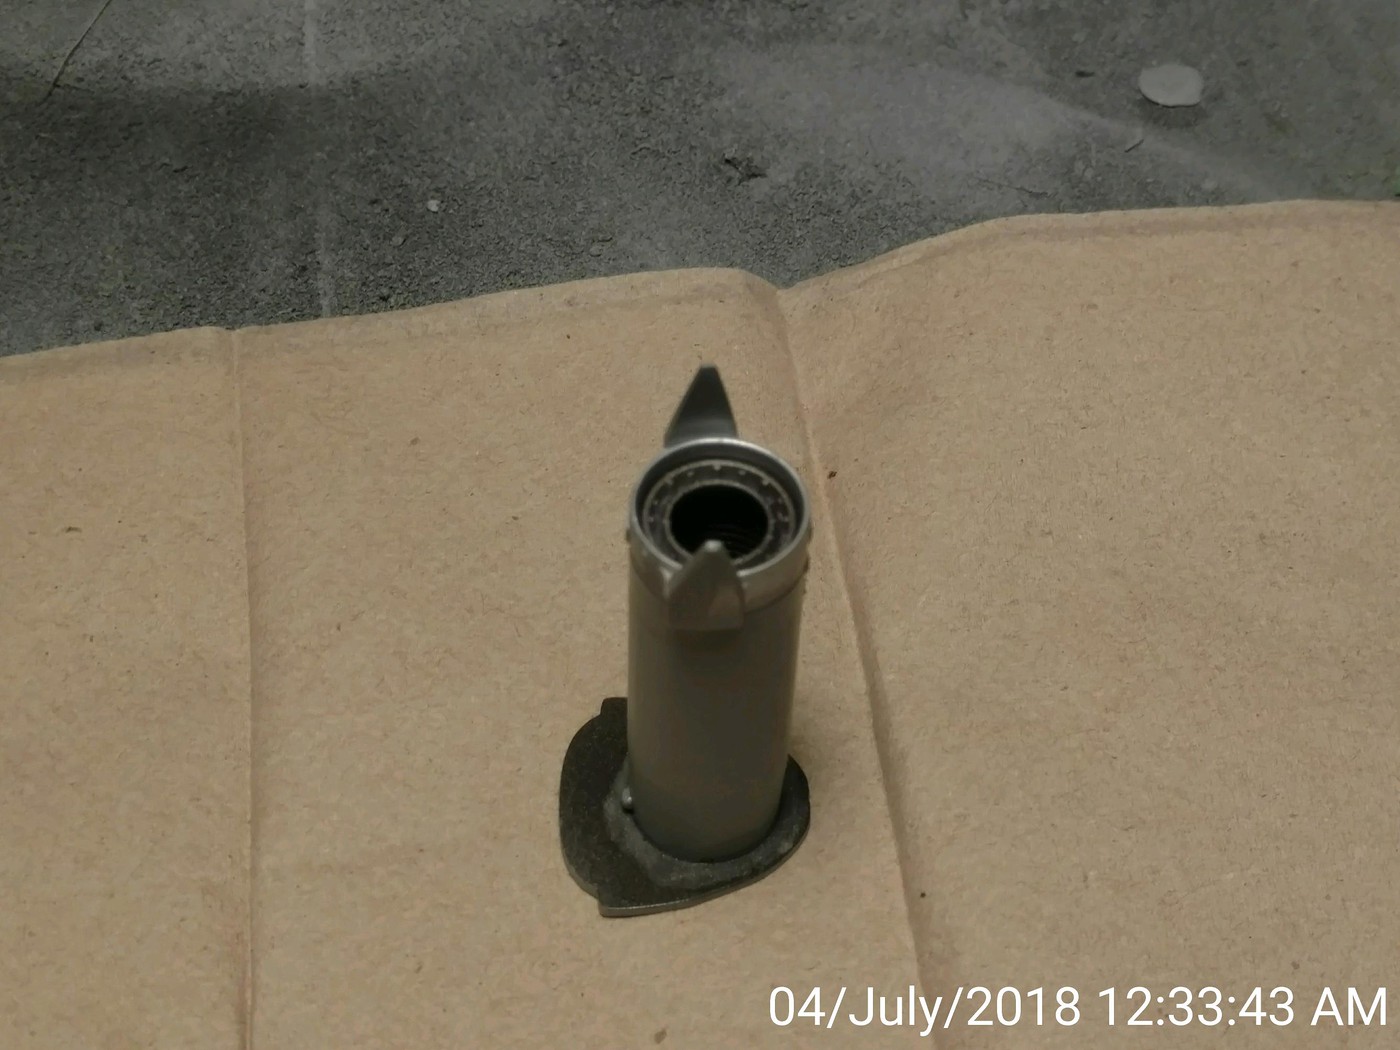
The exhaust installed. 
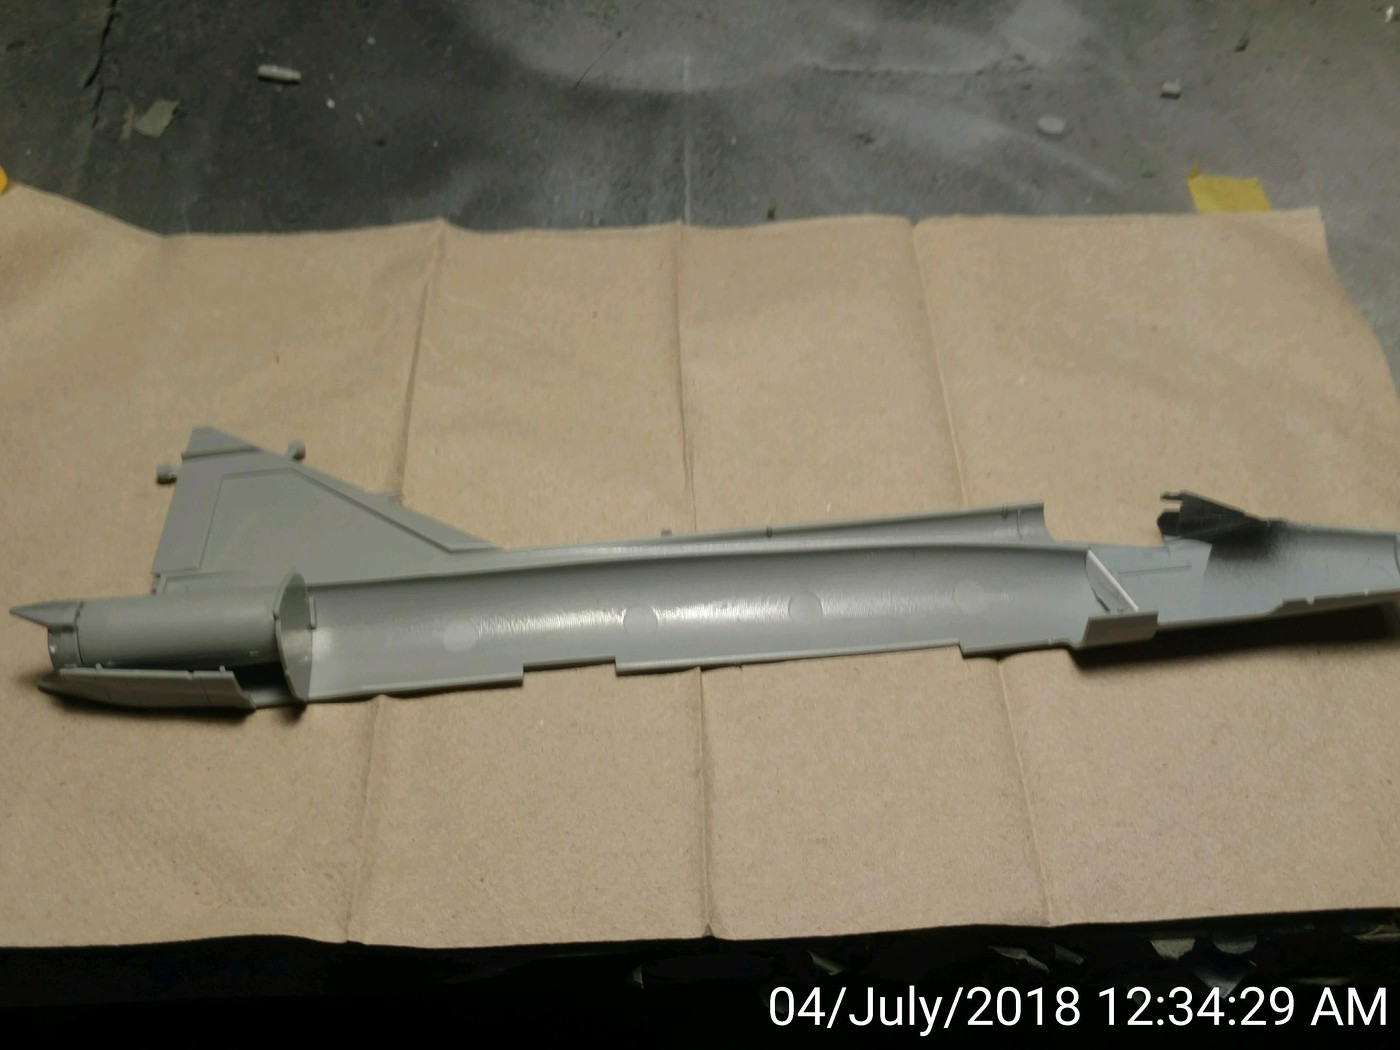
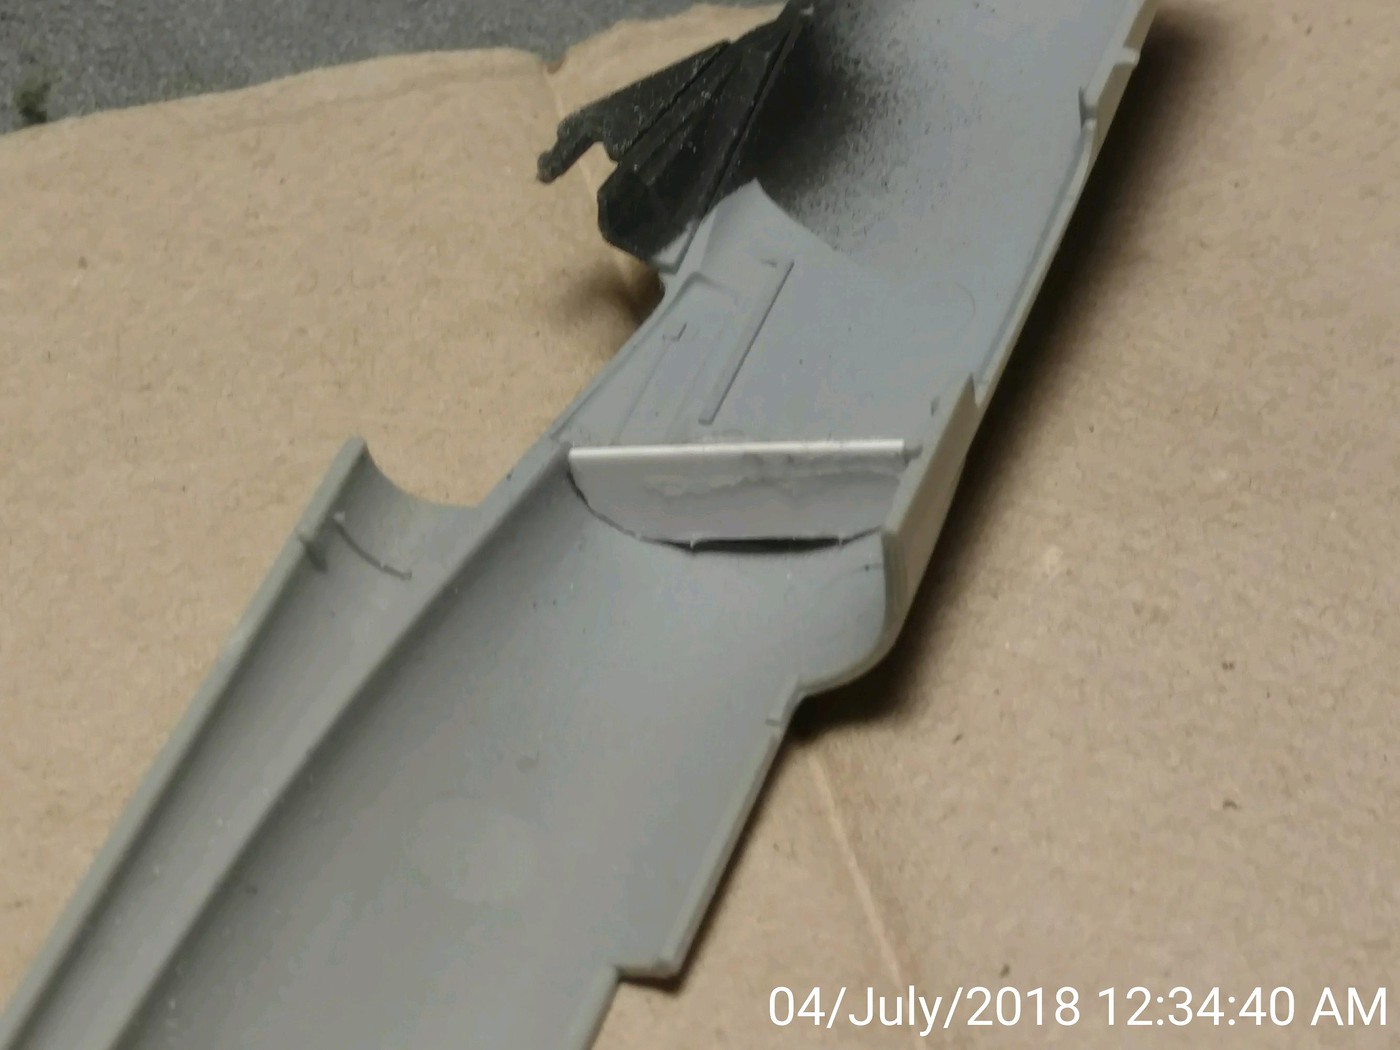
Blanking plate for the intakes. Used some strip stock I had lounging around.
The fuselage is together.
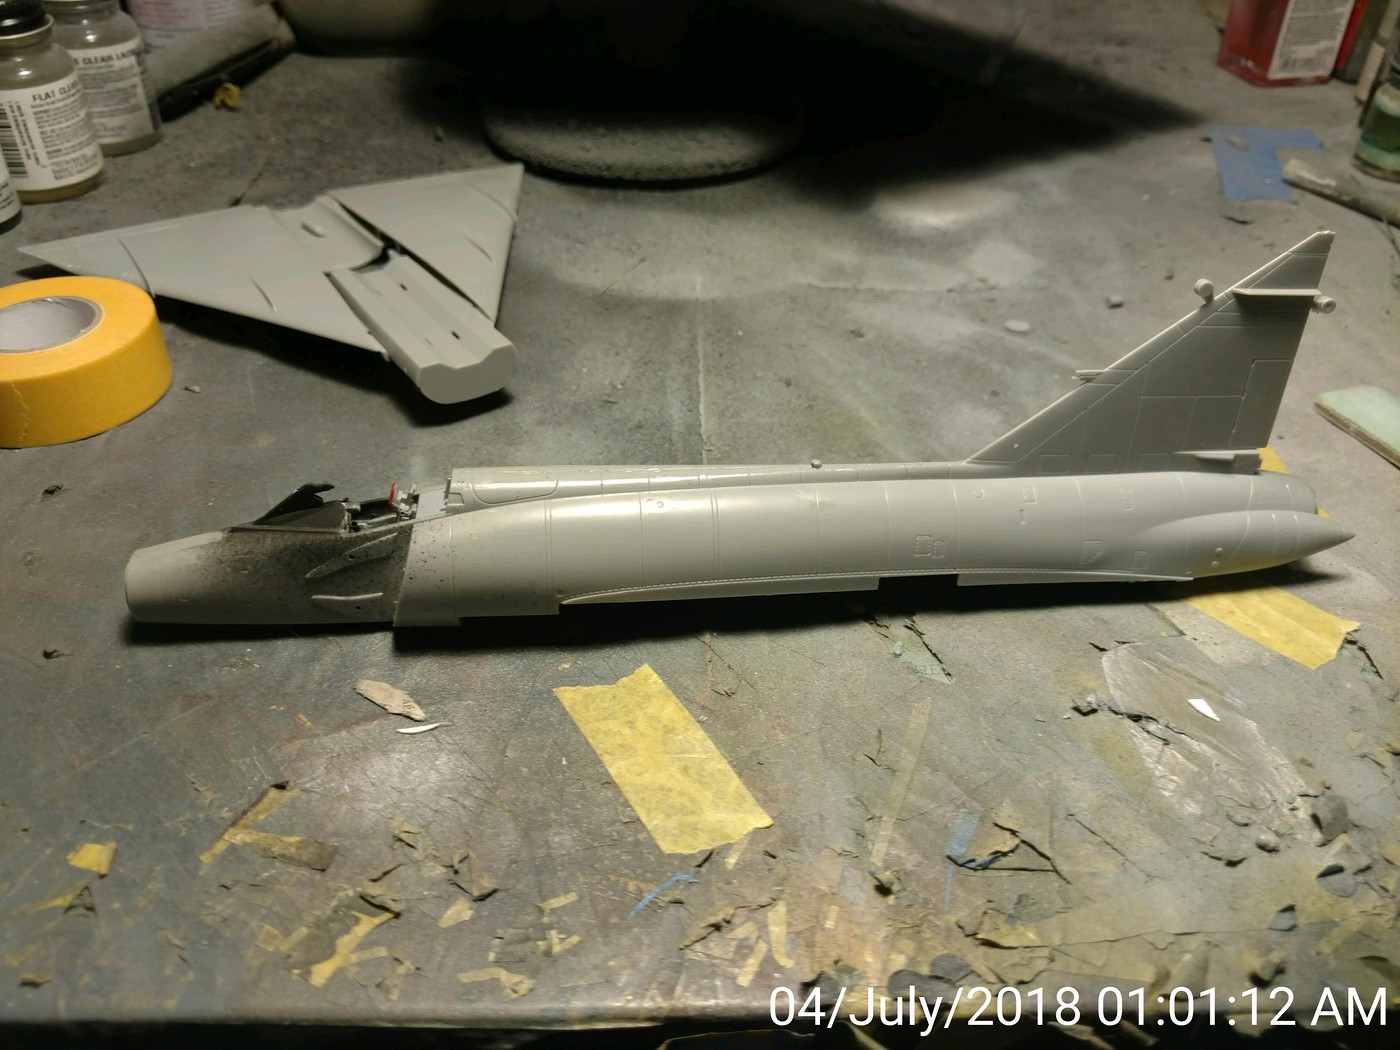
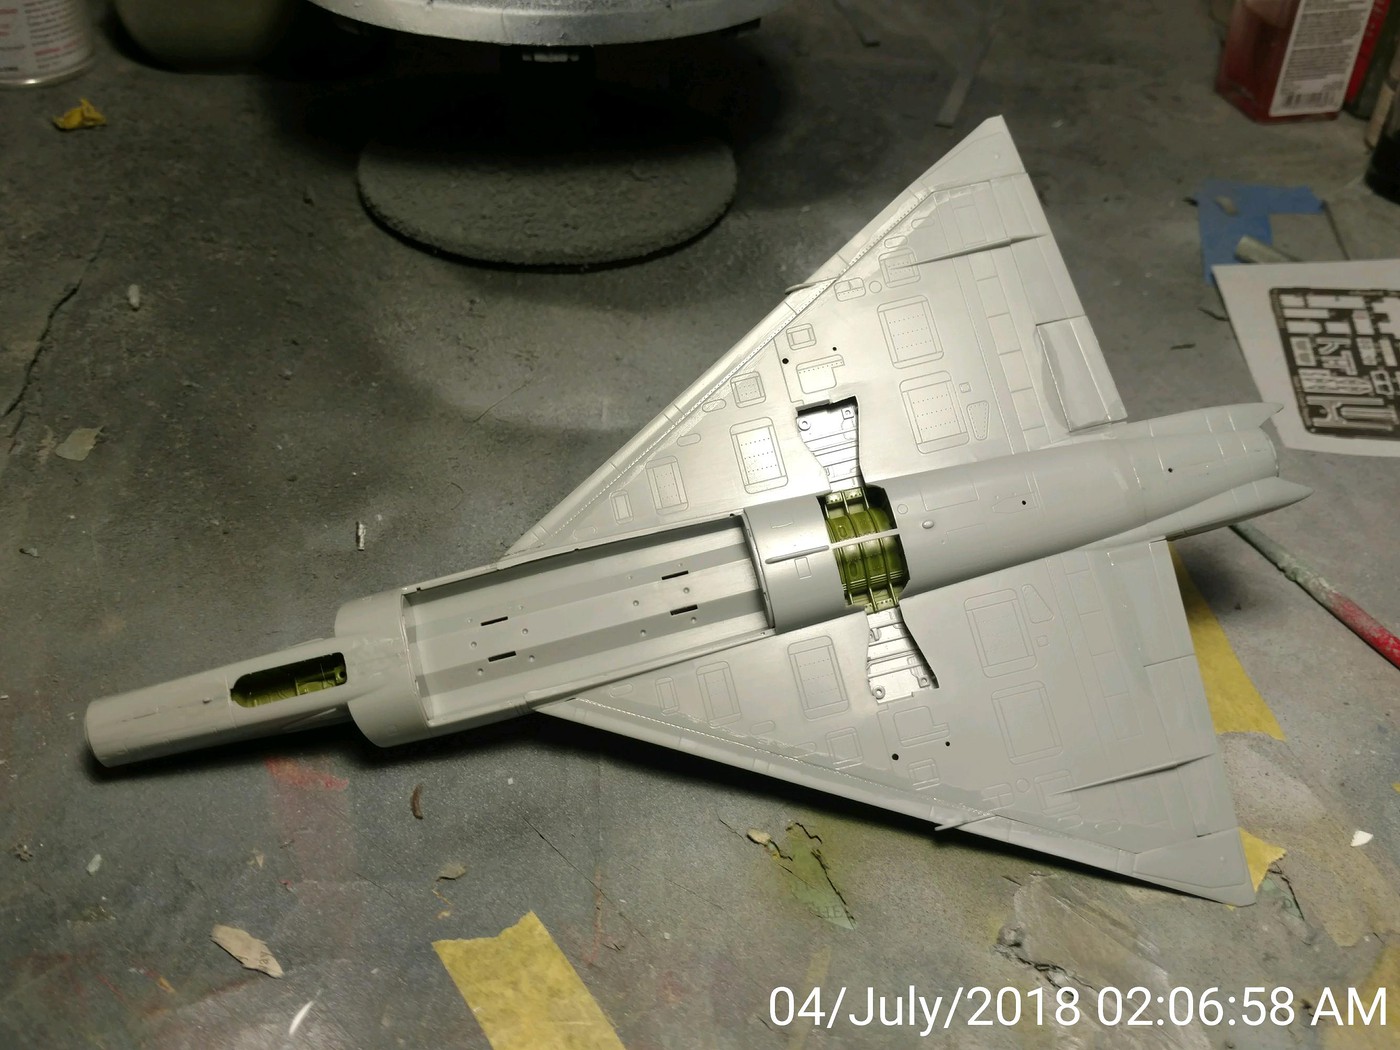
The wings are on. Starting to look like an airplane. Getting the wings on was the most difficult part of the build so far. I tried to do a trial fit before installing the main landing gear bay, but I had a step at the left rear like something was preventing it from seating properly. I cut down the bulkhead that the exhaust is attached to, but that didn't solve the problem. I installed the main gear bay and that helped align things, but didn't help with the step. I carved and sanded on the interior of the wing, that helped a little. I just kept messing with it until it snapped into place. Once it was in place, I MEK'd the heck out of it so it would stay there. Probably still need to do a little sanding to get it flush, but I'll worry about that later.
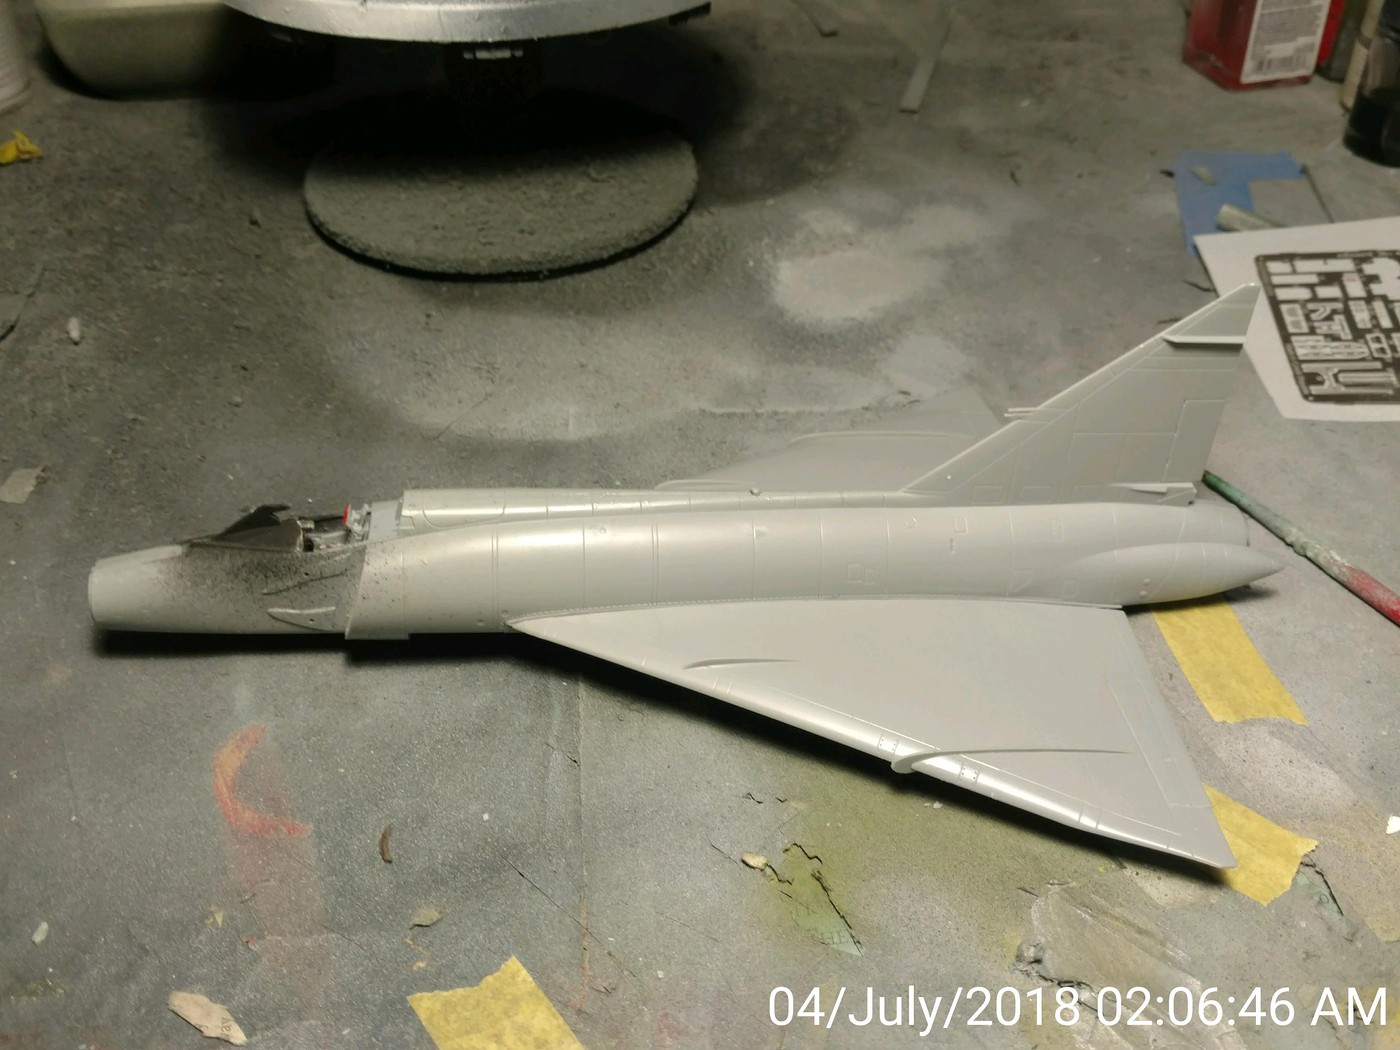
The underside. 
I did more work on her today. The canopy is masked and fitted. The splitter plates are installed. I also installed the cover for the missile bay. There was a step where the canopy met the fuselage, but a little sanding made it flush. This wouldn't be a problem for most as the kit is designed to have the canopy in the open position. No pics of today's work. Will post more tomorrow. Even though I've had some problems, once the parts are in position, the fit is excellent. I had to use some tape to pull the wings into position, but once they were glued in place, almost no putty was needed. The nose will need some putty however.

Buddy- Those who say there are no stupid questions have never worked in customer service.

  • Member since
    November 2003
  • From: Naples, FL
Posted by tempestjohnny on Friday, July 6, 2018 6:18 AM
Looking good


  • Member since
    March 2015
  • From: Streetsboro, Ohio
Posted by Toshi on Friday, July 6, 2018 12:25 PM

This is coming together in an awesome way.  It’s really looking good.

Your friend, Toshi

On The Bench: Revell 1/48 B-25 Mitchell


Married to the most caring, loving, understanding, and beautiful wife in the world.  Mrs. Toshi


  • Member since
    July 2018
Posted by Sawbuck705 on Saturday, July 7, 2018 10:48 AM

Looking good, Lew!  Watching w/ interest, as I have this kit in my stash.  May I ask how much weight you are adding to the nose?

  • Member since
    June 2008
Posted by lewbud on Sunday, July 15, 2018 11:31 AM

Sorry for being away so long but life got in the way.

Sawbuck, no weight is needed to keep the nose down. She goes together pretty good if you pay attention to what you're doing. The only major fit problem is getting the rear of the wing to fit properly with the fuselage. I trimmed the heck out of the bulkhead that the exhaust mounts to. I then just pushed, prodded, begged and cursed at it until it snapped into place. When it did, I MEK'd the heck out of it. I still have a bit of sanding to do, but since it's going on a vertical display, I will have that side face the wall.

Just about ready for paint. Just a couple of seams to deal with.

Puttied the nose and right wingroot after the pictures were taken. When I get home from work tonight, I'll sand and get it painted. Has to be ready in less than two weeks for Nats.

Buddy- Those who say there are no stupid questions have never worked in customer service.

  • Member since
    June 2008
Posted by lewbud on Friday, July 20, 2018 12:11 AM

Toshi,

Thanks for the kind words.

She went into the paint shop earlier this week and is now ADC Gray (Aircraft Gray in the MM line). I haven't had good luck with this paint as some areas are smooth and glossy and some are pebbly. May have to revert to my car building roots and see if I can gently sand those areas smooth and then hit it with some gloss. I didn't take any pics of her before she got masked, but here she is after a coat of Tamiya's Semi-Gloss Black on the engine and intake areas.

Here she is with the engine section painted. The paint is MM Stainless Steel Metalizer. The Eduard PE set provided the interior detal.

Will have the intakes painted after I get home from work in the morning. Hopefully my decals from Fundekals will arrive in the morning and I can start decalling Saturday or Sunday.


Buddy- Those who say there are no stupid questions have never worked in customer service.

  • Member since
    June 2018
Posted by E Baker on Friday, July 20, 2018 1:28 PM

Just a question on the name of the Post; "1/72 lawn dart" I had always thought the moniker "lawn dart" was given to the F-104. Was it also given to the F-102 as well?

Past that, great looking build. I hope to get the Revell-Monogram 1/48 version "soon" and add to my 1/48 century series collection.

  • Member since
    June 2008
Posted by lewbud on Friday, July 20, 2018 7:38 PM

E,

Didn't know about the F-104 being called that, but I have seen the F-16 and B-1 referred to as lawn darts. As to the F-102, I don't know if it was ever called that.  I came up with the title in the middle of an overnight shift at work and I forgot that the 102 was the Delta Dagger, not Dart. However, it does resemble an old lawn dart. I look forward to seeing your build.

Buddy- Those who say there are no stupid questions have never worked in customer service.

  • Member since
    April 2015
Posted by Mopar Madness on Friday, July 20, 2018 9:16 PM

Those Daggers really were quite beautiful.

Chad

God, Family, Models...

At the plate: 1/48 Airfix Bf109 & 1/35 Tamiya Famo

On deck: Who knows!

  • Member since
    October 2004
  • From: Orlando, Florida
Posted by ikar01 on Friday, July 20, 2018 11:39 PM

The first time I heard of a lawn dart was in reference to the F.Falcon, (always disliked that name).  Back when the F-16 first came out there was a effort to change teh name to Viper.  It was during the runn of the original Battlestar  series.  It was quickly rejected.  The first part of hte name we believe was there because ther was already a falcon in the inventory, the A.I.M.4 missile.I ddi bush's aircraft once with the Hasegawa kit.  It eventually went to the White House, never to be seen again.

I've never had a kit form that company, how are teh panel lines?  They look a bit deep.  Are there any plans for a TF-102?

  • Member since
    June 2008
Posted by lewbud on Saturday, July 21, 2018 6:24 AM

Ikar,

No plans for the Tub (TF-102). I have a Case XX as well that will be in Minnesota ANG markings. There is a nice conversion kit out of Greece, but the maker escapes me at the moment. One of our clubmembers is building it for our club display at the IPMS Nationals in a couple of weeks.

Buddy- Those who say there are no stupid questions have never worked in customer service.

  • Member since
    June 2008
Posted by lewbud on Saturday, July 21, 2018 6:26 AM

Ikar,

The panel lines aren't too bad, they just look deep. Your Avenger is most likely in a box somewhere in the Bush Memorial Library or wherever they put gifts sent to the President.

Buddy- Those who say there are no stupid questions have never worked in customer service.

  • Member since
    June 2008
Posted by lewbud on Thursday, July 26, 2018 3:35 AM

Had to put her back in the paint shop after I realized that the natural metal section of the rear fuselage was wrong. After I fixed that, I found a spot on the right side that I'd missed when masking, so I had to carefully mask, prime and reshoot the ADC Gray for that spot. Also painted the wing fences red. Also painted the anti-glare panel on the nose (I really don't like doing them, I never get them right). Theoretically, I should have waited until everything was decalled and clearcoated because on the real a/c, the panel is flat black, but I wasn't going to chance it.After a couple of coats of gloss, she's ready for decals.

Need to clean up the wing fences a bit.

Port side. The decals are a mix of the kit and Fundekals stencil set. The kit has the USAF and U.S. AIR FORCE in black when it should be Insignia Blue. The Fundekals sheet corrects this.

Rear view.

Starboard.

Underside.

All that's left to paint are the wing racks, fuel tanks, arrestor hook, and nose probe. She should be on her mains this evening before I have to leave for work.

Buddy- Those who say there are no stupid questions have never worked in customer service.

  • Member since
    June 2008
Posted by lewbud on Saturday, July 28, 2018 7:14 AM

Well, she's done and on her way to the Nationals. Had a bit of a scare. I was masking the small wing fence on the starboard side and went to remove the masking tape around it. As I pulled up the tape, a piece of the clear coat came with it. Fortunately, it didn't tear into the decal and with a couple of coats of clear, it's hardly noticeable unless the light is right. Fortunately, that side is going up against the wall of the display. Here she is in all her final glory.

She is sitting on one of the bases for our chapter build (F-102 in ANG service) for the IPMS Nationals. Each base will have the state flag of where the squadron is based and since this is President Bush's bird, she's on the Presidential Flag. Would I build this kit again, yes since I have a Case XX kit already (it will be in Minnesota ANG markings). If you are building for a contest or simply have to have a modern kit get this one. If you just want an F-102 for your collection, build the ancient Hasegawa kit. It looks like a F-102 and will be a much easier build.

Buddy- Those who say there are no stupid questions have never worked in customer service.

  • Member since
    April 2015
Posted by Mopar Madness on Saturday, July 28, 2018 10:00 AM

Ok Buddy, that’s a nice bird!  Those Daggers have beautiful lines.

Chad

God, Family, Models...

At the plate: 1/48 Airfix Bf109 & 1/35 Tamiya Famo

On deck: Who knows!

  • Member since
    June 2008
Posted by lewbud on Saturday, July 28, 2018 9:23 PM

Thanks Mopar!

Buddy- Those who say there are no stupid questions have never worked in customer service.

  • Member since
    December 2002
  • From: Northern California
Posted by jeaton01 on Saturday, July 28, 2018 11:04 PM

Looks very nice, Buddy.  Isn't that the way it goes for most of us, simpler is more fun.  I do think that after the pain wears off we feel better about these more detailed kits as we look at them in the display case..

John

To see build logs for my models:  http://goldeneramodel.com/mymodels/mymodels.html


  • Member since
    June 2008
Posted by lewbud on Sunday, July 29, 2018 10:56 AM

Thanks John. Part of the frustration was the kit, partly my fault for putting myself in situation where I had to finish it by a certain date, and part of it was just unfamiliarty with the aircraft.  This is the first 102 that I've built (my comment was made based on my experiences with the Hasegawa 106, which sits on the shelf of doom), so somethings just didn't look right even though that's the way it was supposed to go together. Since I've got a Case XX in the que, it'll go easier and won't be as frustrating. You're also right in that once she's back home and in the case, I'll have more positive memories, especially if our chapter build brings home a trophy.

Buddy- Those who say there are no stupid questions have never worked in customer service.

  • Member since
    June 2017
Posted by Chemteacher on Sunday, July 29, 2018 8:39 PM
That looks awesome. Best of luck to guys.

On the bench: Revell-USS Arizona; Airfix P-51D in 1/72

GAF
  • Member since
    June 2012
  • From: Anniston, AL
Posted by GAF on Sunday, July 29, 2018 8:45 PM

Excellent work!  Good luck at the show! Smile

JOIN OUR COMMUNITY!

Our community is FREE to join. To participate you must either login or register for an account.

SEARCH FORUMS
FREE NEWSLETTER
By signing up you may also receive reader surveys and occasional special offers. We do not sell, rent or trade our email lists. View our Privacy Policy.