SEARCH FINESCALE.COM

Enter keywords or a search phrase below:

1/48 Airfix P-40B Tomahawk: Worn Mount of RAAF Ace Clive Caldwell

4696 views
14 replies
1 rating 2 rating 3 rating 4 rating 5 rating
  • Member since
    February 2010
  • From: Berkeley CA/St. Paul MN
1/48 Airfix P-40B Tomahawk: Worn Mount of RAAF Ace Clive Caldwell
Posted by EBergerud on Friday, December 14, 2018 2:42 AM

  RAFCald by Eric Bergerud, on Flickr

  iprr! by Eric Bergerud, on Flickr

 Airfix 1/48 P-40B

 Paint: Golden High Flow Acrylics (Azure, Middlestone, Dark Earth mixes)

 AML Camo Masks: Montex Canopy Mask & ID Stencils

 Weathering: Salt fading, Wilder & Gamblin oils, Iwata Com.Art (panel lines and fluids), Prisomcolor pencils (panel lines)

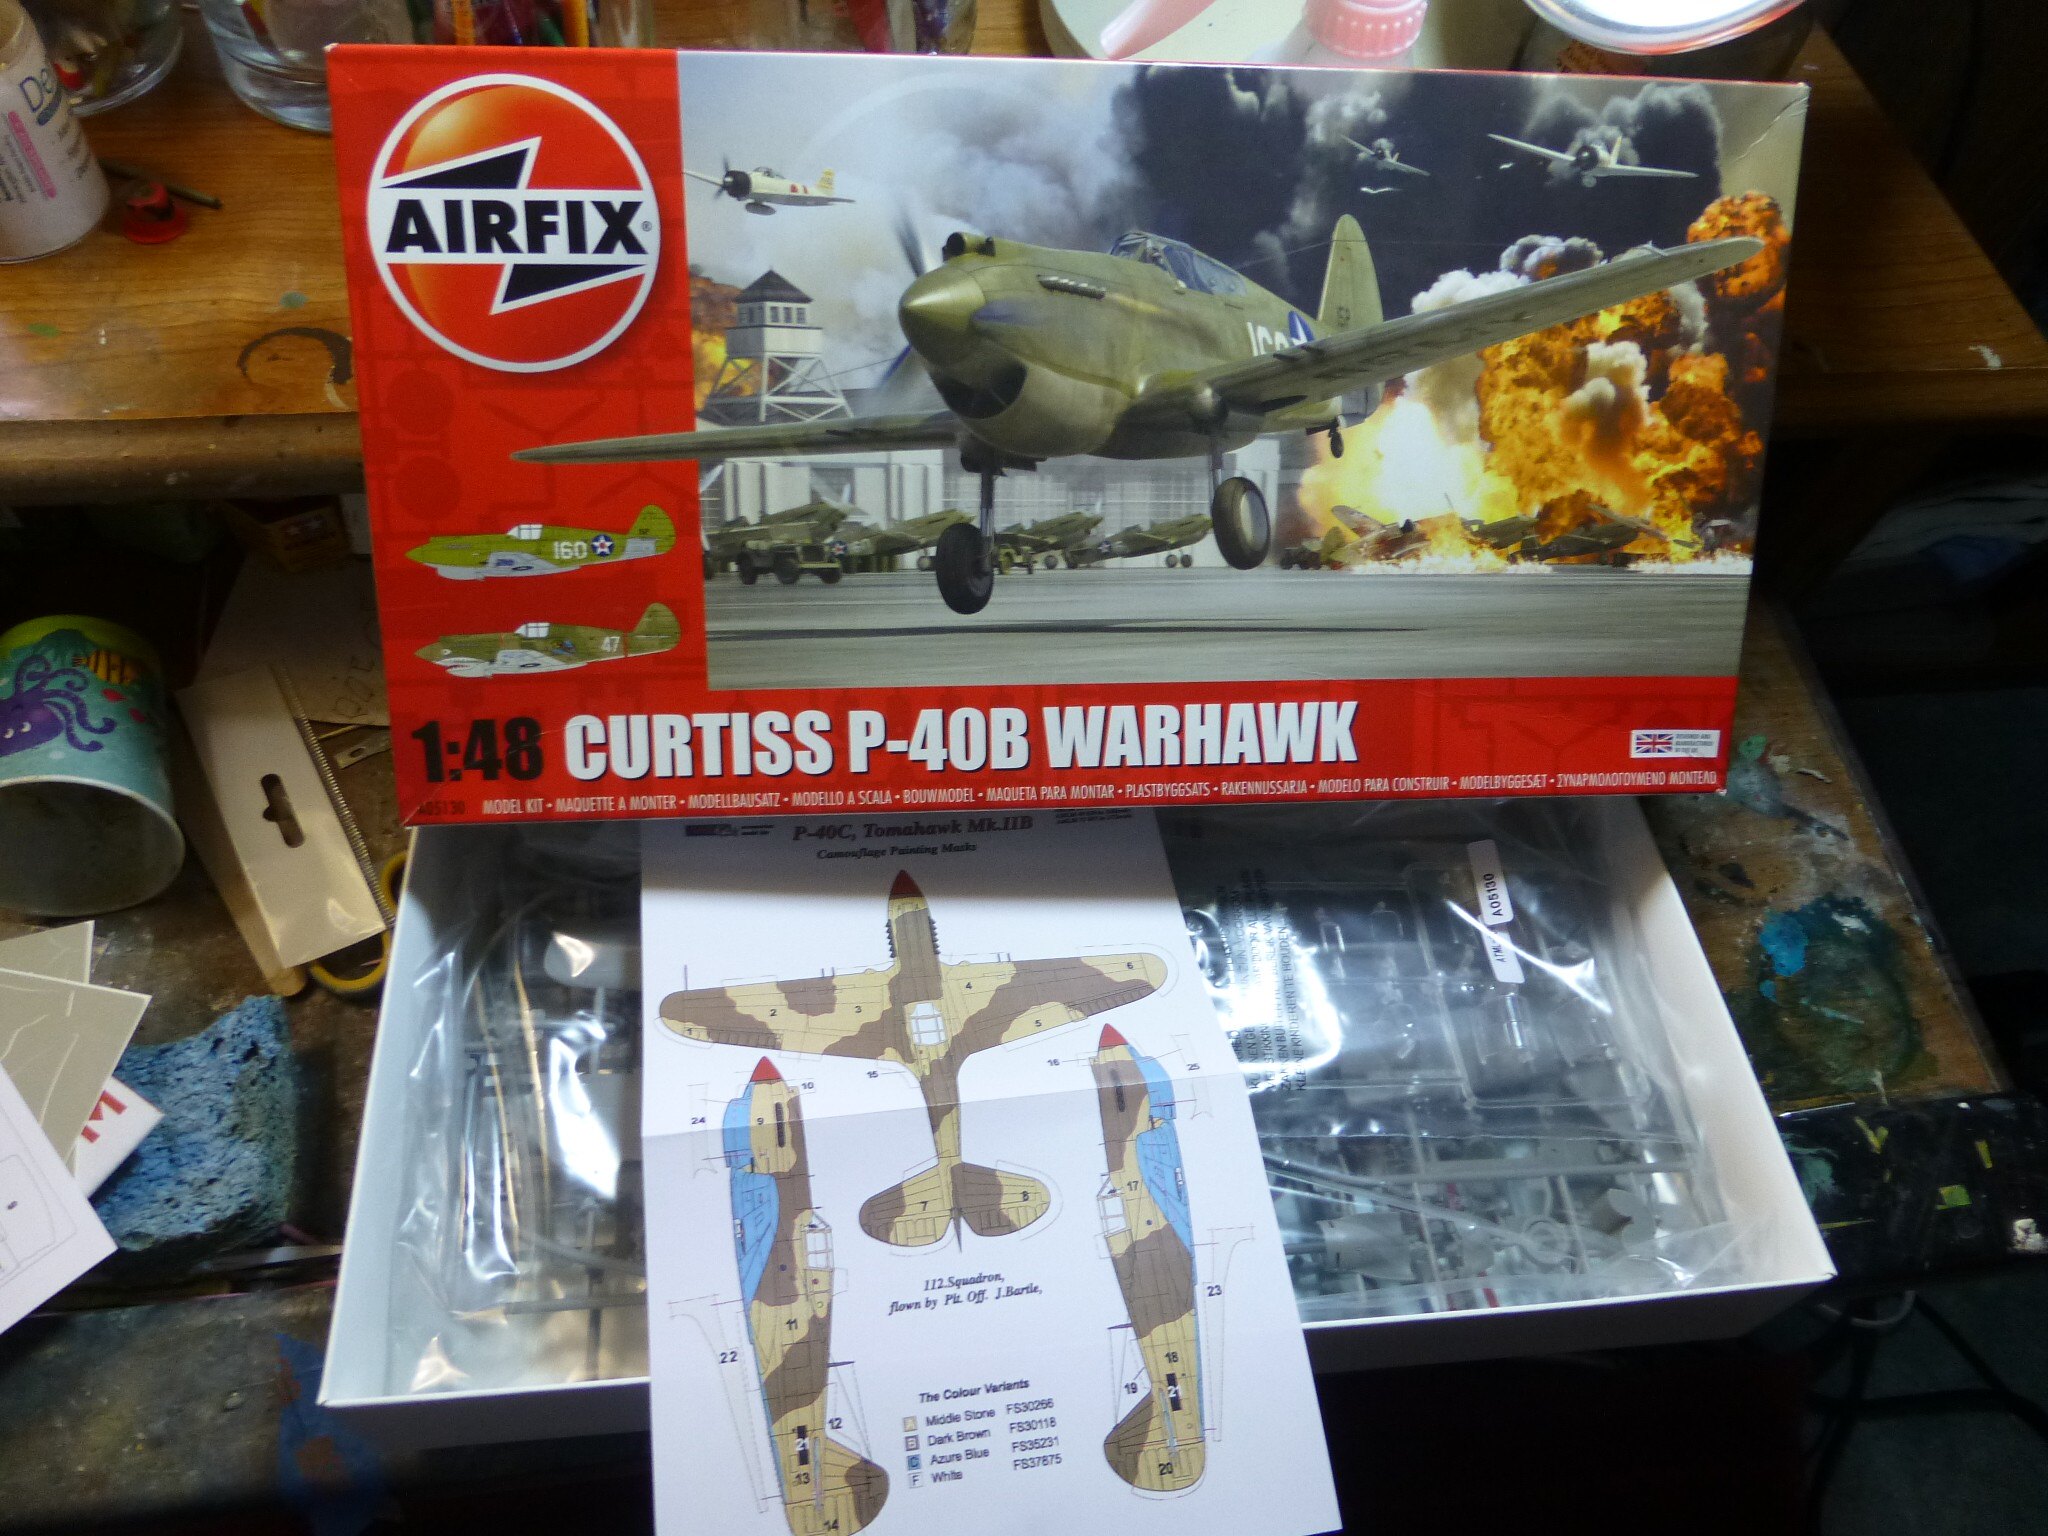
The Kit: By and large this was a very good kit. I think some modelers, especially Eduard fans, might find the surface detail a little sparse, but I thought it was fine. Airfix didn't always pay attention to detail - there was bad fit on the leading edge wheel well fairings - fortunately I was warned about that by very good online build and fixed it with rod and Gunze plastic slurry. One side of the fuselage was just a little larger on the top leading me to think I had a gap. Glad I looked close - it wasn't a gap at all, just one side was "proud". When sanded the fuselage fit together over the installed cockpit perfectly. Also the landing gear were splendidly made - that can be trouble. The clear parts also fit well. The instructions are very good, although Humbrol paint call-outs are a pain. Some of the smaller fits were a headache because Airfix tried to try Tamiya style engineering without their engineers. Tamiya it isn't. I would pay the extra for a Tamiya kit. However, Airfix has been putting out some very interesting kits - like this one - and Tamiya doles out two or three gems a year. So I'm hoping the other "new" Airfix kits I have will work as well (Hurricane, JU-87B, BF-109E, HE-111, B-17 and a C-47 on deck for a C-47/DC3 GB. And I like the look of their Wellington.) Here's the kit along with the AML Camo masks I used.

  kit by Eric Bergerud, on Flickr

 I'll do a quick summary on the painting and weathering. The base colors are all my own mixes from Golden's splendid High Flow Acrylics, a brand that is now my "go to" paint. (I really prefer water based acrylics, so that leaves Tamiya, Gunze and MPR out - splendid paints though they are.) I have become a convert to "black basing" and I used it here. (Black basing is championed by a splendid modeler named Doog: check "Doog's Models" on YouTube, and see his series on black basing for the details.) This technique requires a black primer sprayed over the completed kit. Once on, you paint "small": draw fine lines and squiggles of well thinned base colors of different hues: this is called "mottling". It's a modular approach - each area that will have a different base color gets a differing collection of mottling colors. Like a dope I forgot to take a pic of the P-40 primed and/or mottled. Here's a pic from a Wildcat I recently built that shows what I'm talking about:

  primed by Eric Bergerud, on Flickr

  mottle by Eric Bergerud, on Flickr

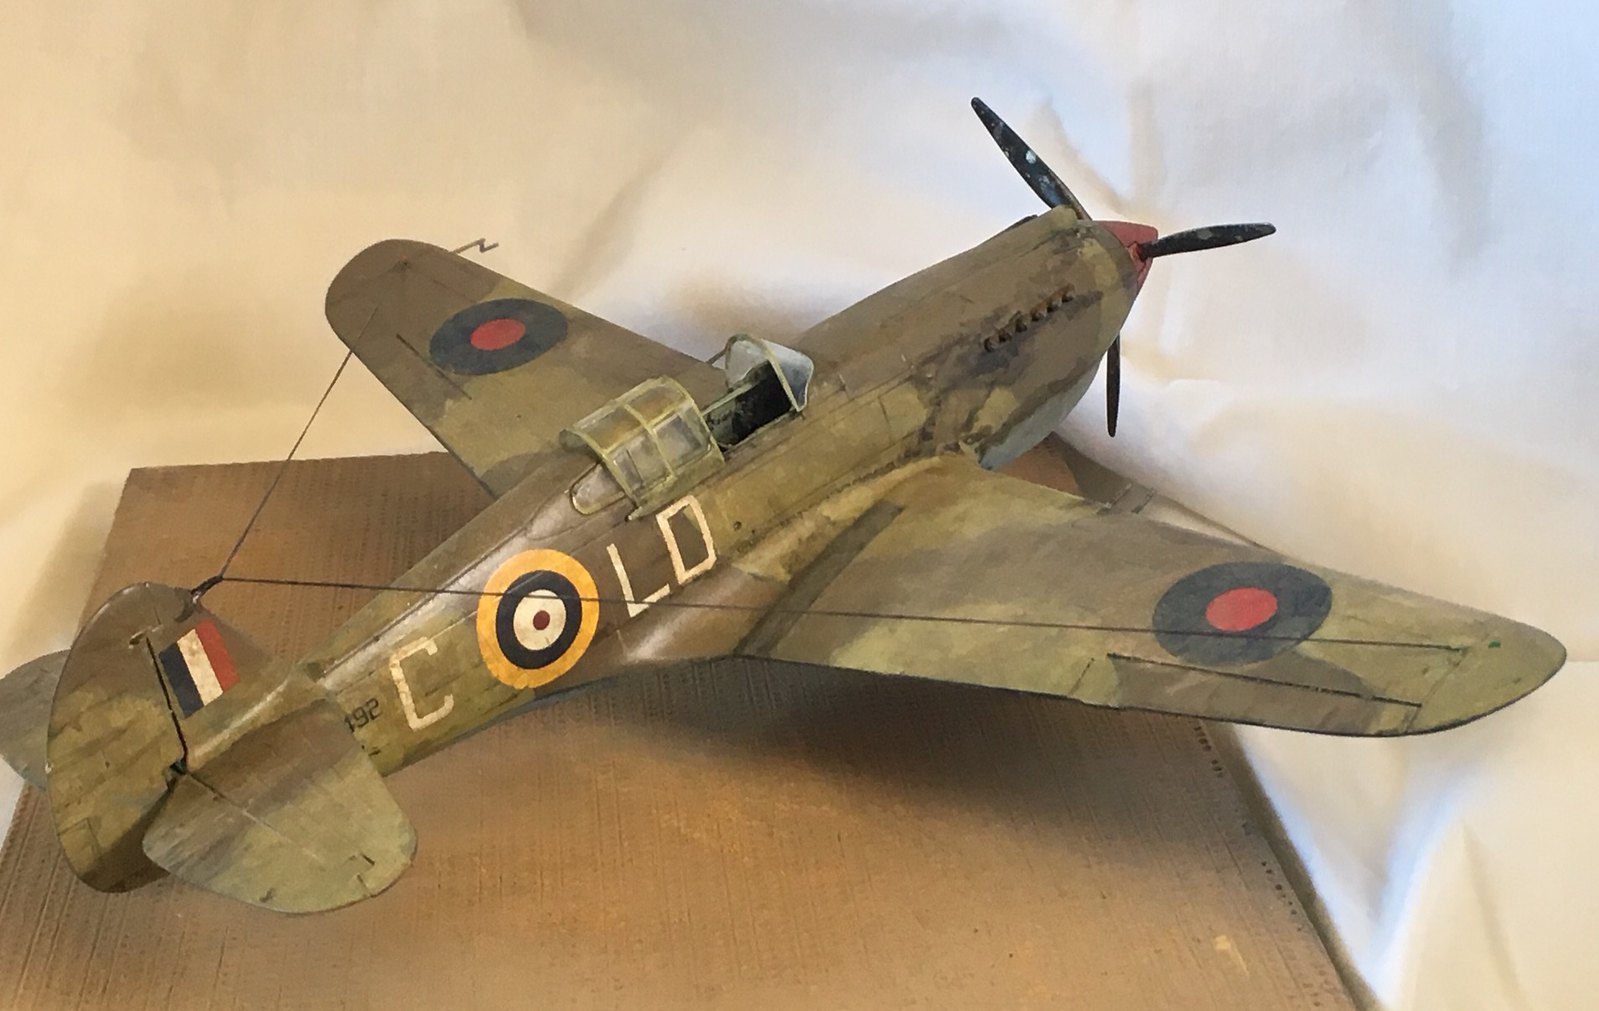
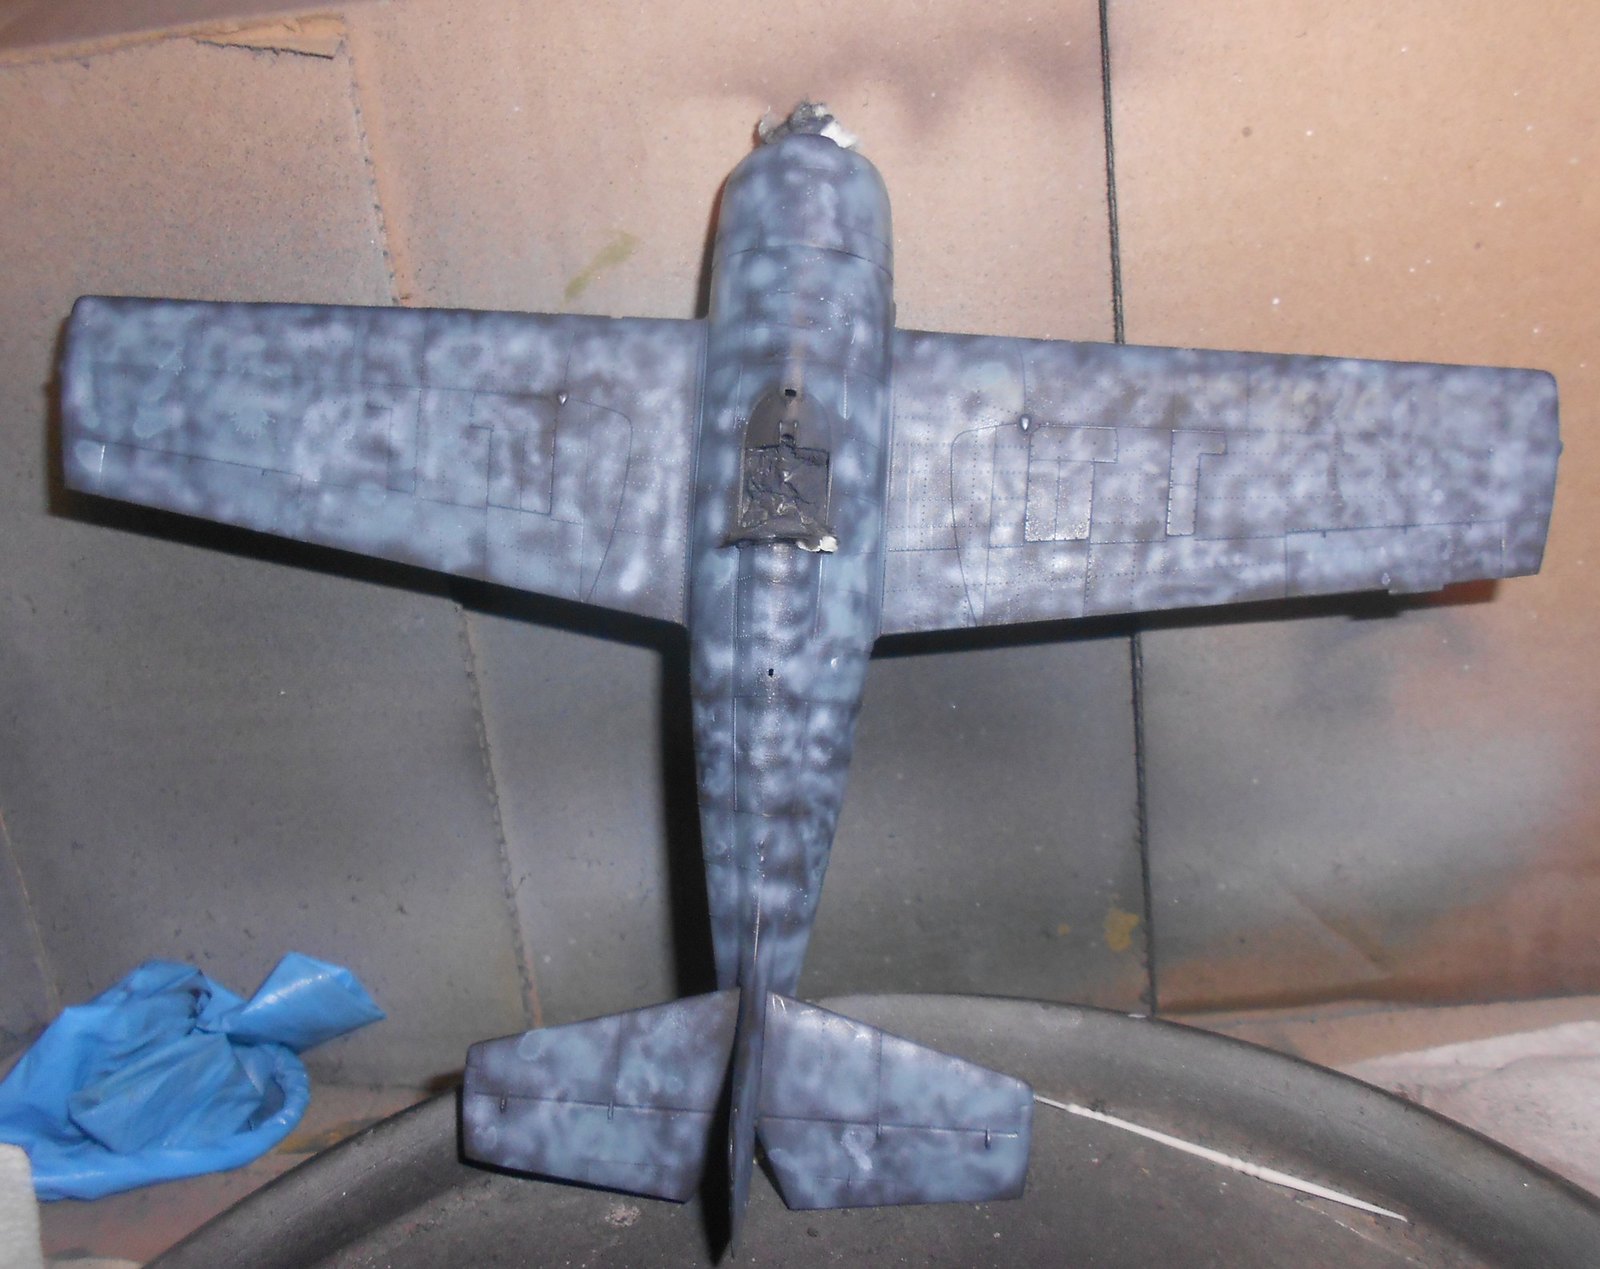
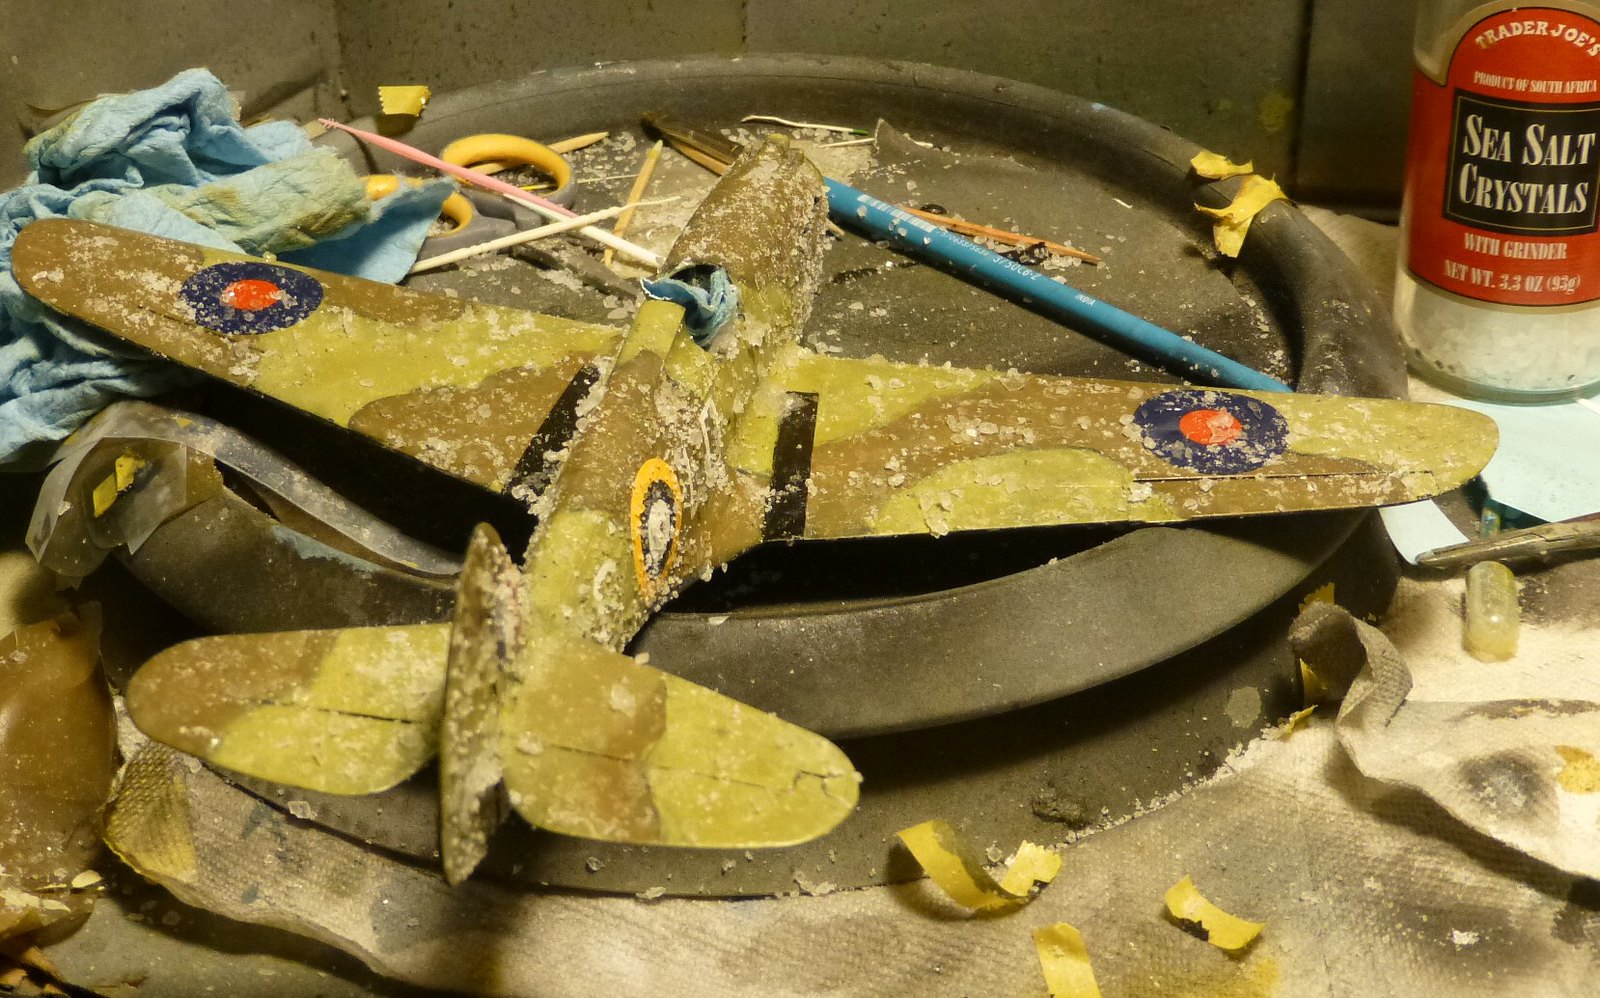
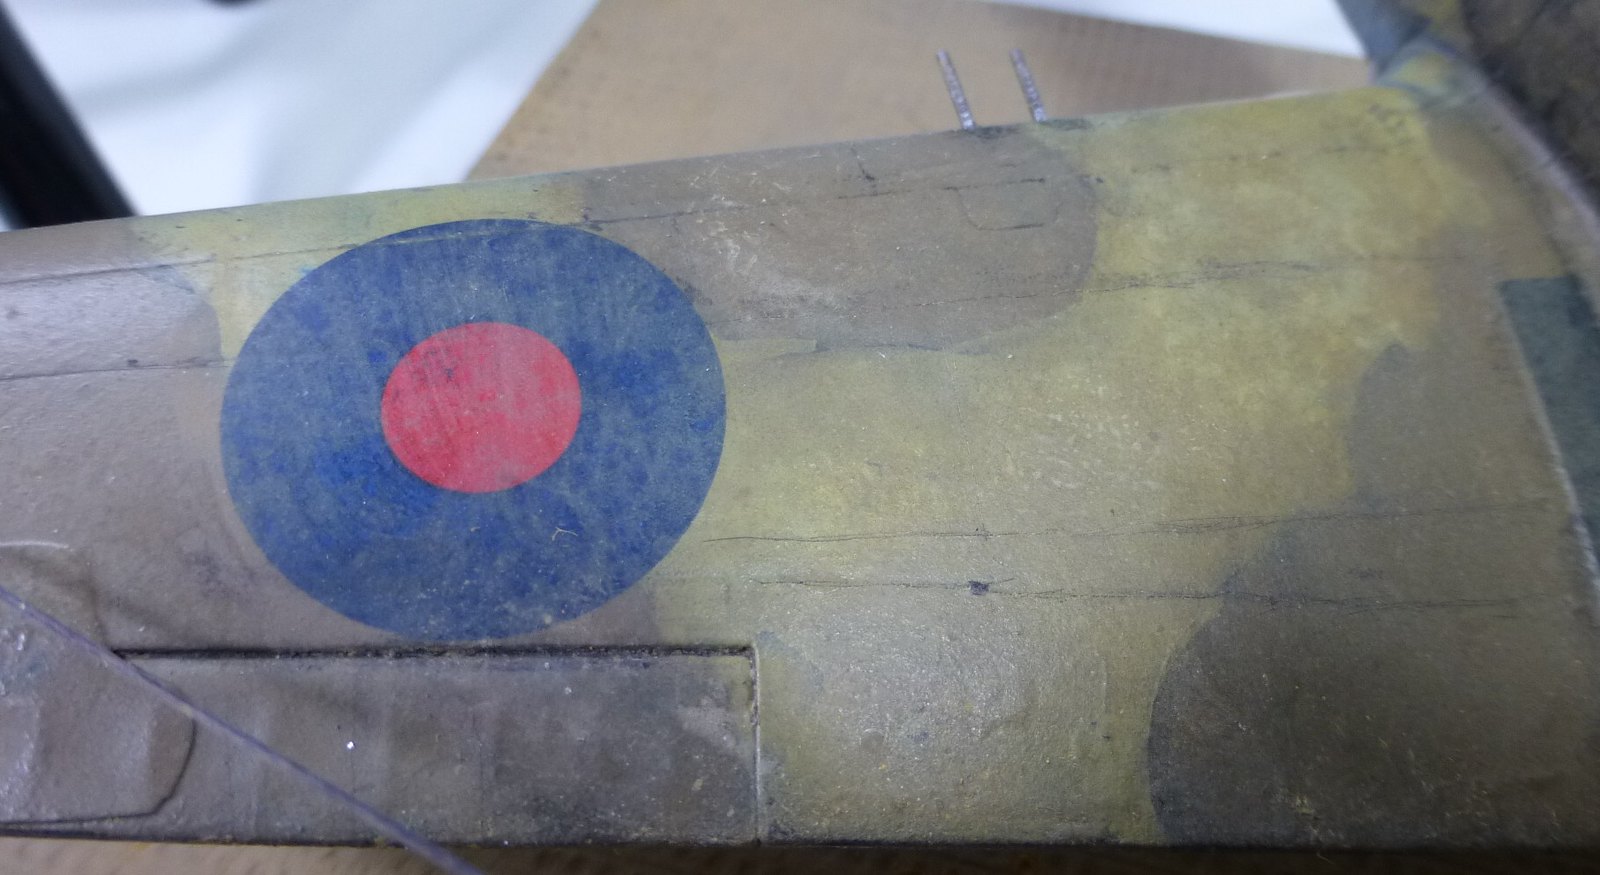
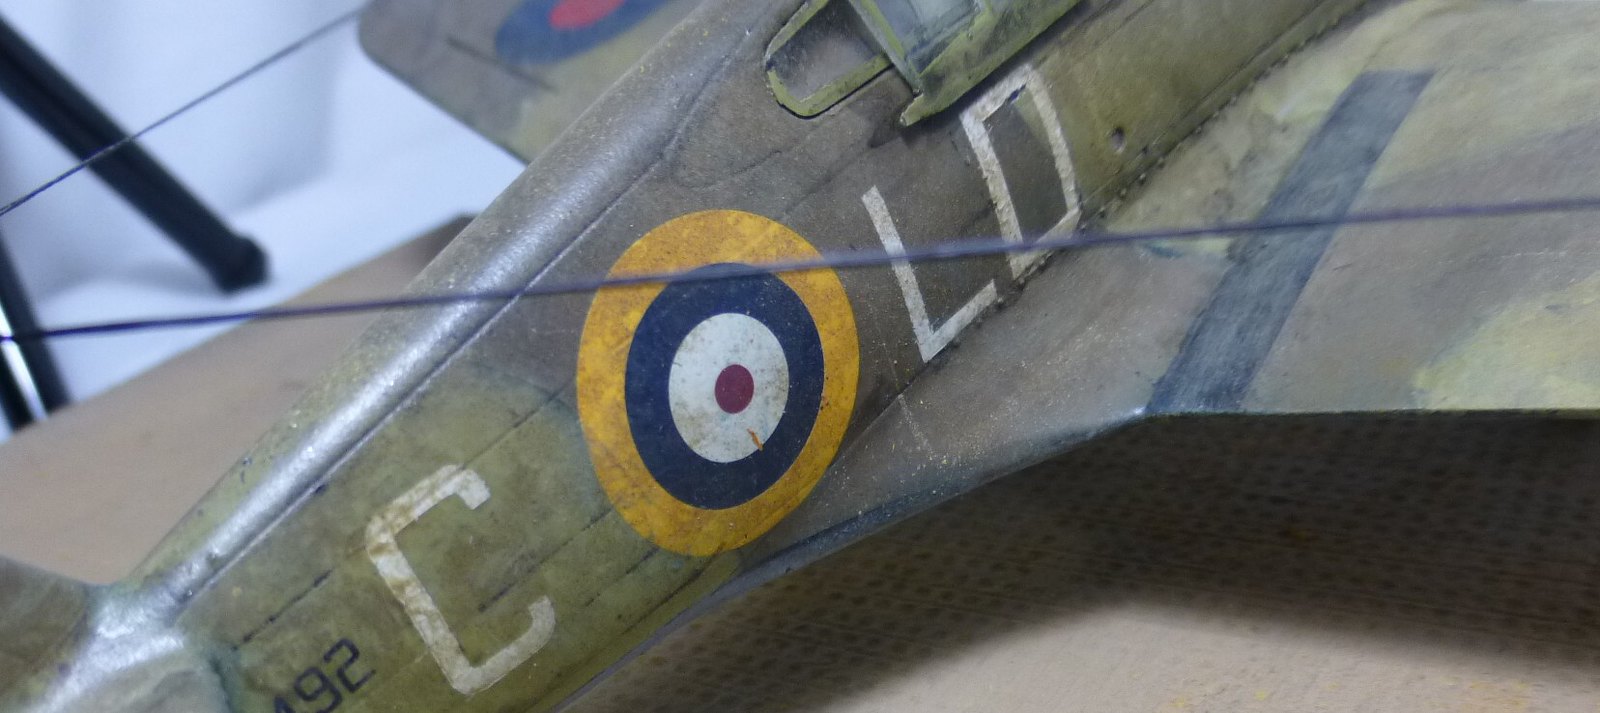
 There are two reasons to black base. First, it gives the model a very irregular surface finish which I believe is appropriate for almost any military plane (or vehicle for that matter) that has seen service. Second, black basing replaces pre and post shading. I know many good modelers use these techniques, but I agree with Doog that aircraft surfaces are irregular and by no means follow panel lines. So preshading, even if not overdone, can make the surface too regular in appearance. After "mottling" is done, you spray a thinned base coat and build it up very slowly - stop sooner than you think you should. The result should be an irregular surface, ready for weathering. Here's what the Tomahawk looked like after I put the base colors, decals and clear coat. (I used camo masks - they were cheap but not of great value. The RAF Tomahawk wasn't out when I bought the kit, so RAF markings had to be aftermarket. I raided three different kits for the roundels - all smaller than normal in this theater - and bought canopy masks and aircraft ID markings from Montex. Good masks. However, the ID markings weren't decals but stencils. I don't think they were worth the extra time - there are good decals in our age. Anyway, the plane wears the marking of Clive Caldwell - the RAAF pilot who was the "top gun" for Desert Air Force, and the war's top P-40 ace with 22 kills. He added another five in the PTO flying Spits. One thing was essential - no shark's teeth. It was a German idea and shame on us for copying them. I will do no shark's teeth - ever. Just like I'll never build a Bismarck. I kept the kit's Chinese markings for use on an Eduard I-16 - more of those were flown by Chaing's birdmen than AVG P-40s. And no teeth - I'd also guess it's a very tricky decal.) Anyway: do note the very irregular surface finish:

  Fusebase by Eric Bergerud, on Flickr

 Next up was a heavy dose of salt fading that delivers a very splotchy appearance:

  salt by Eric Bergerud, on Flickr

  saltdet by Eric Bergerud, on Flickr

 Now we want extra fading with oil dot. This is not done to "filter" but to fade. I took a tip from Doog and ran down a tube of Windsor "Transparent White" - a blending oil that's perfect for fading. As you can see I applied the dots with a tooth pick. I first work them around in circles with a small brush and then work them in harder with a flat. Different oil colors were used depending upon the base. On the second pic below, the right half of the wing has been "oiled" and the left side up to the wing root has not. I think you can see the difference. This both fades and also begins to moderate the salt fading and mottling:

  DF1 by Eric Bergerud, on Flickr

  DFComp by Eric Bergerud, on Flickr

 Here's the plane after black basing, salt and oils and ready for final weathering:

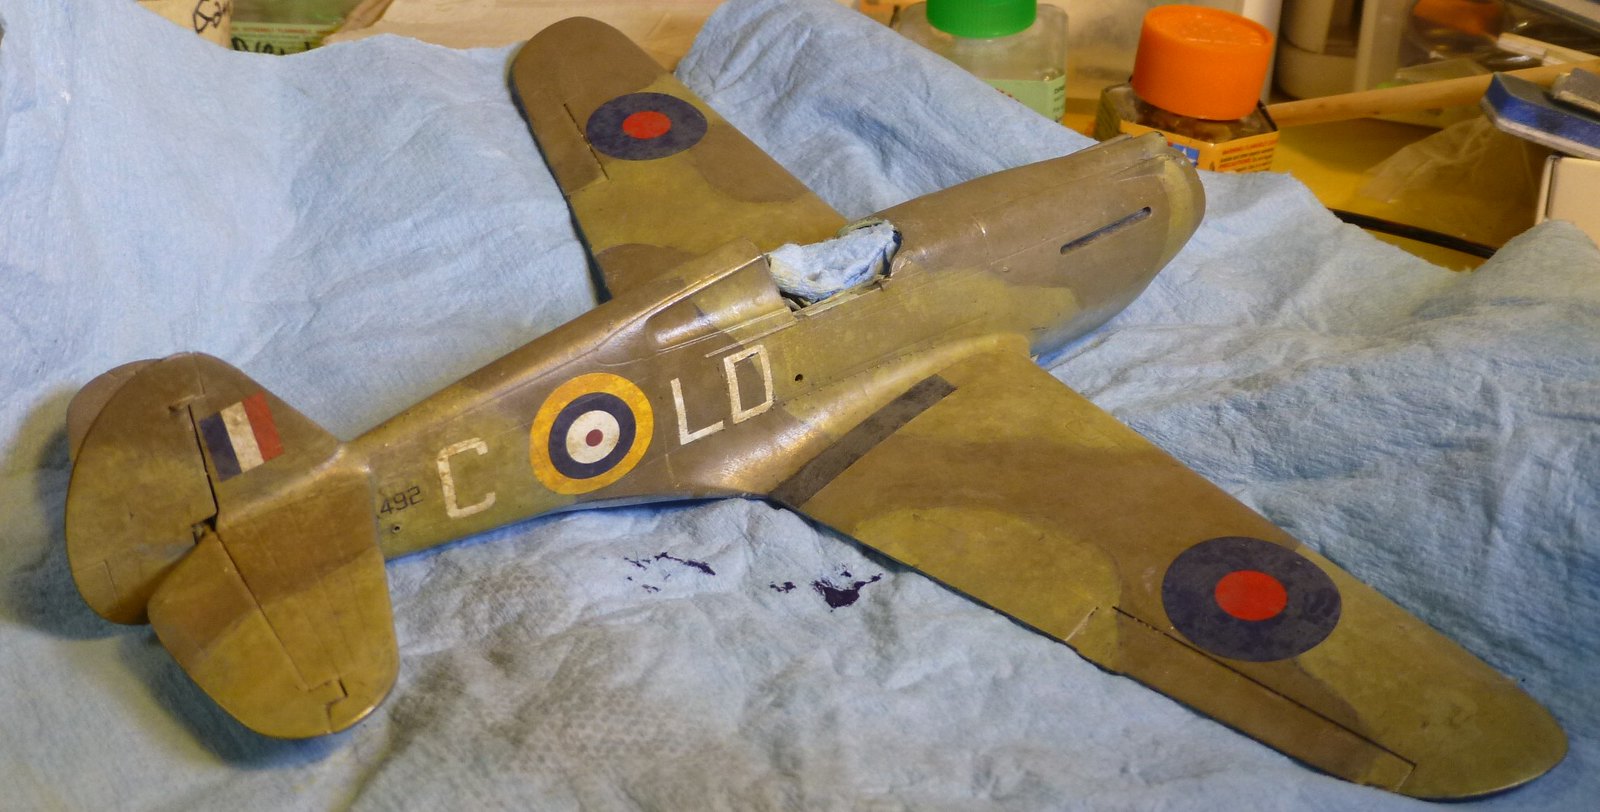
  DFFus by Eric Bergerud, on Flickr

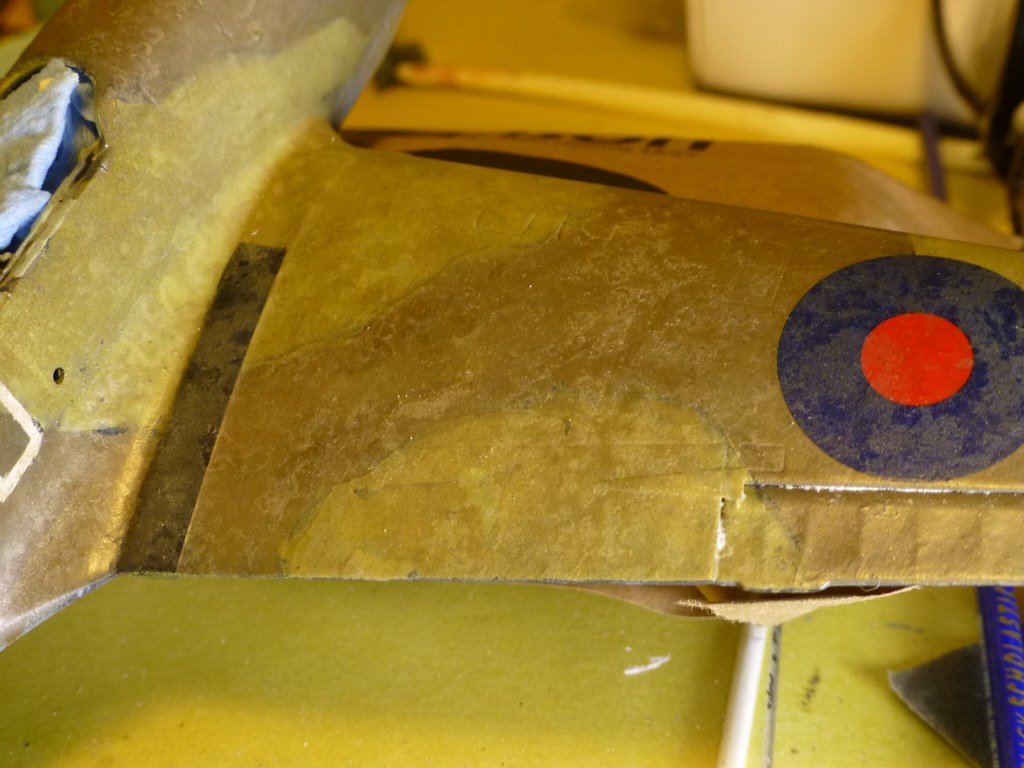
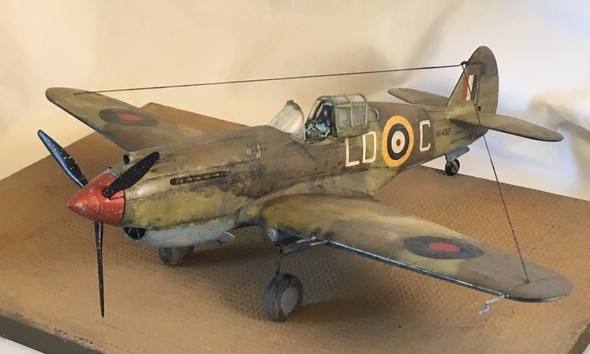
 The last stage was applying panel lines and fluid stains. I did them with Iwata Com.Art "Transparent Smoke" paint which gives an indistinct image of minor panel lines and adds a coarse grime to the the surface that's not easy to see, but emphasizes the fade especially when the final matte varnish is applied. I used Com.Art "Old Oil" along with smoke for fluid and exhaust stains, especially up front. And, as this was a desert plane, I gave it a very light coating with loose Gamblin pigments at the end. (BTW: I use Windsor Newton Matte Varnish which is $9 but is simply super - that bottle will last for many kits. Thin with Gunze or Tamiya lacquer thinner. The matte "eggshell" effect is great.) Here's the result:

  iplftft by Eric Bergerud, on Flickr

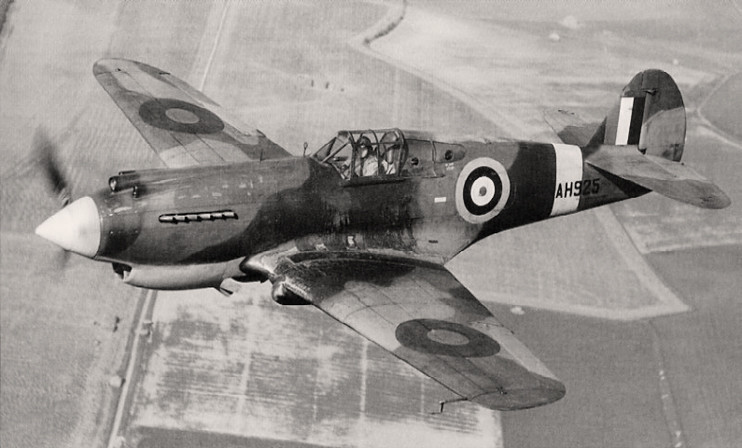
 The P-40 was a good plane for Desert Air Force. The P-40B/C were given the name Tomahawk (they've got the sharp snout with twin mgs over the prop), the P-40E were Kittyhawks (different snout, six mgs on the wings). Either were better fighters than the Hurricane which had it's one day in the sun during the summer of 1940. (Had the RAF had nothing but Hurricanes, the BoB would have been a very tough nut. The Hurricane matched up badly with the 109 and could barely match the speed of the 110 at high altitude. It had an airframe that was really from the early 30s and that hurt. It proved a fine strafer when fitted with 20 or even 40mm cannon until superseded by the Typhoon.) P-40s also matched up pretty well with Macchis and 109s. On paper the bad guys were superior, but in the dust and heat of the desert, both Axis machines (and the Spit) required modifications which hurt performance. Also, when flying in bad conditions, no airplane matched "paper specs" - another advantage for the Detroit Iron school of military aviation. The Tomahawks began to appear in early 1941 and were used until late 1942 when Kittyhawks slowly replaced them. (Caldwell flew both.)

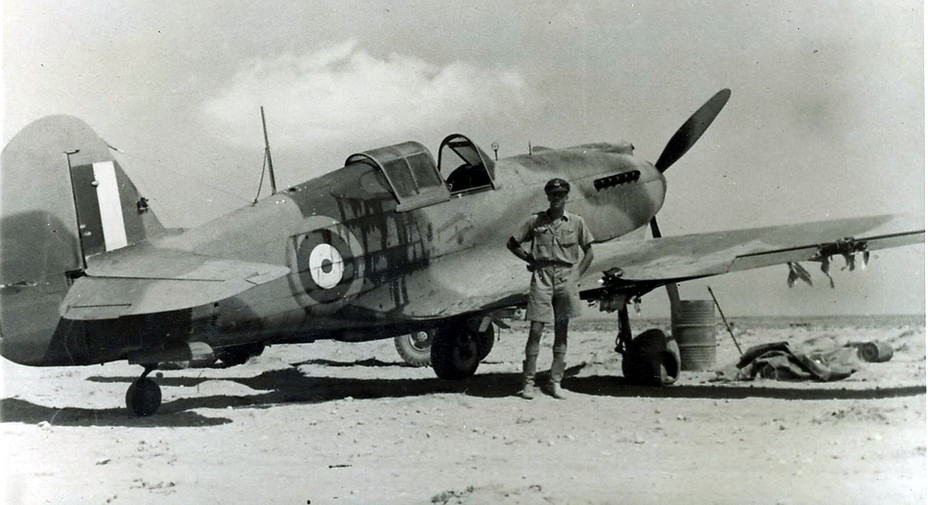
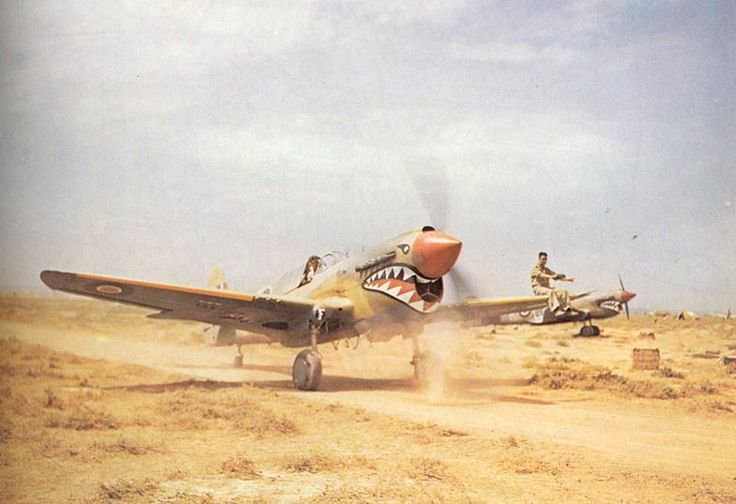
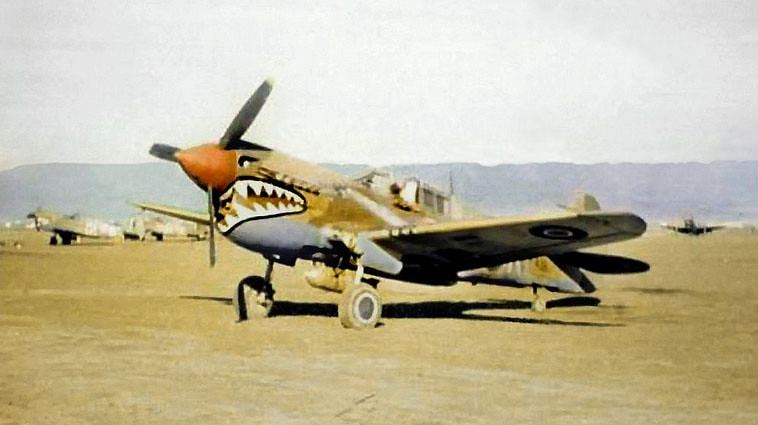
 The desert would have been one of the worst environments for combat aircraft. The sun would do a number on the matte paints of that era - fading them in record time. (Paints weren't very good then, and some pigments like cadmium were allocated to other strategic uses, so even a new plane would wear fast in Libya.) And then there was the sand. I've talked to several vets of the Egypt/Libya and Tunisia and everyone remembers the dust, sand, dirt and flies. One guy told me the dust and sand got into everything - it was literally in the water. So I've looked at hundreds of desert theater aircraft in the last few weeks and they were a worn bunch. Obviously, how worn would vary. Planes lost were replaced with new ones. But in the early war, ground crew kept planes in the air that in 1944 would have gone to the scrap heap. One thing that you often notice are fluids - not always obvious where they come from. The exhaust pattern on P-40s was down and to the rear in a kind of arc - what I've got is about right I think. And, because there were guns, an engine, the exhaust system and fuel lines up front, the front end was pretty soiled. Here are some pics that inspired the "heavy weather" I applied.

  RAF6 by Eric Bergerud, on Flickr

  RAFcol by Eric Bergerud, on Flickr

  RAAF2 by Eric Bergerud, on Flickr

  RAF4 by Eric Bergerud, on Flickr

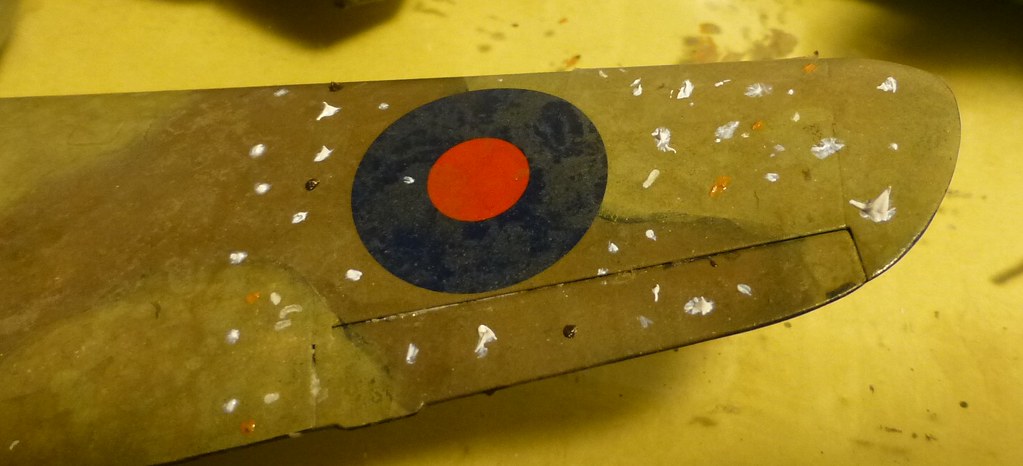
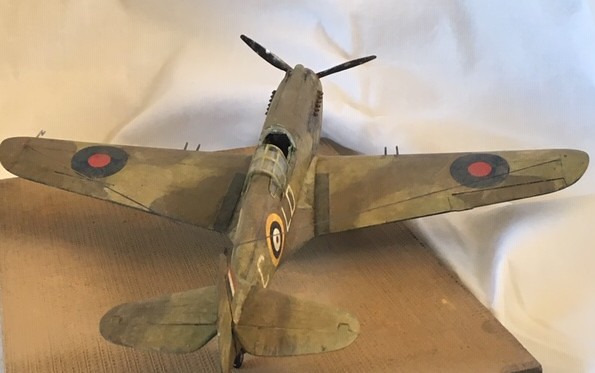
 Here are some pics of my model. These detail shots - which you don't see looking at the kit from two feet away - show a closeup of the muli-layer weathering. It takes real time to make something look bad.

  wngdet by Eric Bergerud, on Flickr

  browndet by Eric Bergerud, on Flickr

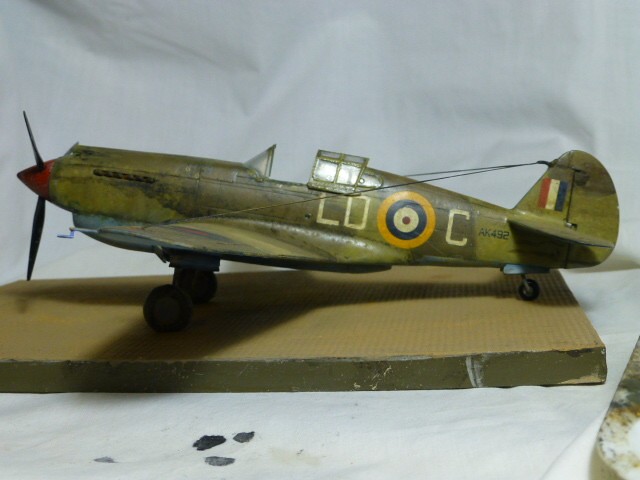
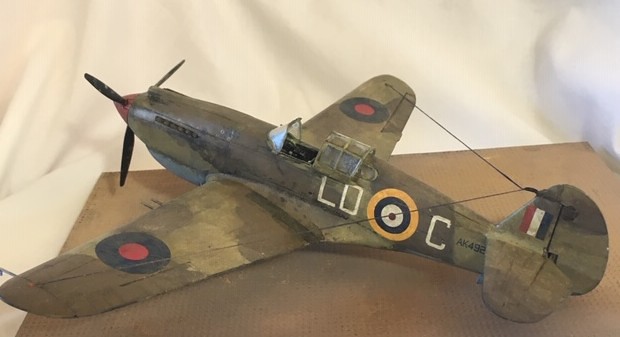
 Here are some pics of the plane. I put it on a simple stand that I painted sand. I have no space for plane dios anyway. And I ran into one ugly trouble. I've got a very good Panasonic "point and shoot" camera, but for reasons that I can't figure, it didn't render the middlestone camo color well. In point of fact, there is green in RAF Middlestone, but the Panasonic amplified it. (So did a Nikon and a Canon.) I took a few thousand photos, or close, under different lighting etc and found I got closest to true color under a flash. So I had my wife use her iPhone 6S, and the color is almost perfect - a kind of tan with the slightest hint of green. There's a little sacrificed in detail, but it gives a good rendition. Just for kicks, the first pic below - a left side profile - came from my camera and the greenish tint on the middlestone is quite evident. The others are from the iPhone: the difference in color is easily seen. I really do have to figure this out. (Any ideas would be welcome.)

  left3! by Eric Bergerud, on Flickr

  iplr3 by Eric Bergerud, on Flickr

  ipr by Eric Bergerud, on Flickr

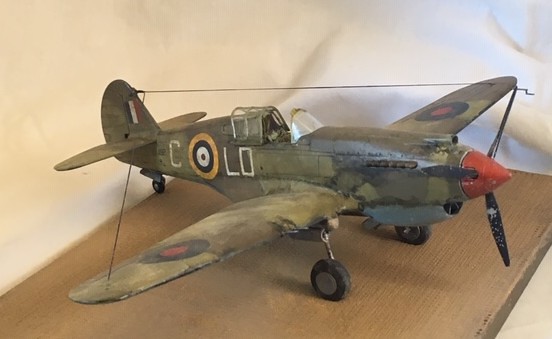
  iprft by Eric Bergerud, on Flickr

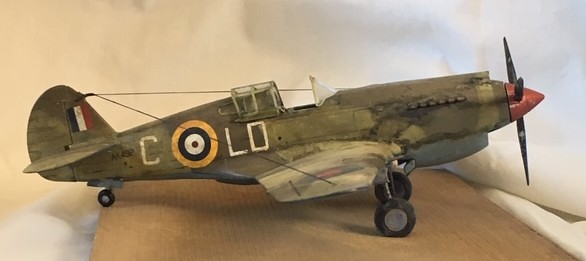
  ipright2 by Eric Bergerud, on Flickr

 Eric


A model boat is much cheaper than a real one and won't sink with you in it.

  • Member since
    March 2003
  • From: Western North Carolina
Posted by Tojo72 on Friday, December 14, 2018 7:58 AM
Thanks for the great tutorial, and a really great build.

  • Member since
    August 2013
Posted by Jay Jay on Friday, December 14, 2018 8:27 AM

TY for posting this fabulous P-40.

I just love the layers of paint you have painstakingly put on this my favorite aircraft. I have been experimenting with these very techniques myself and have yet to acomplish the fine look you have done, but via your explainations here, I think I can improve my results.  Thanks again Mate.

BTW I have a book about the Flying Tigers and in it Claire Chenault states that the shark mouth was copied from "an Aussie plane " not a German one so you can use it in all good conscience. Smile


 I'm finally retired. Now time I got, money I don't.

  • Member since
    August 2013
Posted by Jay Jay on Friday, December 14, 2018 8:30 AM

Smile


 I'm finally retired. Now time I got, money I don't.

  • Member since
    August 2014
  • From: Willamette Valley, Oregon
Posted by goldhammer on Friday, December 14, 2018 10:45 AM

That is nothing but pure beauty.  Extremely well done.

Suggest it be submitted to the magazine.Bow Down

  • Member since
    February 2010
  • From: Berkeley CA/St. Paul MN
Posted by EBergerud on Friday, December 14, 2018 4:23 PM
Shark's teeth - well if the AVG got it from an RAAF plane - probably a Tomahawk, they got it from BF-110. It's really a bit much. In the USAAF many planes had their own nose art, and it ran to subjects like pretty girls (Bong's famous noseart "Marge" is a pic of his wife: it was a different era), Disney characters or quirky things like Robert DeHaven's orchid. Aside from that, sharks are incredibly stupid, smelly and ugly fish that swim badly (I've caught plenty). Why not paint on a skunk's tail? (And I bet that decal is a real trial to get on right.) But Caldwell used no teeth. Good for him. Thanks for the kind words but I still think in our world that most observers would think weathering like I use is bad form. I did it this way, because I think it matched the look of the genuine article. I'd do a Battle of Britain plane differently. The armor community accepts almost anything - often better art than history. Ironically I make rather drab AFVs, because I think they were above all dirty - not rusty, and rarely chipped half to death - but always dirty. War is the enemy of art. But this is a hobby - everybody is free to create their own eccentric artifacts. Eric


A model boat is much cheaper than a real one and won't sink with you in it.

  • Member since
    December 2010
  • From: Salem, Oregon
Posted by 1943Mike on Friday, December 14, 2018 6:27 PM

Eric,

I appreciate the information regarding weathering as well. Your finished model looks like what I think the photographs you've referenced show - and in the case of the B&W photos - should show were they in color.

A wonderful finished model! Many kudos.

Question: I also use Windsor Newton Matte Varnish for a flat coat. However I thin it with just plain old H2O (distilled). Is there something I should be aware of when just using water to thin it? It seems to have done a fine job where I've used it so far.

Mike

"Le temps est un grand maître, mais malheureusement, il tue tous ses élèves."

Hector Berlioz

  • Member since
    February 2010
  • From: Berkeley CA/St. Paul MN
Posted by EBergerud on Friday, December 14, 2018 10:09 PM

Well, WN makes two Matte varnishes. one is called Matte Varnish the other is Artist Matt Varnish. The first says underneath the label "Water Mixable Oil Colors" which means it's made for water mixable oils - I've never tried them. The second, underneath the label says "Oil Colour" so it's for regular oils. I just bought the water mixable type, but have never used it. (I collect varnishes - actually Vallejo Matte Varnish is pretty good.) I'd guess that water would not be a good thinner for something made for true oils. However, if what you're doing works, it must work. I think WN gives a subtle effect - it's not as harsh as Dullcoate, and creates a kind of "eggshell" matte instead of sandblasted.But it's got enough "bite" that it will still easily hold a light dust of pigments.

Actually, if I didn't have a bucket of oil paints, it would be tempting to try the water soluble oils - they do have a following. Solvents aren't really a problem with oils in my world - odorless white spirit is genuinely very mild and Gamblin "Gamsol" is even milder and leaves the smallest "footprint" of any thinner I know (far less than turpentine or turpenoid). In any case, when fading you don't want much thinner on - preferably just wet the brush. If you over-do something, then you'll have to wash some off, but with practice I find that rarely happens. Armor uber-guru Mike Rinaldi has almost switched his famous "tank art" techniques on their head. In his most recent presentation on YT he claims that he gives his armor a good base finish (Mission Models Acrylics, a company Rinaldi cooperates with - they're water based and I'm going to try them next kit though I can't believe they'll be better than Golden High Flow) and then does everything with oils - fading, filters, washes, scratches, rust. I assume he'd still use pigments - no way anything produces the same effect. (I know a lot of modelers give armor a light dusting of Tamiya buff - that may emulate dust, but giving the model a light dusting with pigment looks a lot better to my eyes. Of course paints do have pigment in them - but it's a crap shoot whether it's an organic [chemical] or inorganic [earth mineral] pigment. Either way, they don't look the same.) 

Eric


A model boat is much cheaper than a real one and won't sink with you in it.

  • Member since
    November 2003
  • From: State of Mississippi. State motto: Virtute et armis (By valor and arms)
Posted by mississippivol on Friday, December 14, 2018 10:16 PM

Thanks for sharing, Eric. I've seen Doog's blog about it, and I've been admiring the Danish 104 he's painting now. It really hit me when I took my B-17 to a contest last month, it was way too clean. It had that die cast look to it. I think the clean look works for certain subjects like my C-17 kit, but not for everything. Biggest part for me is dedicating the time to do it; too often I'm just trying to blow past to get to the decals.

  • Member since
    February 2010
  • From: Berkeley CA/St. Paul MN
Posted by EBergerud on Saturday, December 15, 2018 1:33 AM

This is purely subjective and I am not making grand claims. But I think Doog is right when he talks about very clean builds being in the "Hasegawa school" of modeling. You look at the nice finish, the crisp panel lines, the subdued weathering and the shinny canopy and think - nice model. But did WWII aircraft look like that? I honestly don't think so. (I've been giving canopies thought. A perfect canopy is a neat to look at. But if you look at the pics, WWII canopies didn't shine like a diamond - they were actually pretty scratched up. Not sure how to duplicate that.)  I look at airliners in the airport - planes that get a lot of service - and they don't look overly tidy if you get a close look. Nor do photos suggest that wartime aircraft had very pronounced panel lines bursting through a faded finish - what Doog calls "Goth." I don't know if that's important or not. I know that many modelers that have skills far greater than mine like a "clean" build so it's hard to say they're wrong. (Ship modelers especially: it takes so long to build a good ship that I think many modelers are reluctant to risk months of work with a weathering job gone wrong. Some ships were very clean - others were simply pounded. So if Mig Jimenez painted a ship, some of his techniques would probably fit right in.)

I've got the Airfix B-17. Doog does go into using black basing and natural metal finish. There's obviously a connection as NMF models I think always carry a black primer. I haven't tried NMF for years and I've been looking at films and pics - unless a plane was spanking new, a WWII NMF bird was still very worn - might reflect sunlight, but from other angles you can see the grime. And a B-17 would have a bucket of exhaust stain. If you want to see a jaw-dropping Airfix B-17 check out master modeler Tom Grigat's YouTube video: "Airfix Flying Fortress in motion-stop motion." It's one of the finest builds I've seen & Grigat is a blinking genius. (I'd rank him with Paul Budzik for aircraft, Des DeLatorre for biplanes, Adam Wilder for tanks and Jim Bauman for ships as simply top tier in our hobby.)

Actually black basing is not hard. The "mottling" stage is very forgiving and easily mastered especially if you follow Doog's advice and use acrylic/lacquers like Gunze, Tamiya or MRP. The real trick is not to spray on too much while "blending" (applying the base coat) - you should stop before you think it's properly covered and let the paint dry. You are, after all, looking for an irregular finish. You can always add more - but you can't take it off. (I think a lot of modelers over-paint preshaded kits too. The trouble there is that you are getting on a lot of extra paint. Black basing is extremely economical - only a small amount of paint is applied. Things get tricky if you've got complex camo - that does require extra time. But complex camo takes time regardless. You could do a simple one color mottling phase in about the same amount of time preshading takes and get fine results. But you're right about time. The longer I'm at the hobby the longer it takes to finish a kit and I'm not a perfectionist. 

The primer is important. I use Badger Stynelrez on tanks. However, for aircraft, I'm absolutely sold on Duplicolor gloss black "sandable & fillable" lacquer primer. (DAP1698) The can has a "fan cap" and sprays very evenly. It covers very well and will take care of small finish problems. And because it's automotive lacquer, the stuff is cheap: $6 for a can that would do four or five kits. You could decant it and put it on with an airbrush, but I doubt many could lay it on better than the fan cap can does. That means outside work unless you've got a proper booth and fan - it's strong stuff. 

Eric


A model boat is much cheaper than a real one and won't sink with you in it.

fox
  • Member since
    January 2007
  • From: Narvon, Pa.
Posted by fox on Saturday, December 15, 2018 3:41 PM

Toast Toast Toast

Jim  Captain

 Main WIP: 

   On the Bench: Artesania Latina  (aka) Artists in the Latrine 1/75 Bluenose II

I keep hitting "escape", but I'm still here.

  • Member since
    February 2010
  • From: Berkeley CA/St. Paul MN
Posted by EBergerud on Saturday, December 15, 2018 5:03 PM
Fox I did the Revell Kearsarge in about .... 1962. It was a huge build for a kid. My parents put it on top of the tv (they were big back then) and my grandmother knocked it off, doing what the Alabama couldn't. One of my last kits until about 2014. Eric


A model boat is much cheaper than a real one and won't sink with you in it.

  • Member since
    January 2015
Posted by TheMongoose on Saturday, December 15, 2018 7:17 PM

I love a dirty build, ahh bird, lol way more realistic. Glad you shared the techniques. Made for some great reading. Keep em coming!

In the pattern: Scale Shipyard's 1/48 Balao Class Sub! leaning out the list...NOT! Ha, added to it again - Viper MkVii, 1/32 THUD & F-15J plus a weekend madness build!

  • Member since
    September 2005
  • From: North Pole, Alaska
Posted by richs26 on Monday, December 31, 2018 2:41 AM

Excellent build you have Eric.  I did notice three minor details that you might have missed for an accurate build.

1.  This:

https://www.asisbiz.com/il2/Hawk-81A/23FG3PS/pages/Curtiss-Hawk-81A-2-23FG3PS-W77-Robert-Smith-China-1942-10.html

RAF aircraft used ring and bead sights.  USAAC/AF aircraft used the N2N reflector sight with the glass mounted on the windscreen.

2.  RAF aircraft had the front fuel cap painted red with the rear oilcap painted black.

https://www.asisbiz.com/il2/Hawk-81A/23FG3PS/pages/Curtiss-Hawk-81A-23FG3PS-W68-P-8109-Charles-Older-1942-01.html

3.  Export aircraft had the headrest with black leather instead of the US brown.  For a good example, the Life magazine assembly photos with the blue lionoil coated export aircraft having the black headrests while the US aircraft having the brown headrests. 

WIP:  Monogram 1/72 B-26 (Snaptite) as 73rd BS B-26, 40-1408, torpedo bomber attempt on Ryujo

Monogram 1/72 B-26 (Snaptite) as 22nd BG B-26, 7-Mile Drome, New Guinea

Minicraft 1/72 B-24D as LB-30, AL-613, "Tough Boy", 28th Composite Group

  • Member since
    July 2018
  • From: The Deep Woods
Posted by Tickmagnet on Monday, December 31, 2018 7:04 AM

Great build. I use black basing all the time. I have even done white basing under darker colors with the same mottled style of painting as with black base. It has an interesting effect as well by just creating lighter faded areas as opposed to the black shadowing effect. Currently I'm doing a Wildcat and black based the bottom for the white paint and white based the top for the blue paint. Not sure how it will end up looking but it should be interesting.


JOIN OUR COMMUNITY!

Our community is FREE to join. To participate you must either login or register for an account.

SEARCH FORUMS
FREE NEWSLETTER
By signing up you may also receive reader surveys and occasional special offers. We do not sell, rent or trade our email lists. View our Privacy Policy.