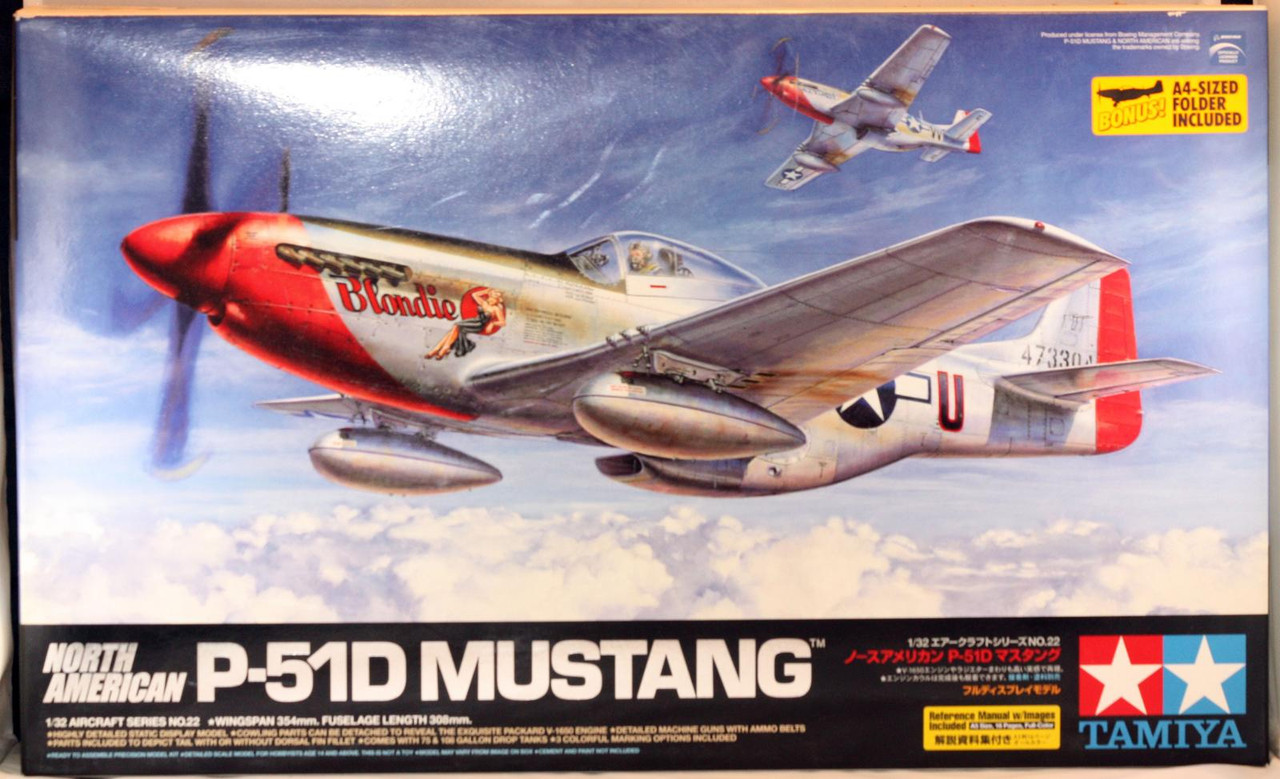
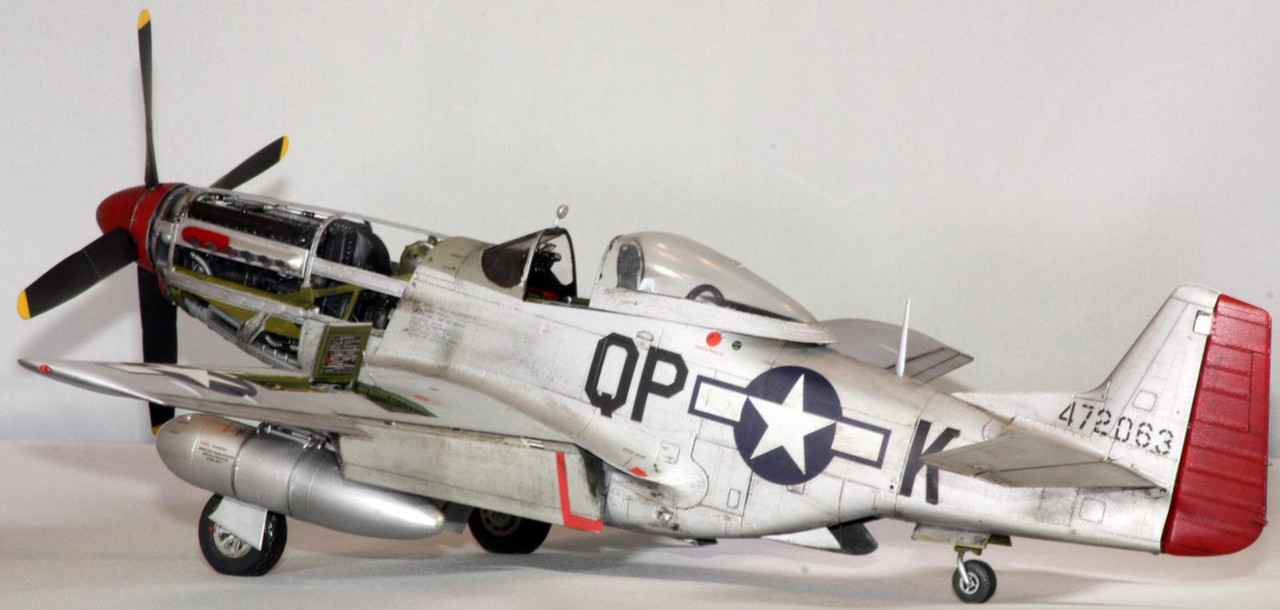
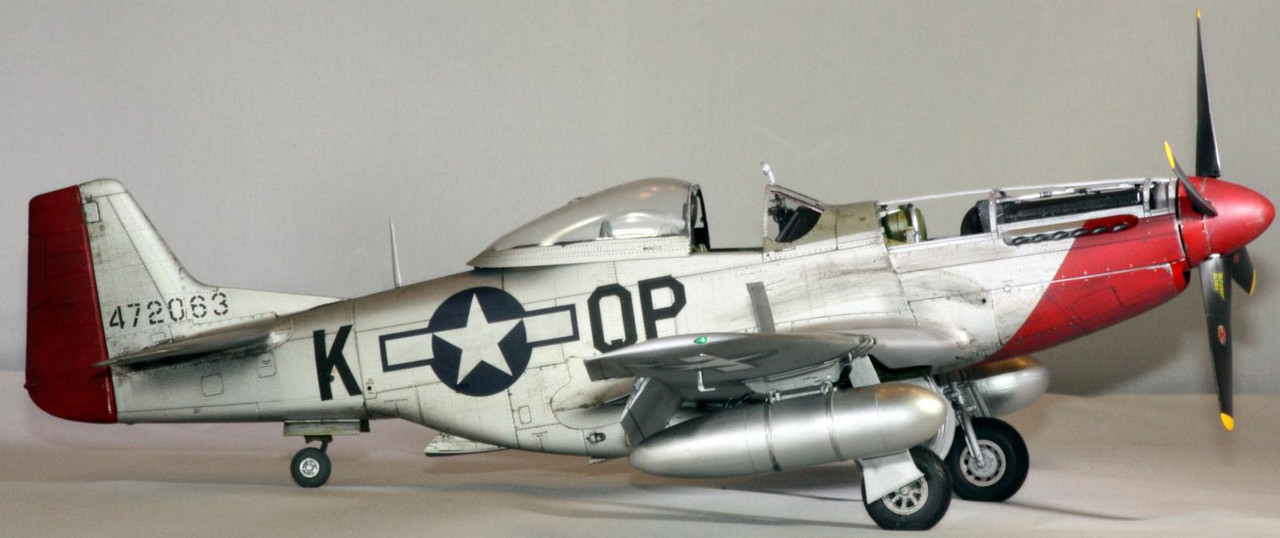
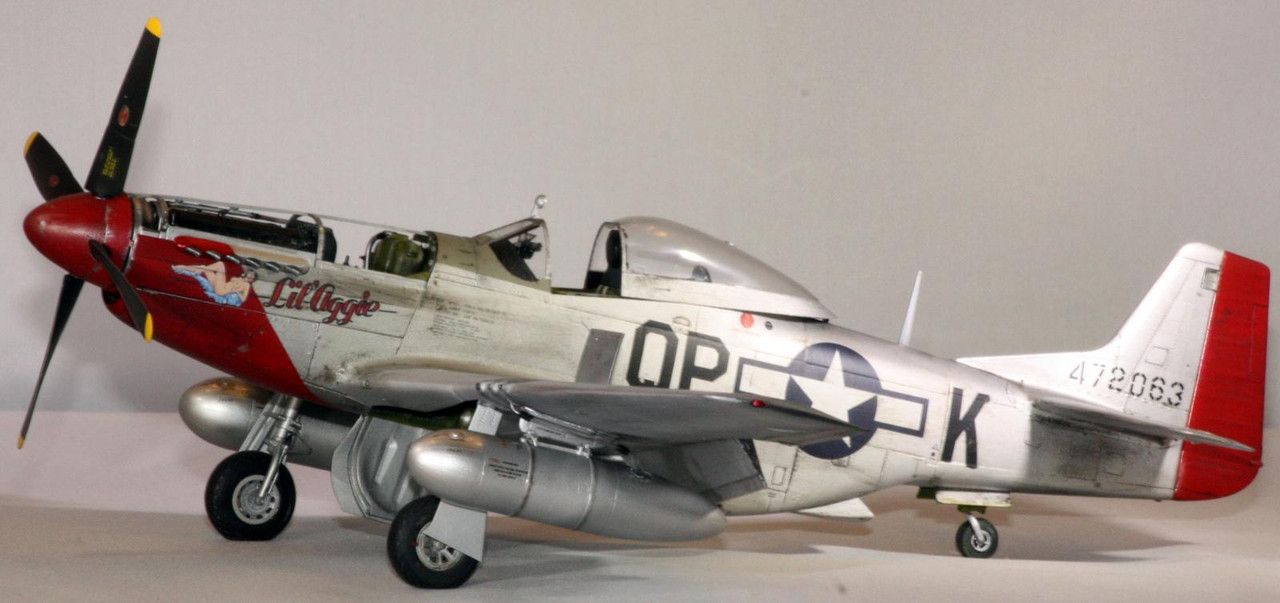
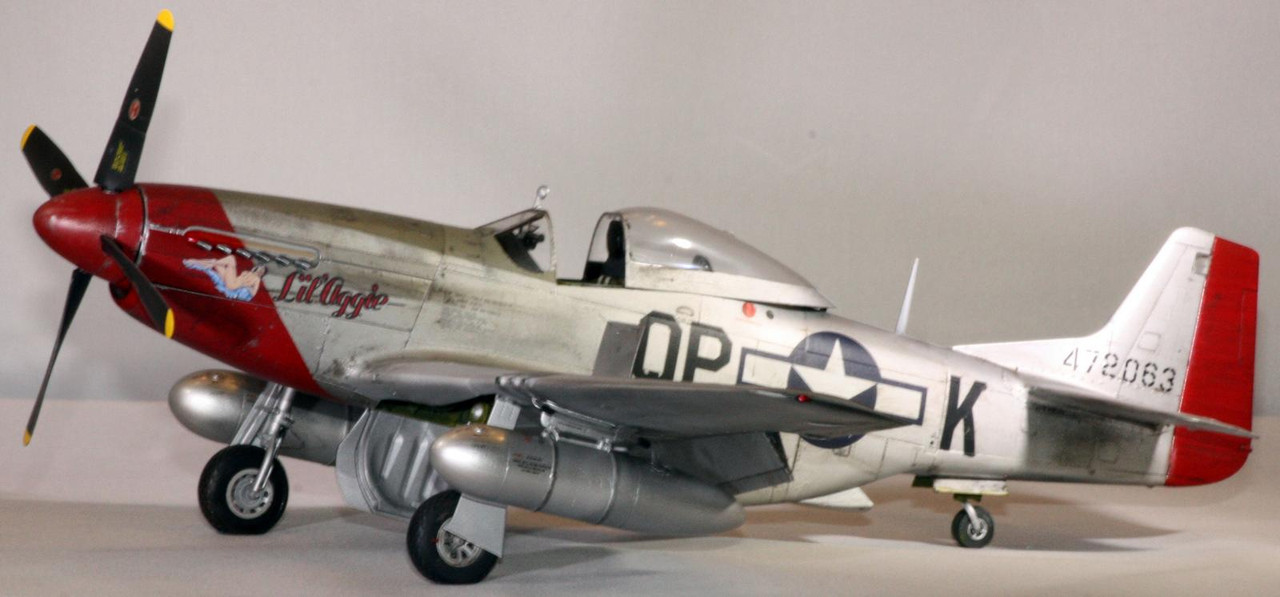
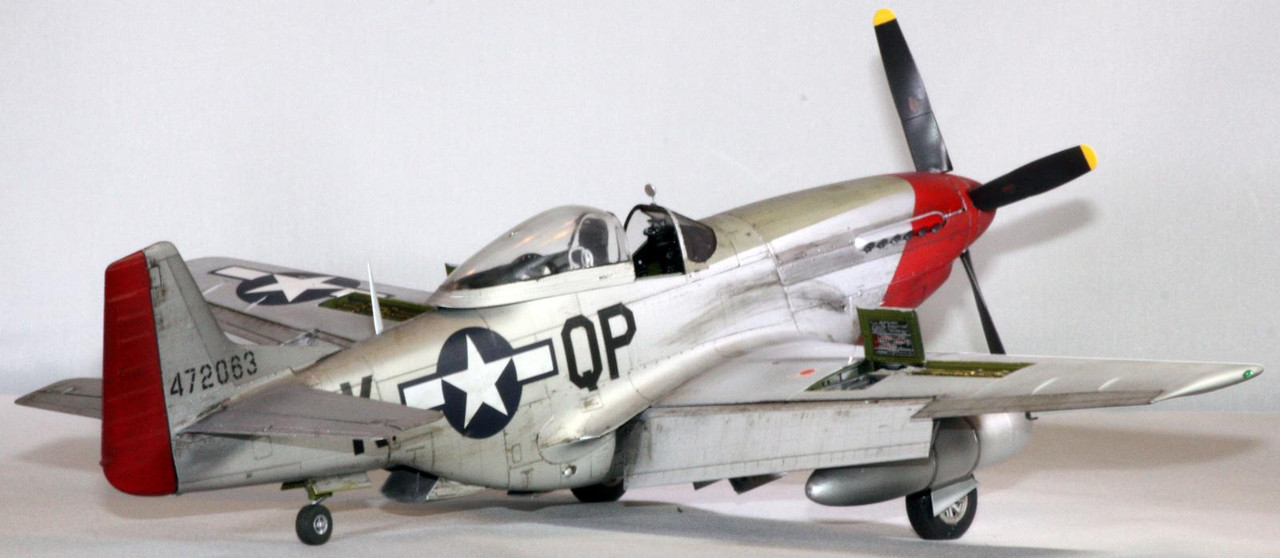
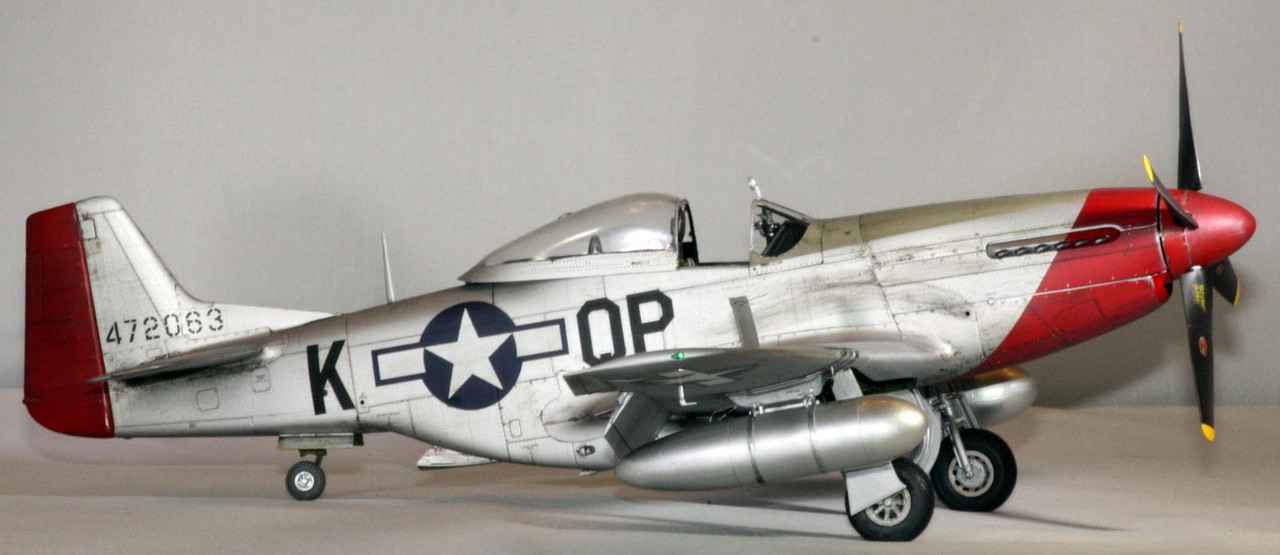
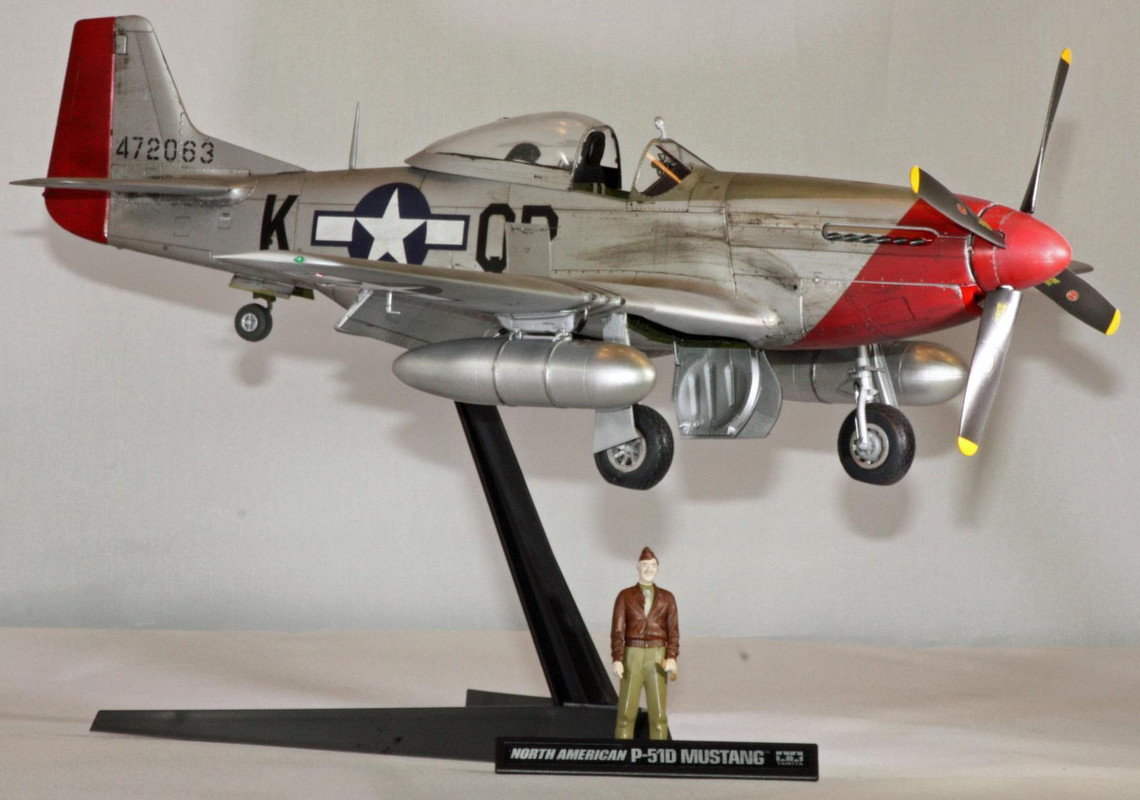
Here is my just-completed P-51D Mustang from Tamiya's fantastic 1/32 kit.
I started work on this 9 May 2019, and completed work 1 July 2019. For me, that's quite a long while for a build, a testament to the complexity of this kit but also of a painting issue that I ran into of my own making.
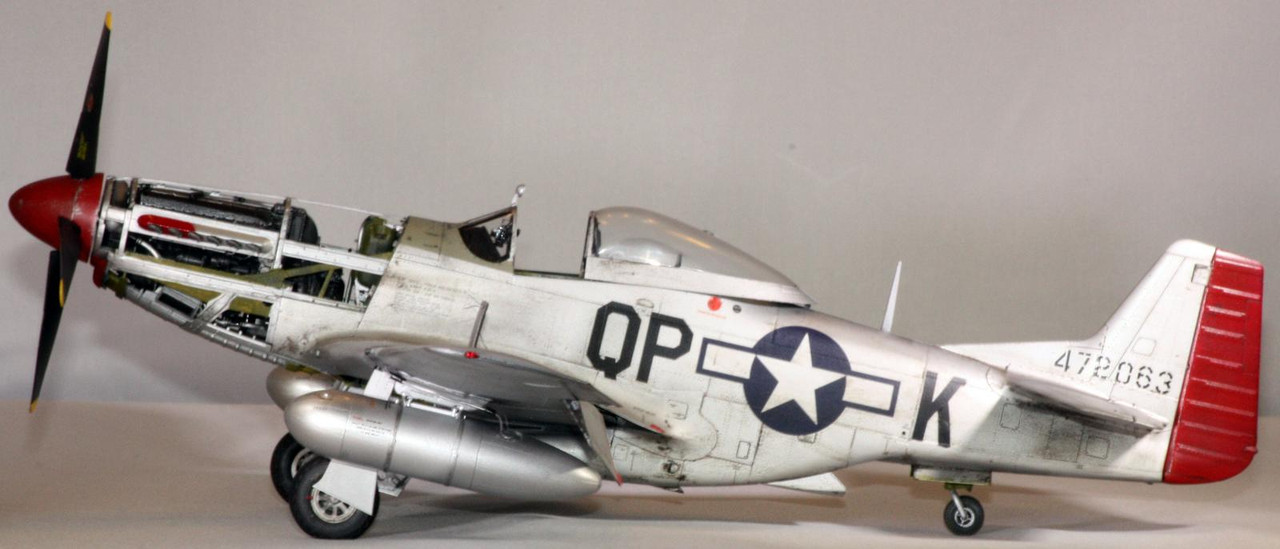
Early on I was looking at the kit decals. I could not make a choice from the provided markings. I was leaning toward the box top art, "Blondie", but while I was browsing various web sites for after-market parts for this kit, I found the Kits World decal sheet containing markings for a 'Stang called "Lil' Aggie". Being a graduate of Texas A&M University myself, there was little chance that I was going to pass up the opportunity to build "Lil' Aggie".
I spent some time researching this particular aircraft. She was originally piloted by Lt. Michael Kennedy, who was assigned to the 334th Fighter Squadron of the 4th Fighter Group of the 8th Air Force, flying out of Debden, England. A bit more information I found was that he was shot down 11 December 1944 but was able to evade capture and eventually returned to base. Details are non-existent as far as I was able to determine as to whether he was shot down in "Lil' Aggie", or where he was shot down at. As for "Lil' Aggie", I wonder if Kennedy was flying this aircraft when he was shot down, as I found a reference to the actual aircraft, 44-72063, being transferred to another squadron and re-christened "HillBilly" after a pilot who was a native of West Virginia.
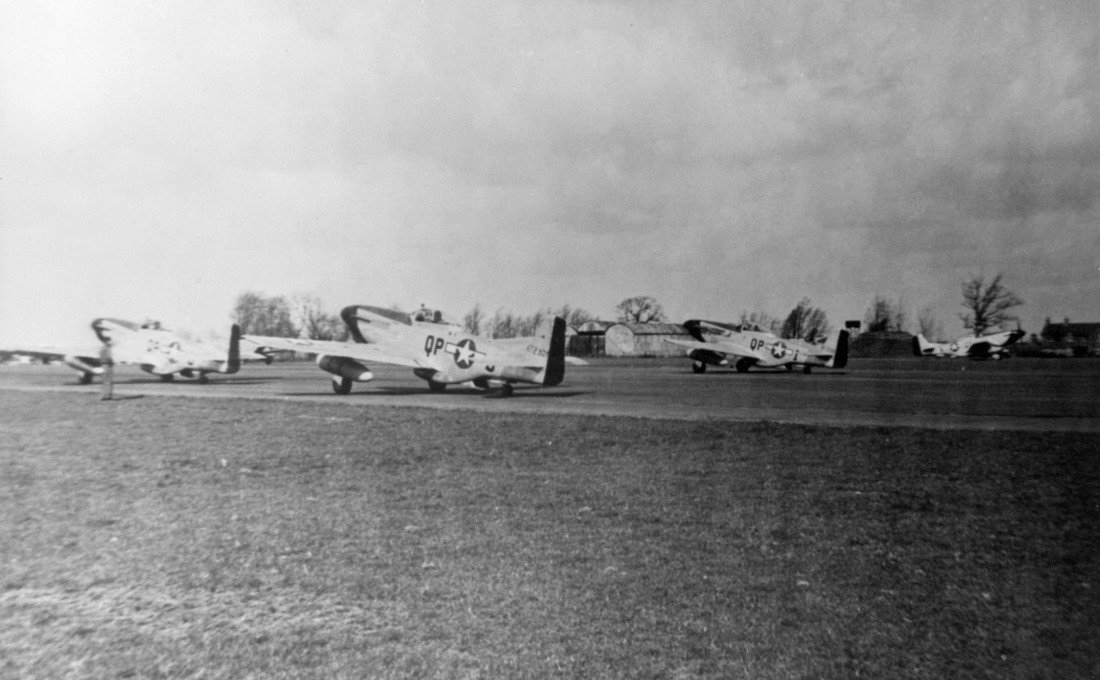
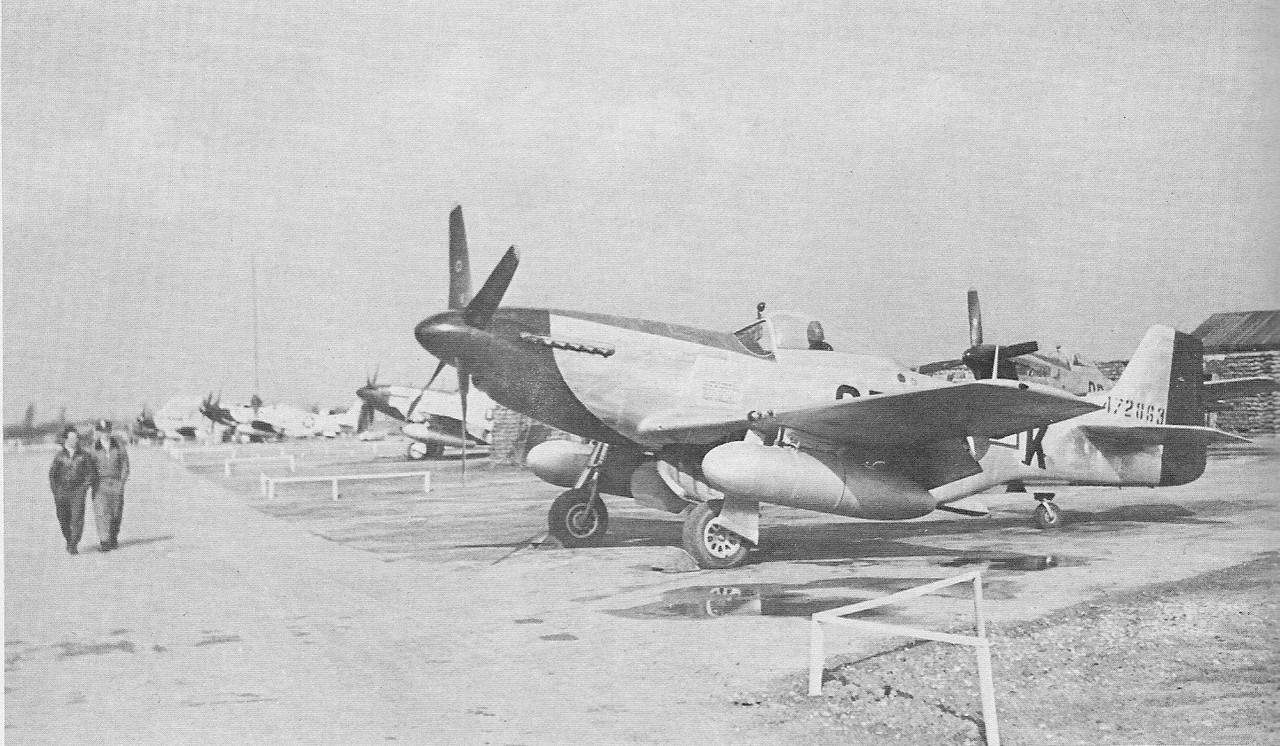
Anyway, here are some photos of the actual aircraft that I was able to find.
Kennedy's 'Stang is the one in the far background, per the caption.
This one does not feature the "Lil' Aggie" nose art but bears the identification number.
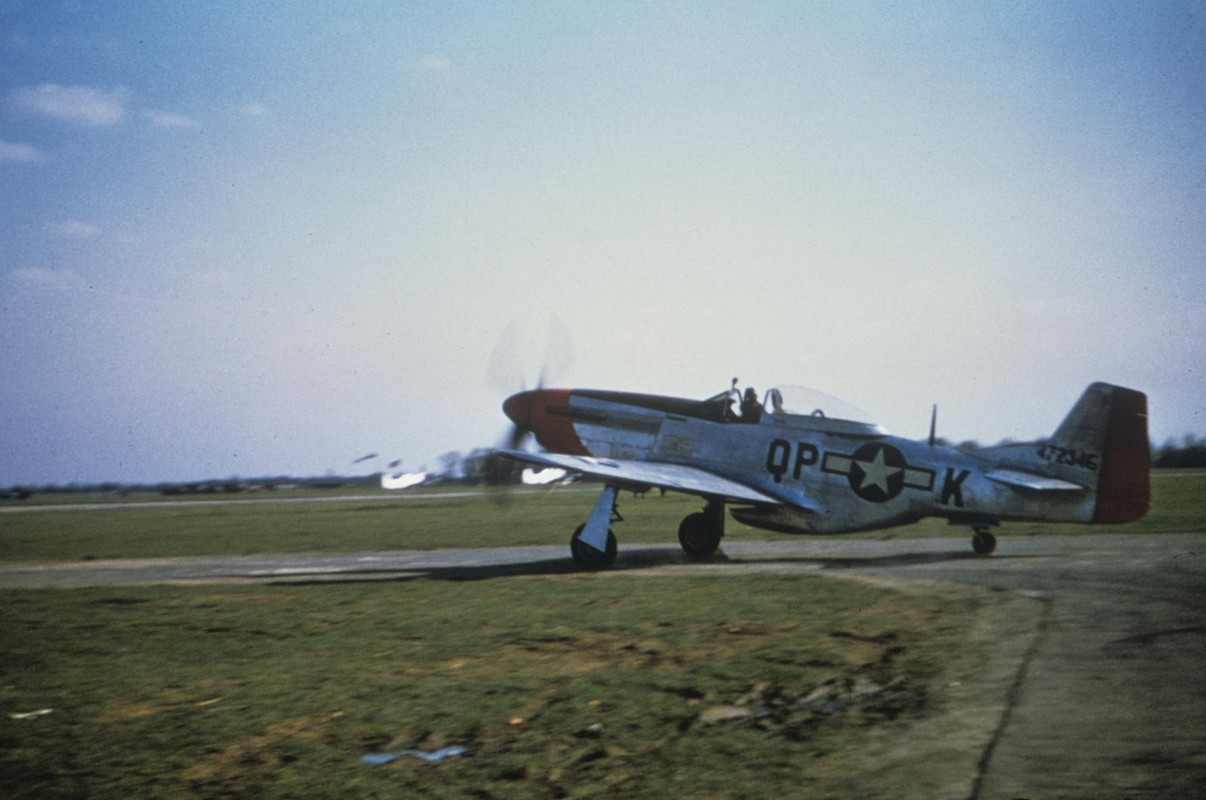
A color shot, also without the nose art. Notice that the identification number is different.
I have a close-up shot of the nose art, but I'm going to refrain from posting given the no nudes rule; suffice it to say, "Lil' Aggie" did not likely go through the A&M Corps of Cadets.
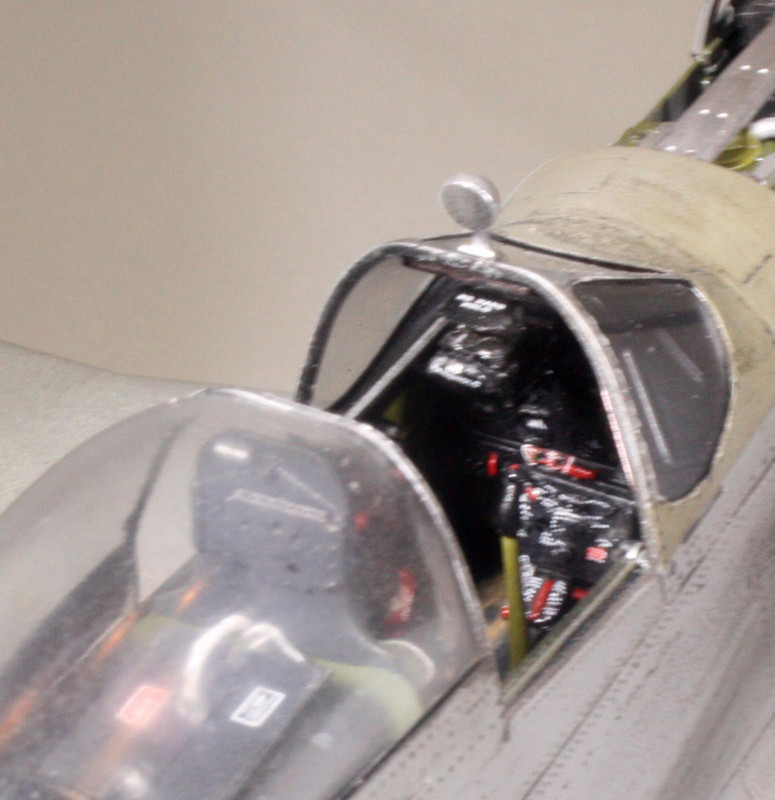
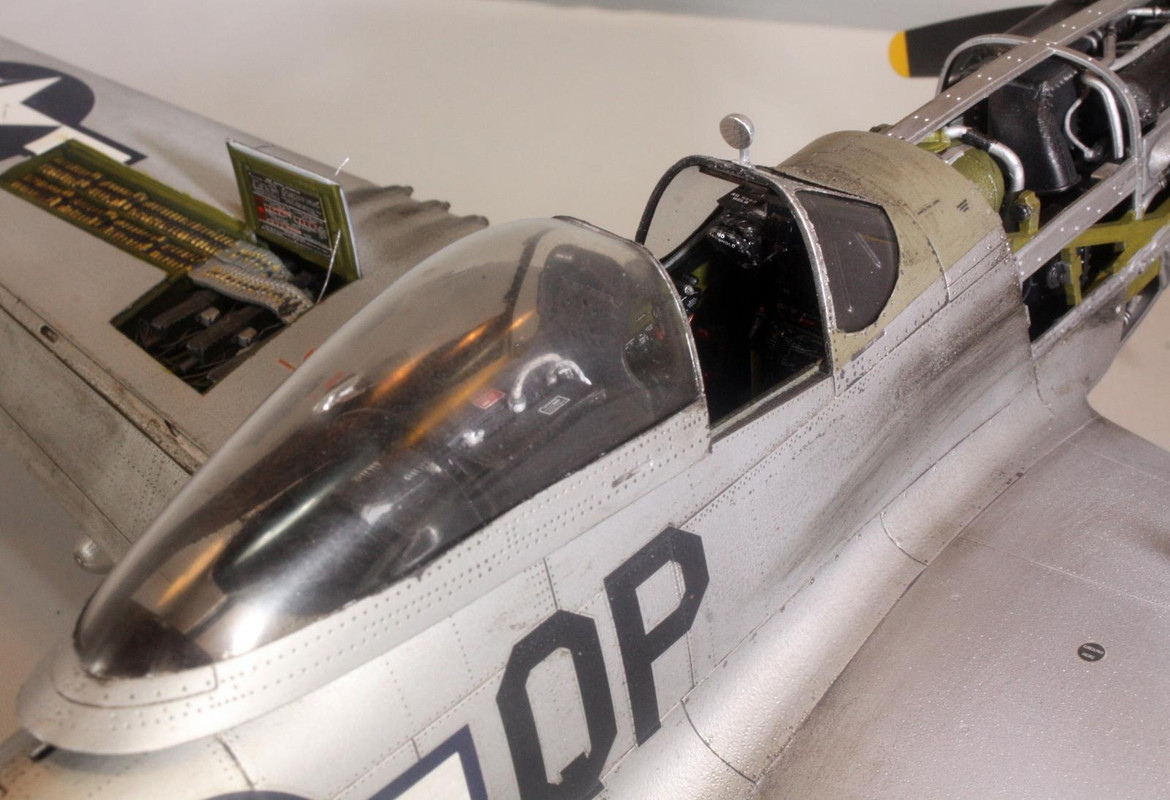
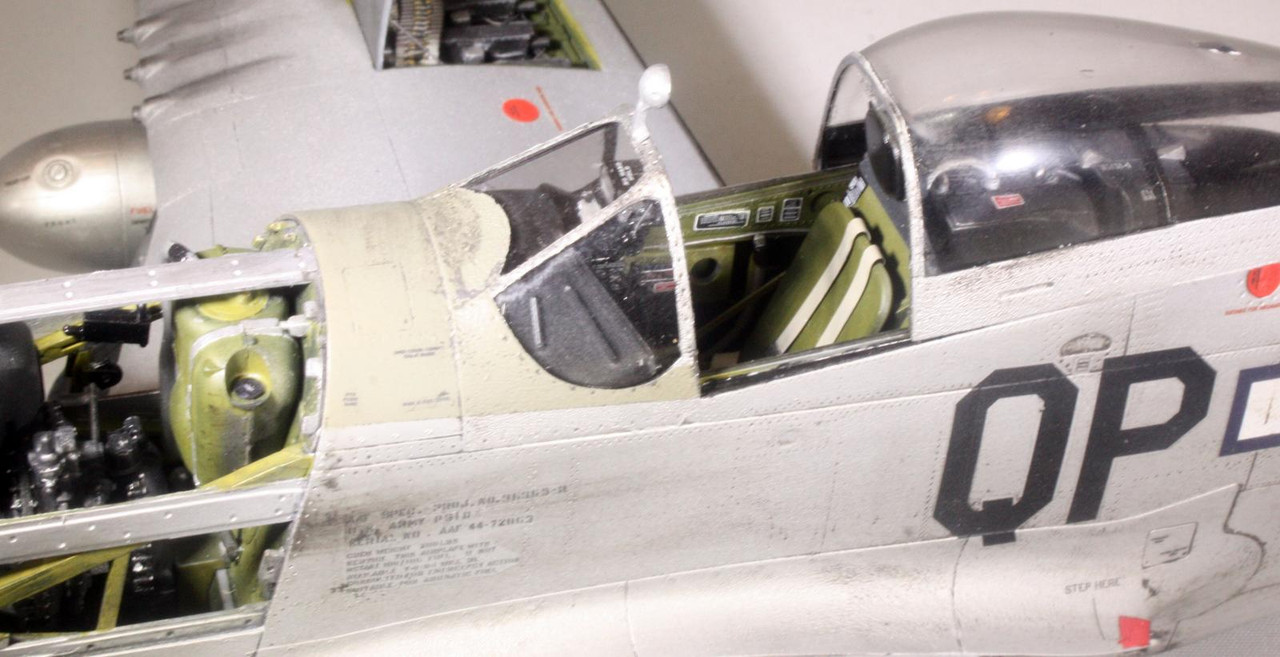
So in studying these photos, even with the discrepancies of identification numbers and lack of nose art, I noticed some differences between what I see in the photos of the actual aircraft and Tamiya's instructions as to what parts to utilize. The "Blondie" 'Stang was a member of the same fighter squadron, with squadron codes QP and the same red swoosh painted on the nose. Tamiya's instructions called for an antenna wire and for a hood-protected rearview mirron on the canopy; yet the photos of the aircraft of this fighter squadron clearly show a circular mirror and no wiring. I opted to model what I was seeing versus what Tamiya's instructions said to do.
I will also point out a spectacular build of this kit that I found first on a web site called "ARC Forums". As it turns out, the build log that I followed religiously there was also a cover story in FSM back in January 2014. If that gentleman is active here, I'd like to give a hearty thanks for pointing out all the problem areas of this kit (not many of those, actually) and for sharing his magnificent build for everyone else.
I utilized a slew of metallic paints for this build, although most really don't distinguish themselves in the photos or even looking at it live. Mostly Tamiya bare metal silver, but also Alclad polished aluminum, Alclad white aluminum, Alclad dull aluminum, Alclad dark aluminum, and Alclad steel. Other paints include Tamiya flat red, semi-gloss black, flat aluminum, chrome silver, flat green, khaki, metallic gray, clear orange, red brown, deck tan, and desert yellow; Model Master clear green, clear red, olive drab and faded olive drab; Vallejo aluminum; and Mission Models US interior green.
The painting issue I mentioned earlier was related to prep work for laying down all this metallic paint. I decanted Krylon gloss black and started spraying that paint onto the model. That's when I noticed a problem with the Krylon: it appeared very dark gray and almost powdery. I was able to flick some off with a fingernail. Then I made a crucial mistake instead of displaying some patience and thinking through the problem - I sprayed Krylon directly from its can. Way too thick! Then I compounded the issue by attempting to wipe it off. I cannot say what it was I was thinking here. I've done plenty of NMF builds, so I knew what I was supposed to do. Yet here I was compounding mistakes by the bushel. The initial problem was likely that I didn't allow the Krylon to release its gas from the decanted paint (something else that I knew to do but just didn't, probably a result of my eagerness to get things rolling).
After wiping away as much of that thick Krylon, I was left with a mess and a sick feeling that perhaps I'd ruined quite an expensive model. (I am three years now out of work, and now the wife is working for a company that is about to fold, so the prospect of purchasing anything hobby-related is a big fat NO at this time).
This is when I started to assume my age and experience, and sat down to think through a solution to the problem I was facing. The wiped-away Krylon had left a bunch of rough spots, crusted paint, stuff like that. I ended up wet-dry sanding the entire thing with successively higher grades of micromesh sanding pads until I had largely removed the bad Krylon. After that, I used a bottle of Alclad black base to put down a primer coat and the base for the metallic paint job to come. More on that to come.
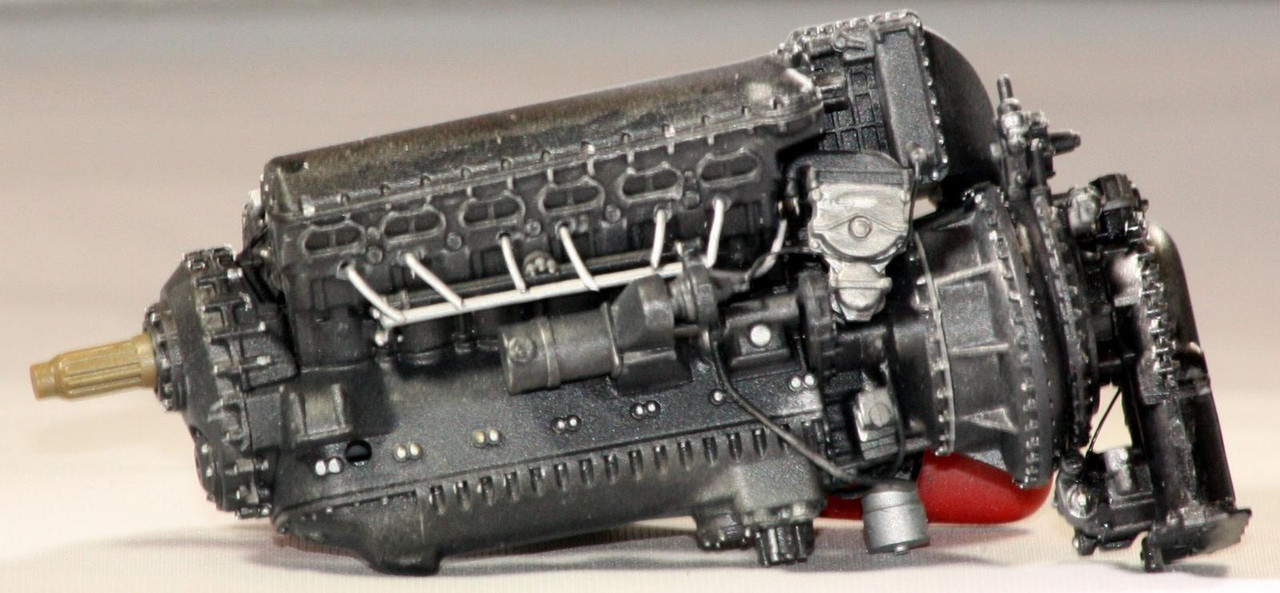
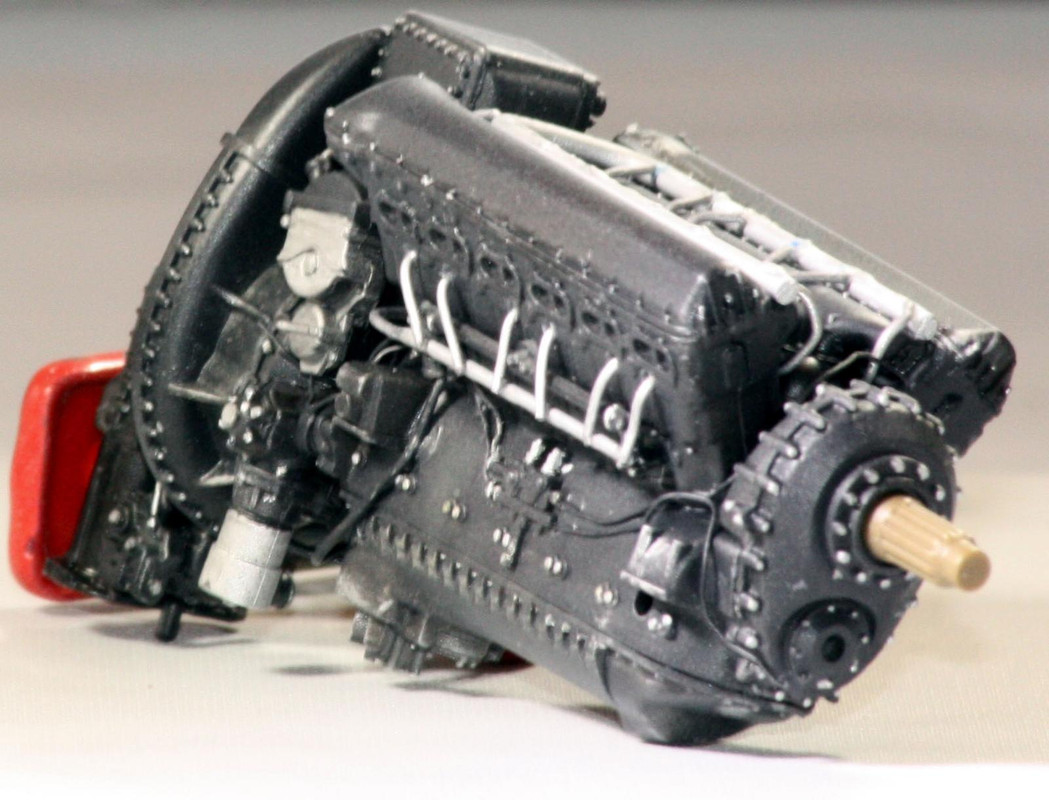
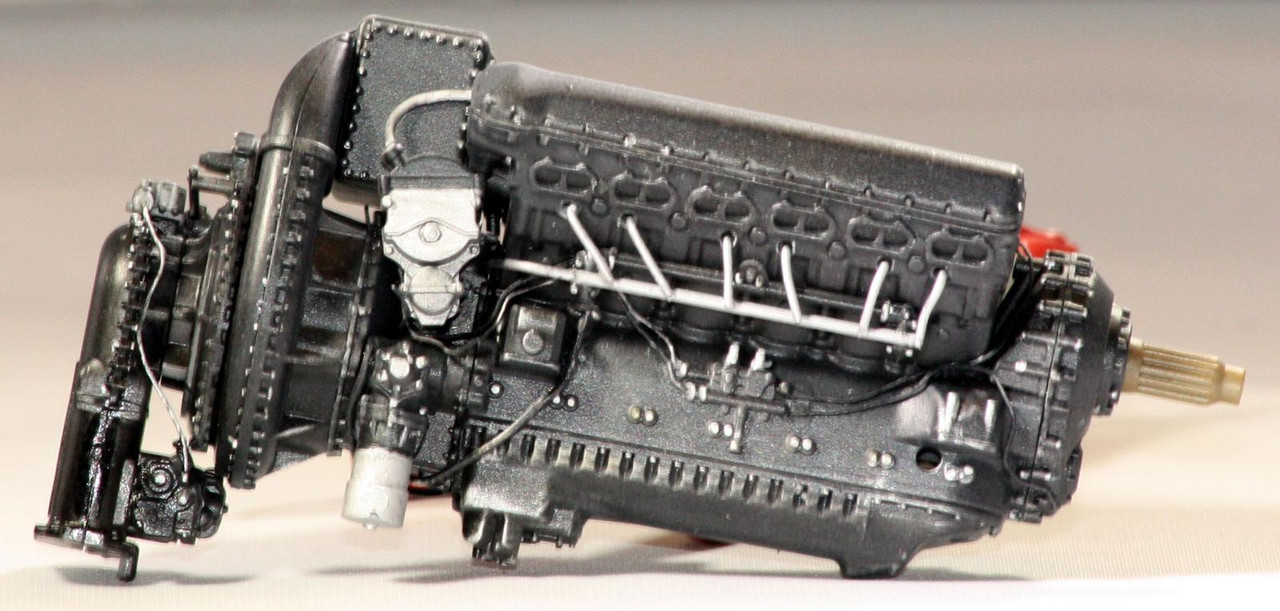
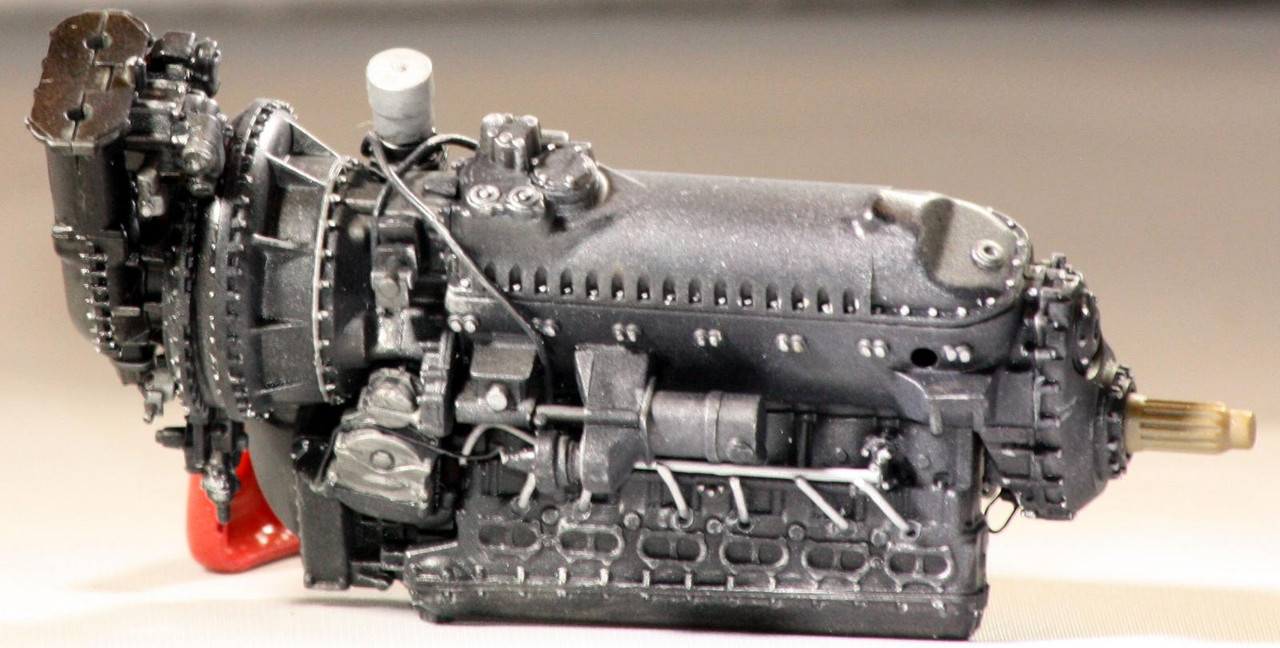
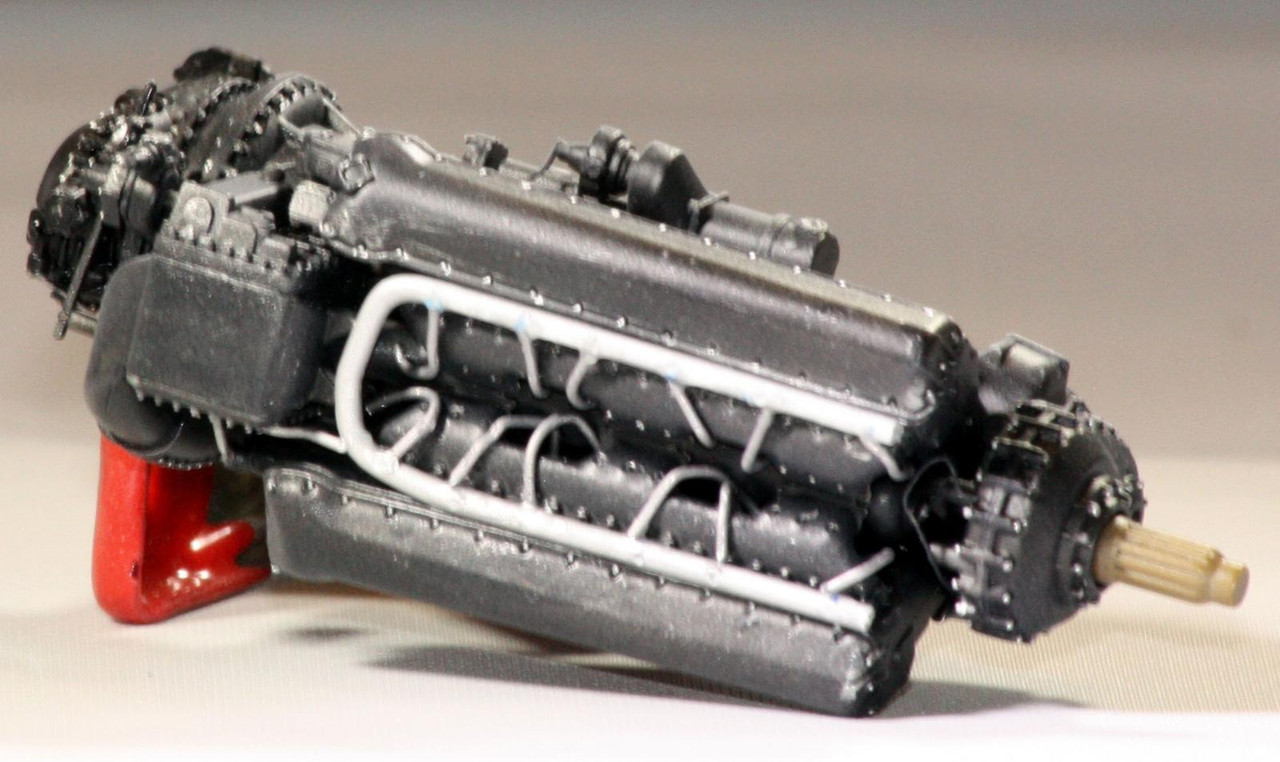
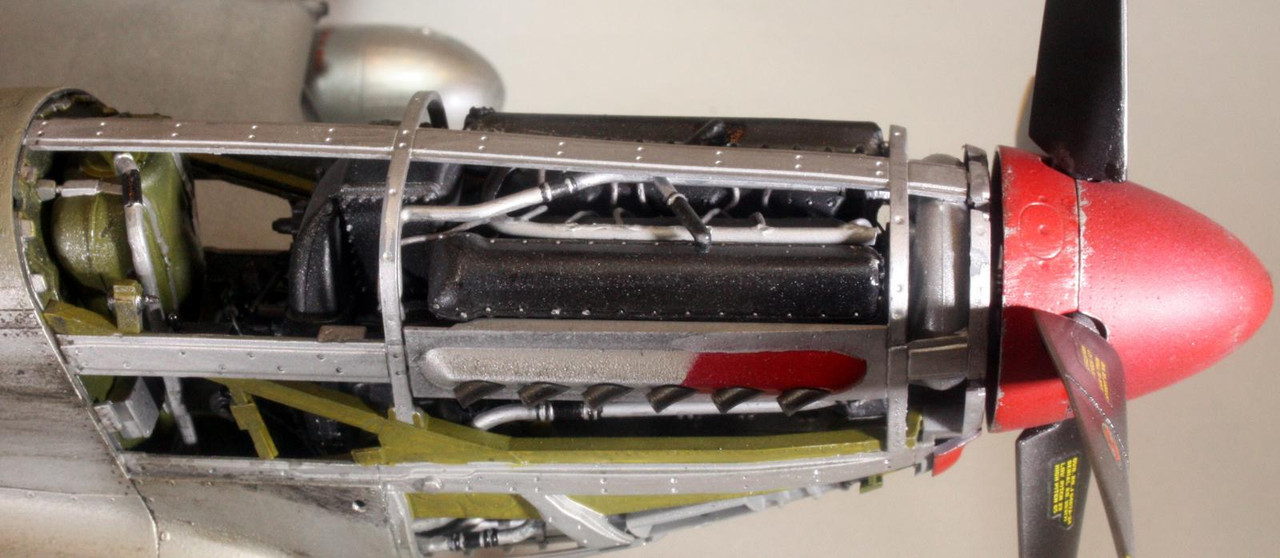
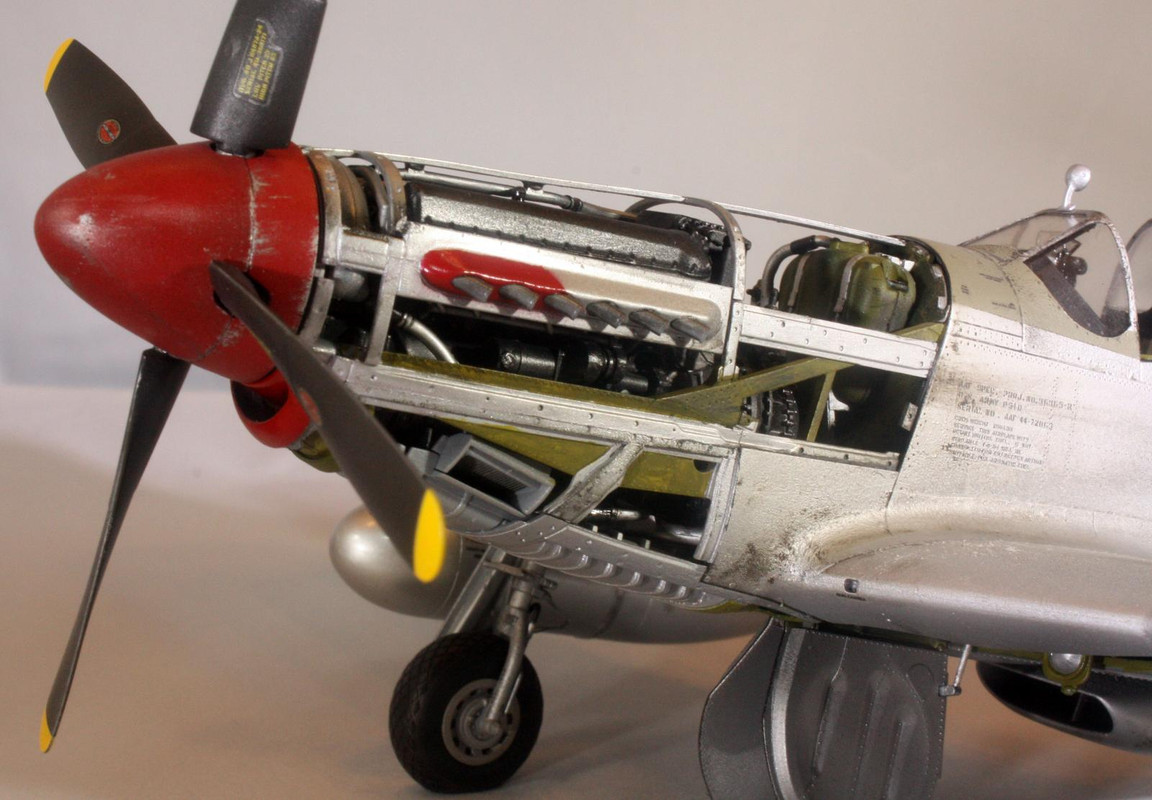
Construction began with the engine. The engine is a miniature work of art in its own right to which I added only a few bits of plumbing.

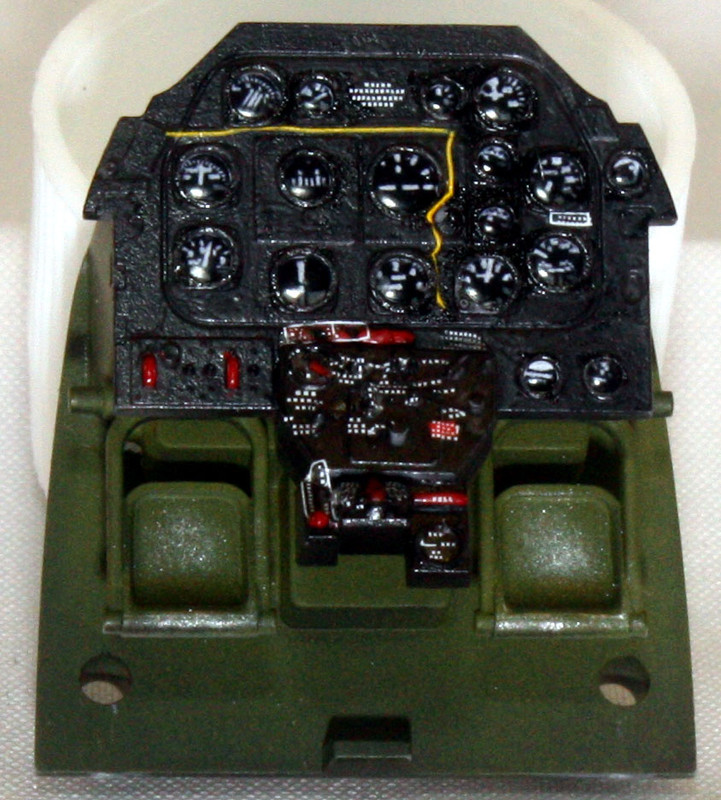
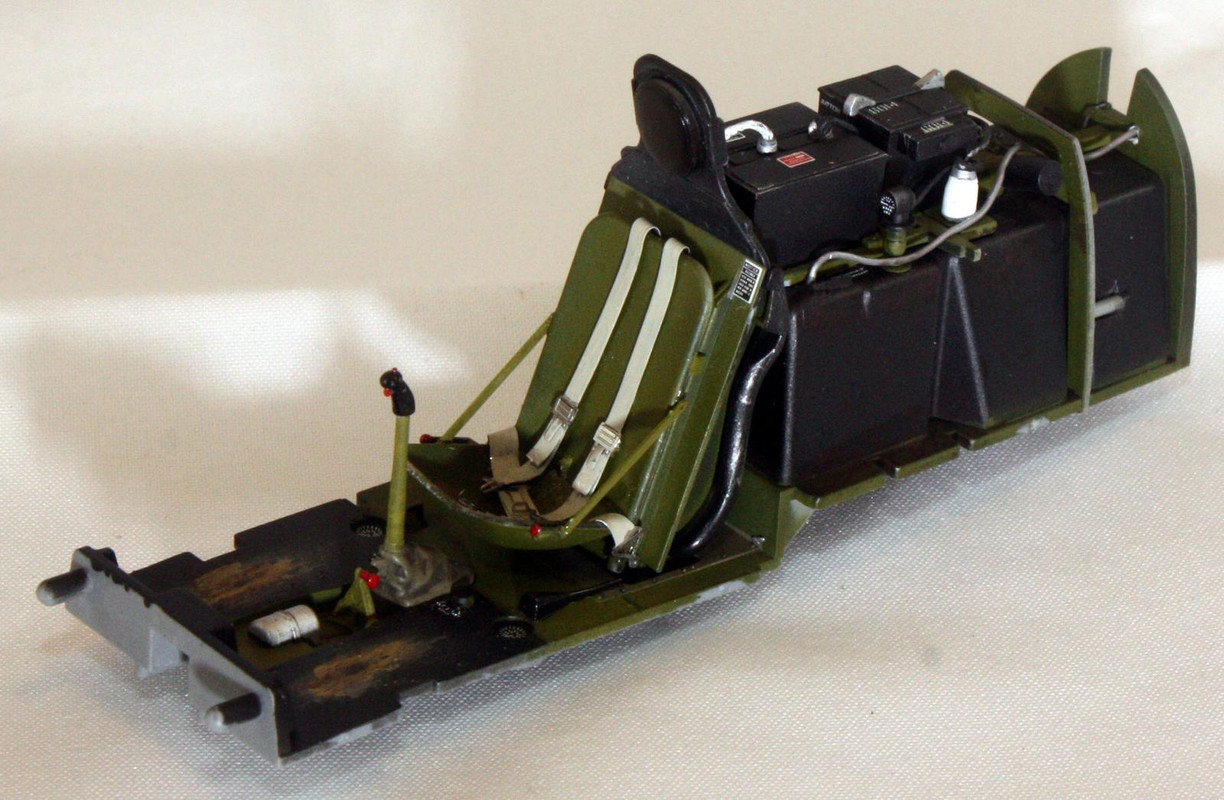
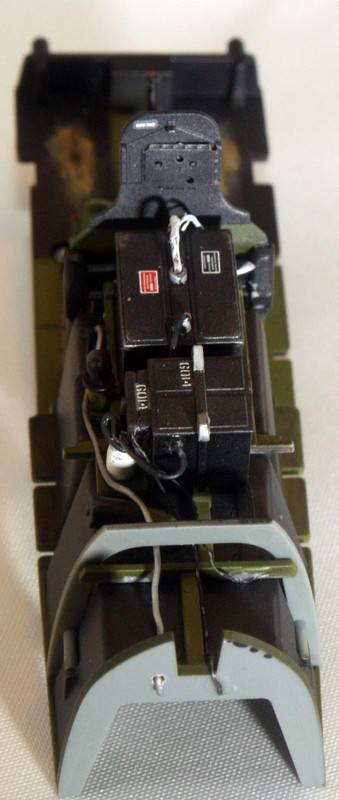
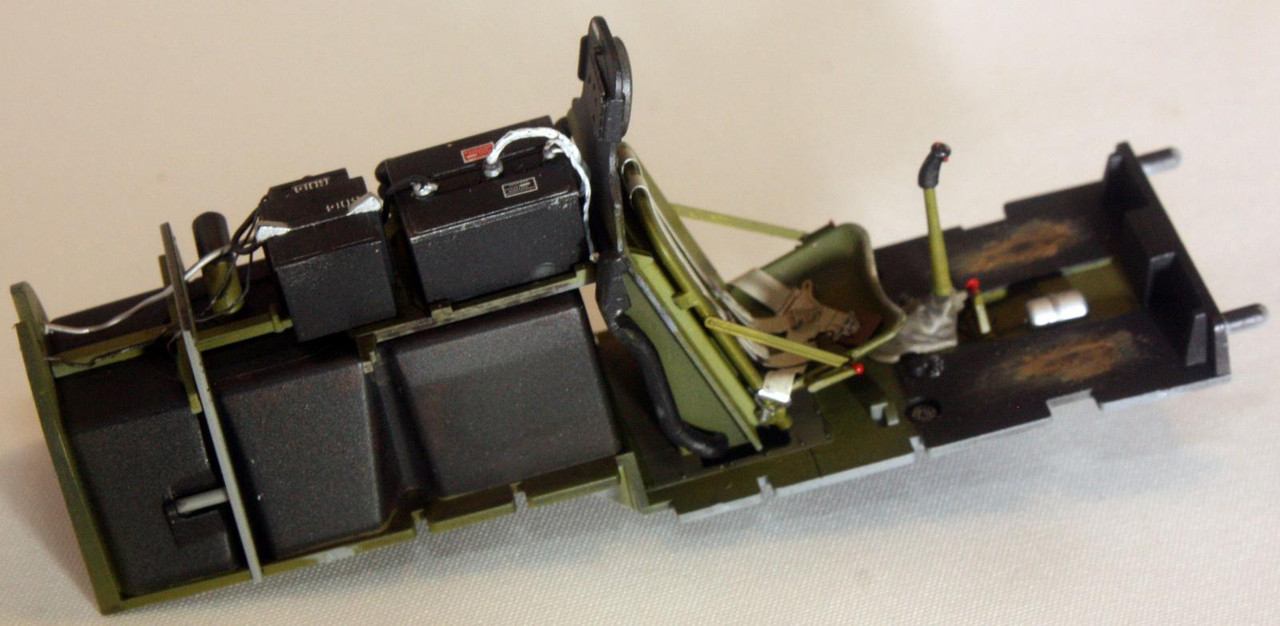
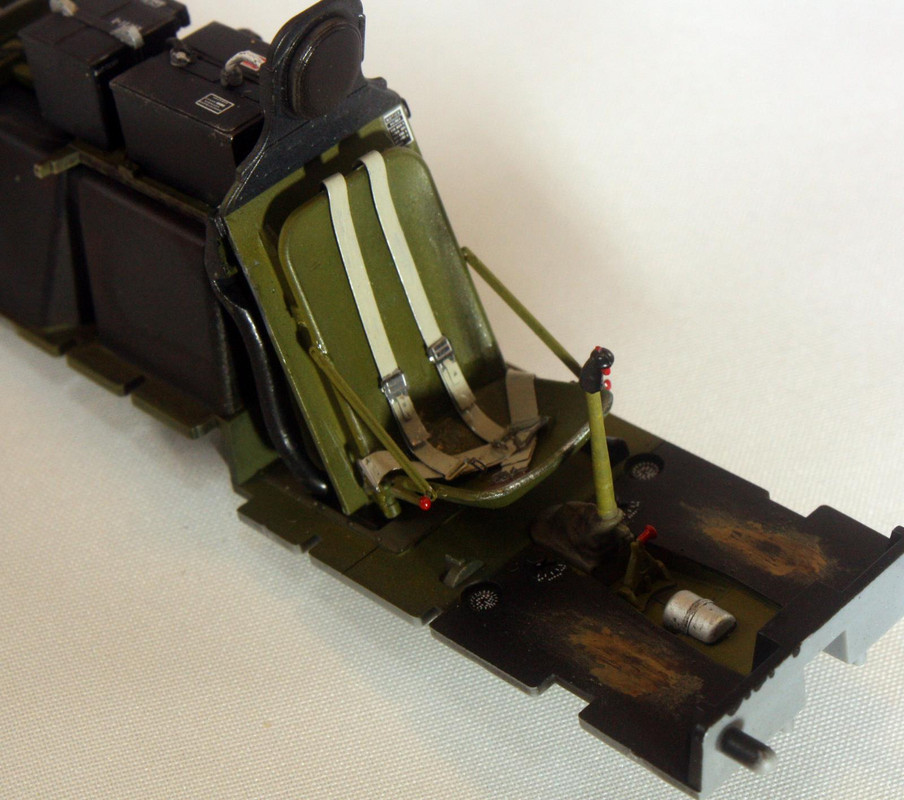
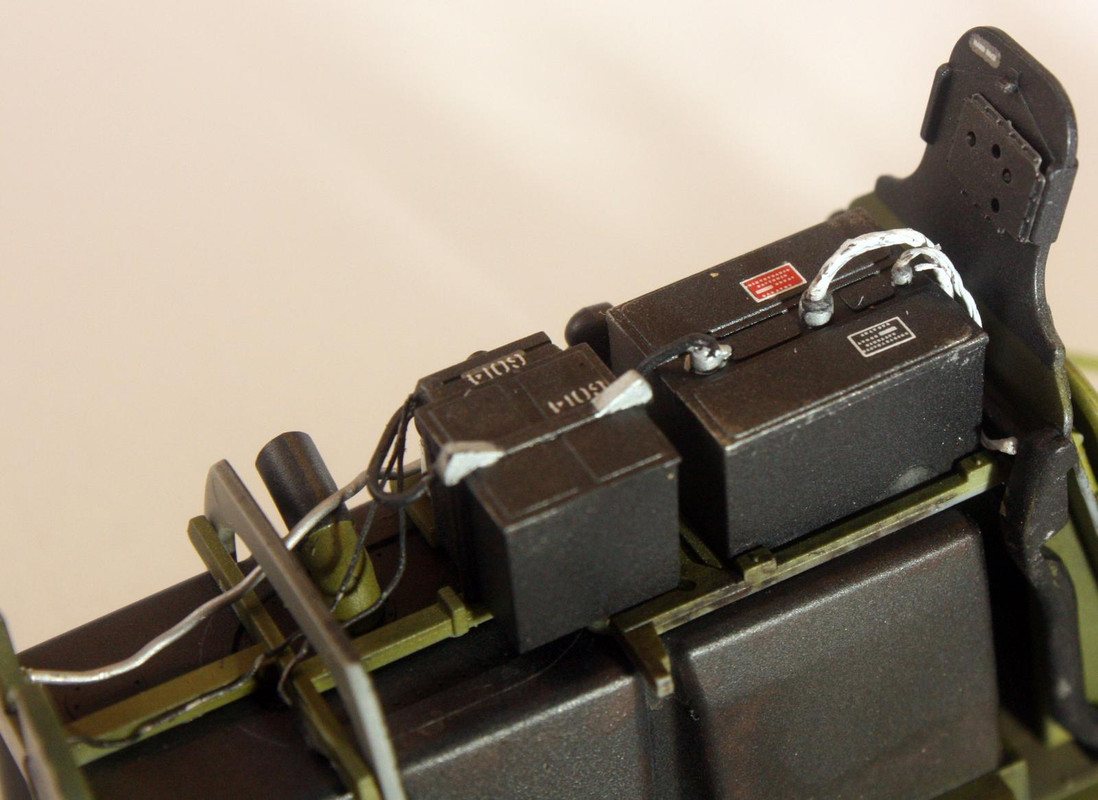
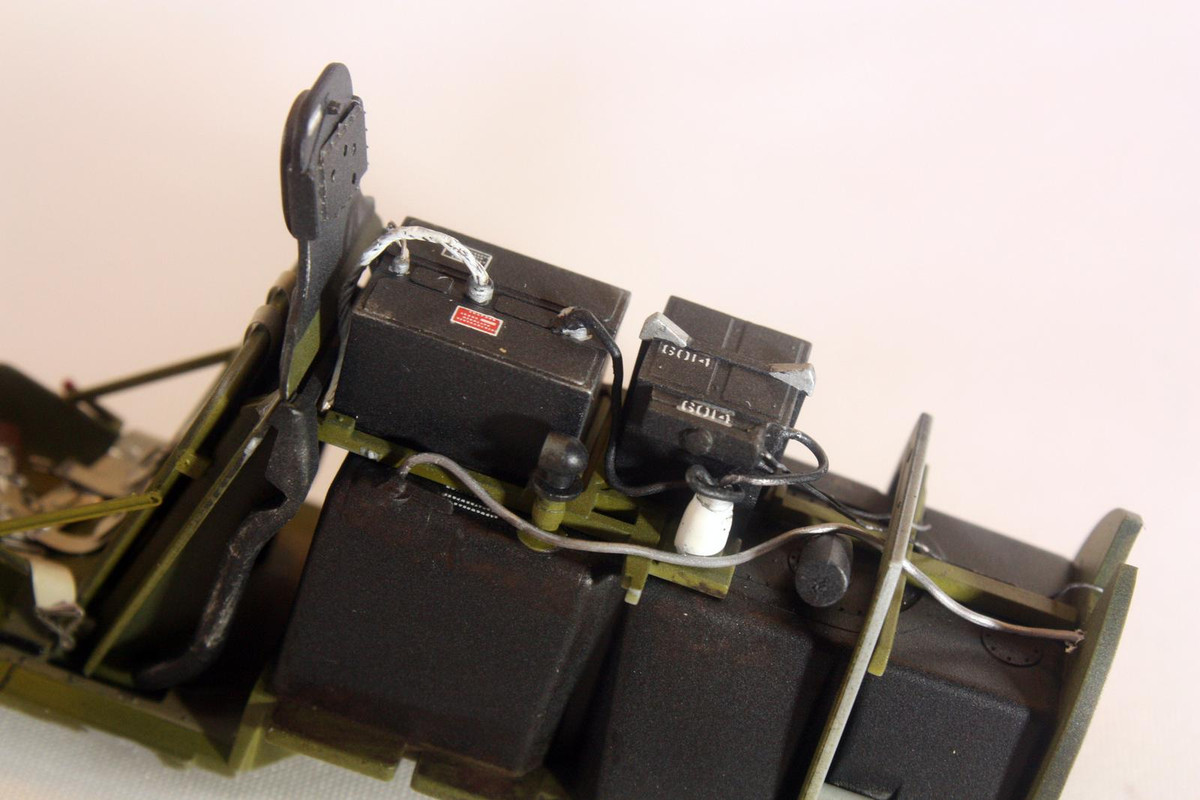
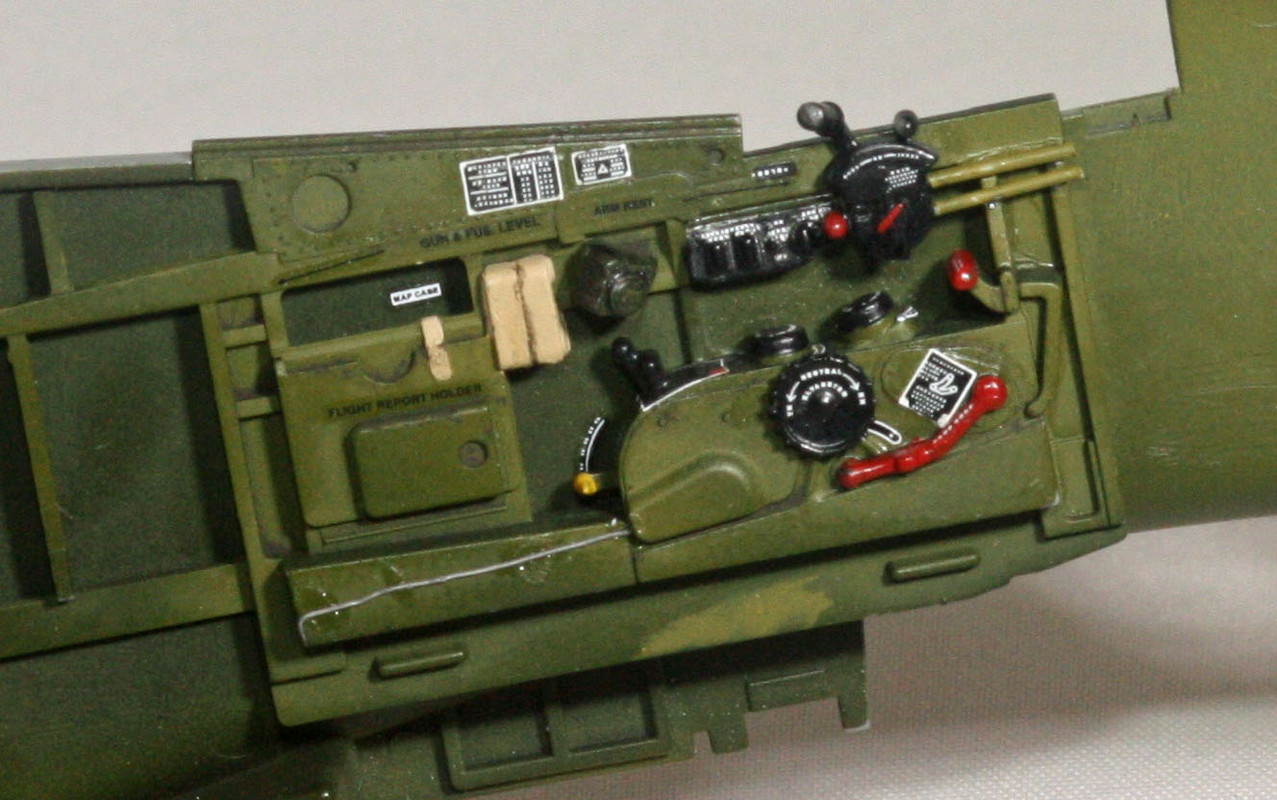
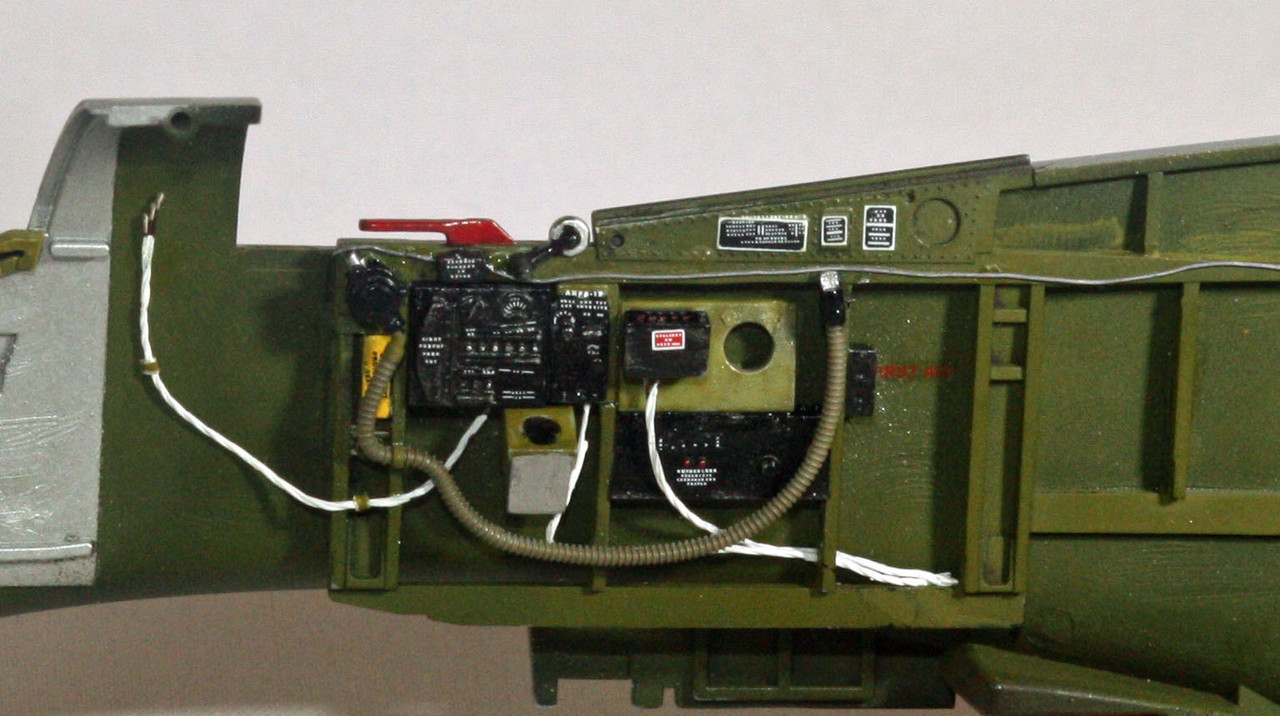
Next up was the well-apportioned cockpit. Aside from the aforementioned Kits World decal sheet, I was originally going to do this build OOB, but I found a Barracude cockpit placard set that I could not pass up. I also added a set of resin tires as the kit tires, made of rubber, feature a very prominent mold release line right along the center of the tires that resist all efforts to remove without leaving a crumbly mess. The kit comes with a couple of PE frets to spruce up the cockpit a bit. I also used various sizes of lead wiring that I got from UMM-USA (highly recommend this stuff as it is very pliable for running around tight areas like we often find in aircraft kits).

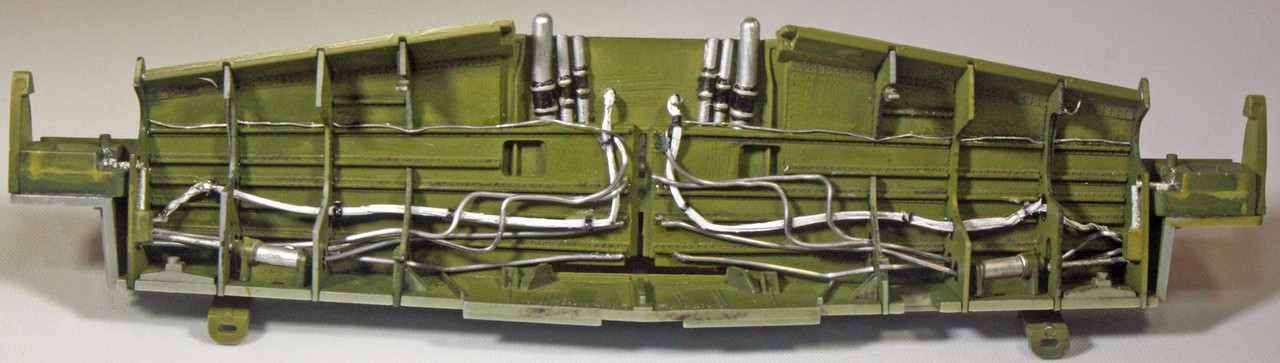
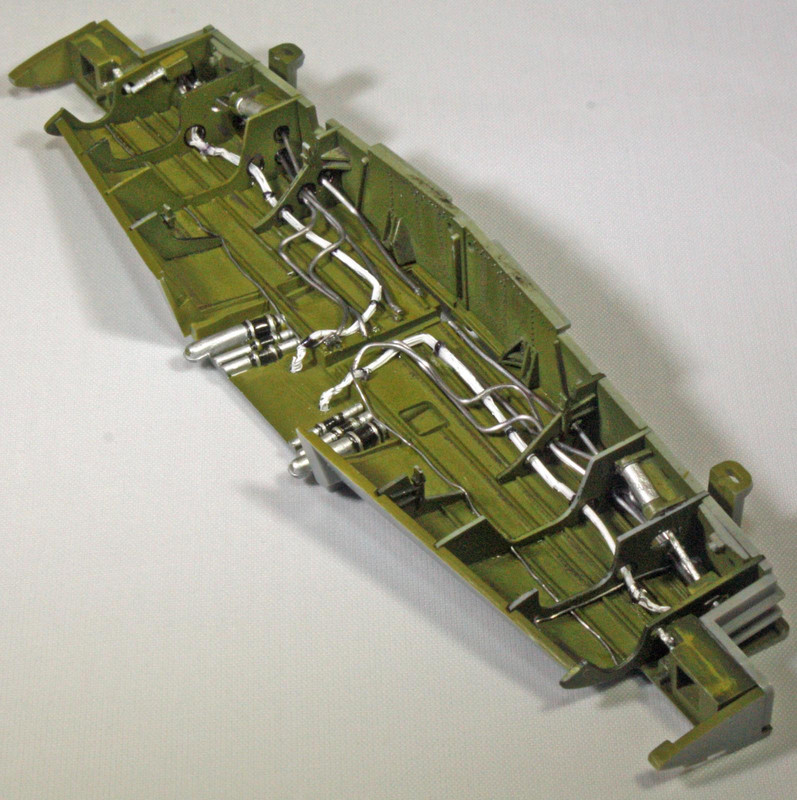
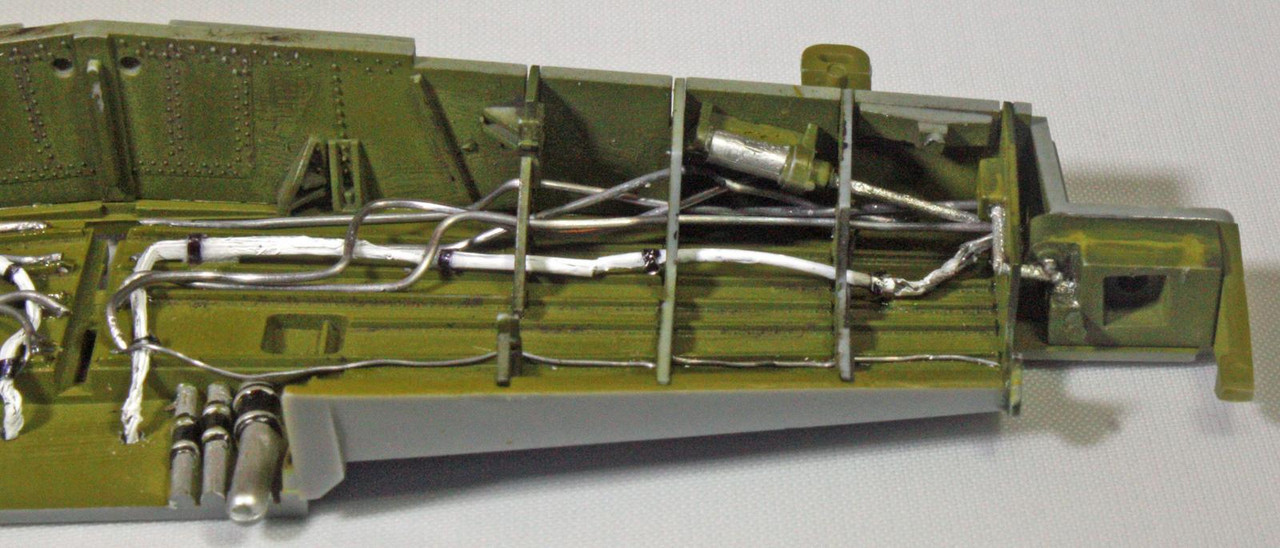
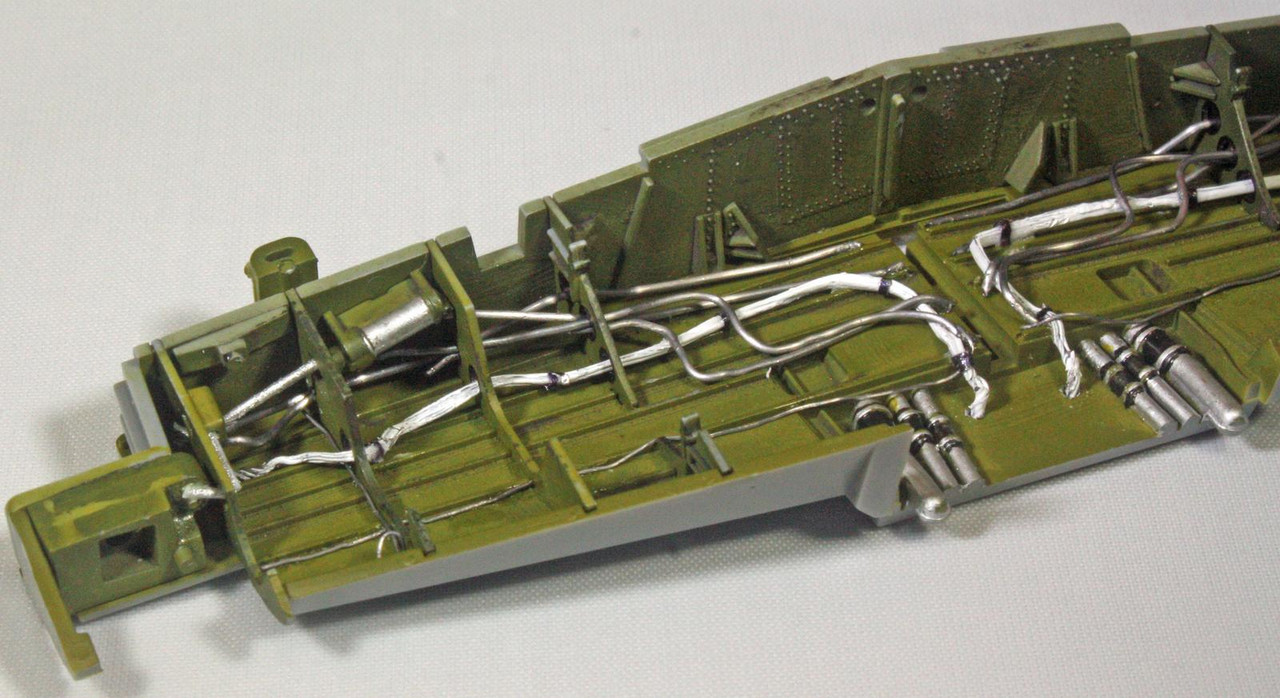
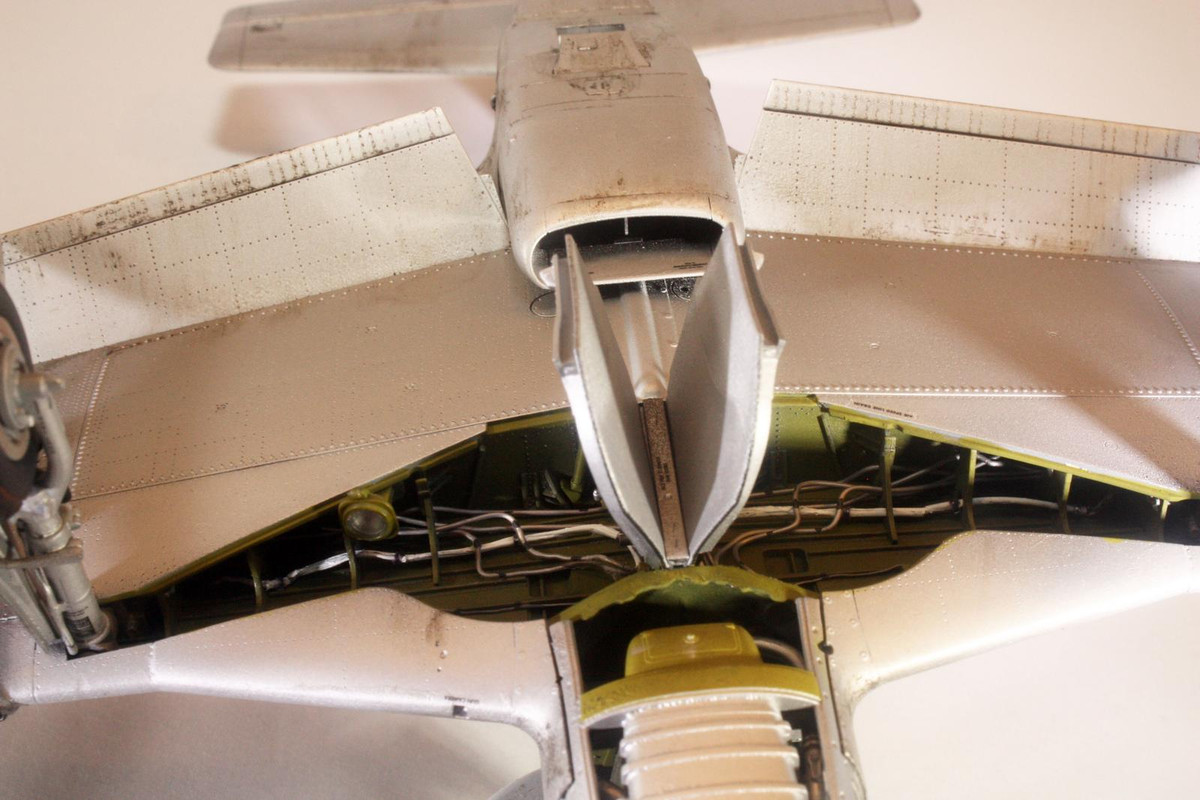
After finishing up the fuselage, construction moved on to the wings. First up was the wheel wells, where I spent a lot of time adding a bunch of plumbing and wiring to spruce it up a bit.
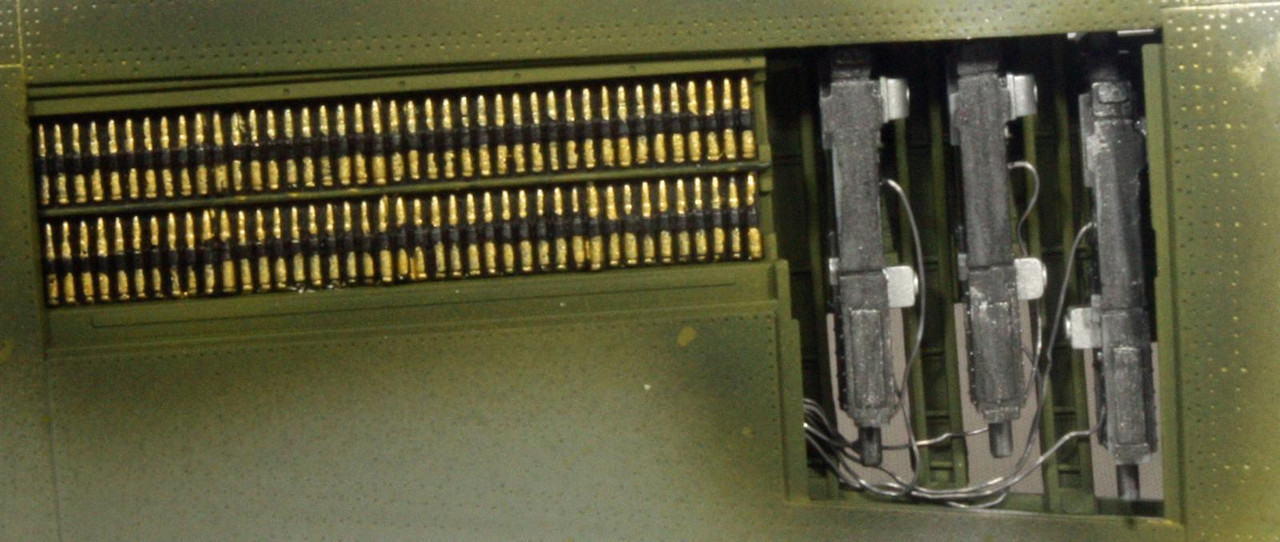
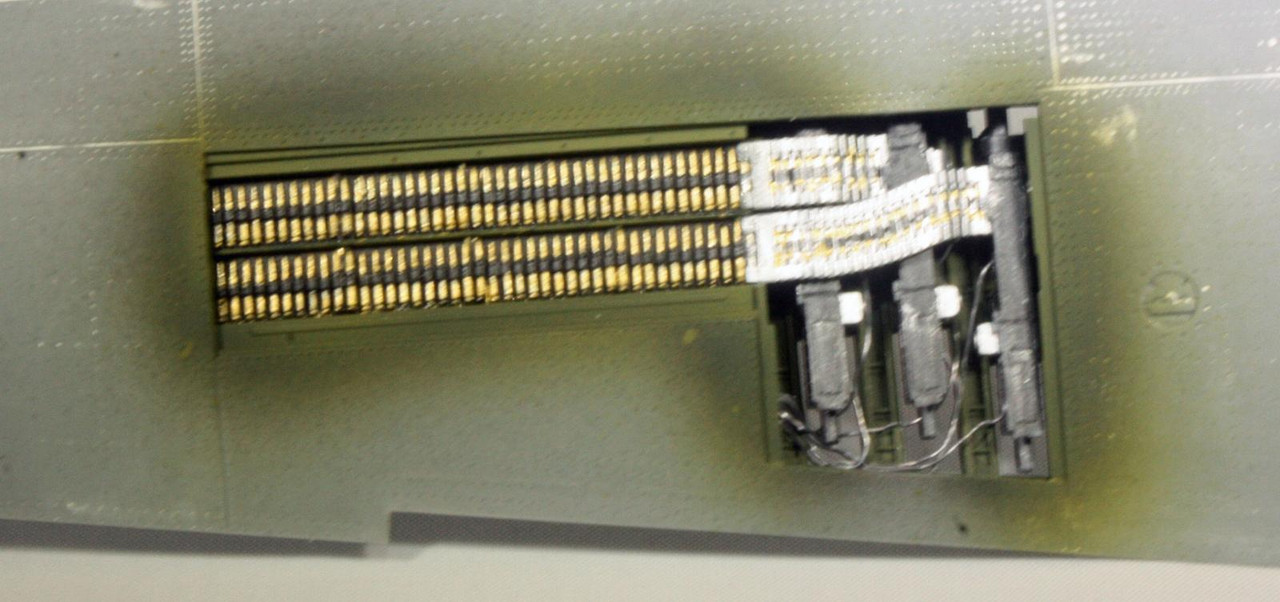
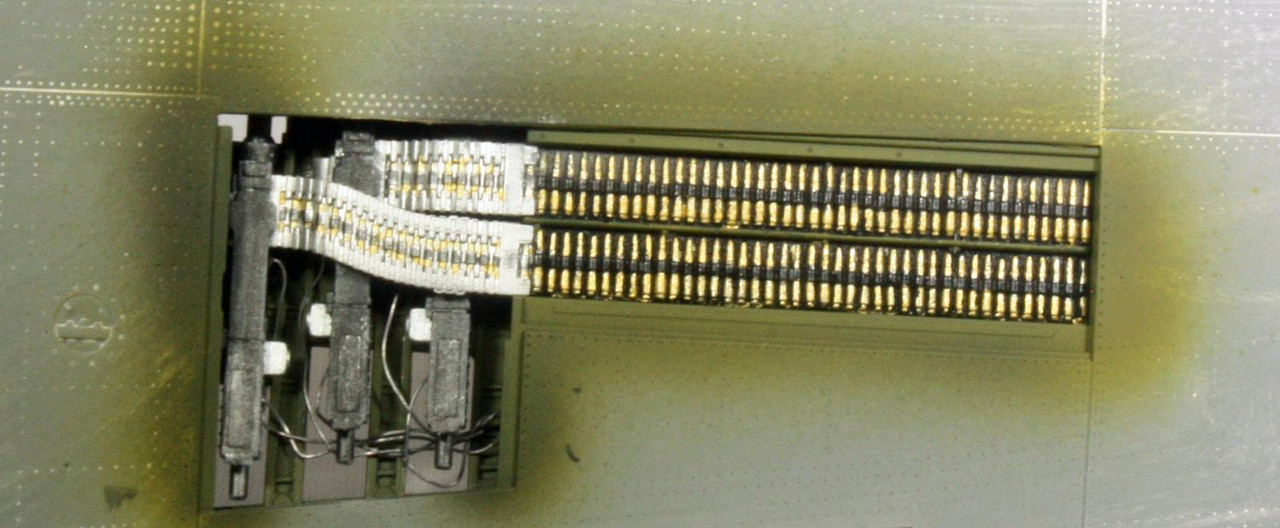
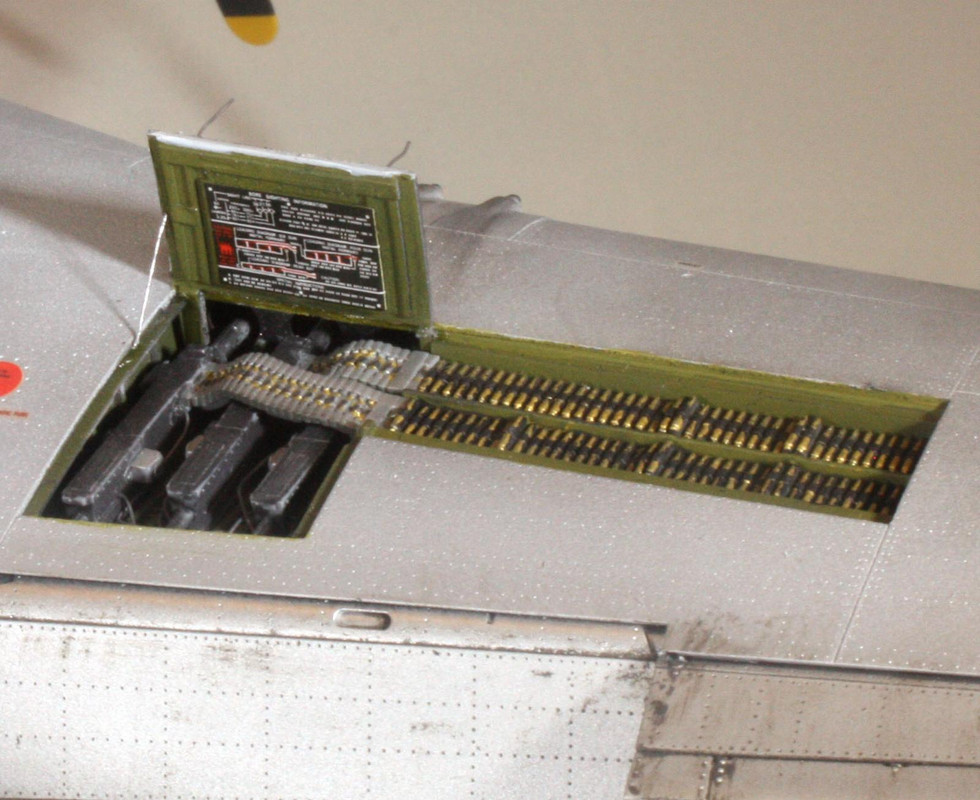
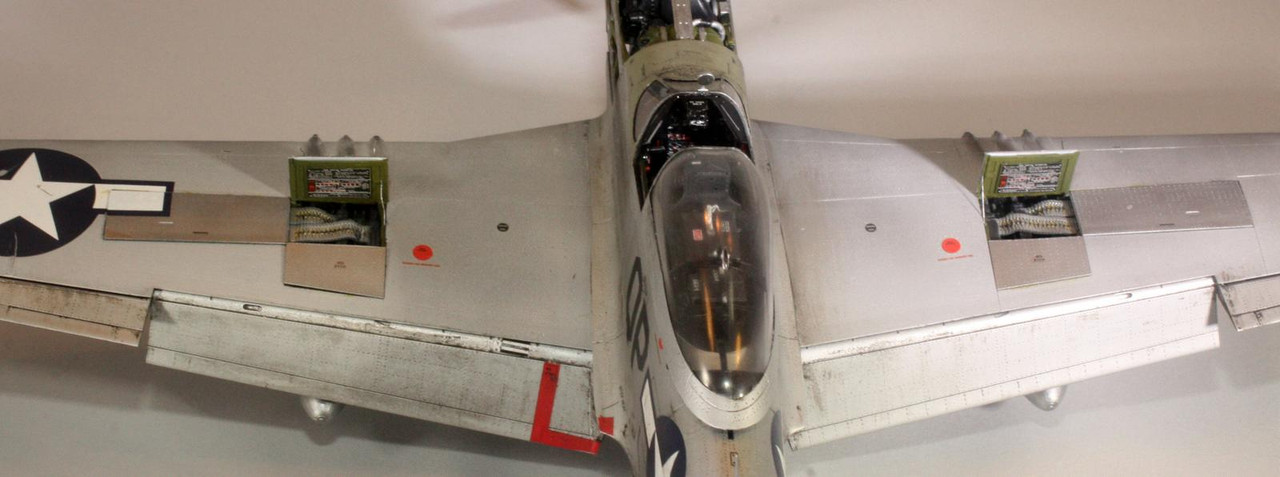
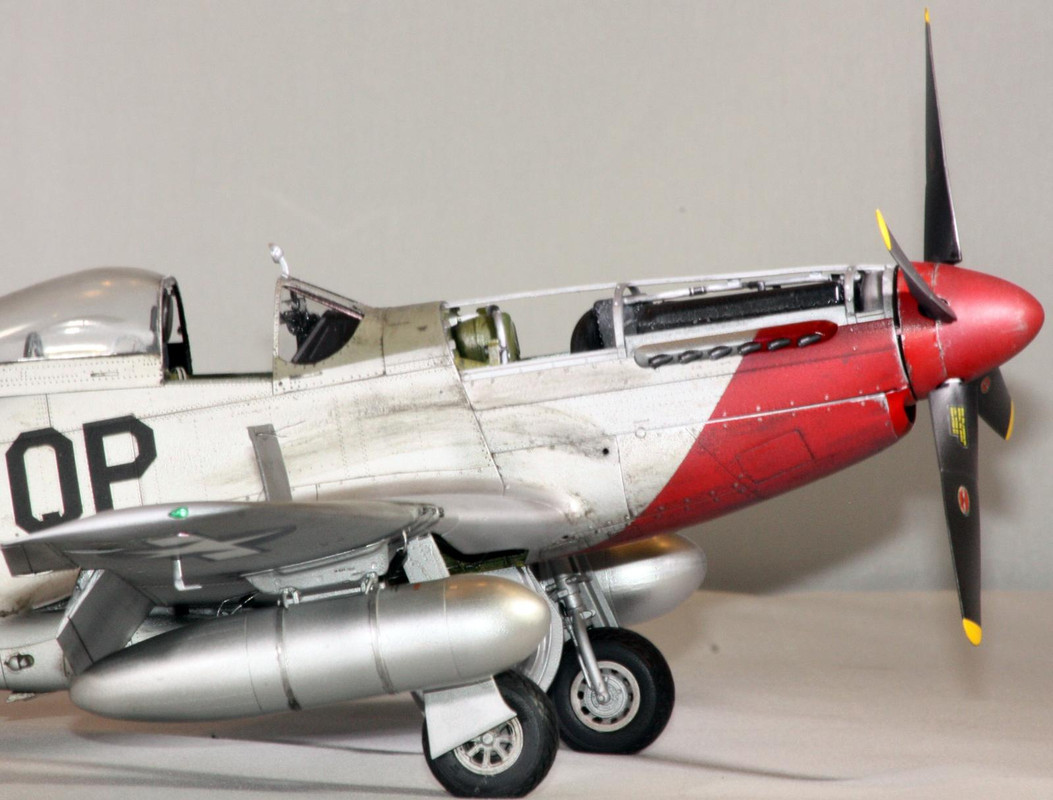
Gun bays next. These are the kit parts rather than an aftermarket set. I added some wiring.
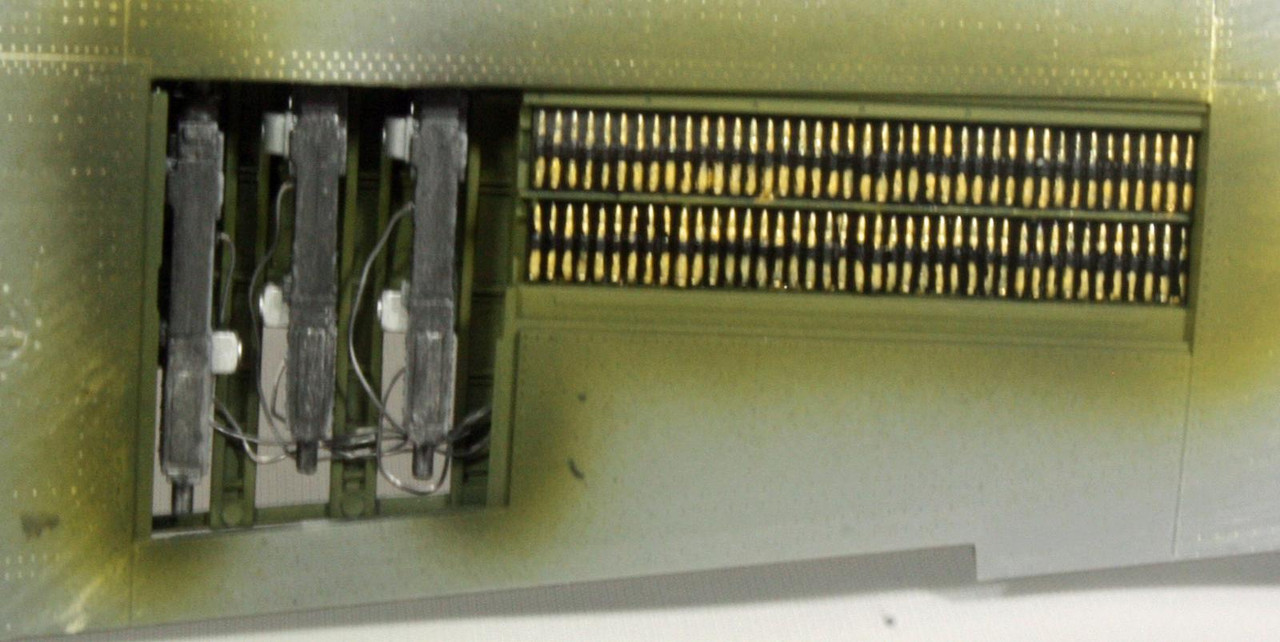
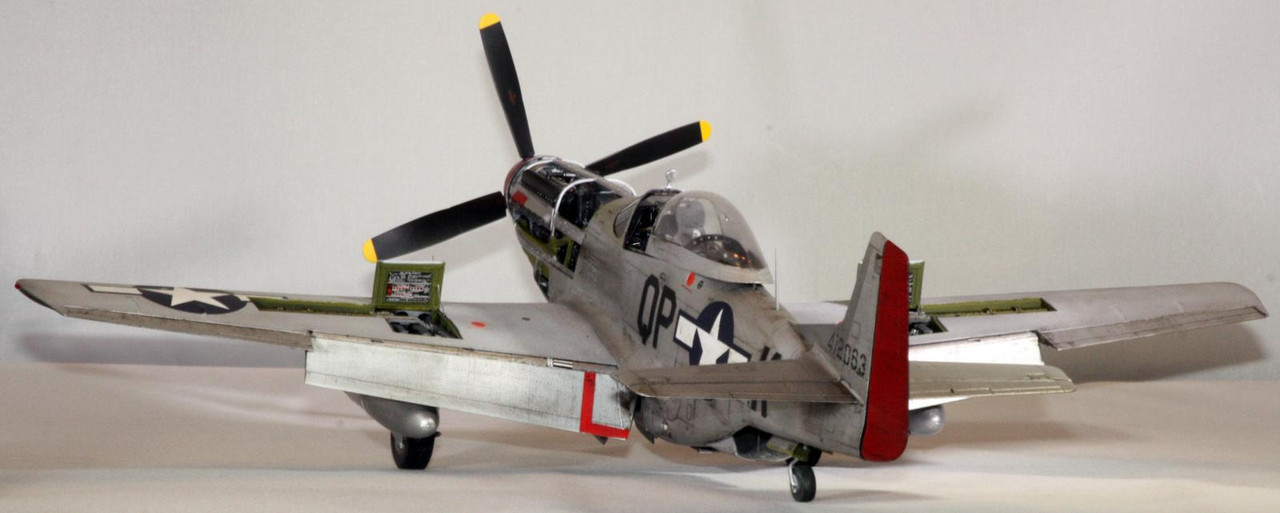
Now for some finished build photos. This kit comes with a bunch of magnets that allow for the engine cowling parts to be easily removed, or to remove other parts that feel way too much like a toy (operating landing gear) or swapping out parts such as the gear bay doors or the rear landing gear. I used all of the magnets but none of the swapping stuff is actually available, as I glued the gear in place. I did leave the cowling panels removable, although the underside is actually difficult to get into place so it will be staying on.
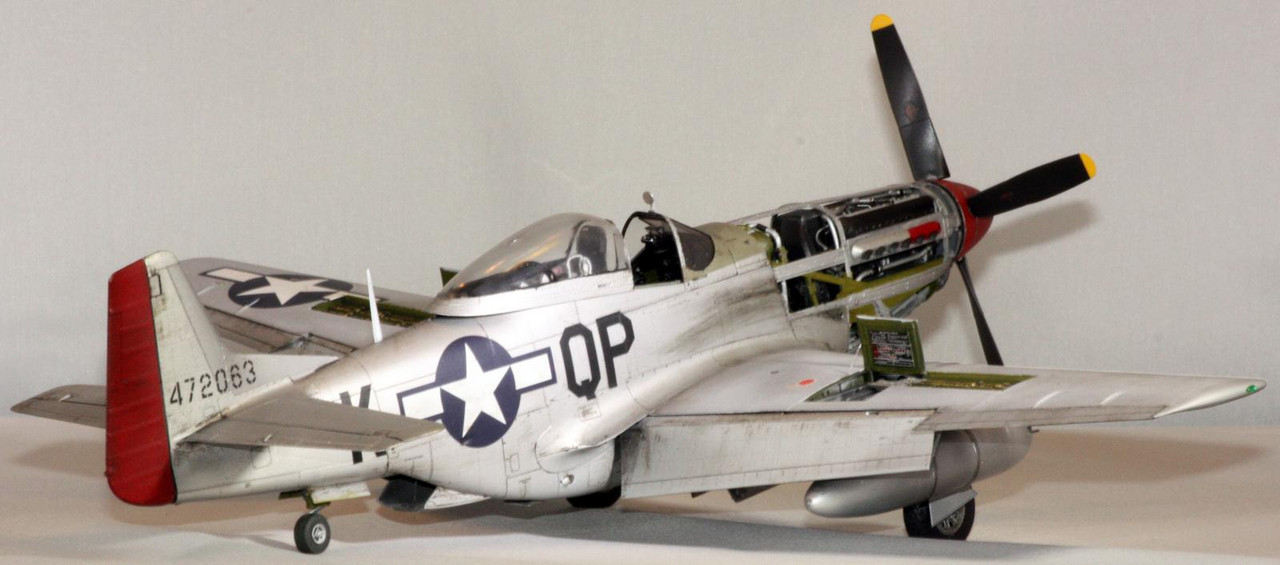
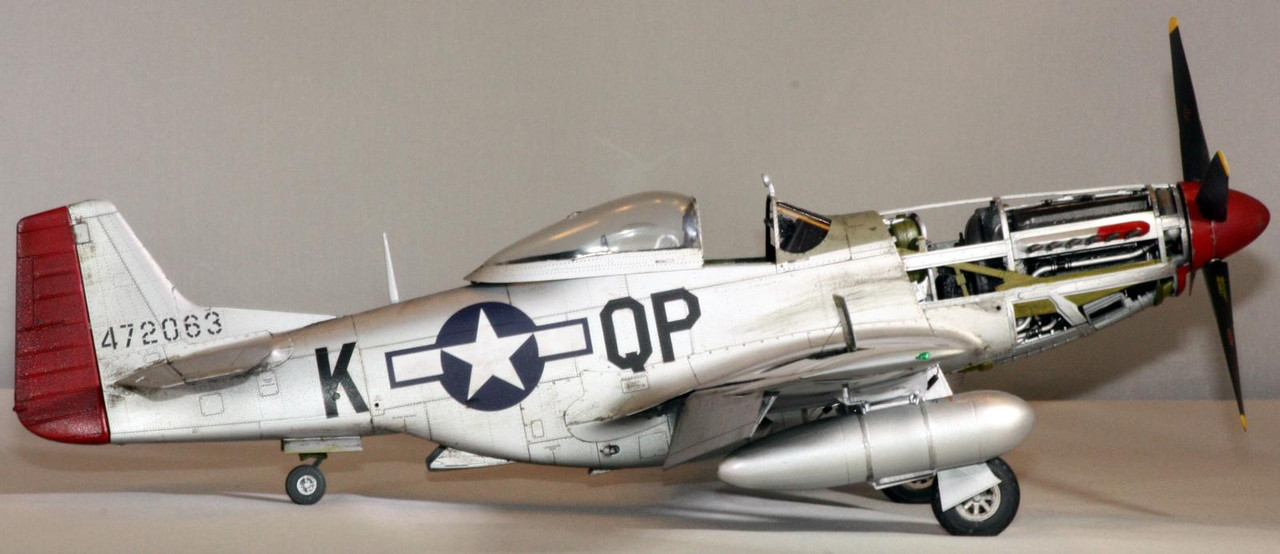
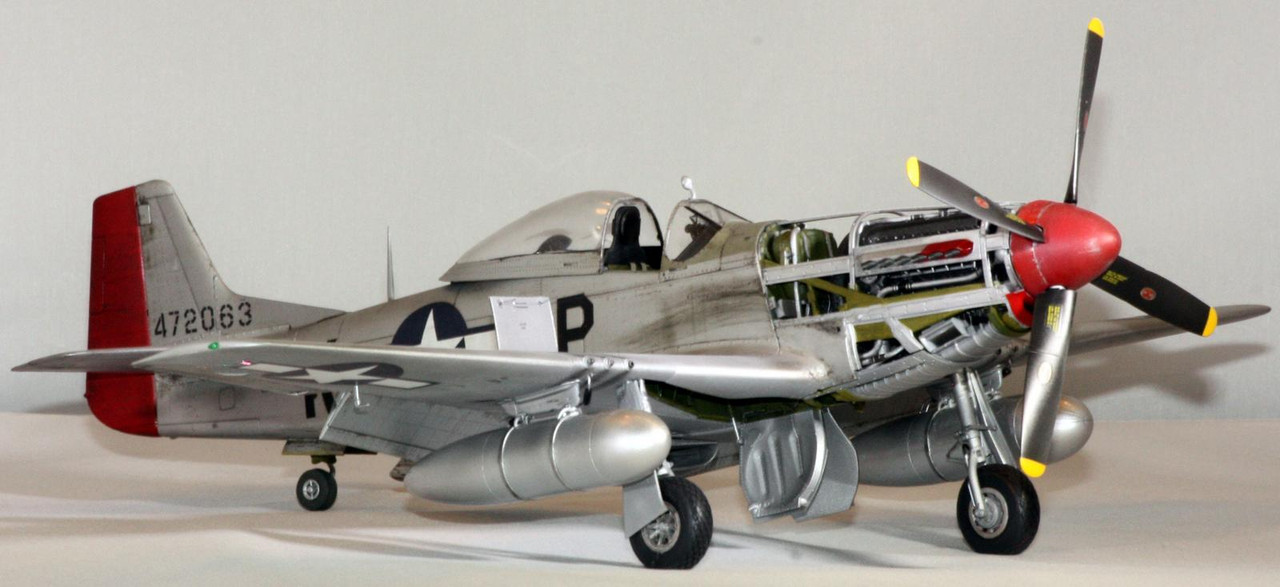
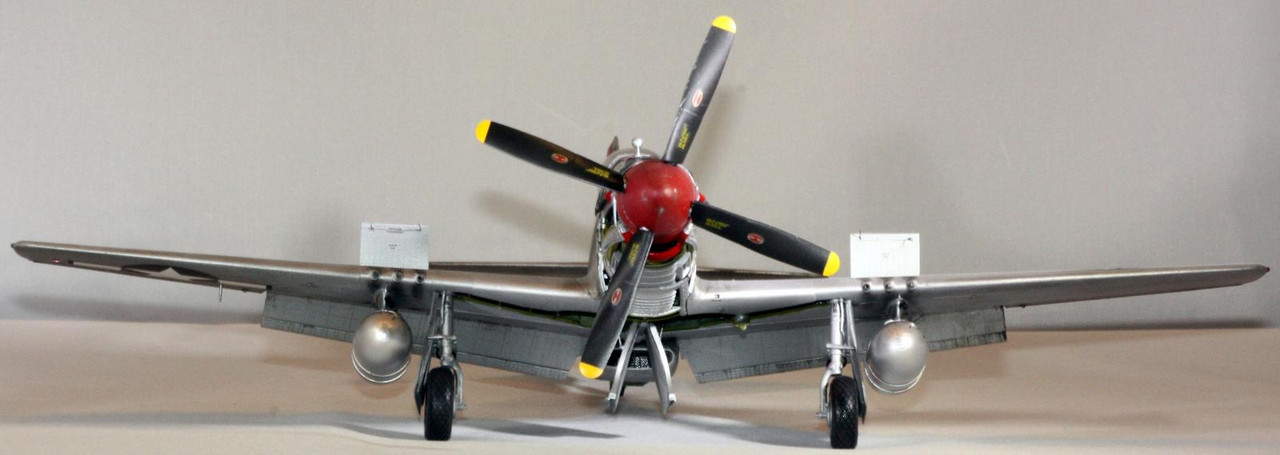
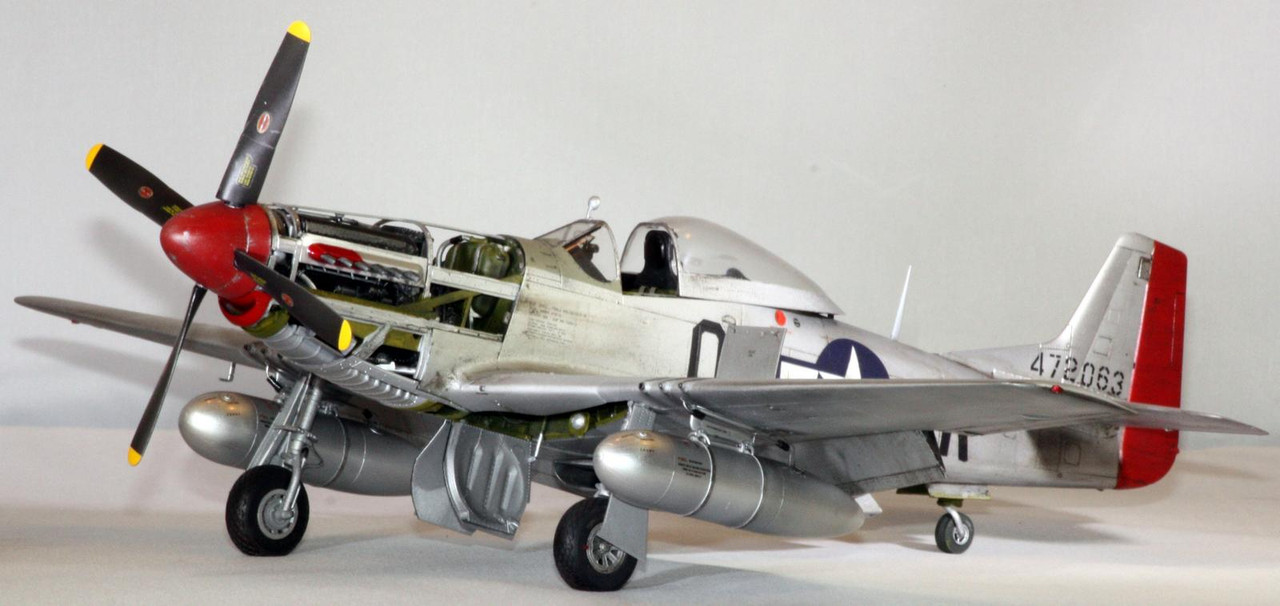
Some close-ups.
Note the added parts to the gunbay door. There is a PE sheet available that includes these parts, but I opted to use bits of lead wire to replicate the actuator for the door and what I presume are locking bars for the door itself. To the naked eye my efforts look okay but up close not so much.
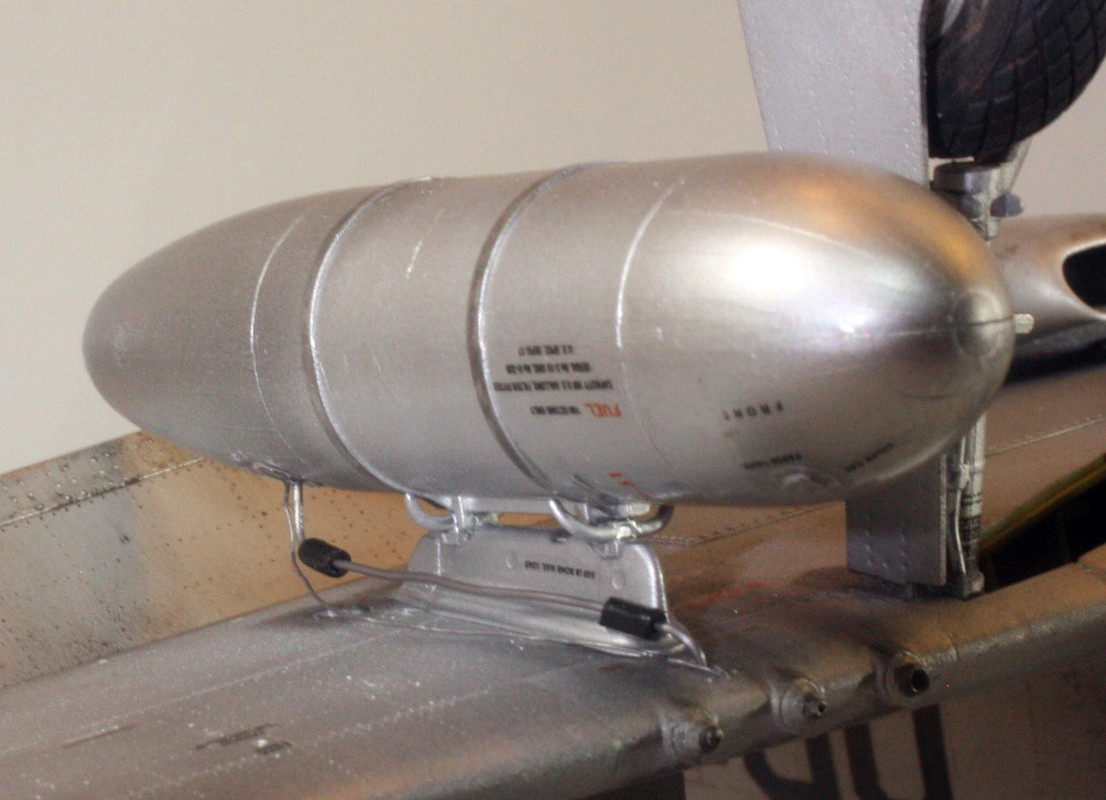
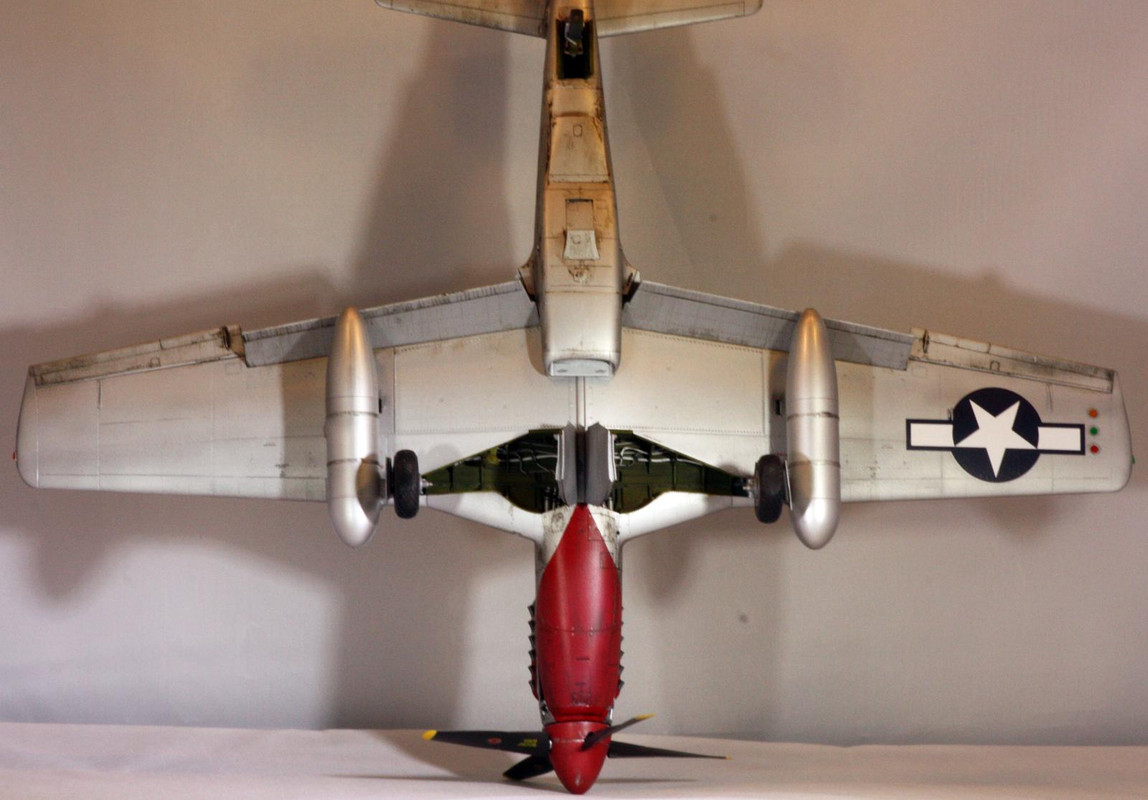
I added plumbing to the 108 gallon drop tanks.

The gunbay doors don't actually fit well. I don't know if that is a builder error or a kit issue, but in any event, I was always going to leave them off to display all the work I did in the gunbays. If I was going to do a diarama, these baydoors would be on the wings as if crew were working on the guns.
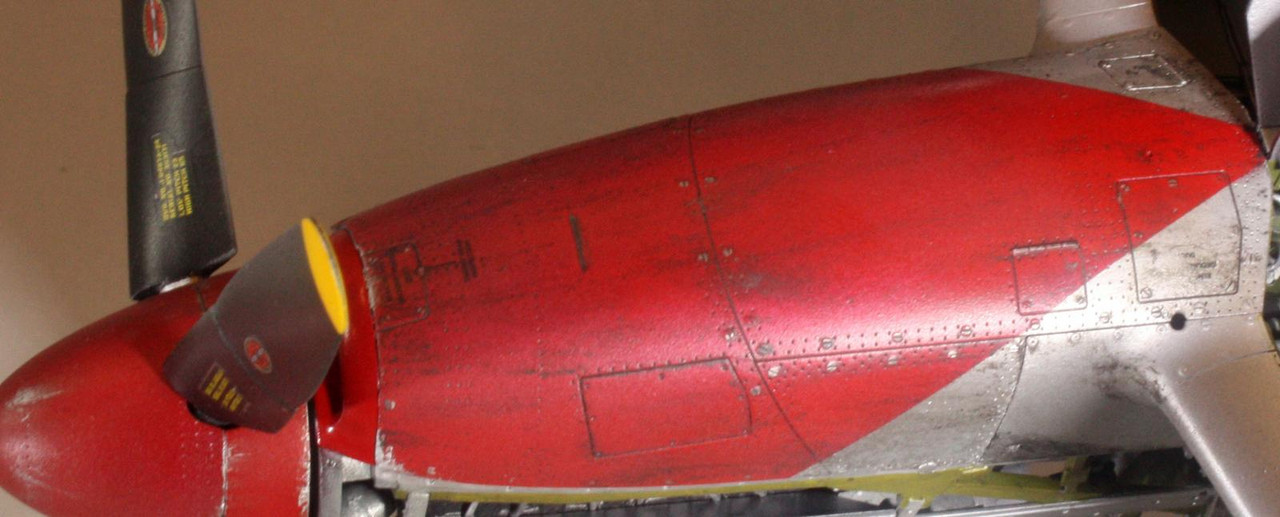
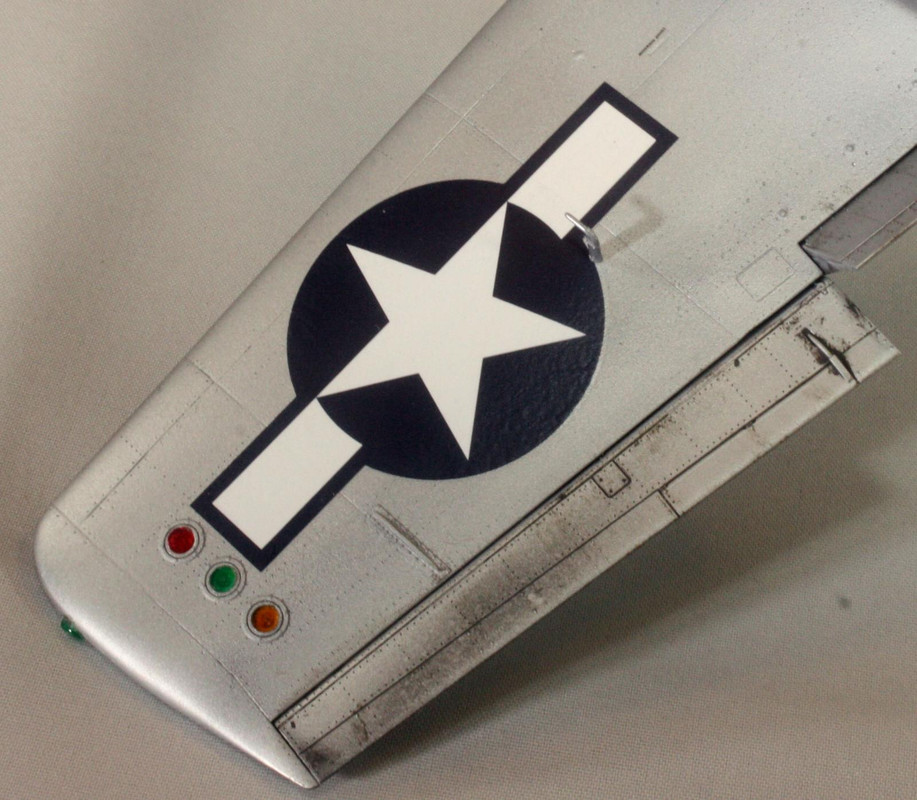
I thought the underside cowling cover should show just a bit of oil stains and other dirt. I also did some dry brushing with aluminum paint to add to wear and tear to this 'Stang.

I also dirtied the flaps and ailerons. The wings themselves don't show a lot of grit as the rivets were typically puttied over to improve airflow, although the putty would flake out over time. I could probably have added a bit more dirty wash to the wings, but I actually liked the relatively clean look there as opposed to other areas of the Mustang.

The stand for this is insufficient when aligned facing forward, as on my previous Tamiya 1/32 builds of the A6M5 Zero and Spitfire Mk. IXc. The Mustang was nose heavy, so I rotated the stand facing to the rear to offset the engine weight. Then there is the standing pilot figure. I don't do faces well at all. Clothing turned out good, I think, but his face is way too monotone, and probably too in need of some sun as well. I used a 0 tipped brush and was able to paint his eyebrows and even his eyes (first a light brushing of white and then a pinpoint of blue, but that just looked cartoony).

This is a great kit. I think I did a reasonable job on it, given the Krylon issue I had. There are some areas where I can see the problem areas, but in general, to the naked eye I think those areas just look like part of the weathering job. The Kits World decals worked great, but that set didn't include the insignia, which came from the kit sheet. The insignia on the port wing gave me fits. Looked like it was snuggled down just fine, even put a coat of decal softener on it, but when I went to spray a coat of gloss clear coat, the dadgummed thing lifted right up. I had to work at it a bit to get it to adhere, but even then a small chunk of it ripped away during a later spraying session.
I have moved my next build from stash to bench. This will be a pair of C-47 Skytrains (75th anniversary of 6 June 1944 is my primary motivation here); one will be a 6 June aircraft, and the other will actually be a Market Garden Skytrain. The kits will be an original issue Monogram, dated 1978, and the more recent Trumpeter kit. The only caveat is my previously referenced lack of work. I am a software engineer, but my experience is strongly tied to databases and old-style desktop applications. None of my previous experience has afforded me an opportunity to build a skillset in web or cloud development, so to that end I have enrolled in a coding bootcamp beginning at the end of August and running through the end of the year. I'm not sure how much time this class is going to afford me to spend at the bench, so it's likely this Mustang is the last build for me this year (I don't expect to be able to finish two big kits like these Skytrains in the slighly less than 2 months that I have until the start of the class).