SEARCH FINESCALE.COM

Enter keywords or a search phrase below:

WIP 1/48 FW189 Night Fighter- GWH

998 views
9 replies
1 rating 2 rating 3 rating 4 rating 5 rating
  • Member since
    December 2002
  • From: NYC, USA
WIP 1/48 FW189 Night Fighter- GWH
Posted by waikong on Friday, April 17, 2020 2:27 PM

So now that many of us are working from home, and have no where to go when we are not working.  I find my benchtime is significantly increased, so much so that I will finish a model in less than a month.  I started this a few weeks ago, GWH's 1/48 FW189 Night fighter version.

Haven't detailed a good cockpit in a while, and since this plane's has a lot, I mean a lot of glass, it would be a good choice as you can see so much.

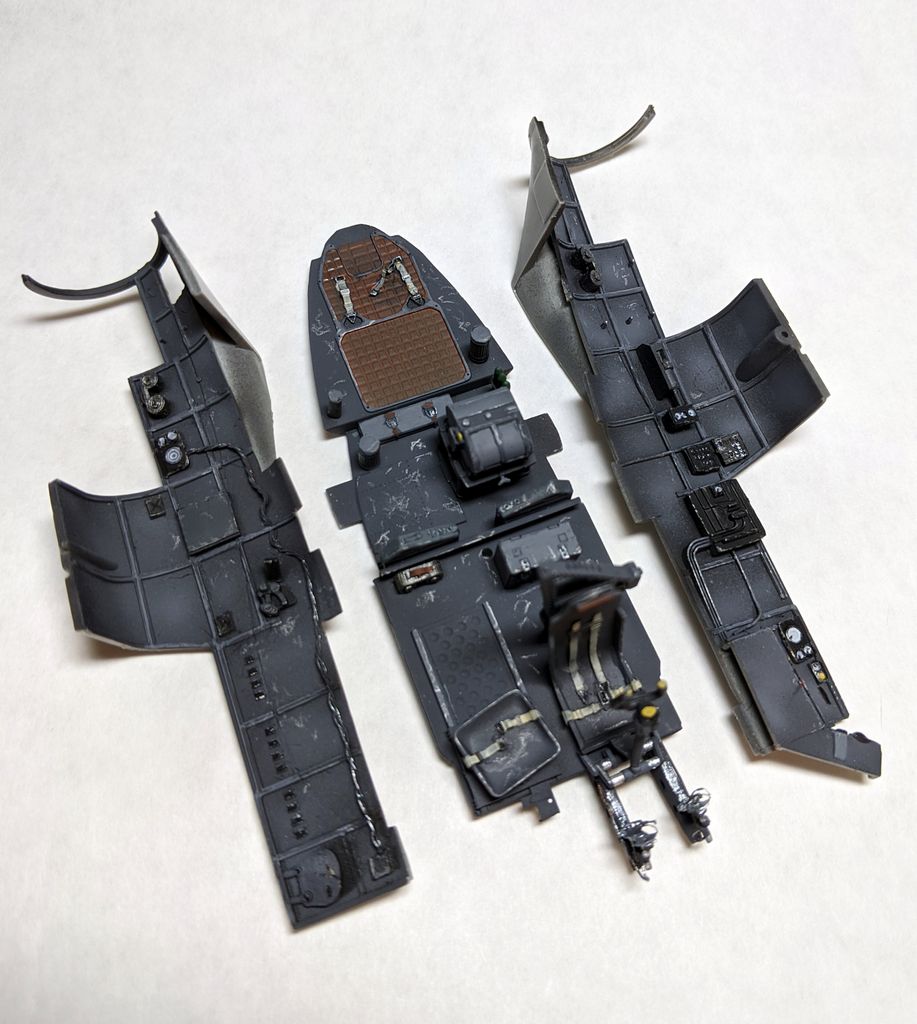
The cockpit builds up nice, but man, that's a lot of ejector pin marks, I filled some of them in, others I left as they will be hidden with equipment or just not easily seen.  The kit has a limited PE sheet, but decided to go old school and scratch build details with plastic stock, wiring, drilling, leftover PE, etc...

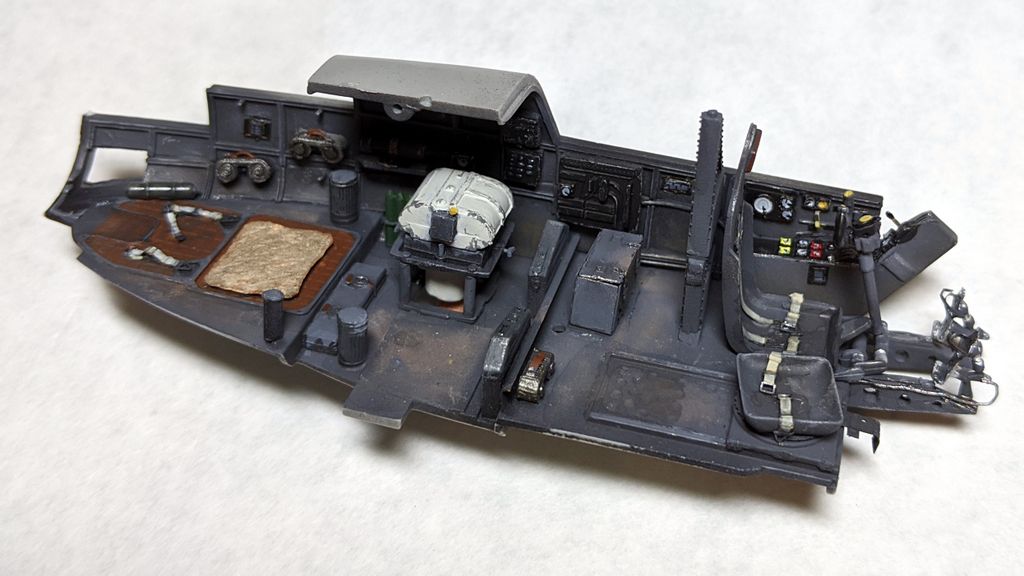
The belts and pedals are from the kit, the oxygen cansisters are from german army cansisters, the big ammo box is from a 1/35 armor pe set, the oxygen bottles are just plastic stock.

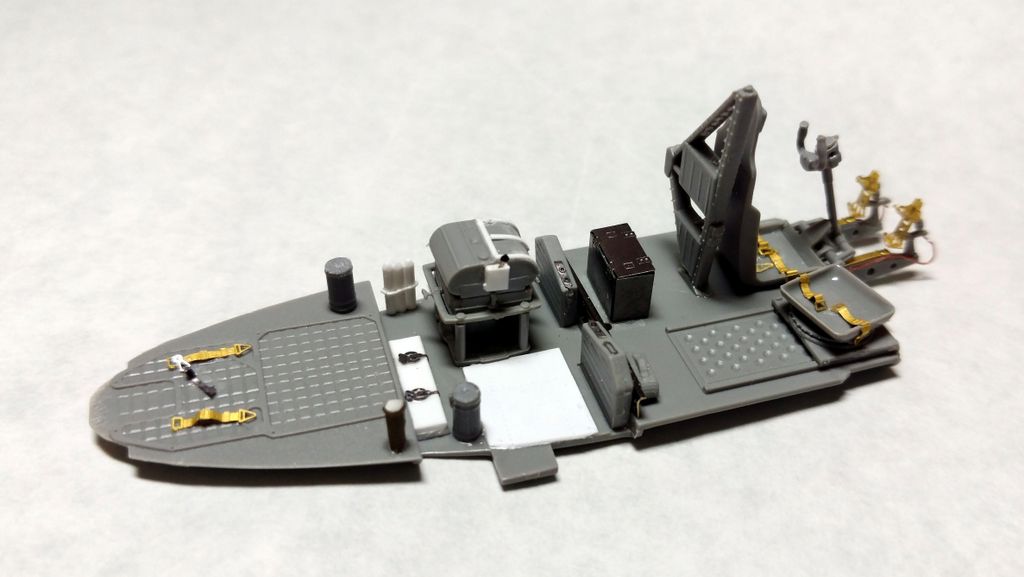
Added some pedal lines, misc PE scraps, drilled out the support behind the pilot seat, and detailed the camera with palastic strips.

Twisted electrical wiring, misc pieces left from the junk box, and plastic card for missing consoles based on reference photos.

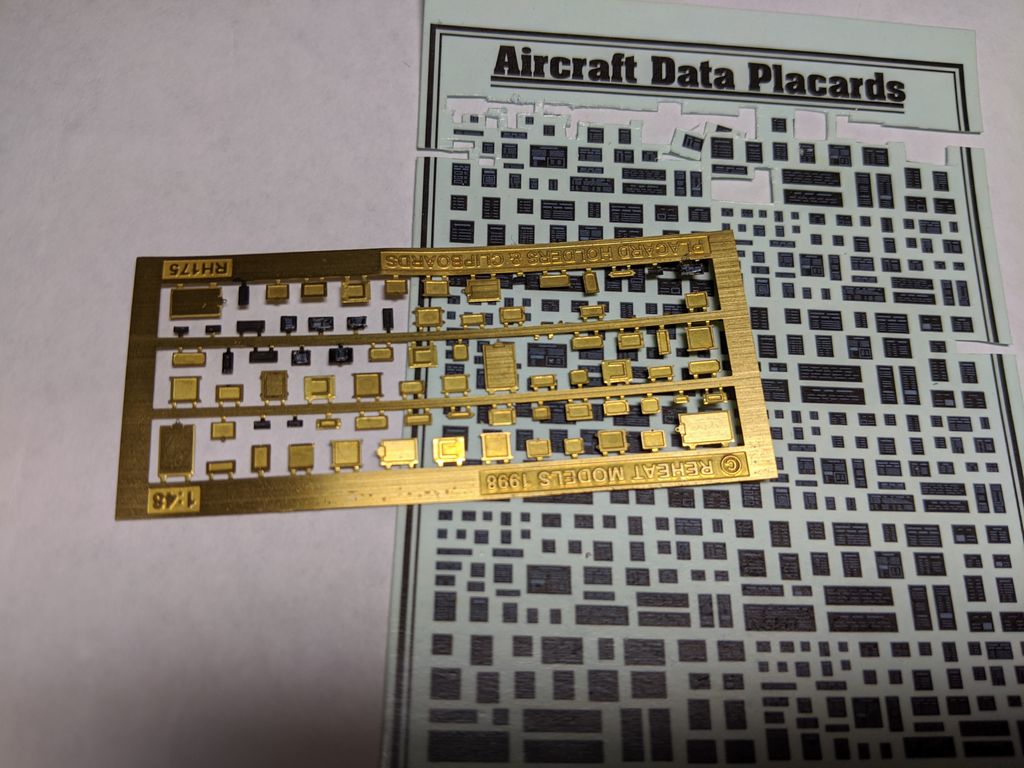
 The extra consoles are from a really old reheat PE set and their generic decal sheet,  Solder added for piping.  Added a 'doodad' I saw in a picture with a shelf, I think it's the motor to moves the camera.

There's a nastly seam where you join the top and bottom of the side pieces.  Filled and sand where I could, the rest I left as they are hard to see.

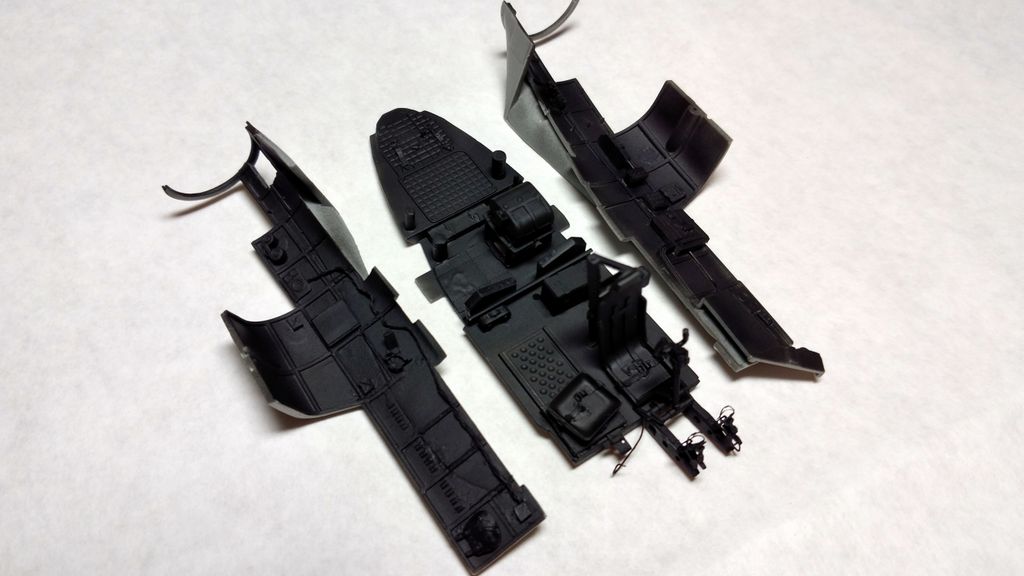
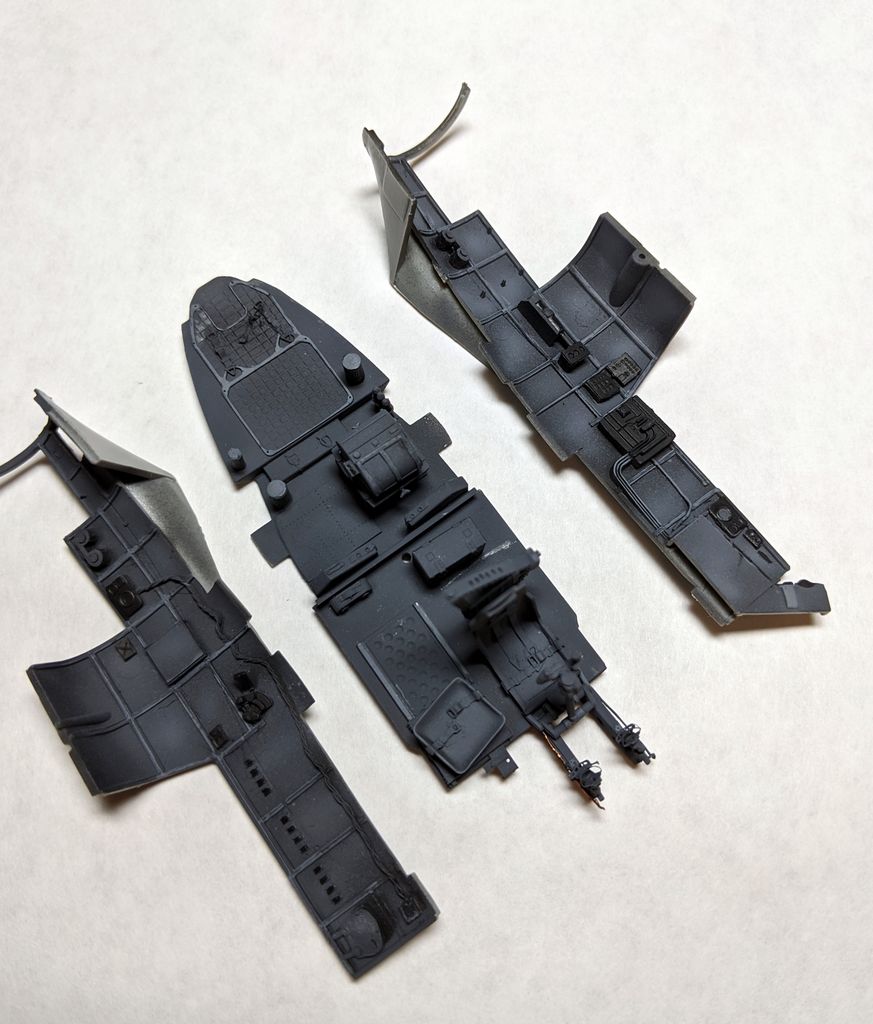
Here's the cockpit primed with black and then painted german gray

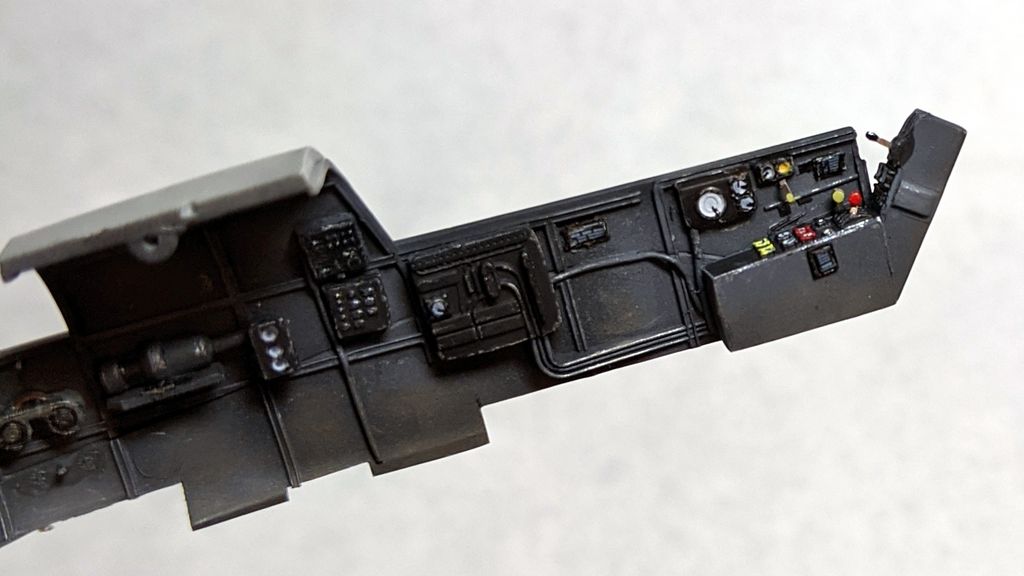
Sprayed lighter shades of gray in the panel centers and picked out highlights with even lighter gray.

Finished up brushpainting the details and added chipping

sidewall switches added and painted 

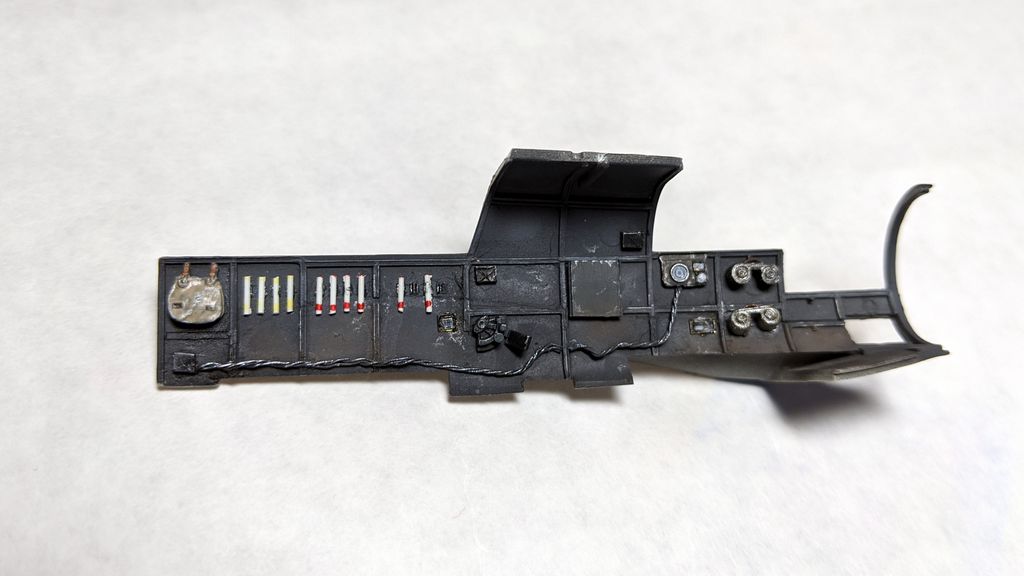
the other sidewall added flares from plastic rod, looks a bit crude close up, but ok in 'real life'

Completed cockpit, painted the camera an off-white as that seems to the correct color. Added some oil pin wash and a little pigments to dirty things up.  The gunner's pad is from a cotton pad stiffened with diluted white glue.

Ok, that's it for now.  Have some picture of the rest of the cockpit and the plane is actually closed up.  Will put more pics up this weekend.


My website: http://waihobbies.wkhc.net


  • Member since
    October 2019
  • From: New Braunfels, Texas
Posted by Tanker-Builder on Friday, April 17, 2020 2:36 PM

Well;

 I have to say this is some very nice work.Thank You!

  • Member since
    April 2015
Posted by Mopar Madness on Friday, April 17, 2020 2:39 PM

Excellent work.

Chad

God, Family, Models...

At the plate: 1/48 Airfix Bf109 & 1/35 Tamiya Famo

On deck: Who knows!

  • Member since
    July 2019
Posted by Hoss WA on Friday, April 17, 2020 8:55 PM

Looking great so far. 

  • Member since
    November 2008
  • From: Central Florida
Posted by plasticjunkie on Saturday, April 18, 2020 7:26 PM

Great attention to detail. That pit looks amazing! Beer

 GIFMaker.org_jy_Ayj_O


Too many models to build, not enough time in a lifetime!!

  • Member since
    December 2002
  • From: NYC, USA
Posted by waikong on Tuesday, April 21, 2020 1:24 PM

Thanks for everyone's comments, appreciate it.

So closing up the fuselage, man this thing has some major gaps that needs fillling. Maybe it's just my poor execution, I dont know.  In anycase, time to work on the front windscreen.  

There are 2 metal gratings that are not in the kit, I think they are meant for the crew to step on.  So I figure I can replicate using strip styrene.  The catch is that one of them has a curve to it, and I figure I can use a screw driver warmed up from a candle to bend it. Eh... nope, a little too hot, the thing immediated started to melt.  So try # 2 will just use come Tamiya thing cement to soften it.  Here'a picture of the melted one vs the 2nd try.

I then added some depth to the overhead instrument panel by punching out round disks of different sizes.  I will add some soldering as wiring to these in the back of the panel.

The front got individual instrument decals

And here's the front piece with the pieces installed

The kit was masked with Eduard masks, I started with Montex, but they just didn't stay stuck on any of the compound curves.  So they are cheaper, but I guess I will stick with Eduard in the future except for flat pieces.


My website: http://waihobbies.wkhc.net


  • Member since
    July 2019
Posted by Hoss WA on Tuesday, April 21, 2020 11:43 PM

Looking good so far. I agree with you 100% on Montex canopy masks. The vinyl is too rigid and adhesive not strong enough to keep them stuck on anything other than a flat surface. Also, the last time I used them I found that adhesive residue stuck to the canopy clear surfaces and was hard to remove. I'd rather cut out the Tamiya kit masks or get Eduard. No more Montex canopy masks for me. 

  • Member since
    December 2002
  • From: NYC, USA
Posted by waikong on Thursday, April 23, 2020 12:23 PM

Thanks for your comments Hoss, yeah, I was penny wise but pound foolish with the Montex.  Still have 2 other sets though :(

Ok, so making good progress.  Finished up the engine by adding a few more details based on reference pictures.  Didn't do too much back behind except adding the yellow oil container (?) - as test fitting showed that you can't see too much, but if you left it alone, it looks too open.

After masking and the engine, it was time to close it up with paint and decal.  I use vallejo black primer, then gave it a coat of Hellbleu, followed by Gray violet to create th e pattern.  If ind that i better control over that then trying to do the 'random' patterns over the darker color - even though that's how it was applied in real life.

So almost there.

My website: http://waihobbies.wkhc.net


  • Member since
    December 2002
  • From: NYC, USA
Posted by waikong on Friday, May 1, 2020 8:41 AM

Well, this thing is almost wrapped up.

Starting add the small details:

Engine mounted and added the flames suppressors, don't know if they rusted, but couldn't resist - still trying that technique out.

I did drill out the flame suppressors, used pigment and paint for the rust, and a oil wash.

Got some nice PE ammunition belts to add to the rear machine gun

The kit comes with a nice set of service ladders and wheel chocks - very, VERY delicate and I think I broke half the parts putting them together.  I took an ICM luftwaffe figure from their set, and will create a small vignette for the display.  Still practicing my figure painting.

My website: http://waihobbies.wkhc.net


  • Member since
    April 2015
Posted by Mopar Madness on Friday, May 1, 2020 9:52 AM

That really is a nice kit supplied service ladder!

Chad

God, Family, Models...

At the plate: 1/48 Airfix Bf109 & 1/35 Tamiya Famo

On deck: Who knows!

JOIN OUR COMMUNITY!

Our community is FREE to join. To participate you must either login or register for an account.

SEARCH FORUMS
FREE NEWSLETTER
By signing up you may also receive reader surveys and occasional special offers. We do not sell, rent or trade our email lists. View our Privacy Policy.