Well, its been a while... enjoy.
After taking a long break from armor I decided to do something very plane (plain).
But watch out, I've got my eye on a U-boat soon.
So this evening I took a few quick pics, hope you like ‘em. This Wildcat is the prehistoric Monogram quarter inch scale kit (1/48) with all the raised rivets and panel lines from 1961.
I actually built it in ’61. This time I took a while to see what I could do with it’s inherent issues. I really had a lot of fun working on this and enjoyed seeing how my abilities have progressed over this last half century….. and with only one working eye I'm doing better with experience than when I was young and dumb with two good eyes.
Click the pic's for a larger image.
Below’s a picture of how the box should have looked when it was new. I still remember it like yesterday.

I’m presenting this on a temporary jungle landing strip with a base I whipped up in a hurry.

This kit isn’t perfect. My box was squashed and up in the hot attic for many, many years. That affected the upper wing fit. The decals were junk. With a lot of patience, scratch built parts and without any aftermarket parts this is the second result 60 years later.
The pilot came with the kit (the mechanic figure went missing somewhere) and is my first painted figure in over 35 years. It's attached (temporarily) with some sticky tack. I don’t think the painting on the parachute is correct.
I added exhaust pipes, reworked the engine area, nothing for the wheel covers so I made the slightly dome shaped wheel covers from styrene sheet (minus the 6 attachment screws). The landing gear was a fiddly affair so I had to add some minor adjustments to ensure an un-fiddly stance. The tail wheel was broken off so I (tiny) drilled both the attachment points and fitted a half inch long section of electric guitar string (worked great, like new) using Tamiya extra thin glue to fit them together this time, instead of my usual (slower drying) lacquer thinner. I also added aluminum machine guns, clear sprue (wing) landing light, toothpick ladder.
The canopy framing is painted decal paper..... works pretty good too. The molded canopy framing had next to nothing showing so I had to use the instruction sheet as a map to add the framework.
The upper surfaces are painted with Tamiya XF-18 and the lower area with Mr. Hobby 11 light gull gray. The rear rudder was taped off (with cheap washi tape from the dollar tree and painted red/white).
The weathering was the most fun part.


Next is some more plane stuff….


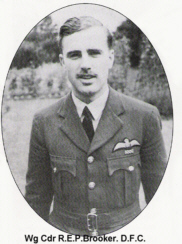
![Battle of Britain London Monument - F/Lt. R E P Brooker]()

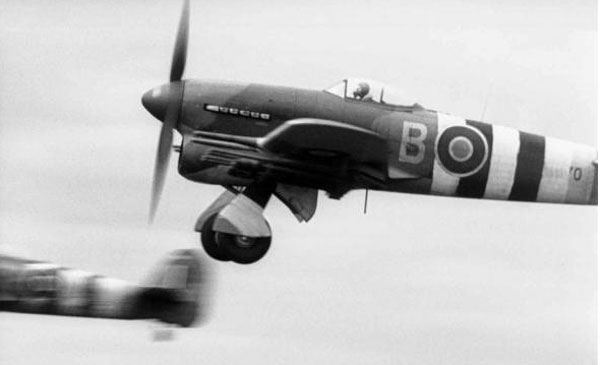
June 6th 1944
Here is the Mk.1B (MN570) of Wing Commander R E P Brooker of 123 Wing based at Thorney Island.

Below is the 1/48 Hasegawa kit # 09060

Here it is. It took a while, but I had a ball bringing this together. The plane is out of the box (except for the rocket’s fuse wires, I could have used sprue). I added the pilot figure (my second painted figure in 35 years).Those objects hanging from the rockets are the electrical attachments for the rockets.


I masked the yellow spiral on the nose spinner and airbrushed it. It’s painted exactly as on the original aircraft. All the invasion stripes are masked and airbrushed. Again, I used cheap washi tape from the dollar tree for all masking.

I’m so glad I bought this kit as it was a real blast to build and improve on.

Sorry, I’m running out of time so the last picture isn’t so good. I can hear the spooks outside now, gotta go.
