SEARCH FINESCALE.COM

Enter keywords or a search phrase below:

Two 1/48 P-47's finished Testors vs. Revell

8561 views
15 replies
1 rating 2 rating 3 rating 4 rating 5 rating
  • Member since
    January 2003
  • From: NE Georgia
Posted by Keyworth on Sunday, February 3, 2008 7:57 PM
Nice job on both kits.  Did you use the Superscale decals for your twosome?  The Testors kit is, in reality,the old Hawk release from many years ago.  I built that one up a couple of times.  The Revell offering is the old Monogram kit from the early 70's and it builds up into a respectable likeness, but the Hasegawa and Tamiya kits do have superior fit and detailing.  Try one when you can afford it.  Hobby Lobby offers discount coupons periodically, up to 40% off (one there this week) for one item, and they also have sales on all plastic kits from 25-50% off.
"There's no problem that can't be solved with a suitable application of high explosives"
  • Member since
    August 2006
  • From: The Great State of Wyoming
Posted by wyoroy on Sunday, February 3, 2008 7:34 PM
 Butz wrote:

 wyoroy wrote:
With practice your airbrushing skills will improve.  Daywalker can give you some great ideas on how to improve those skills.  IMHO he is one of the best on the forum.

 Hey Roy,

 Ok, so how much did Frank pay ya to say that.. LOL Tongue [:P]

Flaps up,

Mike

Rangers Lead The Way 

Frank said I could use his snow blower when he's done with itBig Smile [:D]

Roy (Capt. Wyoroy FAAGB/USNFAWGB)

John 3:16

  • Member since
    February 2003
  • From: Niagara Falls NY
Posted by Butz on Sunday, February 3, 2008 1:54 PM

 wyoroy wrote:
With practice your airbrushing skills will improve.  Daywalker can give you some great ideas on how to improve those skills.  IMHO he is one of the best on the forum.

 Hey Roy,

 Ok, so how much did Frank pay ya to say that.. LOL Tongue [:P]

Flaps up,

Mike

Rangers Lead The Way 

  If you would listen to everybody about the inaccuracies, most of the kits on your shelf would not have been built Too Close For Guns, Switching To Finger

  • Member since
    January 2007
  • From: Northern California
Posted by trexx on Sunday, February 3, 2008 1:48 PM

Revell makes kits that are affordable. I have a hard time shelling out $40-$50 for a model from Japan or Europe when I can get the same airplane for $10 from Revell. So they don't have perfectly fitting seams... big whoop. You're gonna have to putty anyway so I go with the lower cost in almost every case. But then again, it's the building that I like the best. Once done... the fun is done.

AND... about "solva-set" and similar products, remember this stuff actually disolves your decals and essentially makes them a puddle of 'paint' until dried. Be careful. As mentioned in other threads, sometimes it needs to be thinned with water, depending on how delicate the decals are. Some are thick and hardy while other are really thin and fragile.

  • Member since
    February 2007
  • From: Calgary, Alberta, Canada
Posted by T-rex on Sunday, February 3, 2008 1:32 PM
I see revell a much better that testor, speaking of Revell and testor, some craft store (like Micheal's) will only sell Revell and Testor products, sure there Cheap but not always worth it.

Working on: Trumpeter SU-152 (1/35) Trumpeter E-10 (1/35) Heller Somua (1/35)

"The world is your enemy, prince of a thousand enemy. And when they'll find you, they will kill you... but they will have to catch you first ''

  • Member since
    August 2006
  • From: The Great State of Wyoming
Posted by wyoroy on Sunday, February 3, 2008 9:29 AM
Andrew, I have to agree you are getting better.  I have done what Butz said, it does workBig Smile [:D]  With practice your airbrushing skills will improve.  Daywalker can give you some great ideas on how to improve those skills.  IMHO he is one of the best on the forum.

Roy (Capt. Wyoroy FAAGB/USNFAWGB)

John 3:16

  • Member since
    February 2003
  • From: Niagara Falls NY
Posted by Butz on Saturday, February 2, 2008 11:31 AM
 raptordriver wrote:
 Butz wrote:

 Hey Drew,

 As I have mentioned before, you are getting better n better.. Both kits look good over all but I can see some of the fit issues as you mentioned w/ the Testor's kit.

 As DB mentioned, I prefer the Revell Jug anyday..!!! One thing I did see on both your Testor and Rev build is a little silvering around the code letters.

 To correct this, first off do you have either Solvaset or Micro Set? These are what helps set the decals down so they look like they were painted on..

 Anyways, take a pin or needle(make sure they are not dull) From there and very gently pin prick the areas that you see the silvering. Do not go over the whole entrie surface area but in spots as you see fit.

 Then take either one of the solutions as mentioned above and apply it lightly. By doing these two steps, it will help remove the silvering from under the decals. If need be repeat the steps as you see fit.

 If you have any question, please fire away... I'm here fer ya..!!

Other than that Drew, I am really pleased on how you are coming along!! By the way, I like the way you presented this thread..!! Nice touch

Take care bud..!!

Flaps up,

Mike

Rangers Lead The Way 

Thanks ikey my question is can the decal be dry? when you poke it with the needle I havent really paid attention but I think slivering comes up when dry

Hey Drew,

 Opps I forgot about that part... It's extremely cold here so my brain must have been froozen or sumtin like thatTongue [:P]

 To answer your question, Yes, the decals will be dry when you do this method. Once you put on a flat coat and thats when the silvering shows..

 So even w/ the flat coat on, you can still do this. Hopefully this answered your question

Flaps up,

 Ikey

Rangers Lead The Way 

  If you would listen to everybody about the inaccuracies, most of the kits on your shelf would not have been built Too Close For Guns, Switching To Finger

  • Member since
    January 2015
  • From: Katy, TX
Posted by Aggieman on Saturday, February 2, 2008 9:36 AM

I've built both kits (Revell & Testors) and I'd say hands-down the Revell is far superior.  I never actually finished the Testors kit since I was so disgusted with it.  The fit was poor, and several of the pieces were mis-molded or incompletely molded.  Perhaps that was just a real lemon of a kit that happened to come off the Testors production line, but it sure steered me away from Testors kit offerings.

The Testors kit was not a total loss, however, as I kept it around for a test airbrushing subject.  Looks pretty funny now with all kinds of different paint schemes on it.

I built the Revell (actually Monogram at the time) kit a few times when I was younger.  The old Monogram/Revell kits do lack in Tamiya-esque detail but for the money they are excellent kits.  There are occasionally fit problems but nothing that can't be overcome.  And they typically built into nice display models.

As of now, I have 1 Revell kit in my stash, and both the Razorback and bubble-top Tamiya kits as well.  I'm really looking forward to building those Tamiya kits since I've heard nothing but praise for those kits.

  • Member since
    September 2006
  • From: From Vernal UT OH YEA!!
Posted by raptordriver on Saturday, February 2, 2008 8:57 AM
THanks everyone. Rick I'd definetly try the Tamiya kit  it would probaly be perfect. I just got to save up for it.Big Smile [:D]

Andrew


  • Member since
    September 2006
  • From: From Vernal UT OH YEA!!
Posted by raptordriver on Saturday, February 2, 2008 8:52 AM
 Butz wrote:

 Hey Drew,

 As I have mentioned before, you are getting better n better.. Both kits look good over all but I can see some of the fit issues as you mentioned w/ the Testor's kit.

 As DB mentioned, I prefer the Revell Jug anyday..!!! One thing I did see on both your Testor and Rev build is a little silvering around the code letters.

 To correct this, first off do you have either Solvaset or Micro Set? These are what helps set the decals down so they look like they were painted on..

 Anyways, take a pin or needle(make sure they are not dull) From there and very gently pin prick the areas that you see the silvering. Do not go over the whole entrie surface area but in spots as you see fit.

 Then take either one of the solutions as mentioned above and apply it lightly. By doing these two steps, it will help remove the silvering from under the decals. If need be repeat the steps as you see fit.

 If you have any question, please fire away... I'm here fer ya..!!

Other than that Drew, I am really pleased on how you are coming along!! By the way, I like the way you presented this thread..!! Nice touch

Take care bud..!!

Flaps up,

Mike

Rangers Lead The Way 

Thanks ikey my question is can the decal be dry? when you poke it with the needle I havent really paid attention but I think slivering comes up when dry

Andrew


  • Member since
    February 2003
  • From: A Spartan in the Wolverine State
Posted by rjkplasticmod on Saturday, February 2, 2008 8:21 AM

Pretty good builds Andrew, especially considering the age & quality of the old kits.  When you're ready, try the 1/48 Tamiya kit.

Regards,  Rick

RICK At My Age, I've Seen It All, Done It All, But I Don't Remember It All...
  • Member since
    December 2002
Posted by Bossman on Saturday, February 2, 2008 8:15 AM

Drew,

Great job on the models - and a great idea to post them together and compare the two kits.  What scale are they ?  1/48 ?

Chris

  • Member since
    September 2012
Posted by namrednef on Saturday, February 2, 2008 7:25 AM

Nice work Andrew! Love theme builds like this. Great overall effect!

...and thanks for the mini-reviews 

  • Member since
    February 2003
  • From: Niagara Falls NY
Posted by Butz on Saturday, February 2, 2008 3:02 AM

 Hey Drew,

 As I have mentioned before, you are getting better n better.. Both kits look good over all but I can see some of the fit issues as you mentioned w/ the Testor's kit.

 As DB mentioned, I prefer the Revell Jug anyday..!!! One thing I did see on both your Testor and Rev build is a little silvering around the code letters.

 To correct this, first off do you have either Solvaset or Micro Set? These are what helps set the decals down so they look like they were painted on..

 Anyways, take a pin or needle(make sure they are not dull) From there and very gently pin prick the areas that you see the silvering. Do not go over the whole entrie surface area but in spots as you see fit.

 Then take either one of the solutions as mentioned above and apply it lightly. By doing these two steps, it will help remove the silvering from under the decals. If need be repeat the steps as you see fit.

 If you have any question, please fire away... I'm here fer ya..!!

Other than that Drew, I am really pleased on how you are coming along!! By the way, I like the way you presented this thread..!! Nice touch

Take care bud..!!

Flaps up,

Mike

Rangers Lead The Way 

  If you would listen to everybody about the inaccuracies, most of the kits on your shelf would not have been built Too Close For Guns, Switching To Finger

  • Member since
    September 2007
  • From: galt, ca.
Posted by dirtball on Saturday, February 2, 2008 12:46 AM
 Andrew, gota tell ya you have 2 nice builds there! I like the Rev. best. I think you did a better build there of the 2.Keep posting, and good luck!!
"I once shot an elephant in my pajamas. How he got in my pajamas, I`ll never know!"
  • Member since
    September 2006
  • From: From Vernal UT OH YEA!!
Two 1/48 P-47's finished Testors vs. Revell
Posted by raptordriver on Friday, February 1, 2008 10:24 PM

 Hey everyone, I thought this would be kind of neat to do, I built two razorbacks one was a Revell and the of course the other was Testors. The Revell one might not be as neat cause it was my second one with my airbrush finished in 07. I just finished the Testors kit though. Well anyway here it is.

Testors:DSCF1557.jpg picture by Raptor94

DSCF1556.jpg picture by Raptor94

DSCF1560.jpg picture by Raptor94

DSCF1559.jpg picture by Raptor94

DSCF1558.jpg picture by Raptor94

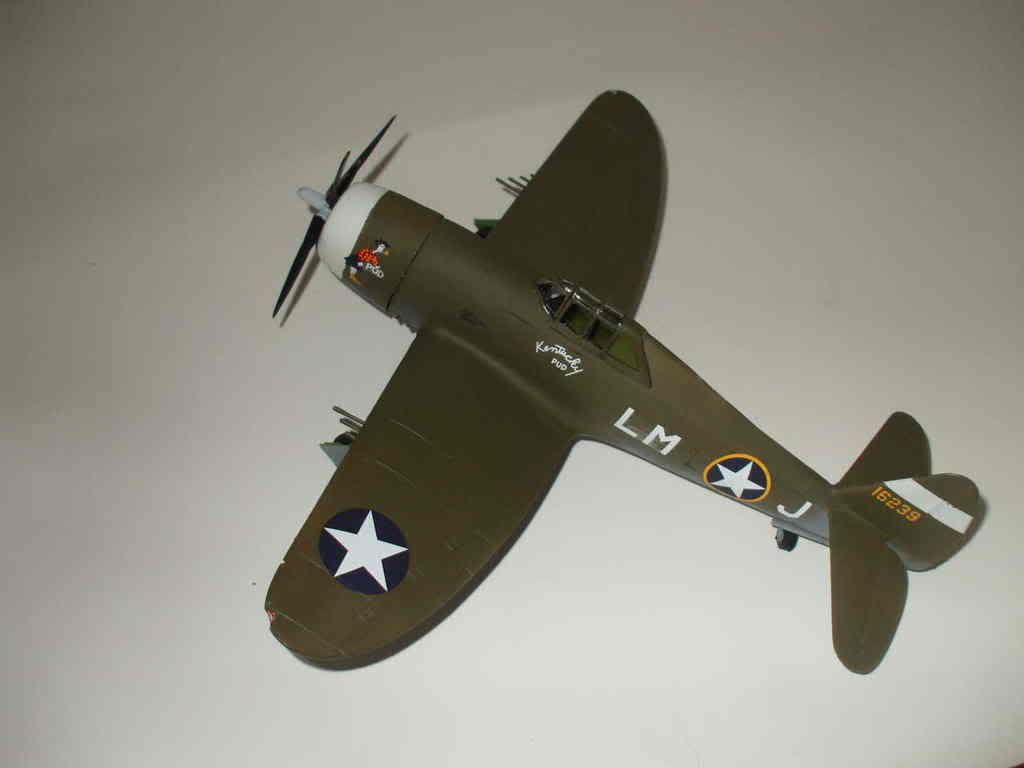
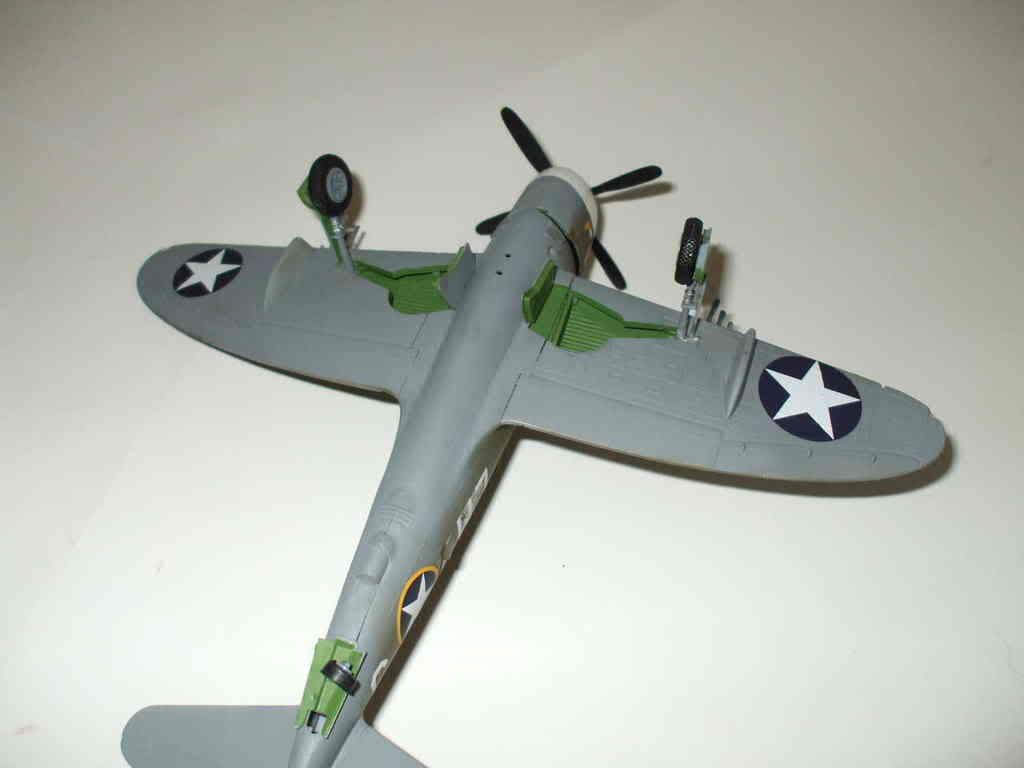
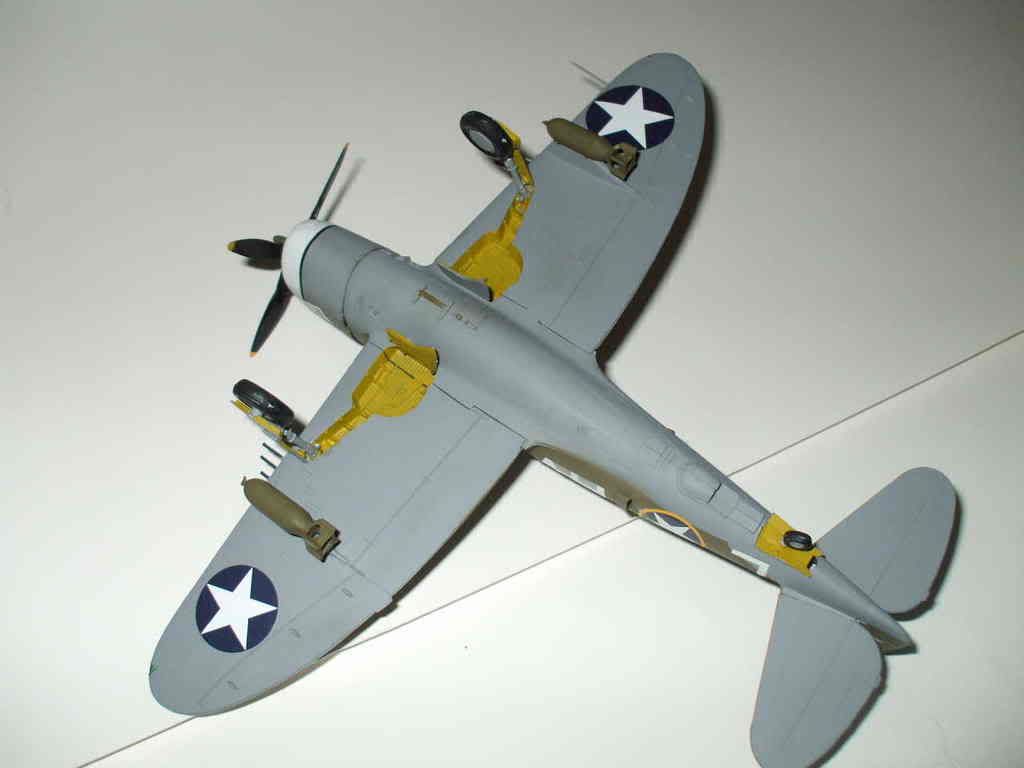
 Good things: My favorite thing about the kit was it had the option to either razorback or bubble top.Clear lights at end of wing. The fusalage fit was pretty good but needed some putty. the wheels and propeller were molded black so you didnt have to paint them.It comes with and instrument panel decal. Last, it had a good weapons load. Which I'll put on laterBig Smile [:D]

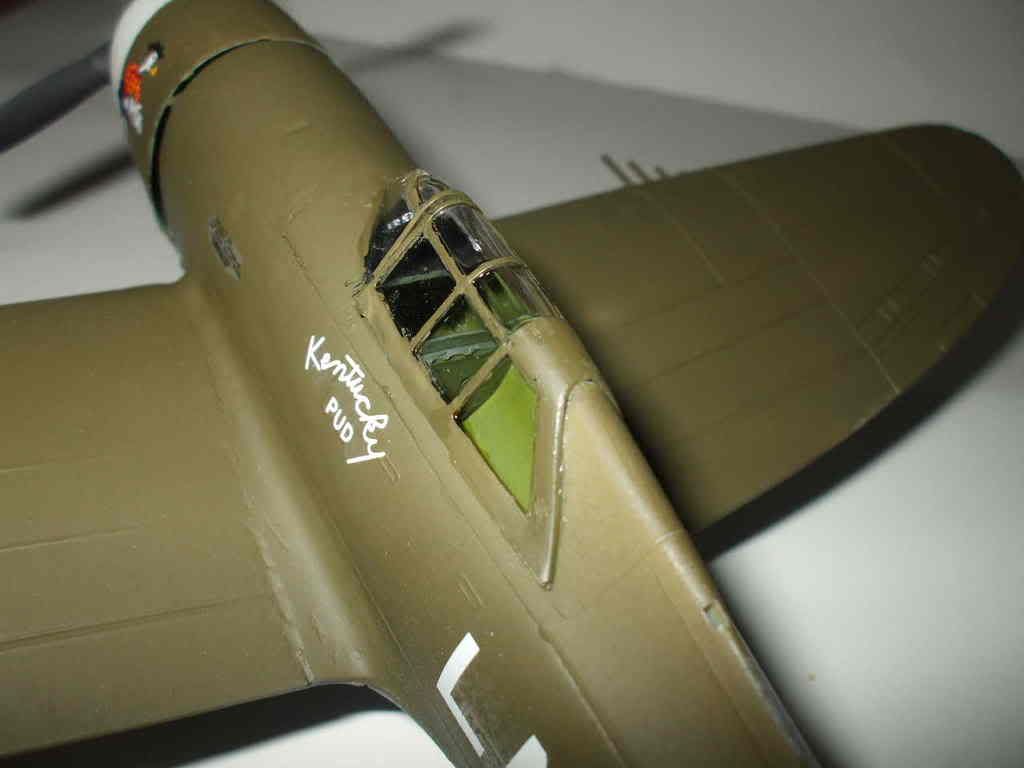
 Bad things: Horrible wing to fusalage fitGrumpy [|(] which was a mess. Had to put landing gears in before you glue the wings halves together. It doesn't bug me so much but might others ( Bad cockpit detail). And the wheel well panel lines seem wrong. Wrong shape of Prop.   Poor cowl fit. Last is poor canopy fit.

 Revell:DSCF1568.jpg picture by Raptor94

DSCF1565.jpg picture by Raptor94

DSCF1563.jpg picture by Raptor94

DSCF1567.jpg picture by Raptor94

DSCF1555.jpg picture by Raptor94

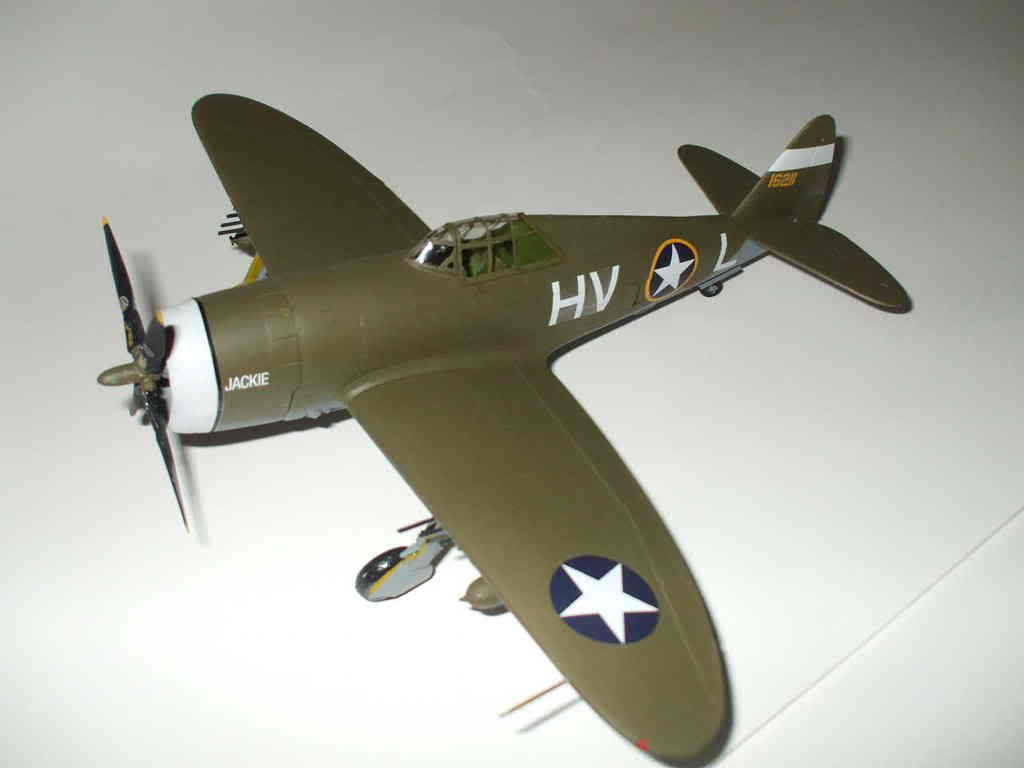
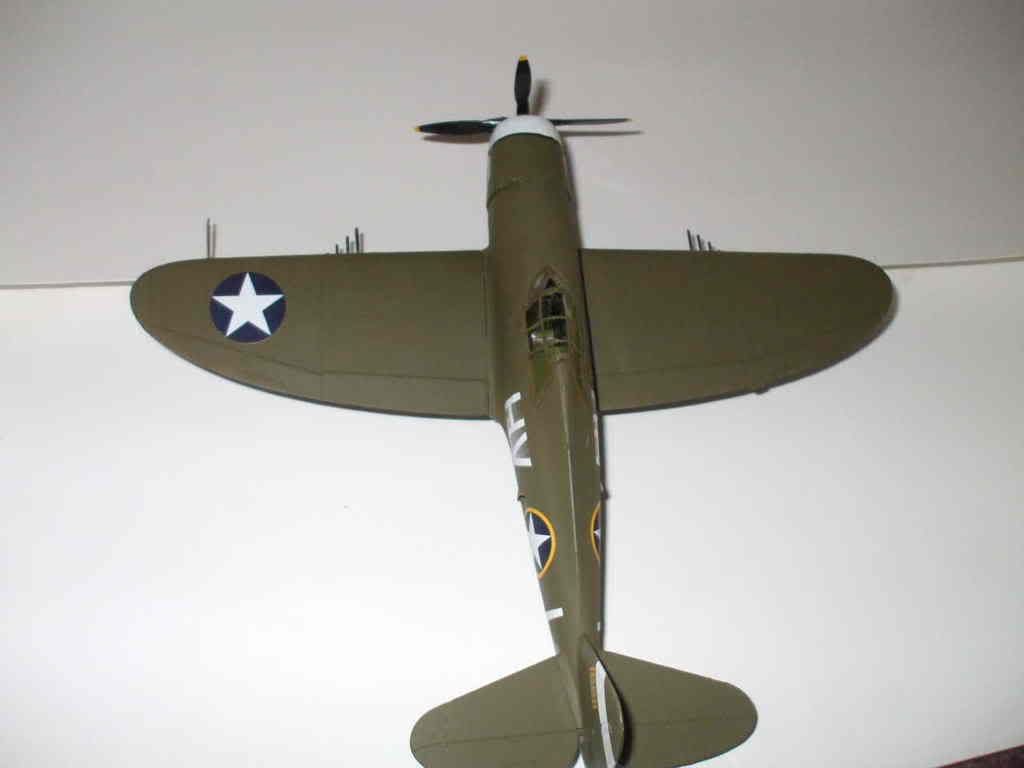
 Good things: Pretty good cockpit decal. Good fit with fusalage and wings. Good ordanece selection. Great canopy fit.Nice simple assembaly.

 Bad things: Poor landing gear fit, some what poor with elavaters. All parts molded OD green, Poor fit with interior Also only Razorback.

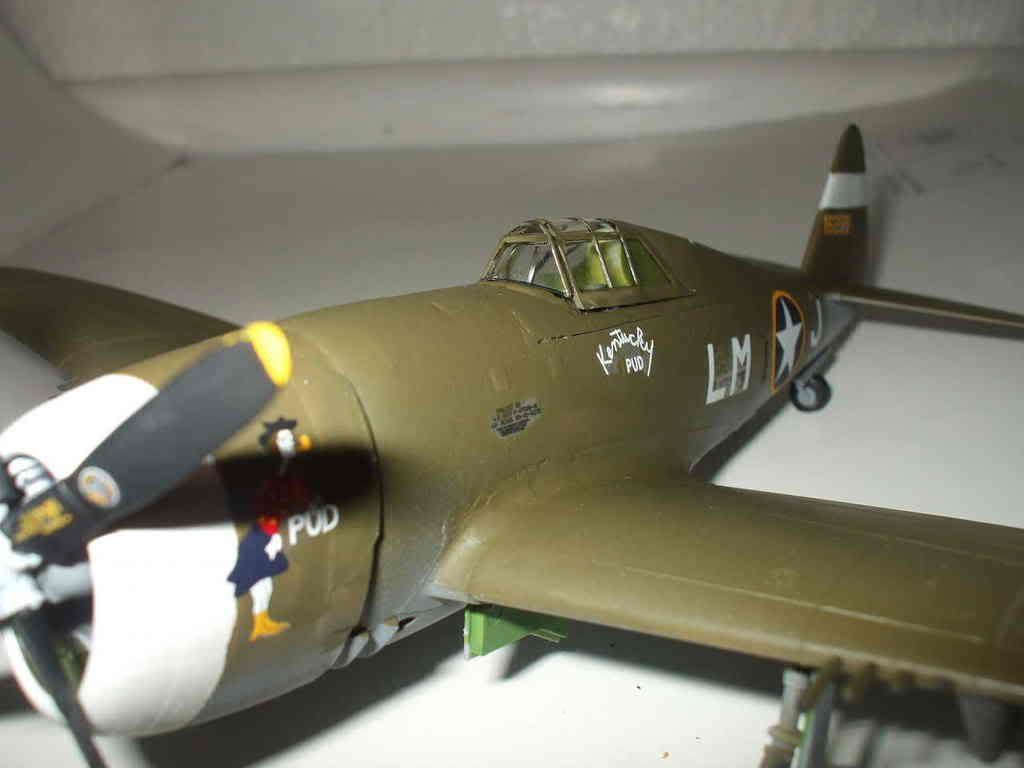
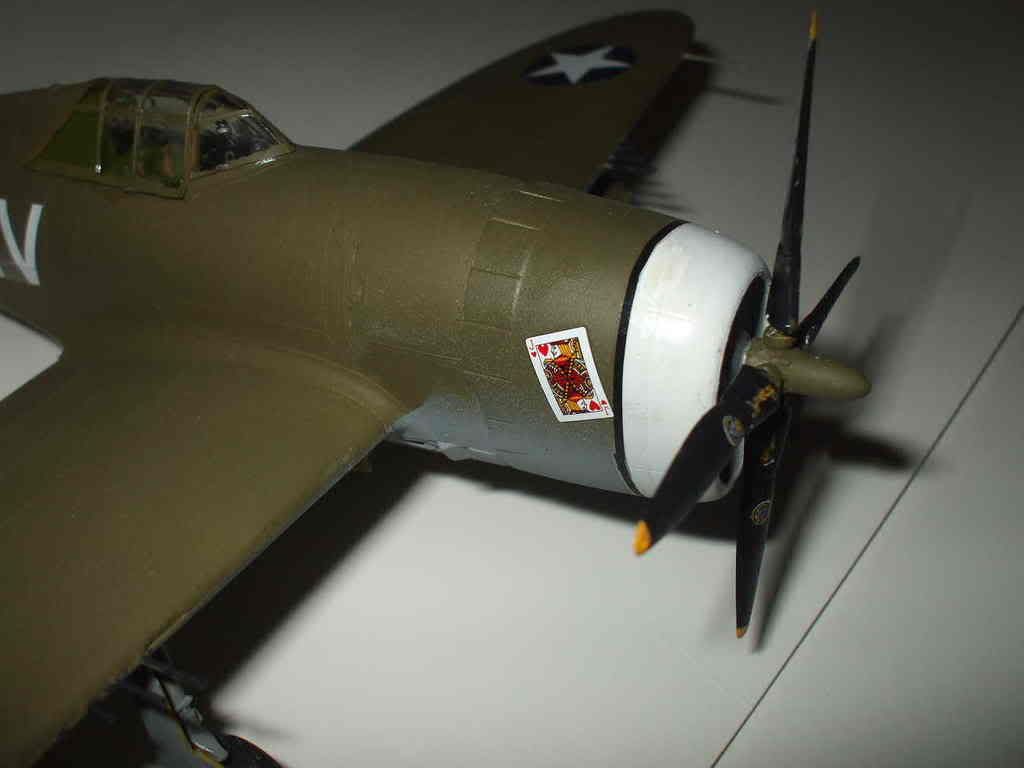
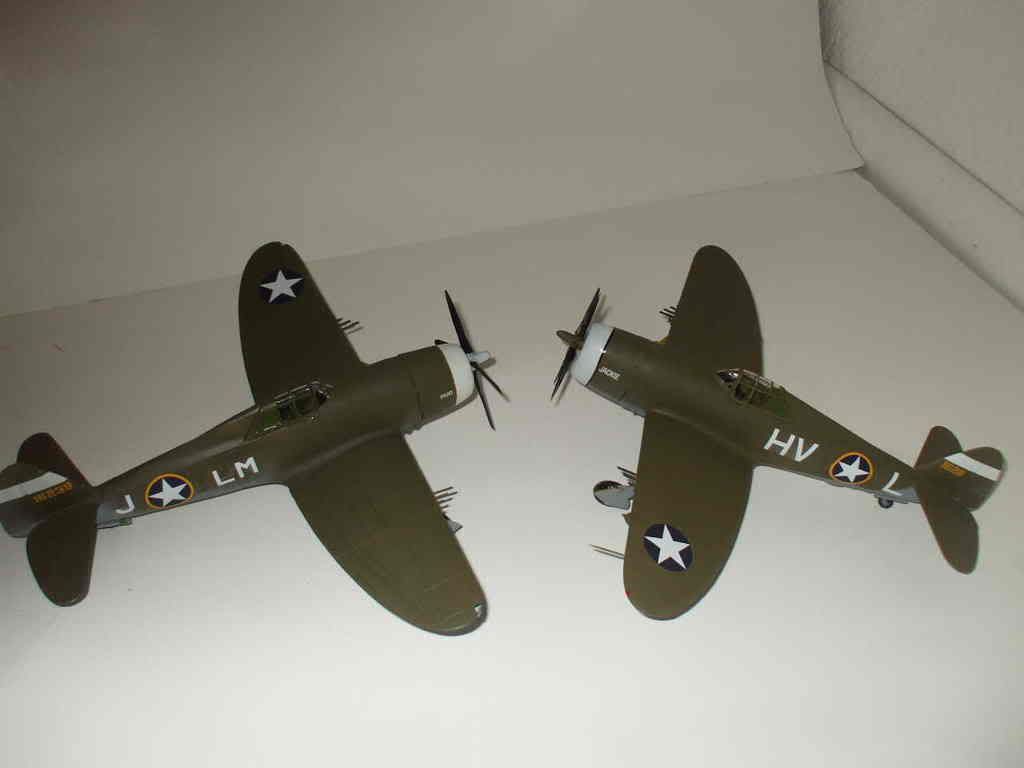
 Conclusion: out of everything I liked the Revell kit slightly better so I would prefer that one more. I still like the Testors though Its just the better fit of the Revell kit.Both kits were only seven dollers. For both the kits I used Aeromasters Wolf Pack pt.1 with the options of three thunderbolts here it is right here. http://www.squadron.com/ItemDetails.asp?item=AN48648  Heres a little info on the pilots

 The one that  has LMJ code letter: Was flown by Lt. Ralph Johnson. During the war he managed to score one victory.

 The one that  has HVL code letter: Was flown by Maj. Robert Lamb. But this guy was an ace he shot down seven air kills in the whole war.

 Well thats it thanks for readingSmile [:)] all comments welcome. and if any of you built both kits I would love to hear what you think is betterBig Smile [:D].

Andrew


JOIN OUR COMMUNITY!

Our community is FREE to join. To participate you must either login or register for an account.

SEARCH FORUMS
FREE NEWSLETTER
By signing up you may also receive reader surveys and occasional special offers. We do not sell, rent or trade our email lists. View our Privacy Policy.