I use Tamiya Extra Thin (Green cap) cement. It is fast setting but really works well.
I glue up just enough to go around about 1/2 of the sprocket and another set to do 1/2 the idler. I rubber band them on and let them sit over night. Then I start on the straight runs. I glue enough together to make the top run (using a jig made from a thick sheet of styrene with a piece of Plastrut angle glued onto it), and let them sit for about 15 to 20 minutes. Then glue the front end under the top, end link of the sprocket run and position the total so it comes off the sprocket properly. Push down on the run to match the sag you want. Use spacers, clamps, or glue to the return wheels as necessary to get the proper sag. run it up towards the idler at the other end clamping, bracing, etc. along the way. Use individual link to work that into the idler run you made earlier and let it all sit overnight (or at least a few hours) to harden. Then work the links around the idler and sprocket, down to the ground run and towards each other. For most tanks that have a short, straight run from the sprocket and idler to the ground, I glue up and let harden a straight run of the right length. If you pick up a 1/72 kit with link and length tracks, you'll see the method I come close to. It's worth the 8-9 bucks to learn how to do it, imo.
Have fun.
Bill
Bill
==========================================================
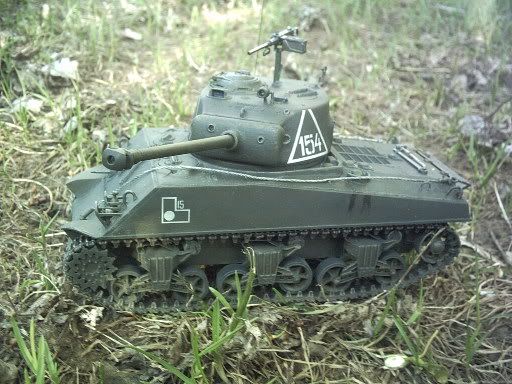
DML M4A2 Red Army
==========================================================


==========================================================
-- There is a fine line between "hobby" and "mental illness". (Author unknown)