SEARCH FINESCALE.COM

Enter keywords or a search phrase below:

Finally finished...1/35 Tasca Sherman VC Firefly

16357 views
26 replies
1 rating 2 rating 3 rating 4 rating 5 rating
  • Member since
    February 2010
  • From: Spring Hill, FL
Posted by jagdtiger1944 on Tuesday, February 23, 2010 8:47 PM

That is incredible. Great work. I hope my Sherman turns out half this good.

  • Member since
    April 2006
  • From: LaValle, Wisconsin
Posted by Hermesminiatures on Tuesday, February 23, 2010 7:56 PM

Thanks guys, I appreciate it!


...and yes, I know there is still part 4 of the figure tutorial...someday...

Jonathan

For every modeling technique that works, I have three that don't.

  • Member since
    September 2009
  • From: Rugby, England
Posted by Hinksy on Friday, February 5, 2010 1:11 PM

WOW!!

Now that it just stunning! If I can ever build half that good I'll be a VERY happy Englishman!

I really want to start incorporating some cammo netting into my builds-it really does the trick imo!

And the figures Bow Down Has the commander actually got hair on his forearm or is it a bit of dust?

Love the build-just superb!

ATVB

Ben Cool

On the Bench - Dragon Pz. IV Ausf. G (L.A.H.) Yes

Your image is loading...


  • Member since
    April 2007
  • From: Schroon Lake, NY
Posted by SMJmodeler on Friday, February 5, 2010 11:34 AM

HERMES...great to have you back!  I thought maybe you were a casuality of war.  Your hiatus certainly didn't hurt your skills any though!  I especially like the netting, tarp and wood timber up front.  The dust work is great too!  What did you use for that?  Airbrush, pastels???

And of course the fig's are top notch!

  • Member since
    November 2006
  • From: Coastal Maine
Posted by dupes on Thursday, February 4, 2010 7:38 AM

Hahahahahaaaaa...I was going to ask the same thing about Part IV. Stick out tongue

  • Member since
    April 2005
  • From: Piscataway, NJ!
Posted by wing_nut on Thursday, February 4, 2010 6:22 AM

Last thing I expected to see was a post from you. It has been a while.  Good to see you back and with some real eye candy. Man that is nice.

Wasn't there another part coming in the figure tootWhistling

Marc  

  • Member since
    May 2008
  • From: Budd Lake, New Jersey
Posted by BeltFed on Wednesday, February 3, 2010 7:10 PM

I was actually going to ask about how you weathered this guy...but can you outline it in greater detail? Embarrassed

  • Member since
    September 2006
  • From: Dripping Springs, TX, USA
Posted by RBaer on Wednesday, February 3, 2010 5:19 PM

I remember this model way back when......

Fortitude, that's it! Looks like the extended effort was worth it.

Apprentice rivet counter.

  • Member since
    April 2006
  • From: LaValle, Wisconsin
Posted by Hermesminiatures on Wednesday, February 3, 2010 4:58 PM

Thanks! Glad you liked it Toast


If anyone's interested, here's a description of my weathering process -

I started with a darker green than I wanted, so several coats of light pigments wouldn't make it look too faded. I used (primarily) 3 shades of MIG powders; Beach Sand, European Earth, and Gulf War Sand (the last being the most extensively used).

I applied the lower hull/running gear pigments over a fresh coat of isopropyl alcohol (which softens the paint slightly and helps the pigment stick in bigger clumps). The upper hull was given a dusting of Gulf War Sand, heavier around the tracks and towards the rear, and in recessed areas that would have seen significant foot traffic.

The tracks and running gear were the real challenge - I first painted the rubber parts with Vallejo dark gray and the metal parts with Testor Dark Anodonic Gray, then gave the metal parts a light rusting with a mixture of European Earth and Light rust. I highlighted the metal parts with a 6B art pencil, and a coat of Beach Sand to the tires and some overall Gulf War Sand completed the effect.


I also added another photo - of the driver and radioman - since I forgot it when writing the post.

Jonathan

For every modeling technique that works, I have three that don't.

  • Member since
    November 2009
  • From: SW Virginia
Posted by Gamera on Wednesday, February 3, 2010 2:21 PM

I'd say she's more than worth all the blood, sweat, toil, and tears. A show-stopper. I've been trying to find a happy medium between no weathering and the knocked all to hades and back style that works well for American, British, Commonwealth armour and you nailed it.

And my hats off to anyone that's an expert with super-glue. I've been using the stuff for years and generally end up making a mess with it. I've mostly junked it in favour of Gator Grip which I find holds about as well and is a heck of a lot easier to use.

"I dream in fire but work in clay." -Arthur Machen


  • Member since
    July 2006
  • From: New Jersey
Posted by redleg12 on Tuesday, February 2, 2010 5:27 AM

A long wait but a beautiful model.....great work.

Rounds Complete!!

"The Moral High Ground....A Great Place to Emplace Artillery."

  • Member since
    December 2008
  • From: Northern Va
Posted by psstoff995's lbro on Monday, February 1, 2010 5:56 PM

That looks awesome!

Great work there, that comander is very nicely done.

-Will young modeler Test fit master
  • Member since
    April 2006
  • From: LaValle, Wisconsin
Posted by Hermesminiatures on Monday, February 1, 2010 3:03 PM

Thanks for all the compliments guys, good to see y'all still remember me Cool

Unfortunately, my current builds are a Jagtiger w/ complete interior (including working lighting), and a diorama with 22 figures...so don't be surprised if it's another 2 1/2 years Stick out tongue


Oh, and about the radio operator - by the time the 20th Armored received Fireflies, the only remaining German armor in the area was the remnants of a Tiger company (four tanks with no infantry support). The typical commonwealth arrangement would have each platoon with three 75mm Shermans and a single Firefly, but for the purpose of Tiger hunting, the 20th used them as a detached Squadron with the Firefly normally assigned to HQ Sqn as the command tank. While I couldn't find out what (if any) changes were made to #18 as a command vehicle, I decided to use the radio operator figure anyway - if I was commanding five other Fireflies and had to keep in touch with division, I'd have wanted the extra radio equipment and dedicated operator...after all, you've got 385 rounds between the other 5 tanks, what's another dozen?

So in other words, you're right, but at least have a somewhat believable excuse (and the figure was too nice not to use) Wink

Jonathan

For every modeling technique that works, I have three that don't.

  • Member since
    November 2006
  • From: Coastal Maine
Posted by dupes on Thursday, January 28, 2010 8:19 AM

Hermes? As in Hermesminiatures? SurpriseSurprise

You're back! And with a sweet build to boot! Cool

  • Member since
    February 2003
  • From: A Spartan in the Wolverine State
Posted by rjkplasticmod on Thursday, January 28, 2010 7:59 AM

Excellent Build & the figures look great Yes.  Well worth the wait.

Regards,  Rick

RICK At My Age, I've Seen It All, Done It All, But I Don't Remember It All...
  • Member since
    October 2007
  • From: N.H.
Posted by panzerguy on Thursday, January 28, 2010 7:55 AM

  Really nice job on this one HermesYes I would never know about the misshaps unless you had metioned it.

Thats one heck of a timeline for one build (at least for a 1/35 armor buildWink) but never surrender right?

"Happiness is a belt fed weapon"

  • Member since
    July 2006
  • From: San Francisco Bay Area
Posted by bufflehead on Thursday, January 28, 2010 1:01 AM

THERE you are Hermes!!  I was wondering what happened to you!Hmm.  I definitely remember this Firefly you were working on and its great to see it done and posted here!  Personally I think you did an awesome job regardless of any booboos you may have pointed out (I would never have noticed them!).  I can relate with all the mishaps you suffered, especially the super glue ones!!Black Eye  I've had my share of CA disasters!  Hope to see you and your builds here more often!  Thanks for sharing!

Ernest

Last Armor Build - 1/35 Dragon M-26A1, 1/35 Emhar Mk.IV Female


Last Aircraft Builds - Hobby Boss 1/72 F4F Wildcat & FW-190A8


  • Member since
    April 2008
  • From: Ventura (at the beach) in California
Posted by *INDY on Thursday, January 28, 2010 12:49 AM

Tragic story~~~Beautiful Sherman

Did you make a resolution to be more Careful /  Prompt ?

"Well...you gunna pull them pistols, or just whistle Dixie?"

  • Member since
    July 2004
  • From: Texas
Posted by wbill76 on Wednesday, January 27, 2010 10:31 PM

Welcome back! Better late than never when it comes to posting pics! Nice work on the Tasca and sounds like it's lucky to still be alive after the journey it's been on. Big Smile Yes

  • Member since
    December 2008
  • From: Goffstown, NH
Posted by New Hampshire on Wednesday, January 27, 2010 8:36 PM

Wowzah!  That there is a beauty!  And your figures....the really sell the whole deal!

Brian

  • Member since
    March 2003
  • From: Rain USA, Vancouver WA
Posted by tigerman on Wednesday, January 27, 2010 8:26 PM

Definitely worth the wait. Love the dusty weathering. The figures are also top-shelf.

Great having you back. Wondered where you went.

   http://i7.photobucket.com/albums/y269/wing_nut_5o/PANZERJAGERGB.jpg

 Eric 

  • Member since
    July 2004
  • From: Sonora Desert
Posted by stikpusher on Wednesday, January 27, 2010 7:41 PM

Absolutely gorgeous work! A real showstopper! But I must add one critique- on the Firefly, the hull machine gunner postion was removed and that area used for ammo stowage. There should not be a crew member there.


F is for FIRE, That burns down the whole town!

U is for URANIUM... BOMBS!

N is for NO SURVIVORS...

       - Plankton

LSM


  • Member since
    December 2006
  • From: t.r.f. mn.
Posted by detailfreak on Wednesday, January 27, 2010 7:33 PM

Why hello there MIA. Thats quite a little break you took there.Darn near sent out a search party! Good to hear your in good health. Heck-of  nice shermie you've put together. Seems to be very nicely weathered for the area it was operating in.So how do you like this here new fangled forum we got going ?Well ok, back to building.Wink

[View:http://s172.photobucket.com/albums/w1/g-earl828/]  http://i158.photobucket.com/albums/t104/cycledupes/1000Roadwheels4BuildBadge.jpg

  • Member since
    June 2005
  • From: NJ 07073
Posted by archangel571 on Wednesday, January 27, 2010 5:33 PM

holy cow.  excellent in every way possible.  thanks for sharing such great inspirations.

-=Ryan=- Too many kits... so little free time. MadDocWorks
  • Member since
    September 2007
  • From: Truro Nova Scotia, Canada
Posted by SuppressionFire on Wednesday, January 27, 2010 5:26 PM

Excellent work! I enjoyed reading the timeline regarding the build over 2.5 years. Ultracast figures are some of the best resin cast ones on the market. Good choice. The weathering of the tracks and running gear is perfect! Working construction has me notice these things, also the tow cable and extra details really stand out.

Poor photo's? I would argue that.

Jason~

http://i6.photobucket.com/albums/y211/razordws/GB%20Badges/WMIIIGBsmall.jpg


  • Member since
    April 2006
  • From: LaValle, Wisconsin
Finally finished...1/35 Tasca Sherman VC Firefly
Posted by Hermesminiatures on Wednesday, January 27, 2010 5:06 PM

Sooo....exactly thirty months and one week ago (that's over 2 1/2 years for those of you keeping track at home), I posted pre-paint photos of my Tasca Sherman Firefly, and promised an update within a week.


I guess you could say it's been a long week. Stick out tongue


Between several modeling mishaps and an extraordinarily busy 2009, it's taken quite a while to finish. Here's a timeline so you can all get caught up:

July 2007: Botched the paint job, knocked off half the PE while trying to strip said botched paint job, spilled super glue all over the engine deck while trying to re-attach the damaged PE, and finally shelved the project in disgust.

February 2008: Fixed the PE, scraped off the glue, and painted it. Got it right this time.

March 2008: Got bored with the weathering process on a monotone paint job. Put it back on the shelf.

September 2008: Pulled it off the shelf to use in a diorama. Ended up scrapping the dio but finally finished the weathering.

November 2008: Painted the crew and added stowage. Pronounced the model more or less complete. 

March 2009: Realized it was less complete after coming up empty at a show (goodbye, sagging tracks!)

June 2009: Fixed the tracks to be super-tight. In the process, got super glue all over my favorite pants, which made me angry enough to put it back on the shelf yet again. Dead

October 2009: Added more duckbills since nearly half had broken off in the process of tightening the tracks. Gave it a final dusting of pigments, and pronounced it complete.

November 2009: Forgot to post photos on the Finescale.com forum. Dunce

January 2010: Saw WIP photos of the model while sorting through my photobucket account. Decided it was about time for my FSM forum hiatus to be over, so here we are. Toast


Without further ado (like I could possibly say any more than I already have), I present my Sherman VC Firefly - Tank #18, HQ Sqn, New Zealand 20th Armored. I've built it as it would have appeared while the 20th was hunting down the few remaining German tanks in northern Italy, April 1945.


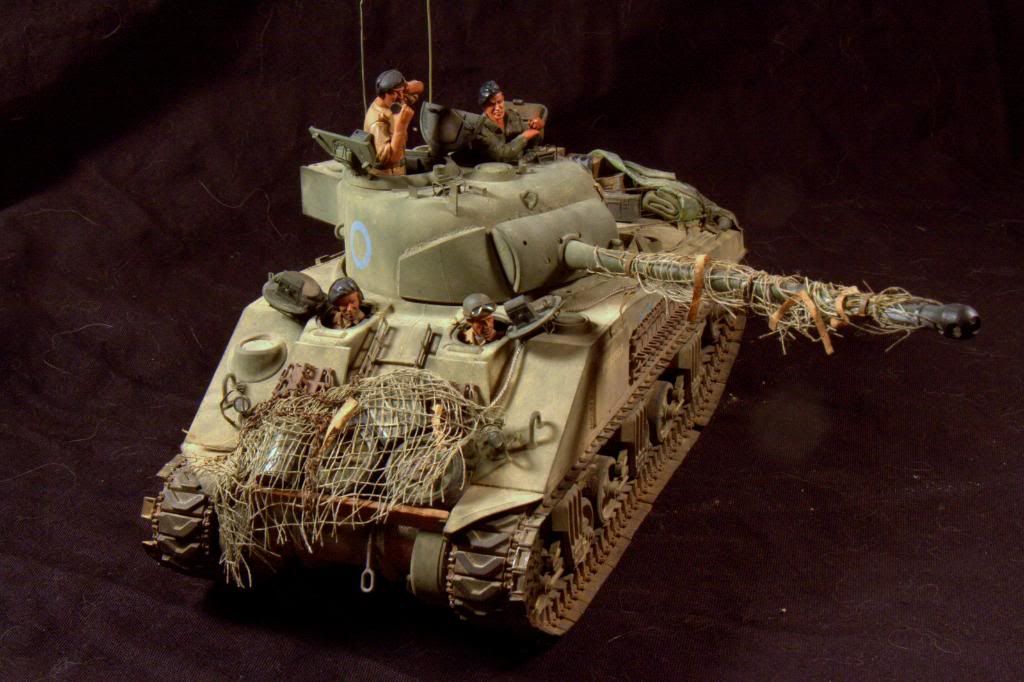
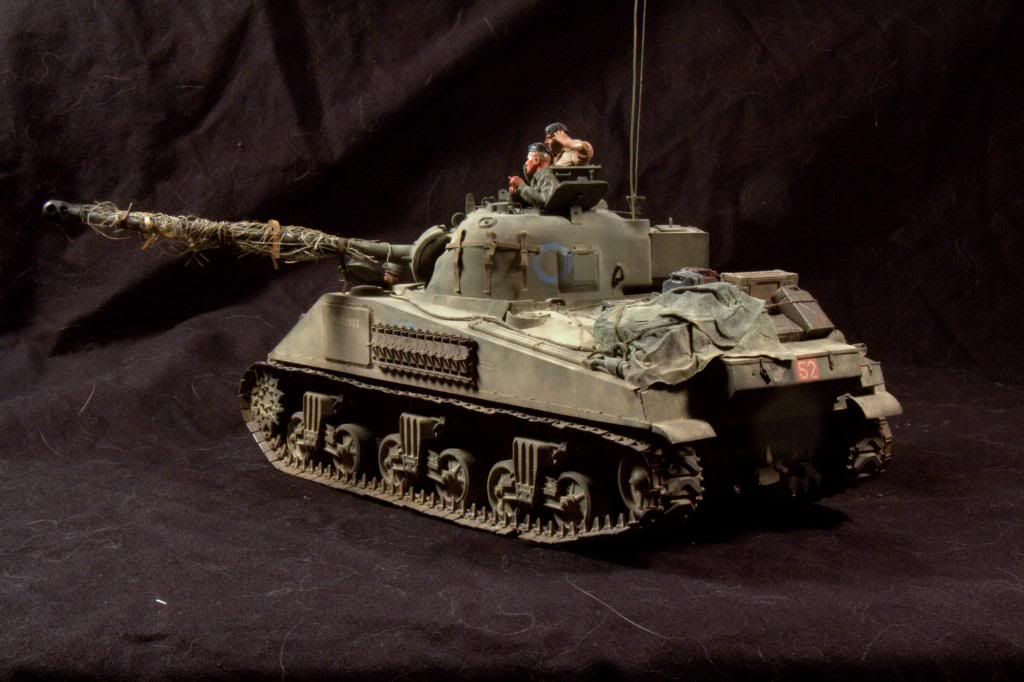
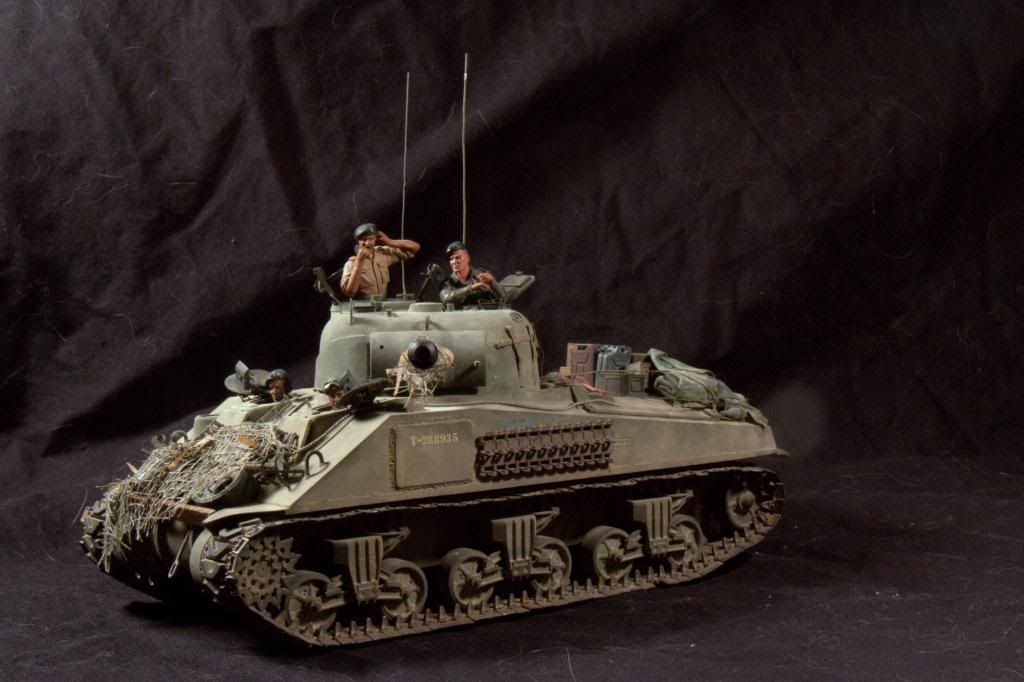
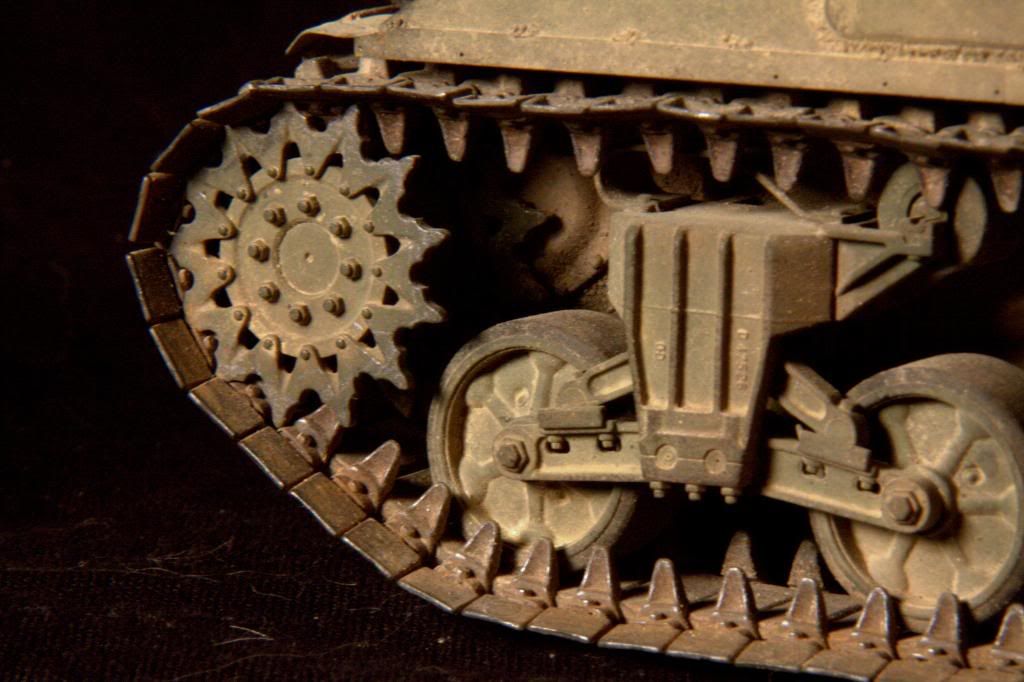
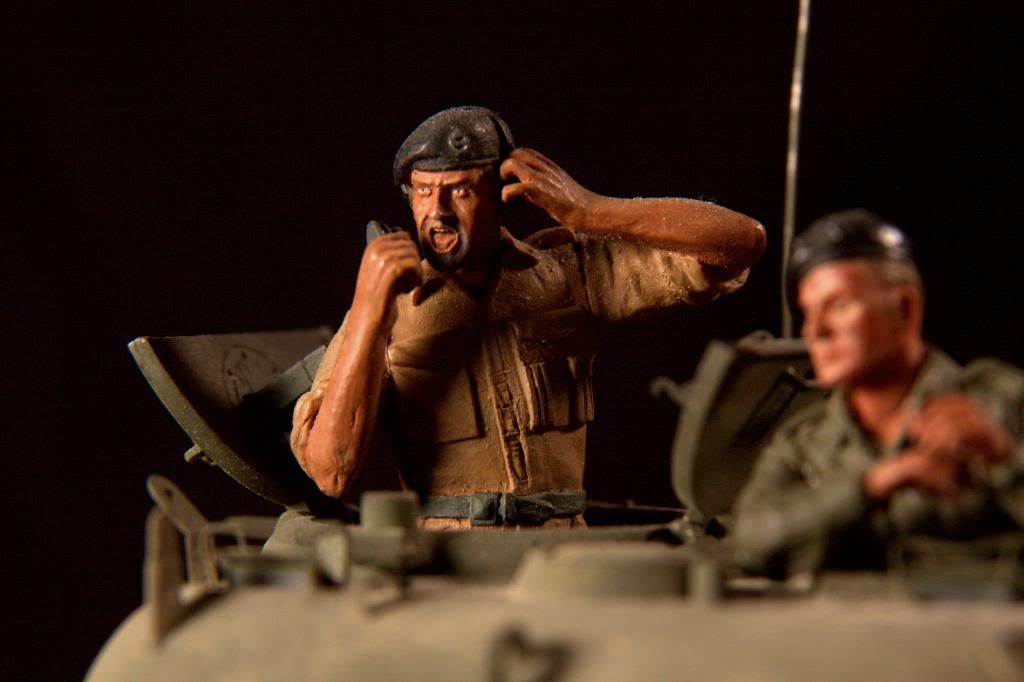
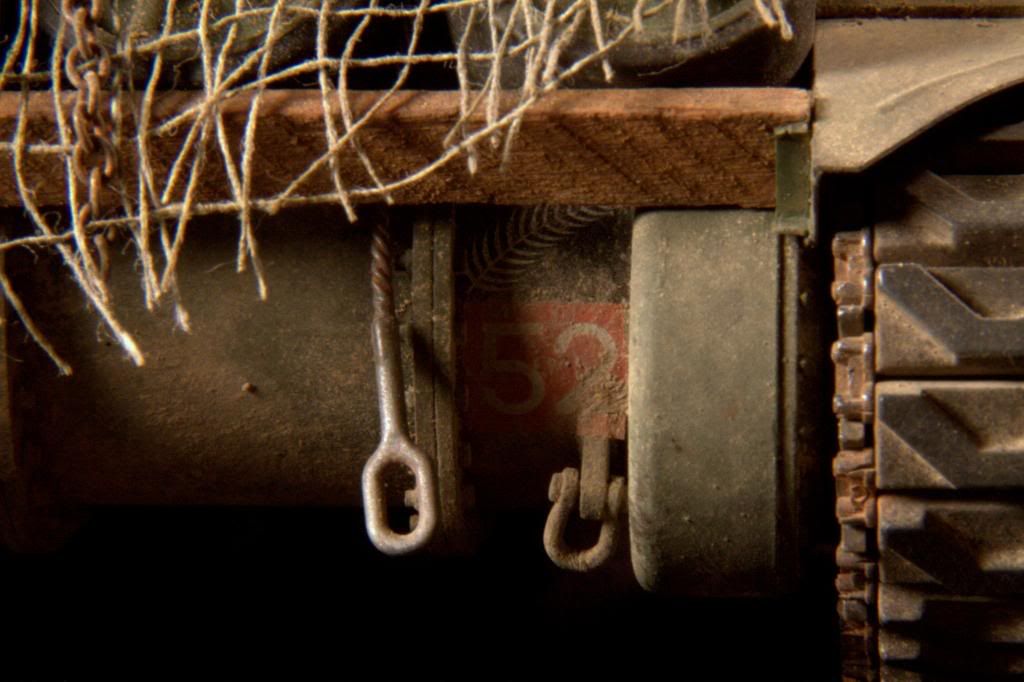
Figures are Ultracast (the gunner is the kit figure), stowage is Verlinden. Netting is surgical gauze with tissue paper strips. Tracks are AFV Club, barrel is Aber, and PE is Tasca and Eduard.

Airbrushed Tamiya acrylic, markings hand painted with dry transfer numbers/insignia. Weathering with oil washes, MIG powders, and a pencil on the metal parts of the track.

The 3 missing duckbills and taillight brush guard are not intentional - I accidentally broke them while handling the model, but didn't notice until after the photos. Also, sorry for the poor photo quality - my good backdrops and lighting were in use elsewhere.

Enjoy! (and don't tell me about any missing bolts or weld seams. I'm waaaay past doing any more of that Stick out tongue)


Jonathan

For every modeling technique that works, I have three that don't.

JOIN OUR COMMUNITY!

Our community is FREE to join. To participate you must either login or register for an account.

SEARCH FORUMS
FREE NEWSLETTER
By signing up you may also receive reader surveys and occasional special offers. We do not sell, rent or trade our email lists. View our Privacy Policy.