SEARCH FINESCALE.COM

Enter keywords or a search phrase below:

1/35 Academy M50 Ontos, WIP 6/12/10, Completed

69514 views
192 replies
1 rating 2 rating 3 rating 4 rating 5 rating
  • Member since
    August 2008
  • From: S.W. Missouri
Posted by Pvt Mutt on Sunday, May 2, 2010 10:53 AM

I'm going to watch as this little six shooter goes together for sure.Yes

Tony LeeSmile

Shoot Low Boys They're Ridin Ponys

  • Member since
    July 2006
  • From: New Jersey
Posted by redleg12 on Sunday, May 2, 2010 10:38 AM

Mike - Thanks for stopping by......well it will start with some VN red earth and maybe some elephant grass but plain VN red (as seen in the video) will work.

The model is small overall and as such will have a small base. Even the four pics I included are just VN red dirt!!

Rounds Complete!!

"The Moral High Ground....A Great Place to Emplace Artillery."

  • Member since
    July 2006
  • From: New Jersey
Posted by redleg12 on Sunday, May 2, 2010 10:34 AM

Hinksy

Cheers Redleg,

Obviously I'm yet to start this build and want to get her 100% spot on. I'll be another few weeks on my halftrack yet but your answers are very helpful indeed!

Many thanks buddy,

Ben Cool

Ben - No problem....hopefully as we go along here you can get your questions answered as the come up during my WIP.

Keep all the research info together and any questions then you will be ready to build Yes

Rounds Complete!!

"The Moral High Ground....A Great Place to Emplace Artillery."

  • Member since
    December 2007
  • From: Bridgeview, Illinois
Posted by mg.mikael on Sunday, May 2, 2010 10:33 AM

Lookin' good so far, redleg12!! Was wondering when someone was finally gonna start this kit, considering it seems like every modeler already has one in their stash.Wink

So....got any sort of vignette or special base planned for this build?

"A good plan executed now is better than a perfect plan next week." - George S. Patton

  Photobucket 

  • Member since
    September 2009
  • From: Rugby, England
Posted by Hinksy on Sunday, May 2, 2010 10:25 AM

Cheers Redleg,

Obviously I'm yet to start this build and want to get her 100% spot on. I'll be another few weeks on my halftrack yet but your answers are very helpful indeed!

Many thanks buddy,

Ben Cool

On the Bench - Dragon Pz. IV Ausf. G (L.A.H.) Yes

Your image is loading...


  • Member since
    July 2006
  • From: New Jersey
Posted by redleg12 on Sunday, May 2, 2010 8:58 AM

Hinksy

Looking great so far Redleg!

A few questions if I may (this very kit is going to be my next WIP).................

When you refer to the .50 cals I'm assuming you are referring to the small targeting rifle attached to each large barrel?

Yes, these are 50 calibre spotting rifles

I've had a good look at the build guide and am pretty much going to be bulding it as you are - leaving off the tiny thin bits that tend to get busted up during WIP and so on. I've looked at a lot of pictures and videos of the ONTOS and the hull will be painted OD Green (XF-74 iirc) as will the hatch area and the mounting cradles for the barrels.

The Ontos was NOT painted OD FS34079 but was Marine Corp green, FS 34052. Tamiya XF-74 is a good match for the Vietnam era OD used by the US Army. I will be using Model Master Acryl 4724 which is a better match for the Marine Corp green. I will use the Tamiya XF-74 to simulate touch up painting. MC green was not always available in VN and many times an Ontos crew would touch up and scratches with OD which was more available.  If you want to find your right paint look it up here

http://www.paint4models.com/paintchart/paintconversionchart20100101.html#

You say you are going to Parkerize the barrels-does this mean you are going to paint them prior to fitting? Is this just the 'main' barrels or the fifties and clamps too?

Yep, I normally paint details before fitting. The assembled 106mm rifles will be painted then fitted to the painted turret. The clamps are MC green. The 50 cal rifle recievers will be painted with Alclad metal paints.

Finally, I was thinking of using Tamiya Gunmetal for the Parkerizing. Will this be the right colour?

Gunmetal is close.....I am expermenting to get closer....you will have to wait!!

 I just happened to be reading a mag last night where a completed ONTOS was featured and it was all painted the same colour green, barrels and all? I'm assuming this is a glaring error as you very obviously know your stuff! Thanks

Many Ontos like many other weapons are painted TOTALLY when put on display to prevent corrision. This is not normally how the weapon was employed when in use BUT people go to a museum or see an old artifact and ASSUME it is correct. The key to scale modeling is research. I am building the Ontos now but I am researching my next build. By time I sit at the bench, I have dozens of phots, manuals, etc to refer to.

Yes I am a retired US Army officer and that helps but research is the KEY. For me the hobby is many hobbies...one is my love of military history. The reseach is as much fun as the build.

If I hadn't raised this question in the first place I'd have just gone with the box art and painted it all in OD too! Would there have been instances where the main main barrels were oversprayed with the hull colour?

Keep us posted dude!

ATVB

Ben Yes

Hummm....that was fastWink......

See my answers above in Italic and Underline. Hope this moves you further along.

Rounds Complete!!

"The Moral High Ground....A Great Place to Emplace Artillery."

  • Member since
    September 2009
  • From: Rugby, England
Posted by Hinksy on Sunday, May 2, 2010 7:37 AM

Looking great so far Redleg!

A few questions if I may (this very kit is going to be my next WIP).................

When you refer to the .50 cals I'm assuming you are referring to the small targeting rifle attached to each large barrel?

I've had a good look at the build guide and am pretty much going to be bulding it as you are - leaving off the tiny thin bits that tend to get busted up during WIP and so on. I've looked at a lot of pictures and videos of the ONTOS and the hull will be painted OD Green (XF-74 iirc) as will the hatch area and the mounting cradles for the barrels. You say you are going to Parkerize the barrels-does this mean you are going to paint them prior to fitting? Is this just the 'main' barrels or the fifties and clamps too?

Finally, I was thinking of using Tamiya Gunmetal for the Parkerizing. Will this be the right colour? I just happened to be reading a mag last night where a completed ONTOS was featured and it was all painted the same colour green, barrels and all? I'm assuming this is a glaring error as you very obviously know your stuff! If I hadn't raised this question in the first place I'd have just gone with the box art and painted it all in OD too! Would there have been instances where the main main barrels were oversprayed with the hull colour?

Keep us posted dude!

ATVB

Ben Yes

On the Bench - Dragon Pz. IV Ausf. G (L.A.H.) Yes

Your image is loading...


  • Member since
    July 2006
  • From: New Jersey
Posted by redleg12 on Sunday, May 2, 2010 5:43 AM

Harshman - LOL.....yep.....Thanks

Bill - The LM barrels are worth it mostly because they are rifled!!! Their only drawback is they are not keyed like the kit barrels, so looking at the photo, when you have the two "major" assemblies the barrel and rear section, you have to line them up properly so the 50 cal sits straight on top.

The kit barrels are "round"  but also have a faint mold line on each side to deal with. IMO the LM barrels are well worth the extra cost based on their better look.

Thanks again guys for stopping in

Rounds Complete!!

"The Moral High Ground....A Great Place to Emplace Artillery."

  • Member since
    July 2004
  • From: Texas
Posted by wbill76 on Saturday, May 1, 2010 11:35 PM

Those LM barrels sure look nice Mike even with the extra bit of coaxing required to get them together. Your "Thing" is really coming together. Yes

  • Member since
    December 2009
Posted by Harshman II on Saturday, May 1, 2010 10:55 PM

Man,it looks like something from Warhammer. Haha..

  • Member since
    July 2006
  • From: New Jersey
1/35 Academy M50 Ontos, WIP 6/12/10, Completed
Posted by redleg12 on Saturday, May 1, 2010 10:47 PM

Fire Mission…….M50 Ontos

Introduction

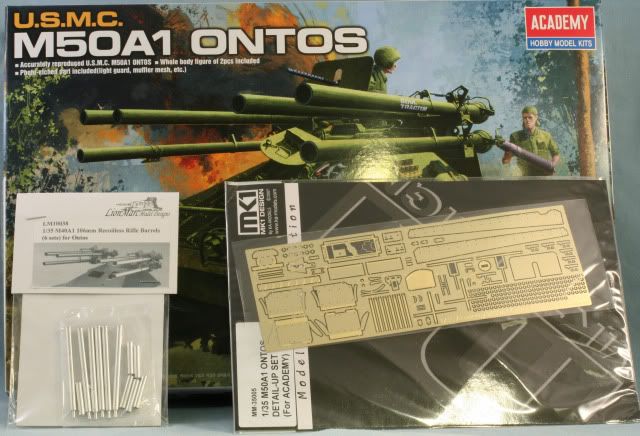
This will be the new Academy M50 Ontos. I will also be adding the Lion Mark Aluminum barrels and the new MK models M50 Ontos PE set.

Background

The M50 Ontos, which means the thing, is a unique vehicle. It mounts 6 – 106mm recoilless rifles. About 300 of these were built and saw service with the U.S. Marine Corps during the Vietnam War. For more details you can read up here:

http://www.militaryfactory.com/armor/detail.asp?armor_id=205

Here is a movie from You Tube showing the Ontos firing during the Tet Offensive at the Battle for Hue.

http://www.youtube.com/watch?v=T0t-0l0Zv0I

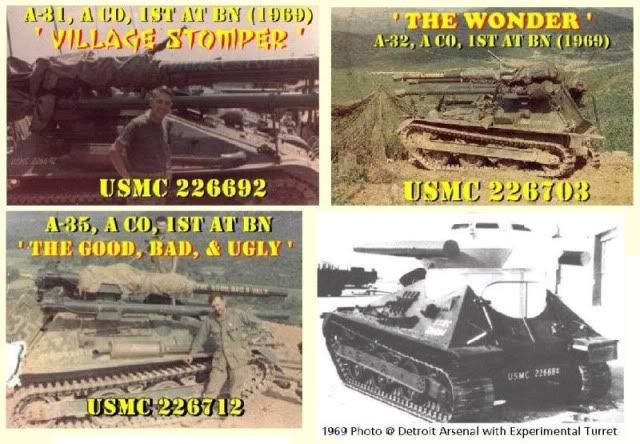
Here are a couple of other shots of M50 Ontos in Vietnam

The Build

The kit has 4 sprues, two of which are duplicates and contain the rifle parts and road wheels. Also there is the upper and lower hull, a small PE sheet and a small sheet of decals.

Step one mounts all the suspension arms to the lower hull

Next, step two mounts the outer connectors for the suspension

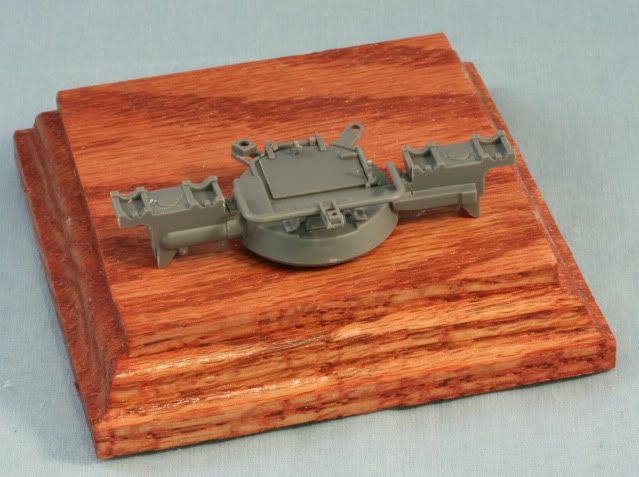
I will skip step 3 & 4 for now which are the assembly of the road wheels and connection of the outside suspension. Step 5 is the assembly of the rear panel of the lower hull. The hinges for the ammo storage door and VERY TINY and for the first time in a long while the floor devoured a part!! So out came the styrene sheet. I did not mount the handle on the door to keep it from getting broken off at this point in the build.

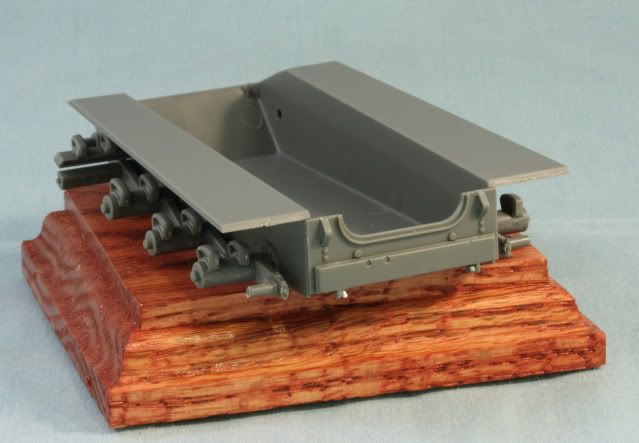
Step 6 & 7 would have you mount all the detail on the upper hull before joining to the lower hull. Based on the way the kit fits together, I thought this was a BIG mistake so I just mounted some of the larger flat hatch covers and caps from step 6.

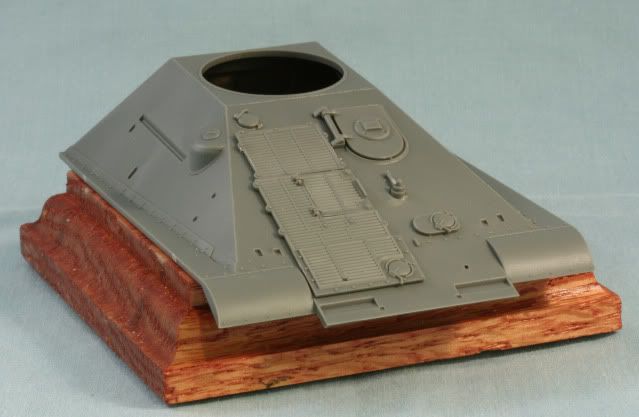
Next I went to step 8 and assembled the rear panel and doors, again leaving some of the small details off at this point. Then the rear panel is joined to the upper hull.

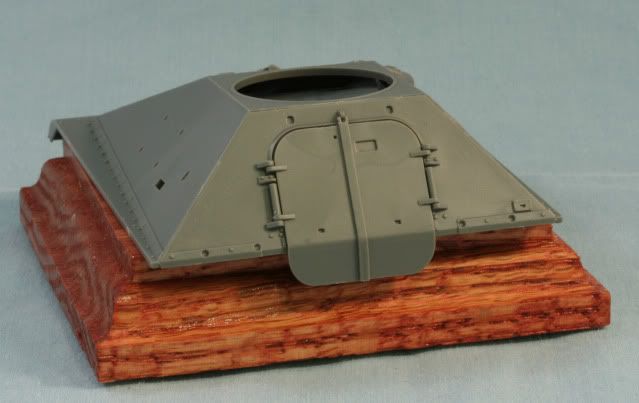
Once dry the upper hull is glued to the lower hull. The seam in the front requires a bit of seam work

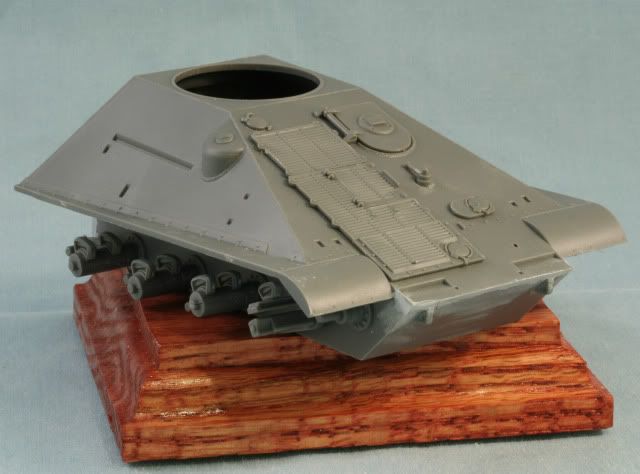
 Also the seam in the rear for the lower hull rear section requires attention. The undersides of the fenders hide the main seam. It is so big it requires some filling. It need not be perfect as it will be hard to see when built but untouched may be noticeable.

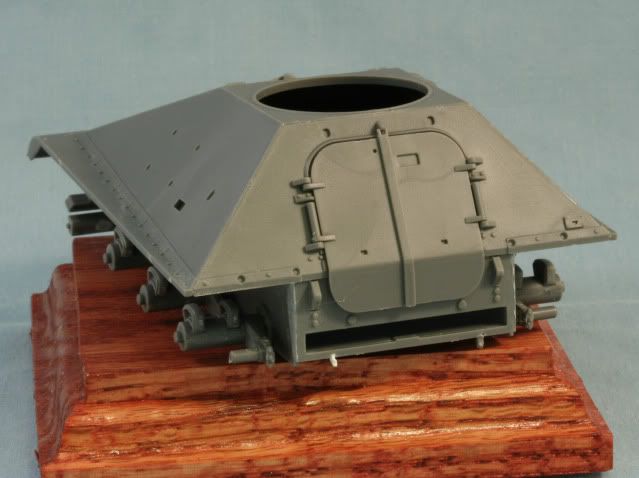
With all the putty work, I went to step 9 and assembled the turret. I left off the 30 cal and shield for ease of painting. The two parts hanging over the rear are for radio antennas.

One of the things missing is the antenna bases. The Ontos would sport an ANVRC 47 (RT 524 and an R442 Radios). This would have a tall mast for the RT (Radio Transmitter) 524 and a short mast for the R (Receiver) 442.  I have ordered the antenna bases and will also mount them later

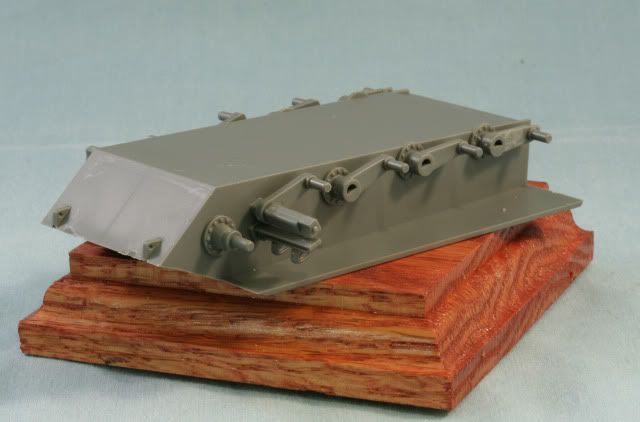
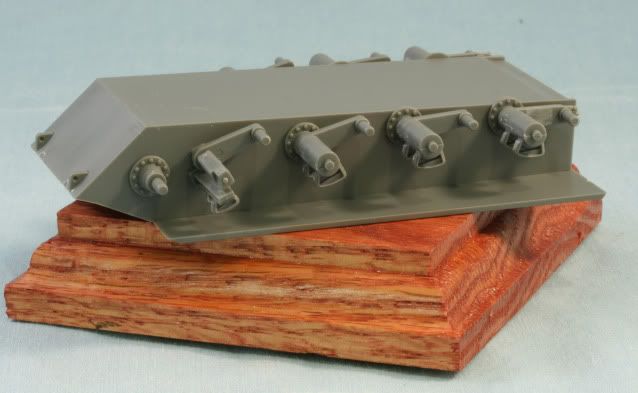
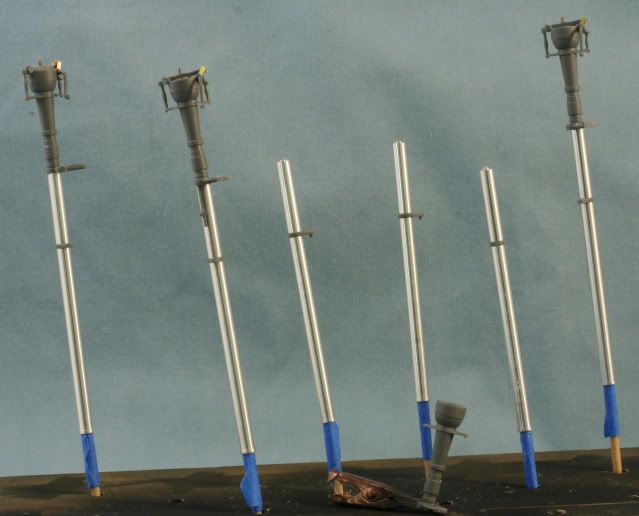
Moving on to step 10, I began the assembly of the 6 recoilless rifles. This involved the Lion Marc barrels, some small PE from the MV sheet and parts from the kit. The barrels are actually two parts which join through the kit supplied forward 50 cal mount. The Lion Marc halves fit very snug and required convincing from my small hobby hammer to assemble.

With all the small parts, I made two sub assemblies, front and rear before mounting the 50 cal barrel and joining. The directions show the 4 with 50 cal all having them mounted the same way. That is incorrect, 3 are as per the directions and 1 is rotated 180 degrees.

Here is the progress on the rifles which I have to say are a PITA to assemble.

In general, the kit is a good kit but does have a number of flaws. There are a number of ejector pin marks which will show and have to be filled. The seams in the front require work and are poorly designed. The road wheel and drive wheel placement are not correct and this the finished model will sit lower than it should. This problem cannot be fixed without a new lower hull.

With that said, we are modelers and not assemblers and everything cannot be handed to us. It is a quantum leap forward from the old Revell/Renwal kit and better detail and better assembly then the Hobby Fan resin kit. But….I will point out all the problems!!

That’s where I am at for now. I have to finish filling the seams and sanding the main hull, that’s why I skipped adding all the detail parts to the upper hull. In between I will be finishing up the rifles so they can head off to the paint booth for parkerization. More details to come.

As always your comments either good or bad are appreciated.

Rounds Complete!!

"The Moral High Ground....A Great Place to Emplace Artillery."

JOIN OUR COMMUNITY!

Our community is FREE to join. To participate you must either login or register for an account.

SEARCH FORUMS
FREE NEWSLETTER
By signing up you may also receive reader surveys and occasional special offers. We do not sell, rent or trade our email lists. View our Privacy Policy.